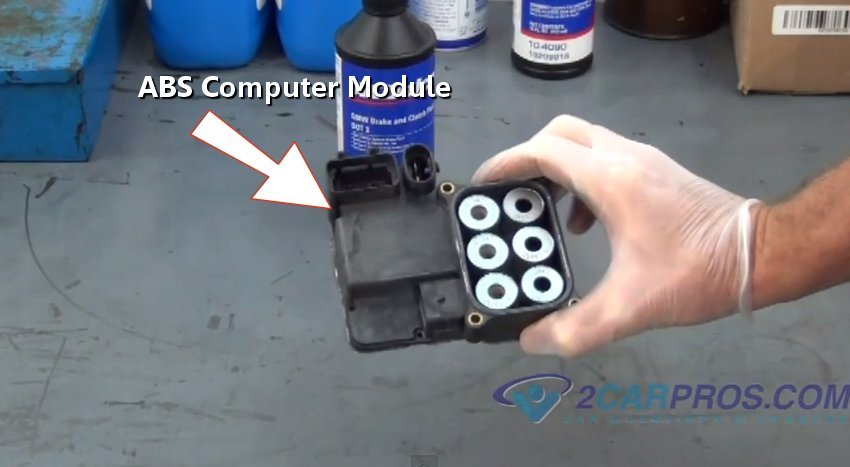
The ABS control module is used to monitor the wheel rotational speed and will send a signal to the ABS valve and motor pump to decrease or increase the brake line pressure to each individual wheel. This module will be mounted on or near the pump motor and valve control block.
What Goes Wrong?
- ABS pump motor is stuck on indicated by a humming noise and draining the battery.
- ABS and Traction Control warning light on.
- Individual brake caliper can remain on and overheat the brakes or cause a brake pull.
Note: Vehicles equipped with a Traction Control Systems will uses a different ABS computer module then non-traction controlled models. In some cases the ABS controller will need to be reprogrammed.
Getting Started
Park the vehicle on level ground with the parking brake on, lift the hood to locate the ABS module, on some vehicles it will be on the frame rail. If the car needs to be raised up please use this guide to jack the vehicle up safely. ABS Control modules may vary in appearances but the replacement steps are similar. Disconnecting the battery at the negative side cable.
ABS Computer Module Removal
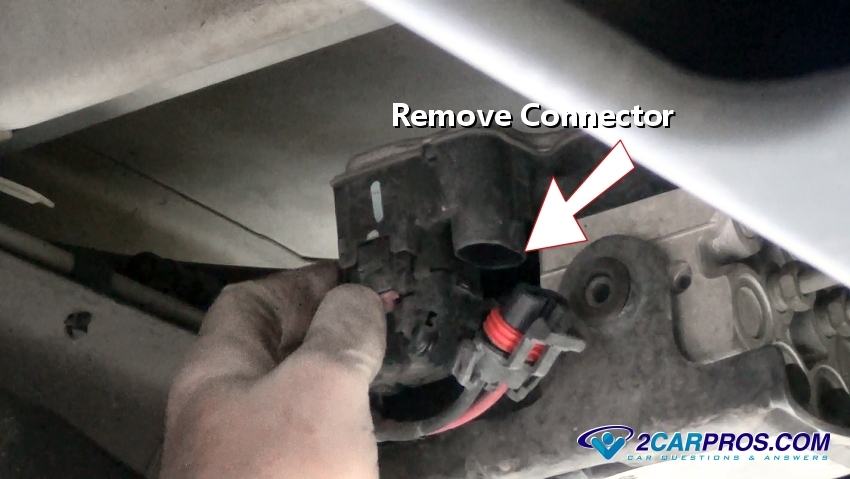
1. Release the electrical connectors from the unit by pushing the safety clips using a small screwdriver. The weather packing seal can make it a little difficult to remove the connectors, wiggle them gently as they are removed from the module.
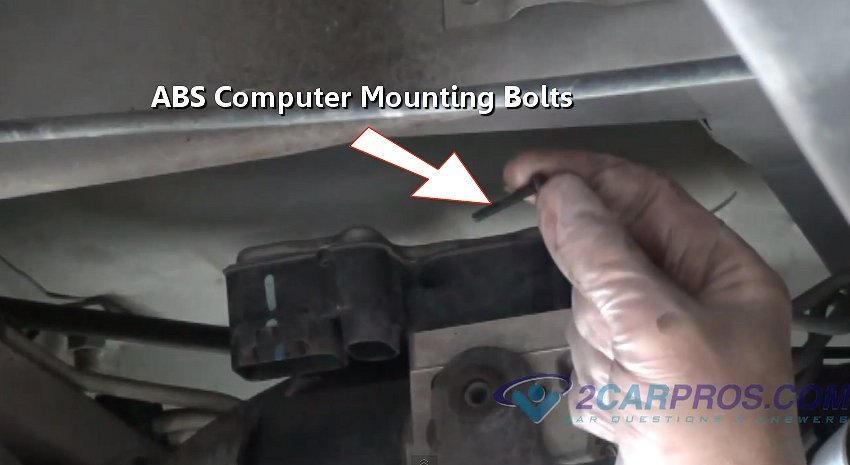
2. There will probably be four or more Torx head (size 20), 8mm or 10mm bolts to remove the controller from the pump motor. These bolts can be little tough to get to if the module is under the vehicle like this one. In this case use a 1/4 inch drive ratchet because its smaller and easier to maneuver. This operation is much easier when the controller is under the hood.
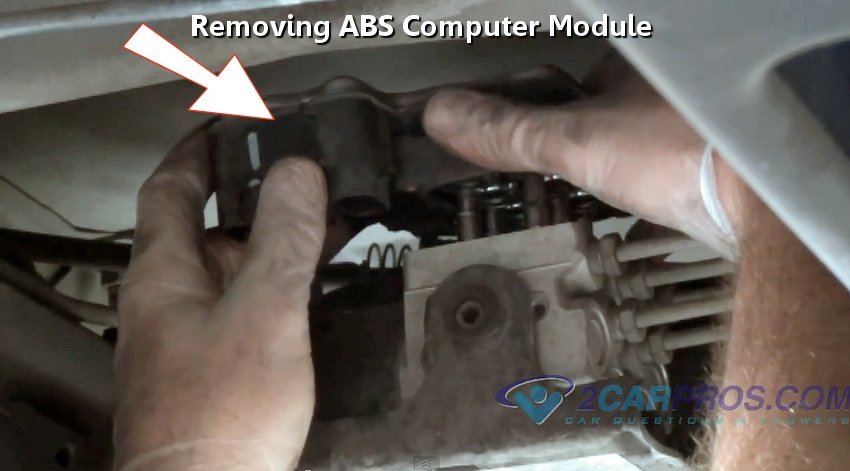
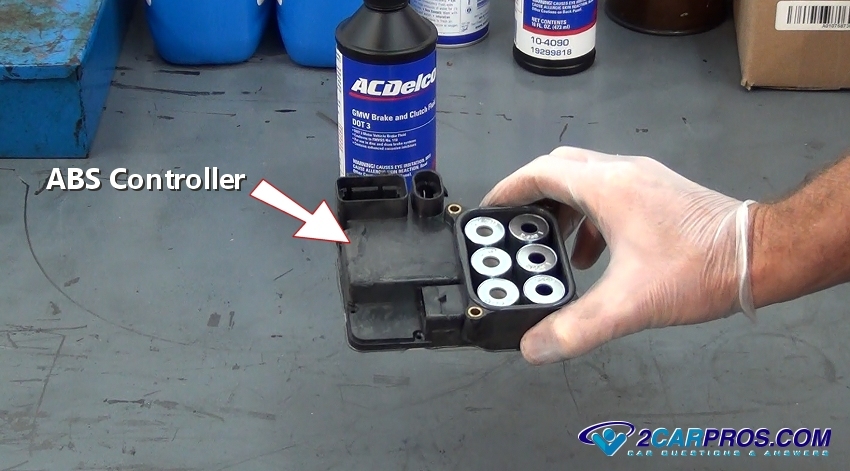
3. Make sure the ABS controller is clean and dry. Gently remove the unit by lifting it straight up from the valve assembly, it might be a little stuck because of the weather seal used to keep moisture out. Use a small screwdriver to gently pry up and loosen the seal to separate the two.
4. Match the old part to the new replacement unit, they should match identically. Be sure to count the number of electrical pins in each connector because there are minor variations according to what options your car has such as traction control.
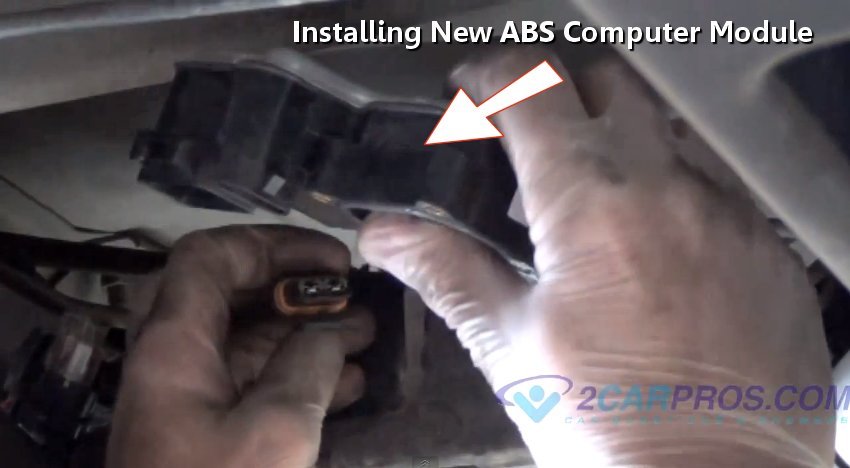
5. Be sure the pump motor is clean and free from dirt before installing the new module. Install the new unit and ensure it sits flush and seals completely onto the valve assembly. This can take some extra effort because the valve cores need to fit into the new module.
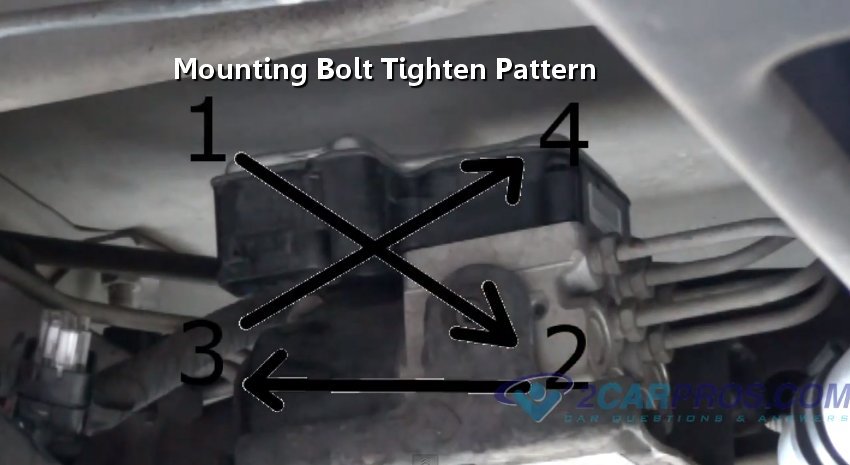
6. After the unit is securely in place, reinstall the mounting bolts and tighten in an "X" pattern to mount the unit squarely onto the pump and valve, this will ensure the proper operation.
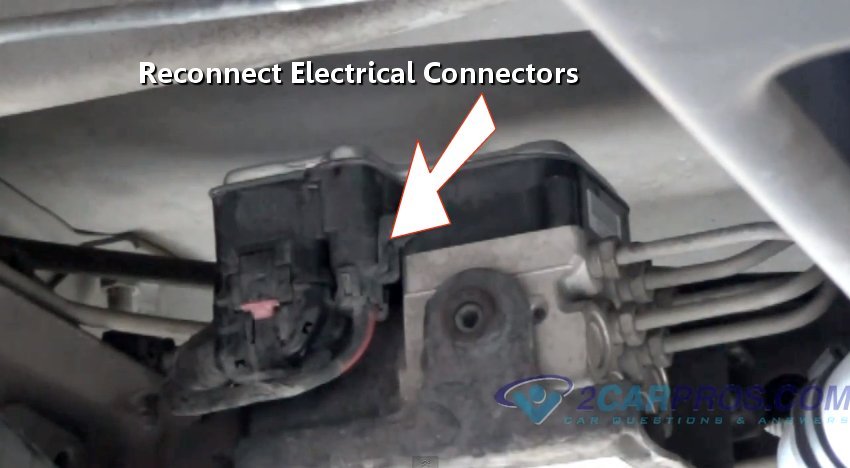
7. Once all the mounting bolts are tight, make sure the connectors are clean from dirt and grime, reconnect the electrical connectors onto the valve assembly. Reconnect the negative battery cable and start the car. The ABS and Traction Control warning lights should go off shortly after the engine is running or after you have driven the car for a short time and you are all set.
Watch the Video!
Please watch this video of the job being done to glean additional helpful information.
Credits
This guide knowledge base was created by the 2CarPros Team, and by Ken Lavacot: Automobile repair shop owner and certified master automobile technician of over 30 years. If you have question or need help please ask one of our experts we are happy to help. Please visit our 2CarPros YouTube Channel.

Article published 2024-04-18
How to Get ABS Codes Video

How to Use a Test Light

How to Bleed and Flush Your Vehicle Brakes