Non strut cars and trucks are designed with an upper control arm that supports the top of the spindle which is where the wheel is mounted. Much like a lower control arm it is responsible for supporting the car frame while acting as a hinge that allows the wheel to move upward while the car is going over a bump. This arm also houses the upper ball joint which enables the spindle to turn in either direction when the steering wheel is being used.
What Goes Wrong?
An upper control arm is equipped with two rubber bashings that wear out in time and usage. This will allow the wheel to wonder and cause irregular tire wear and the steering wheel to shake at higher speeds.
What Does it Cost?
You can get an upper control arm from Amazon for between $44.00 and $81.00 (US). If you were to take the car in to a garage or dealership you can expect to pay between $180.00 and $250.00 (US) for parts and labor per side.
SPONSORED LINKS
There is a video of this job being done at the bottom of this guide.
Let's Get Started
Before starting the repairs park your vehicle on level ground and lift it safely using jack stands. Put the transmission in park and the set the emergency brake. You will also need to remove the wheel and then reinstall it once the job is complete.
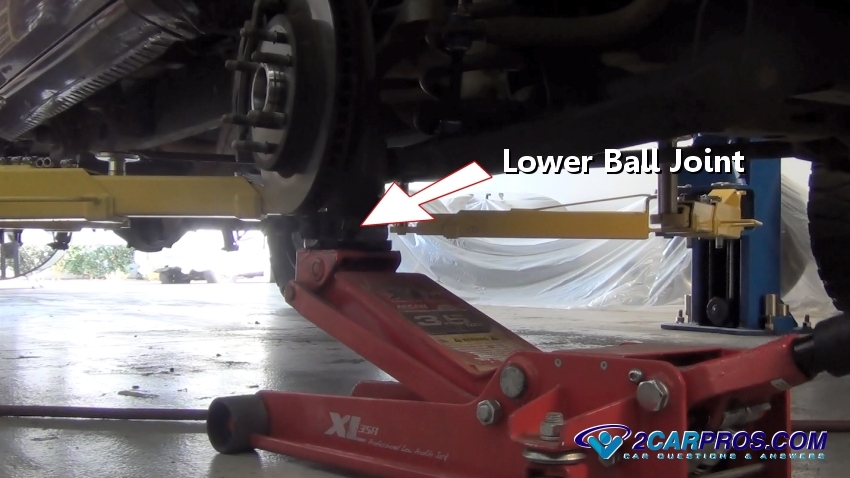
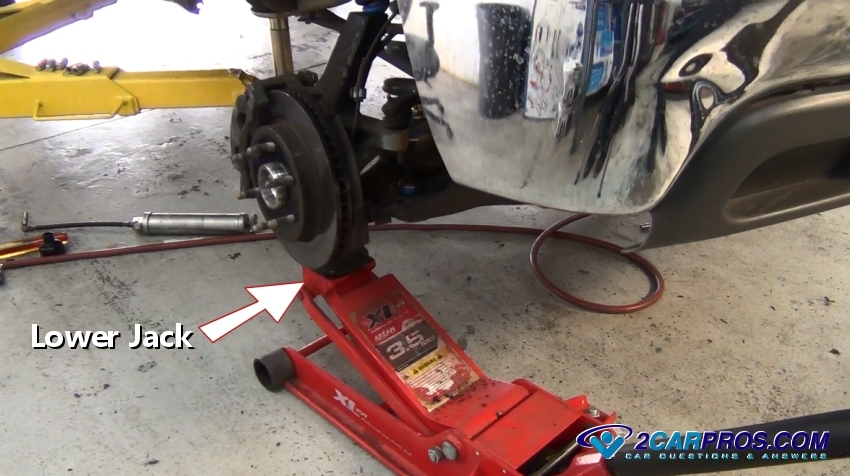
1. Support the Spindle
Position a floor jack under the lower ball joint or control arm to relieve downward pressure on the suspension components. This will enable you to remove the upper control arm without pressure bearing down on the arm. You might need to remove any small wiring or brake flex hose clips to free up the arm for removal. In some application you might need to remove the shock before the arm can be removed.
SPONSORED LINKS
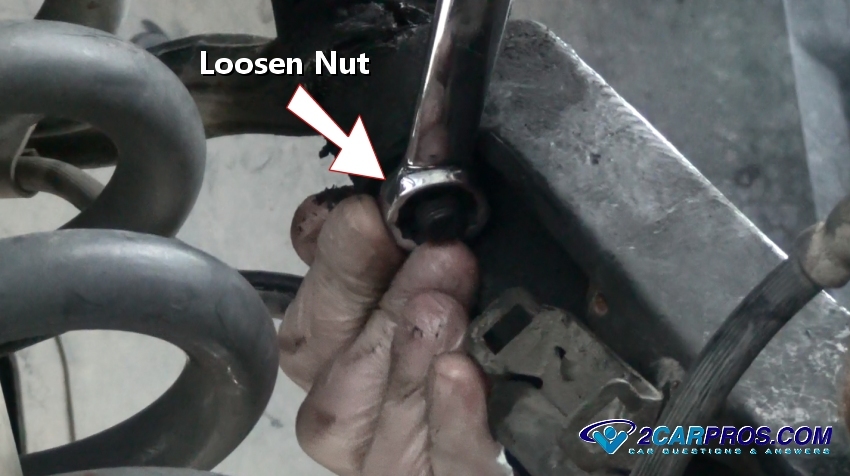
2. Undo the Upper Ball Joint
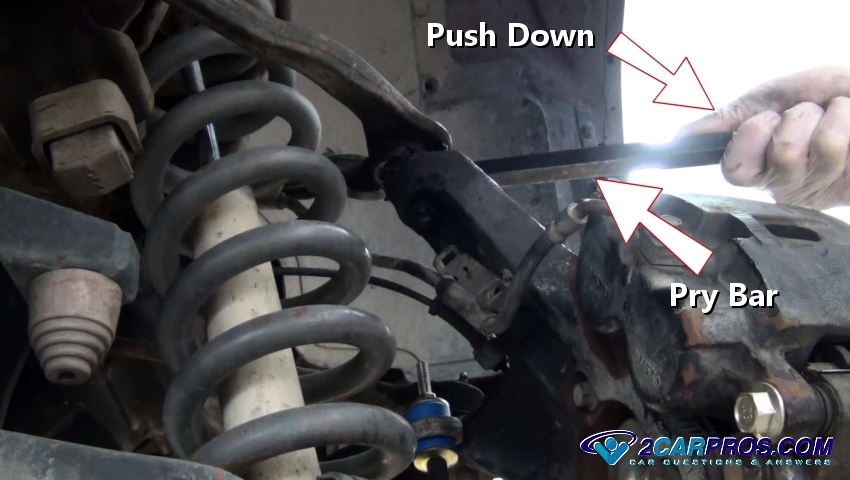
After removing the cotter pin (if equipped) use a 18mm wrench to loosen the ball joint nut about 3 turns. Do not remove the nut completely because it will protect the upper ball joint threads during removal.
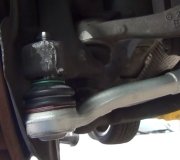
Insert and wedge a large pry bar between the upper control arm and spindle while pushing downward to apply pressure to the upper ball joint taper fitted stud.
SPONSORED LINKS
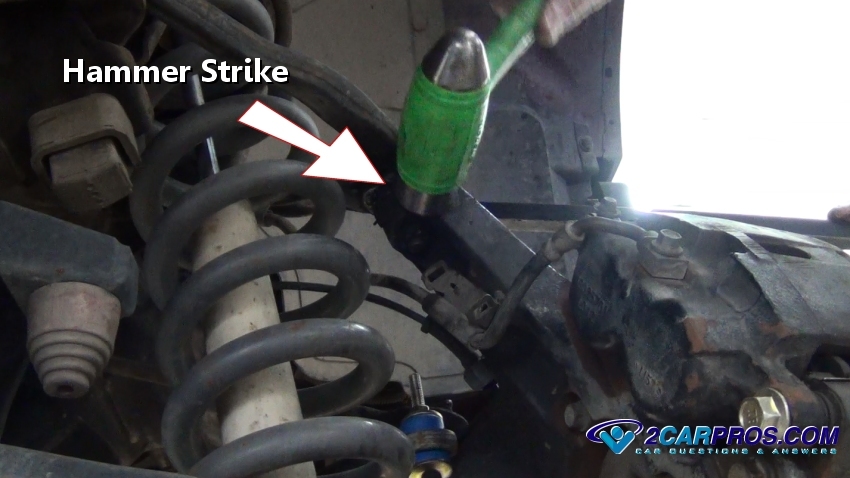
While holding pressure on the ball joint strike the spindle bulkhead with a hammer. You will hear a pop meaning the taper fit stud has been released from the spindle.
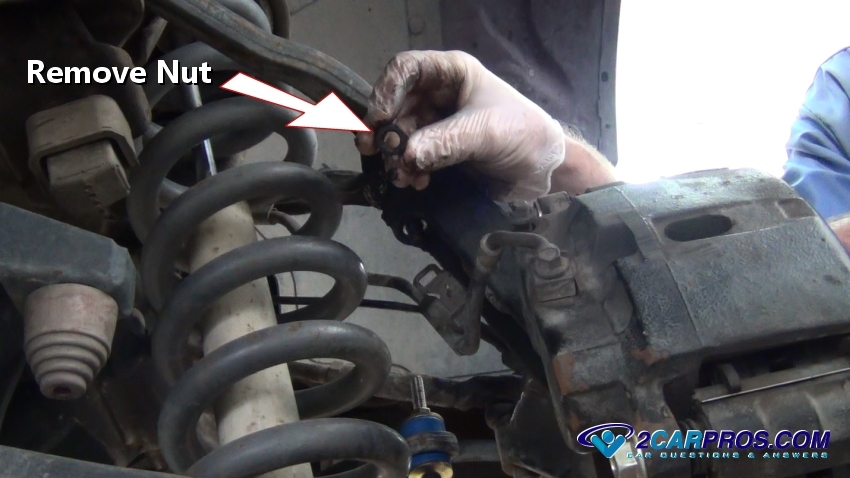
Once the taper fit has been released finish removing the ball joint nut.
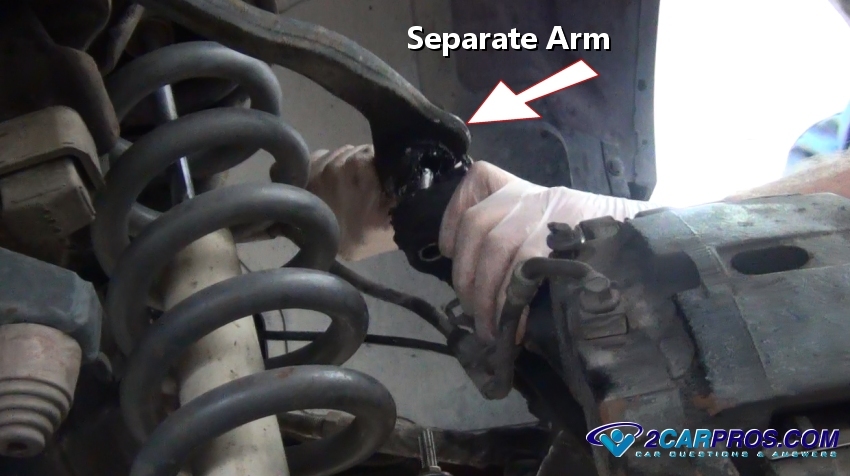
Lift the arm from the spindle. Use caution if any rubber brake lines are involved when the spindle comes loose and remove the line mounts if needed.
SPONSORED LINKS
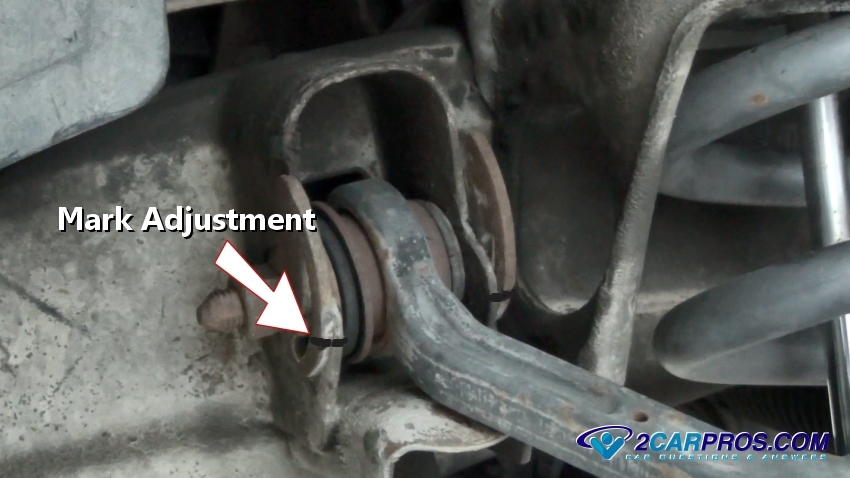
3. Remove the Upper Bushing Bolts
Mark the alignment adjusters using a felt pen and reference these marks when reassembling. Other designs will use a shim or a series of shims which must be reinstalled as they were removed. These bushing bolts can be facing the engine or inline with the frame.
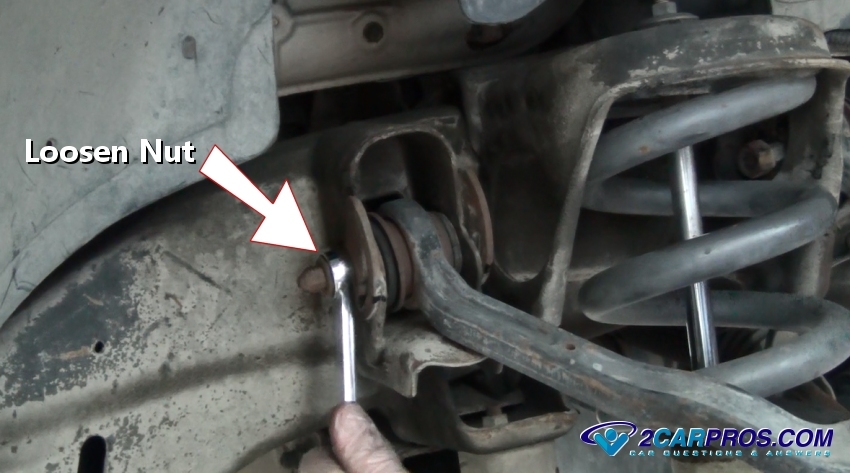
Use a 18mm wrench or socket loosen and remove the nut on either side of the arm.
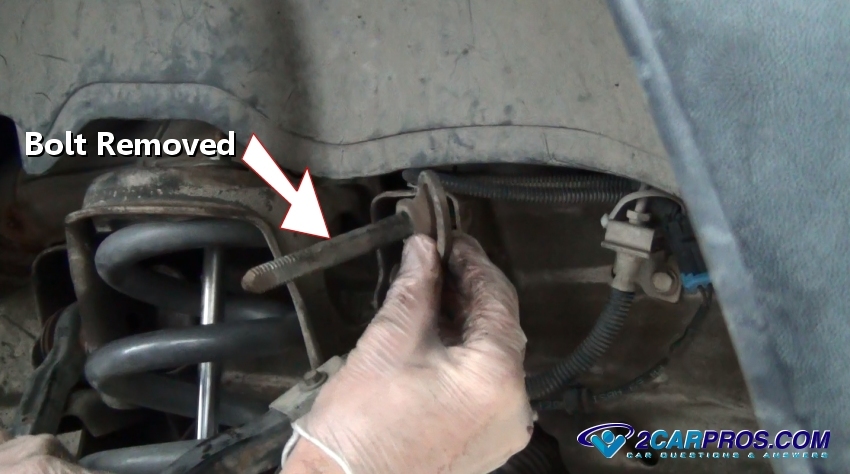
4. Remove the Upper Control Arm
After both nuts have been removed slide the bolts from the control arm mounts while keeping the adjusters in order. To remove the control arm use a upward motion on the arm while pulling outward.
SPONSORED LINKS
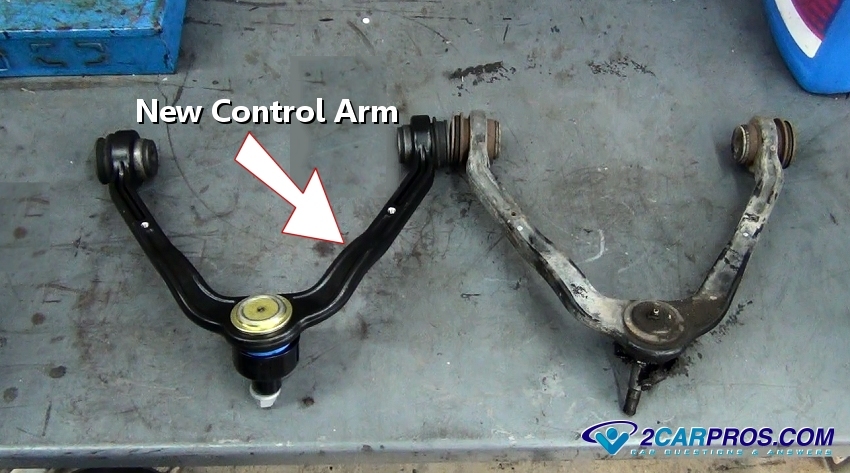
5. Match the New Control Arm
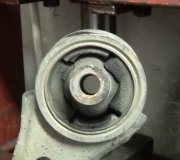
Once the control arm has been removed match it against the old part to ensure a proper installation. In the image below the upper ball joint is included along with both bushings.
Watch the Video!
Here is the job being done by one of our mechanics.
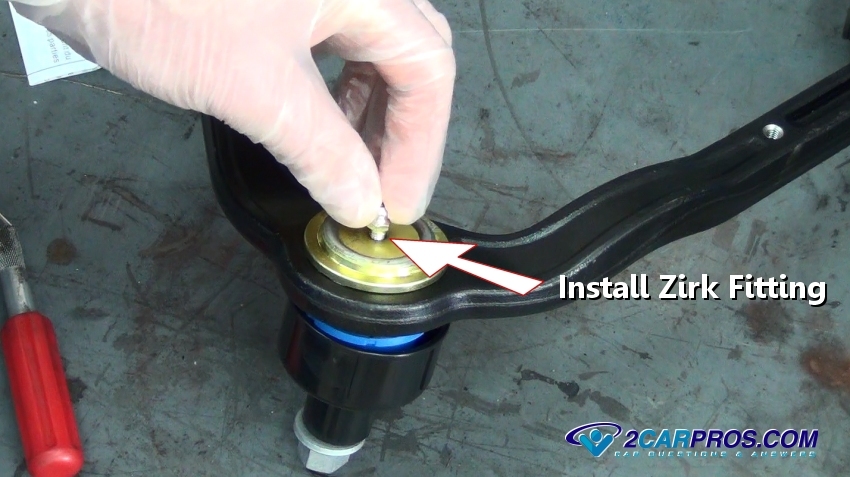
6. Get the Control Arm Ready for Installation
Some control arms are designed using Zerk fittings to allow lubricant (grease) to be installed. Install the fitting and tighten it using an 8mm wrench.
SPONSORED LINKS
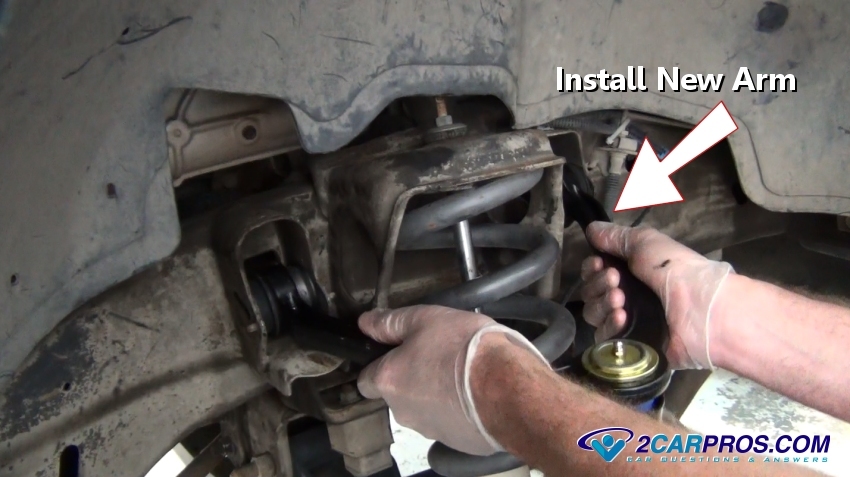
7. Install the New Upper Control Arm
Install the new control arm into the frame mounts. This might take some doing while moving the arm up and down while pushing inward to line up the mounting bolts.
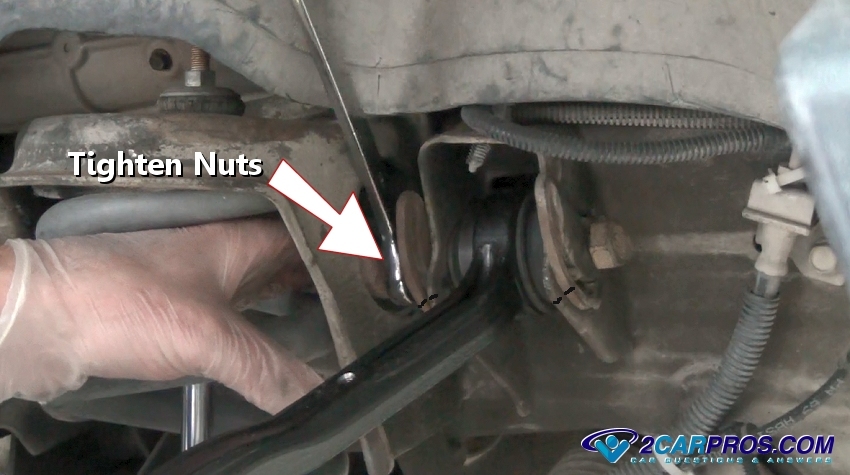
While aligning the bolt holes install both mounting bolts in the same position as they were removed.

Use a wrench or socket to tighten the both mounting bolts while keeping the alignment adjusters or shims in place. These bolts might be difficult to get a torque wrench on but you want to tighten these bolts to manufacturer's specifications which are usually between 65 and 75 foot pounds.
SPONSORED LINKS
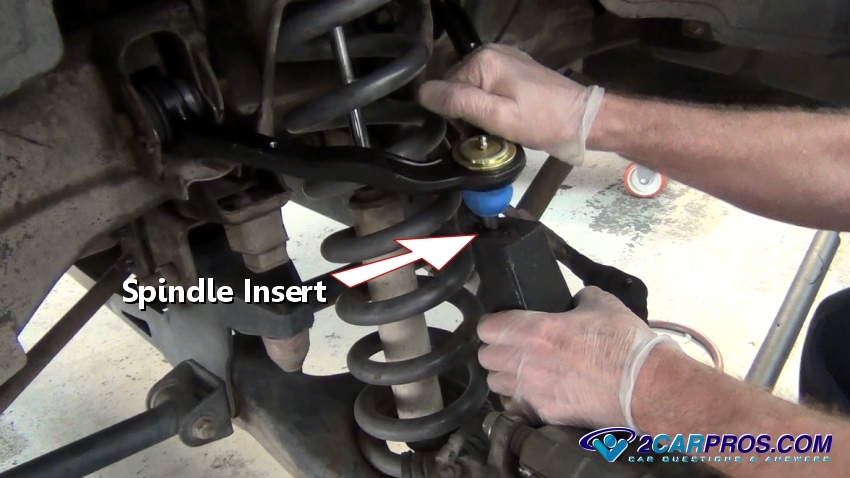
8. Reconnect the Upper Ball Joint
Insert the upper ball joint into the upper spindle bulk head. Use a hammer to gently tap the taper fit stud into place which will keep it from turning while installing the nut.
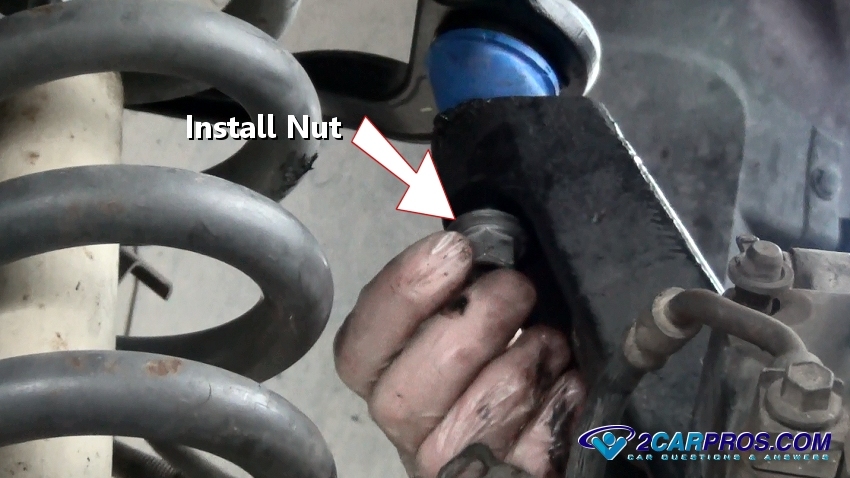
Install the upper ball joint nut by hand to avoid cross threading. If the taper does not hold push down on the control arm which will help hold the ball joint stud from turning.
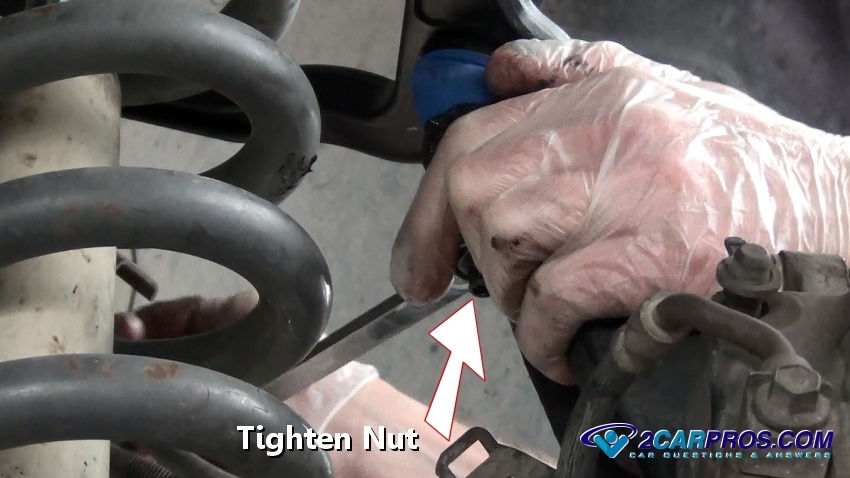
Use a wrench to tighten the upper ball joint mounting bolt. Use a socket and a torque wrench to tighten the nut to manufacturer's specification which is usually between 65 and 75 foot pounds. Install a new cotter pin (if needed)
SPONSORED LINKS
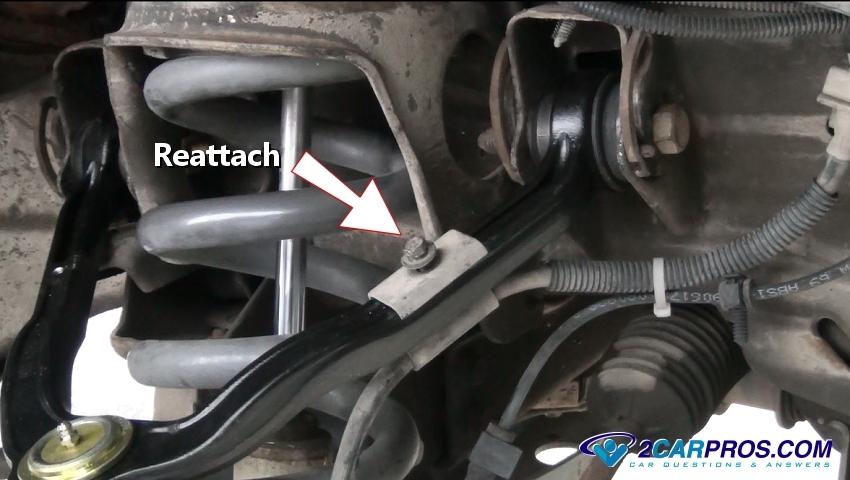
Reattach any brake line or wiring holders or clips removed in the repair.
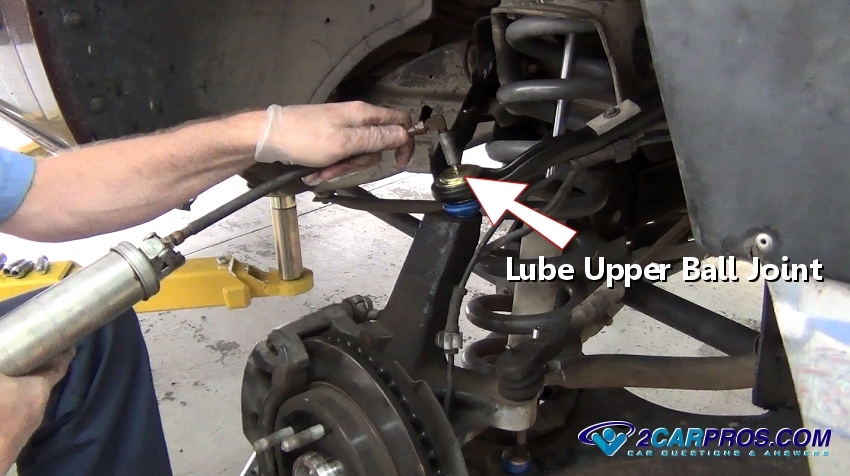
9. Lubricate the Upper Ball Joint
Once the job is complete lube the upper ball joint using a grease gun.
SPONSORED LINKS
10. Release the Supporting Jack
Lower the hydraulic jack and reinstall the wheel. Torque lug nuts to factory specifications (between 95 to 110 foot pounds). When driving the car for the first time listen for strange noises indicating the job will need to be rechecked. It is strongly suggested to have the car aligned when the suspension work is done.
Questions?
If you have any upper control arm questions, please visit our forum. If you need car repair advice, please ask our community of mechanics is happy to help you and it is always 100% free.
We hope you enjoyed this guide and video. We are creating a full set of car repair guides. Please subscribe to our 2CarPros YouTube channel and check back often for new videos which are uploaded almost every day.
SPONSORED LINKS
Article published 2022-03-12
SPONSORED LINKS
Lower Control Arm Bushing Replacement