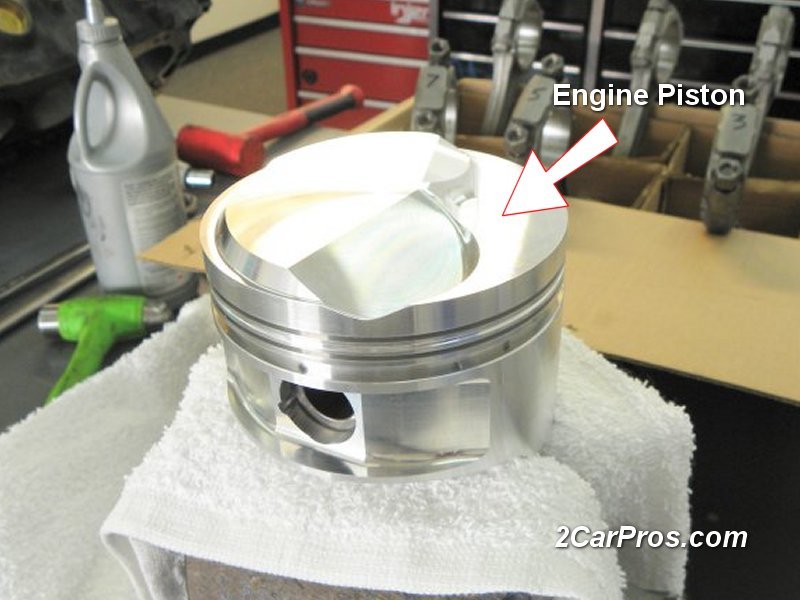
An engine's piston rings are used to seal the piston to the cylinder wall during the compression stroke. When a combustion event occurs these rings are forced against the engine block cylinder walls to help contain the energy that is released. Most engine pistons contain three separate rings that perform unique tasks. The first ring or top ring is the main combustion ring that takes the brunt of the force as the piston is thrust downward. The second combustion ring acts as an overflow or secondary confinement ring that aids in the service of the first main combustion ring. The third and final ring is used to control motor oil from entering the combustion chamber and being burned as explosive gasses are ignited. This oil control ring consists of three separate pieces and must be assembled on the piston.
What Goes Wrong?
If new piston rings are installed without machine work it will make the situation worse due to the oblong wear pattern the cylinder walls produced during normal long term operations. In other words, new piston rings are perfectly round with no wear, if they are installed into an oval shaped cylinder (worn) the ring operation failure will be amplified. Piston rings typically last for the life of the motor, but because these rings are created from extremely hard and brittle metal they can break causing a failure. These failures can range from low compression, cylinder misfire, scoring of the cylinder walls and burning oil.
As an engine ages piston rings wear into the cylinder walls and eventual fail, naturally. When this condition is present it lowers the engine's compression which causes low compression, burning oil and heavy exhaust smells which is the result of an incomplete combustion process. Anytime an engine has reached its normal lifespan the engine needs to be disassembled and re-machined (rebuilt). This process is not difficult with the proper tools and instruction.
Tools and Supplies Needed
- Piston ring installation tool
- Protective eyewear and gloves
- Motor oil
- Shop towels
- Small standard screw driver or pick
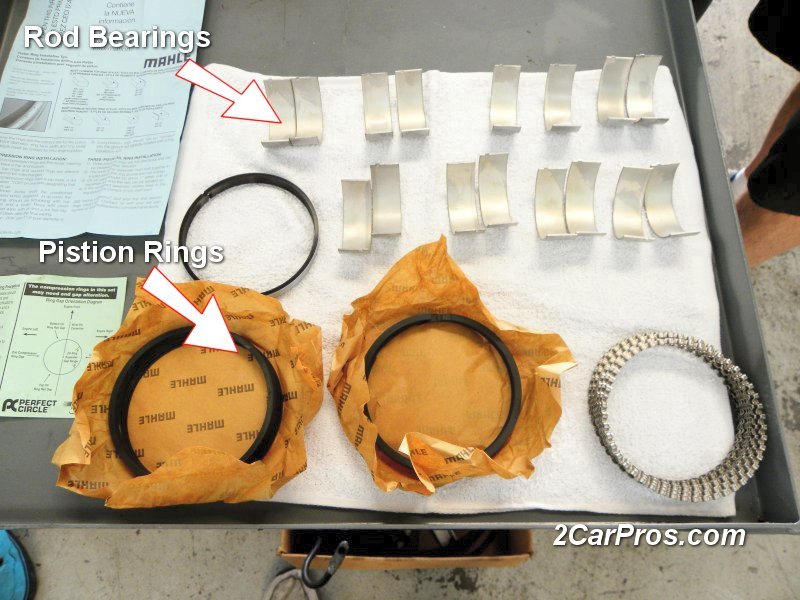
- New piston ring set
Best Practices
- Piston rings are a very important part of the engine and should be installed with care and cleanliness.
- Never install new piston rings into worn cylinder walls.
- Keep ring gap in proper locations on the piston
- Never twist compression rings when installing
Let's Jump In!
To replace piston rings the piston must be removed from the engine block and
replaced (if worn.) For best results the engine block should be bored and new pistons
fitted to the connecting rods which should be re-sized. Piston rods can become "out
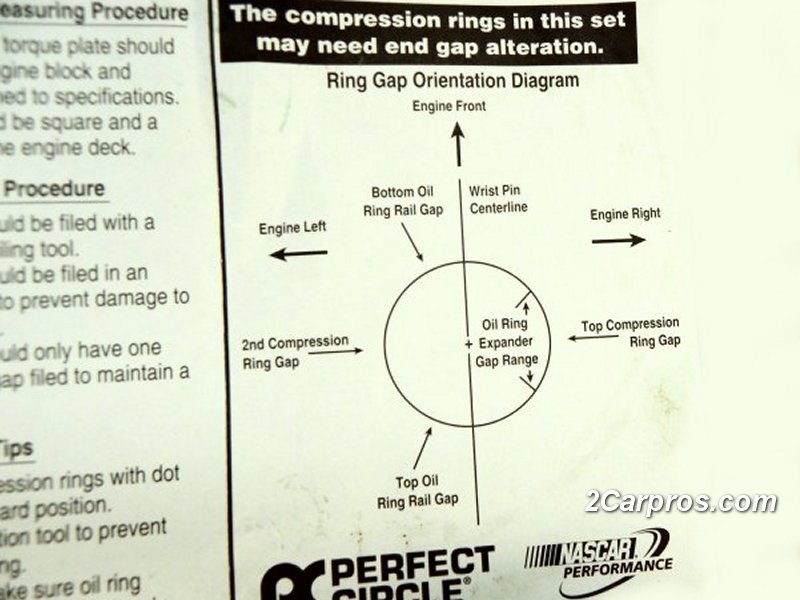
of shape" due to the extreme force they are subjected to. All piston rings are accompanied
by a set of installation instructions, these instructions are used to determine
the orientation of the piston ring gap. The location of this gap is an important
aspect to the performance of the ring. Begin by cleaning the piston thoroughly and
securing it firmly in a vise. (Do not tighten against piston, use connecting rod.)
Remove the piston rings from the box and separate them into organized piles on
a clean surface, use caution as to not mix rings or turn them over. (Compression
rings install one direction only.) Locate piston ring installation instructions
and read completely. (Each ring manufacturer has specific instructions.)
Always install piston rings at their proper orientation, this helps provide a
superior seal to the cylinder walls.
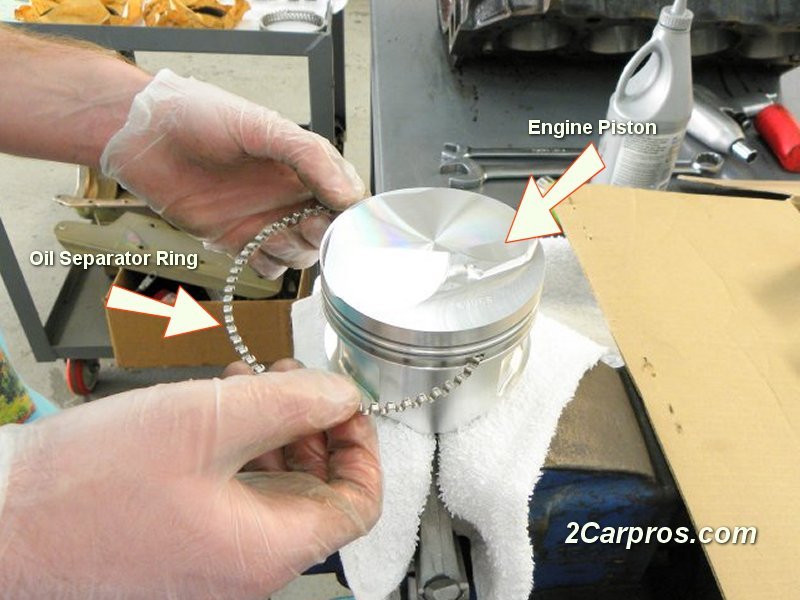
The first piston ring to be installed is the oil separator ring. This ring is
used to hold in place both oil wiper rings and is designed to allow engine oil on
the cylinder walls to be removed and moved back into the oil pan via oil holes built
into the piston. This ring doesn't need an installation tool.
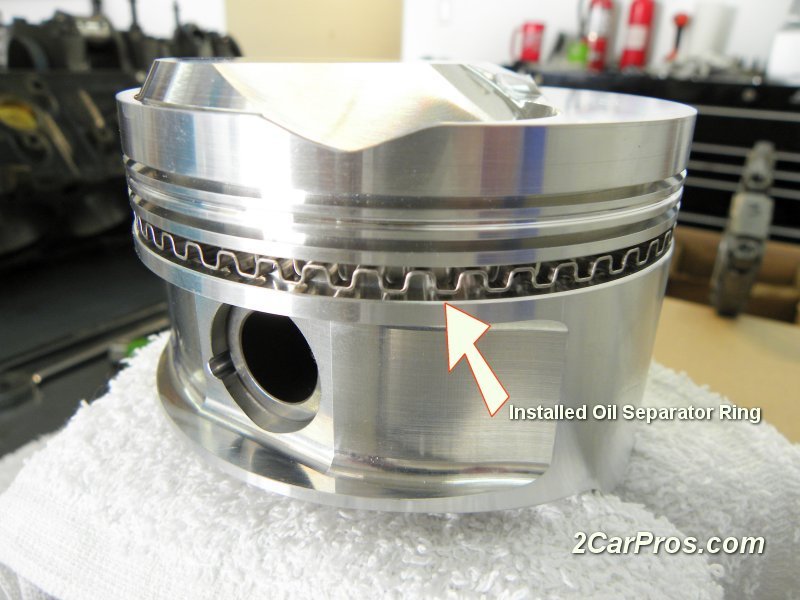
Oil ring separator correctly installed.
Watch the Video!
Please watch this video of the job being done, then continue down the guide to glean additional helpful information.
Once properly installed the individual oil wiper rings are ready to be installed.
These rings are unidirectional with no top or bottom unlike most compression rings.
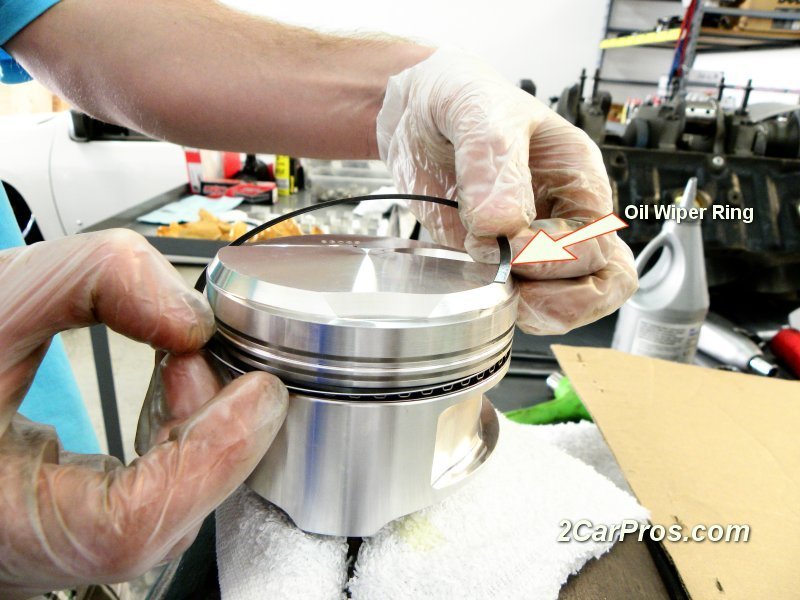
Each oil wiper ring is held in place by the oil separation ring that is securely
mounted in the piston ring groove. These oil wiper rings reside at either end of
the separator and are again, unidirectional. Be sure to reference the installation
guide to ensure proper placement of the ring gaps.

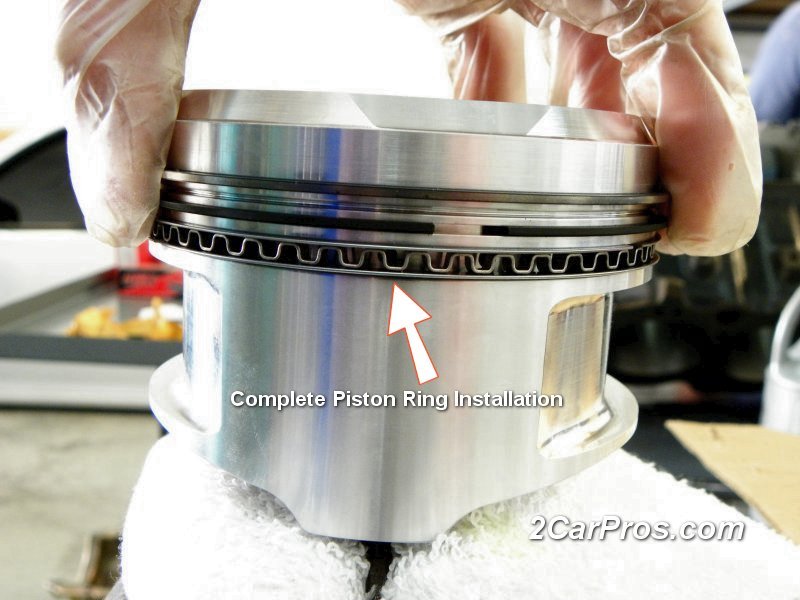
Once the assembly of the oil wiper ring combination is complete double check
the ring gap location as sometimes they can turn without notice while the installing
the additional oil wiper ring. Be sure the oil ring is free from carbon, dirt, grease
or any debris of any kind. Now we are ready to install the first compression piston
ring.
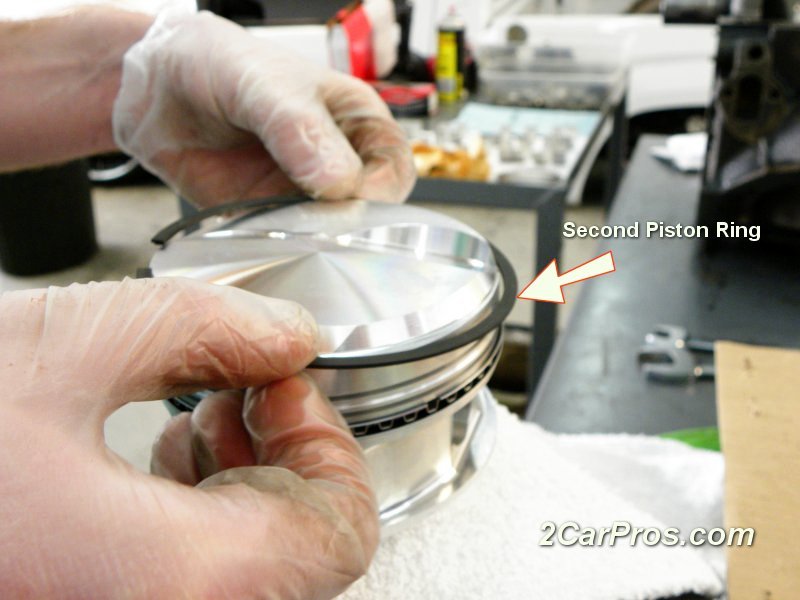
Carefully choose the correct piston ring (the second and first piston rings are
usually different from one another.) This ring could have a top and bottom and usually
is shown by a small dot on the top flat part of the ring, near the gap. This ring
can sometimes be installed without aid of a ring installer. Gently pry the piston
ring open just far enough to fit straight over the piston. Do not bend, or swirl
the ring onto the piston because it can bend the ring inhibiting its operation.
As with the oil wiper rings be sure to locate the ring gap in the correct location
on the piston.
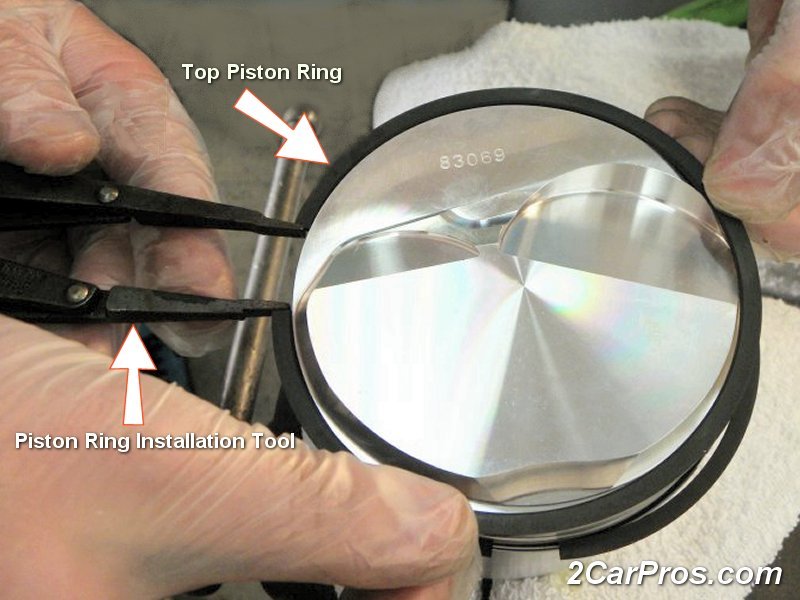
The top and final compression ring is installed at the top of the piston, a tool
is needed to help spread the ring due to its rigid nature. Like the second ring
the main compression ring must be installed with the top of the ring facing upward.
If the piston rings are installed incorrectly the piston (engine) will have low
compression and may burn oil. Be sure the ring gap is in its proper placement for
optimum performance. Once all piston rings have been installed perform a final ring
gap location inspection. Always be sure the piston rings are "free floating". Ring
must be able to move freely on the piston or it will inhibit proper operation.
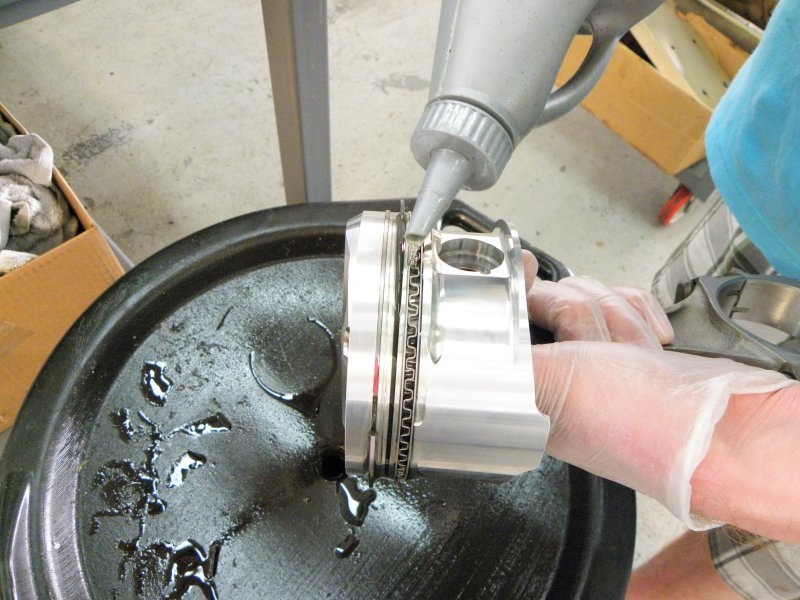
Before installation, piston rings must be lubricated (oiled) this helps the piston
rings "mate" to the piston and the cylinder walls. Also include wrist pin and piston
skirts in the lubrication process. Repeat this process for all pistons to be installed
into the engine block, once completed the pistons are ready for installation. Store
assembled pistons in a clean dry area if they are not immediately used.
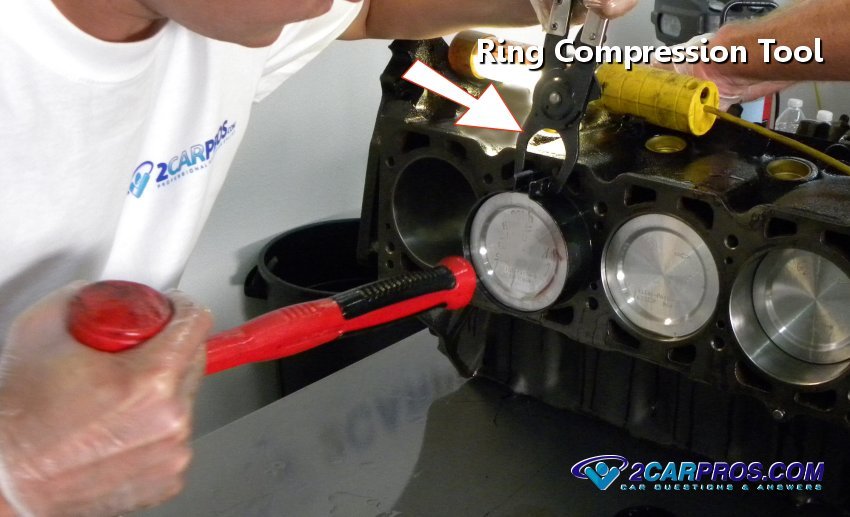
Once the piston rings have been installed onto the piston clean the cylinder
bore and apply a thin layer of oil onto the cylinder walls. Using a ring compressor
hold the rings against the piston while using a plastic or rubber hammer to gently
tap the piston into the bore. This can take some time and practice but hang in there,
the first one is the most difficult. Once new piston rings have been installed allow
a break in period before subjecting the engine to full load, this will allow the
rings to properly mate to the freshly machined bore. These "break in" procedures
will help the engine perform to its utmost ability while controlling oil consumption.
Questions?
Our certified technicians are ready to answer piston ring questions for free. We hope you saved money and learned from this guide. We are creating a full set of car repair guides. Please subscribe to our 2CarPros YouTube channel and check back often for new videos which are uploaded regularly.
Article published 2022-03-10