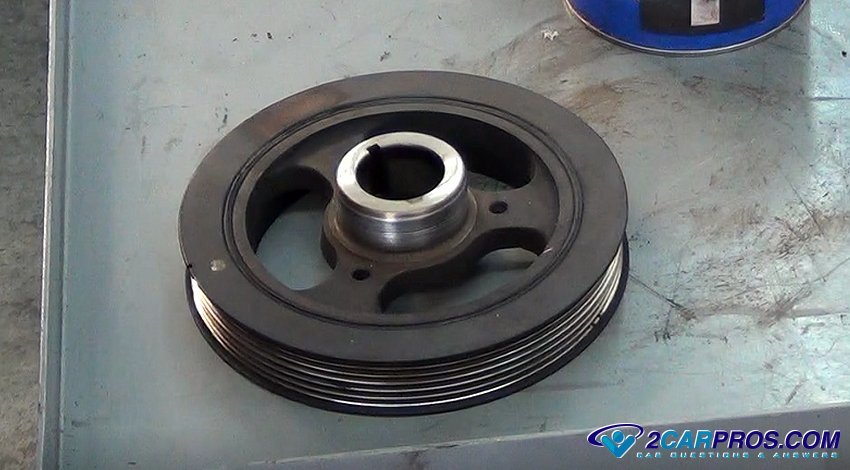
The harmonic balancer or vibration dampener as it is sometimes called is used to achieve three goals, This first is to help balance the engine like the name suggests but it is also responsible for helping the engine maintain momentum while running and to drive the serpentine belt via a pulley or the outer ring of the balancer. This job is needed for many internal engine services such as timing cover gasket, timing belt, timing chain and water pump repairs.
What goes wrong?
A harmonic balancer consists of two separate pieces, the first is the mass which is bolted to the crankshaft shout and the second is the energy dissipating element which is separated by a rubber insulator. Due to the stress and strain that is placed upon the harmonic balancer the unit can sometimes crack or separate. If the front main seal fails it will cause an oil leak which can only be replaced by removing the balancer. In the image below a balancer has completely come apart and is missing the rubber insulator.
Engine harmonic balancer This guide pertains to most cars, configurations maybe slightly different but
the process is the same. Begin with the vehicle on level ground, lifted safely in
the air if needed and the parking brake set. A basic set of tools including a balancer
puller and installation tool kit is required in most cases which is available at
the local parts store, usually for free. First remove all plastic shields that block access to the balancer if any and
then release to belt tensioner to remove
the serpentine belt. At this time check the belt condition in case replacement
is required during the job. Some cars have a pulley which bolts to the front of the balancer which must be
removed before the crankshaft bolt can be removed and the puller installed. Here
we use an air impact gun to help make the job easier. It can also be removed conventionally
but the engine must be held from turning over via the flywheel starter access port. Below is a balancer pulley mounted using three bolts (evenly) and washers. You
want to install the bolts in far enough to hold properly when the puller is being
used. It's a good idea to install a small amount of grease onto the threads of the
puller to aid its operation. (Note: Some dampeners are not a press fit and can be
removed without a puller.) With an air impact wrench tighten the puller, you may hear a small pop as the
dampener starts to move off of the crankshaft, this tells you the puller is working. The puller push bolt will become easier as the balancer comes off the end of
the crankshaft. When the balancer becomes free keep your hands on it because it
can be heavy. Once the dampener is removed, there may be a oil varnish deposit on the front
sealing surface which will need to be removed with carburetor cleaner or fine sandpaper
before re-installation. Always check the condition of the woodruff key slot, if
the balancer was loose this will be damaged. Please watch this video of the job being done, then continue down the guide to
glean additional helpful information. Below is a harmonic balancer installation tool is used to reinstall the balancer.
Never hammer the balancer back onto the engine, crankshaft thrust bearing damage
will result. After any repair work has been completed such as a
front main seal warm the balancer
in an oven to 190° F to help expand the dampener
to ease installation. Then install a small amount of grease to the sealing surface
of the balancer. Align the balancer woodruff key slot with the keyway on the crankshaft and set
into place. The balancer hub will slide on a small amount and hold onto the crankshaft
snout. Install the balancer installation tool, again a small amount of grease on the
tool threads will help the process, wind the installation tool into place. Use two wrenches to tighten the balancer installation tool by holding the screw
and tighten the large jam nut, continue this process until you no longer feel the
balancer moving inward. Once the installation tool has been removed, apply sealer to the center bolt
and install, this is to help stop oil leaks. Tighten bolt to manufacturer's recommended torque specification, (130 to 150
pounds usually) Finish the job by installing a new serpentine belt (if needed) and then start
the engine to check for any fun noises or oil leaks. Our certified technicians are ready to answer vibration
dampener questions for free. We hope you saved money and learned from this guide.
We are creating a full set of car repair guides. Please
subscribe to our 2CarPros YouTube
channel and check back often for new videos which are uploaded regularly.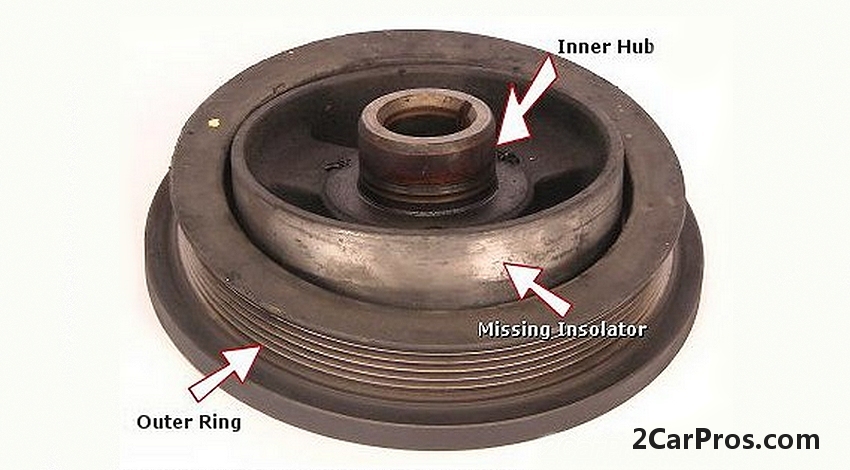 Failed Harmonic Balancer
Let's get started
Watch the Video!
Questions?
Article published 2022-03-11

Serpentine Belt Replacement Ford Contour

Serpentine Belt Replacement Mercedes Benz