Hi,
Here are the directions for removal and replacement. The attached pics correlate with these directions.
____________________________________________
2003 Buick Truck Rendezvous V6-3.4L VIN E
Transmission Replacement
Vehicle Transmission and Drivetrain Automatic Transmission/Transaxle Service and Repair Removal and Replacement 4T60-E/4T65-E Automatic Transaxle Transmission Replacement
TRANSMISSION REPLACEMENT
Transmission Replacement
Tools Required
^ J35944-A Transmission Oil Cooler Flusher
Removal Procedure
Important: Transmission oil circulates between the transmission assembly and the transfer case. In situations where transmission related failures circulate debris into the transfer case. the transfer case must be disassembled, cleaned, and inspected for damage.
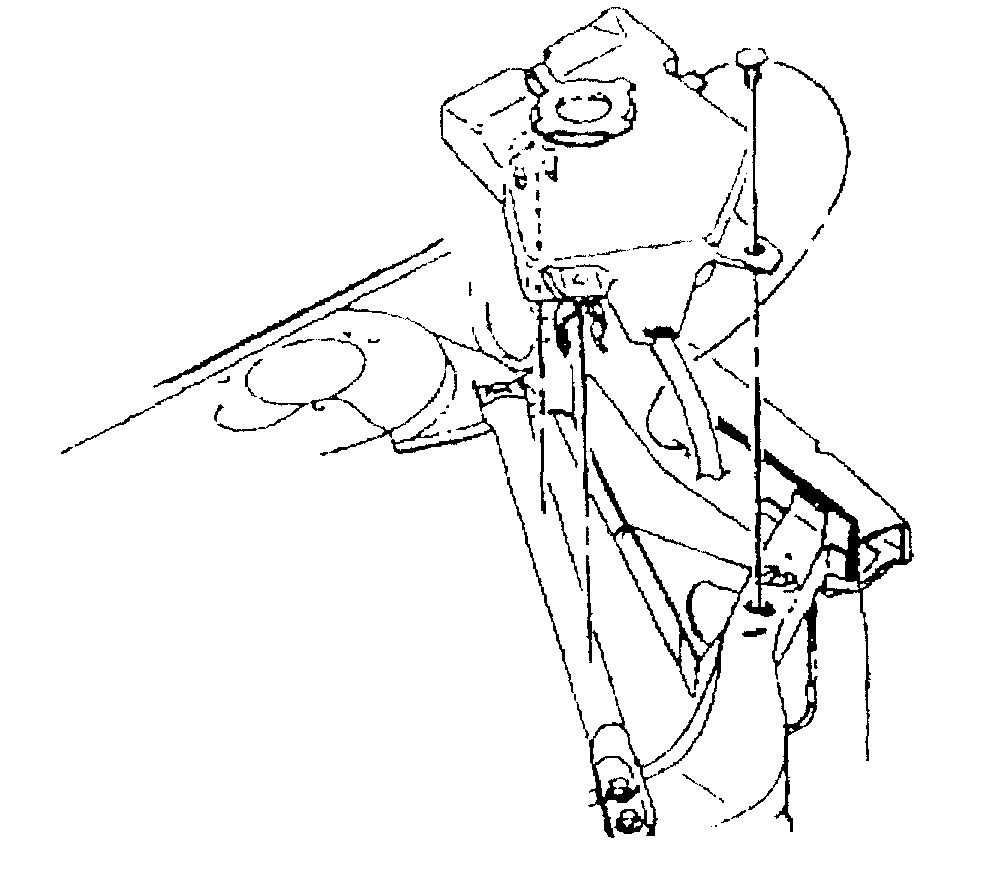
pic 1
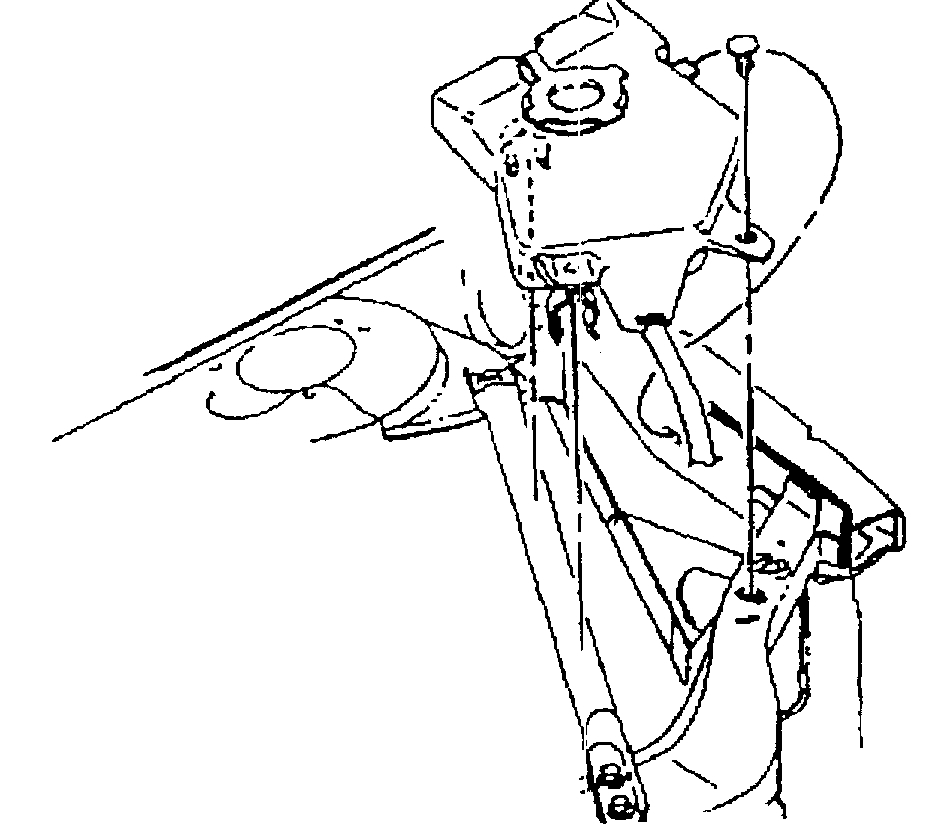
1. Remove the push pins from the coolant recovery bottle.
2. Position aside the coolant recovery bottle.
3. Remove the air cleaner.
4. Remove the automatic transmission range selector cable from the automatic transmission range selector cable lever.
5. Remove the automatic transmission range selector cable bracket.
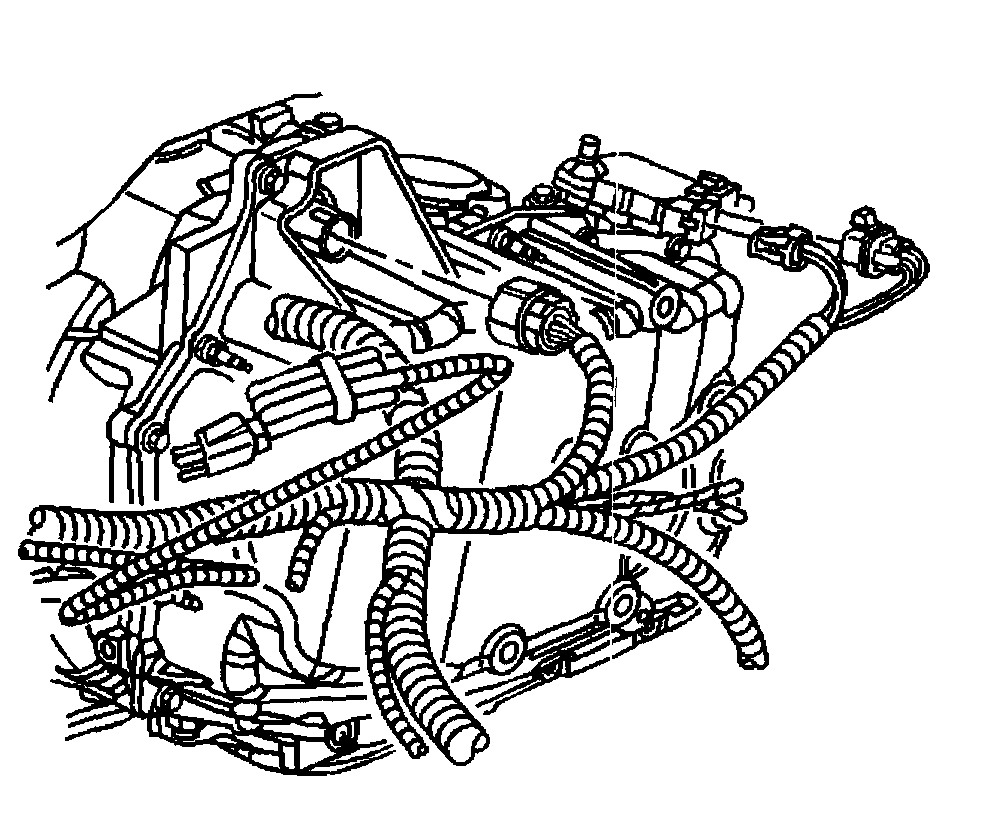
pic 2
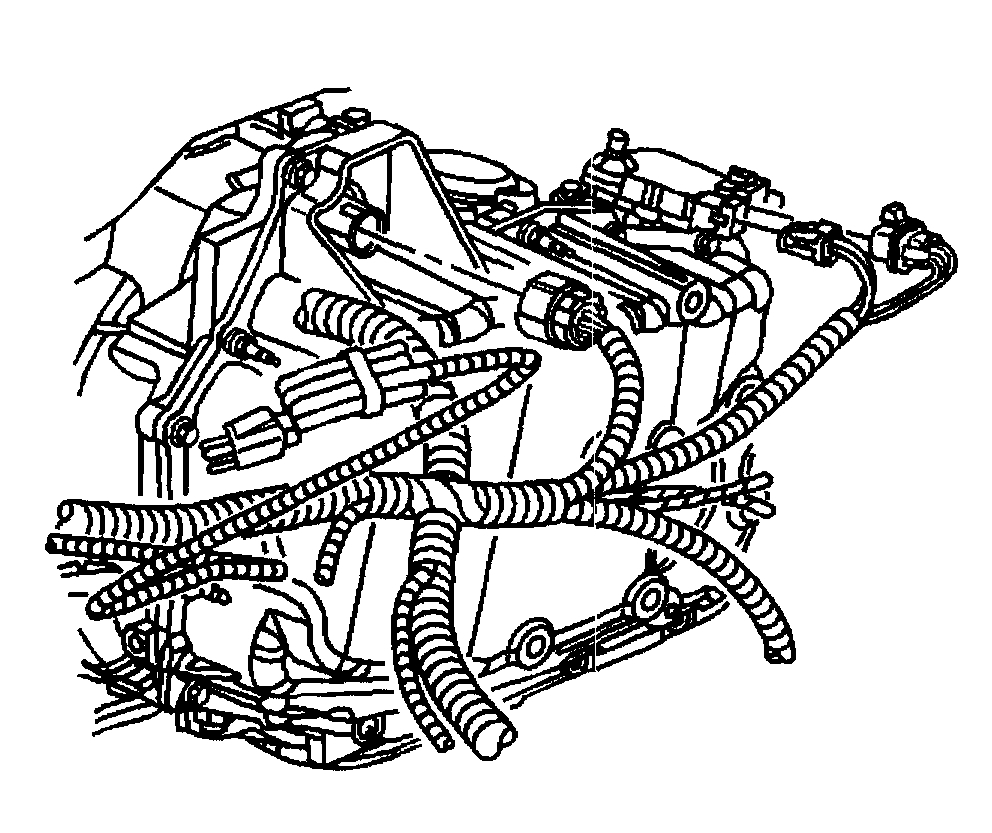
6. Disconnect the wiring harness connectors from the transaxle.
7. Remove the wiring harness from the transaxle.
8. Remove the right side engine strut.
9. Install the engine support fixture.
10. Raise the vehicle. Refer to Vehicle Lifting.
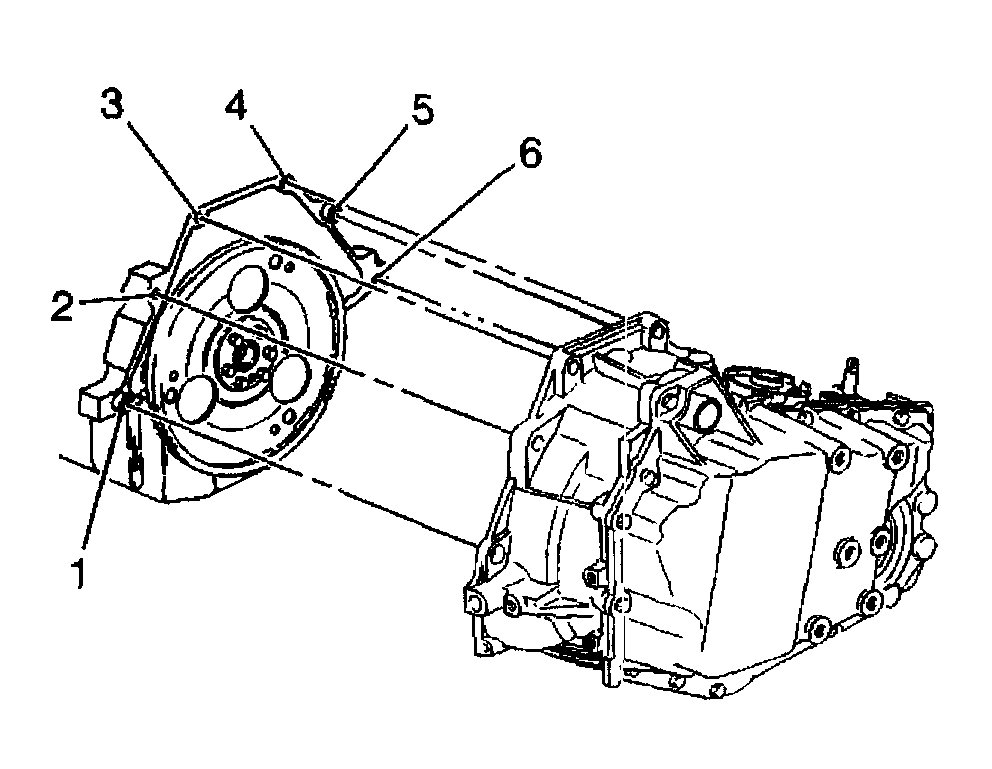
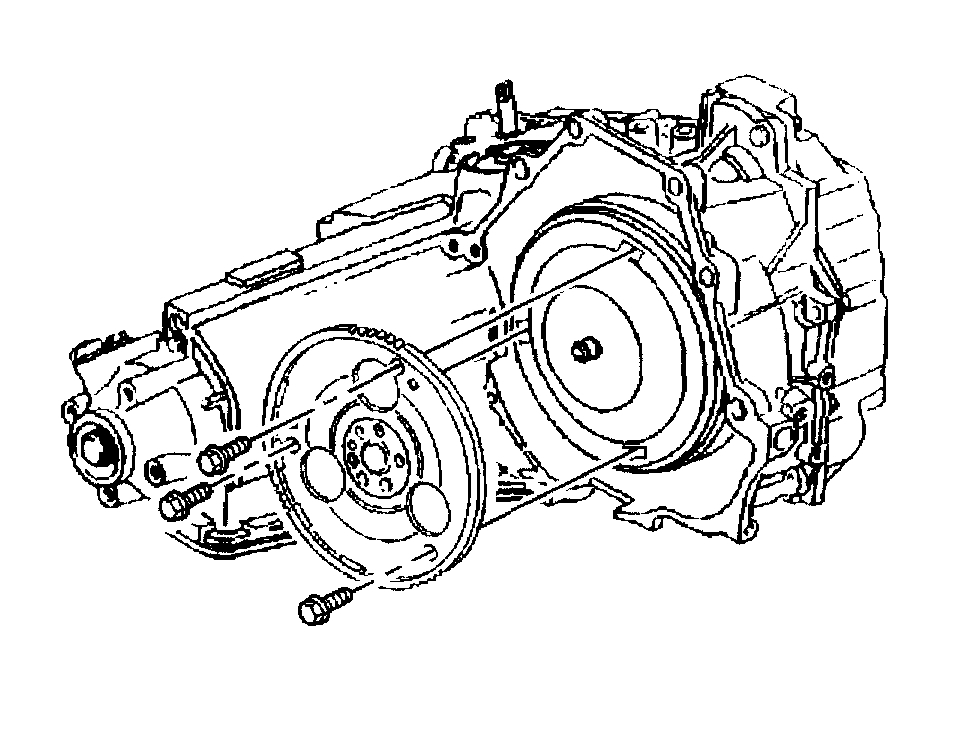
pic 3
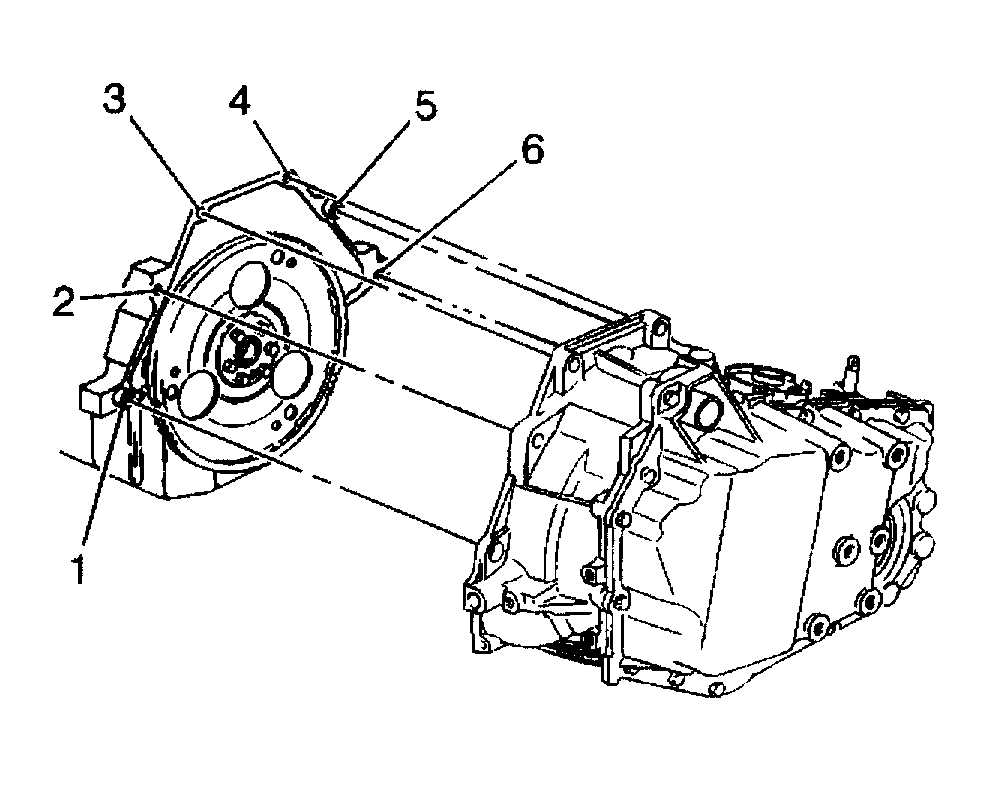
11. Remove the top four bell housing bolts (2, 3, 4, 5).
pic 4
12. If the vehicle is equipped with All-Wheel-Drive (AWD), perform the following steps:
12.1. Remove the propeller shaft.
12.2. Remove the transfer case brace.
13. Remove the frame.
pic 5
14. Remove the filler tube.
15. Remove the torque converter cover.
16. Remove the torque converter bolts.
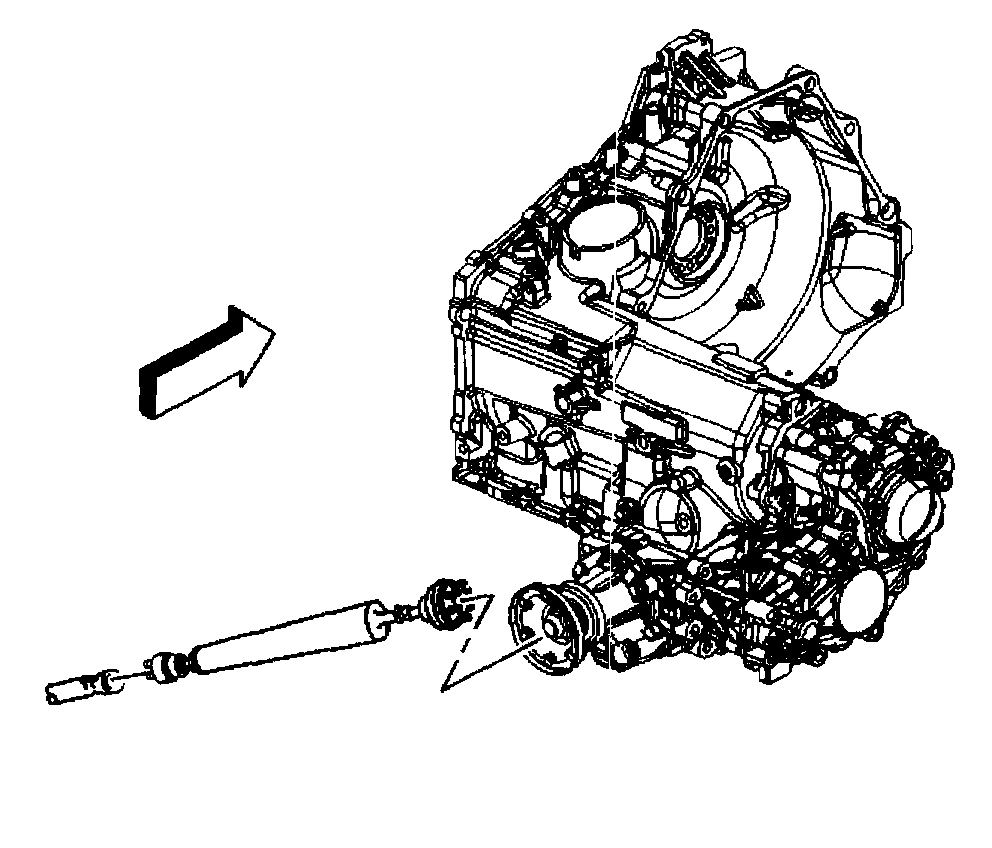
17. Disconnect the vehicle speed sensor electrical connector.
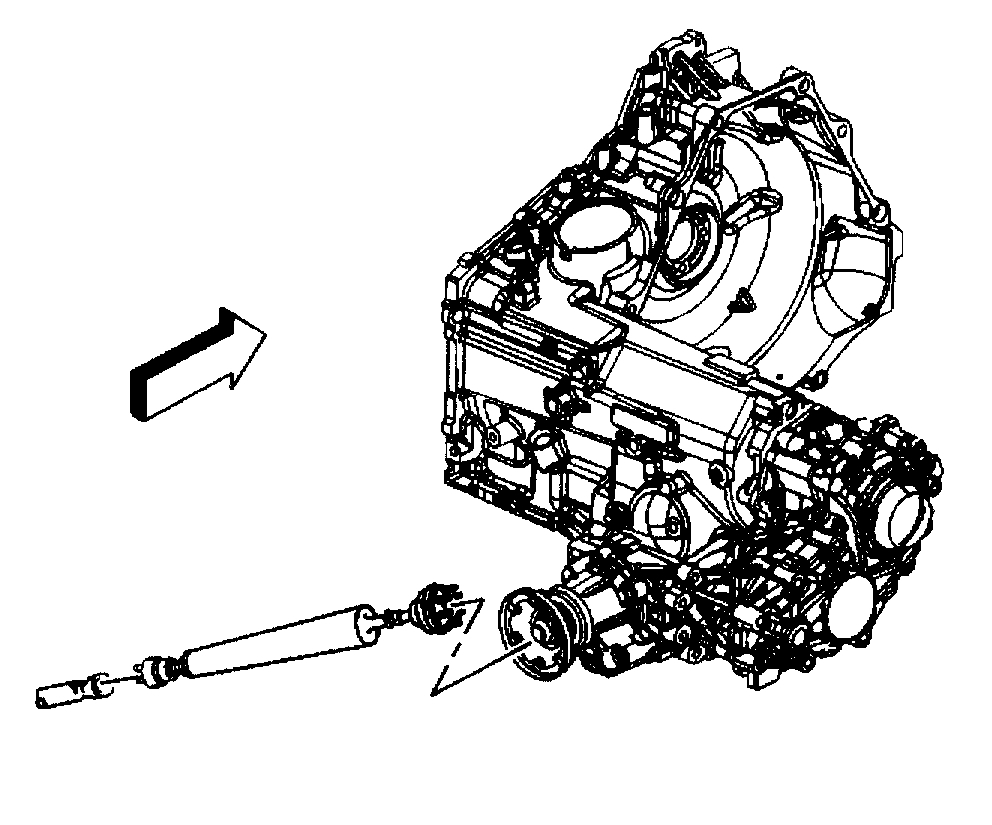
18. Remove the right and left drive axles from the transaxle.
19. Disconnect the transmission cooler hoses from the transaxle.
20. Position the transmission jack under the transaxle.
21. Remove the transaxle / transfer case brace.
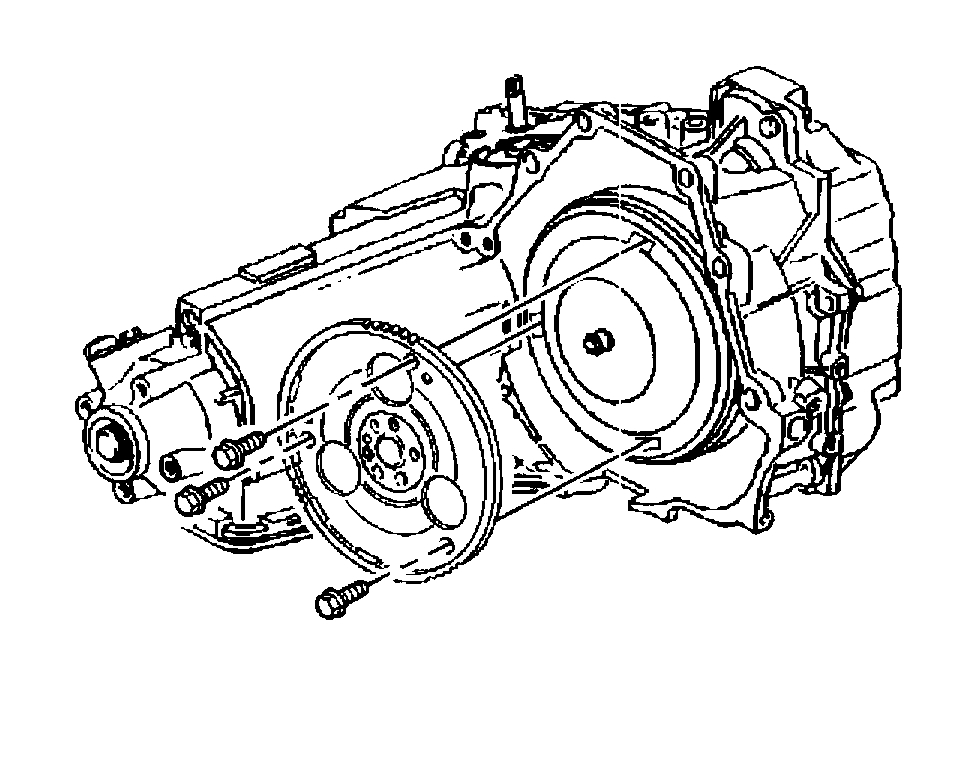
pic 6
22. Remove the lower transaxle bolts (6) and stud (1).
23. Remove the transaxle from the vehicle.
24. Use the of 35944-A or equivalent to flush the transaxle oil cooler and the transaxle of cooler hoses.
25. If the vehicle is equipped with AWD, remove the transfer case.
Installation Procedure
Important: If you are replacing the transaxle, transfer case or any internal components, you must inspect the end play and adjust as needed.
1. If the vehicle is equipped with AWD, install the transfer case.
2. Position the flex plate alignment hole to the seven o'clock position.
3. Align the transaxle filler tube to the transmission and install the transaxle into the vehicle.
Notice: Refer to Fastener Notice in Service Precautions.
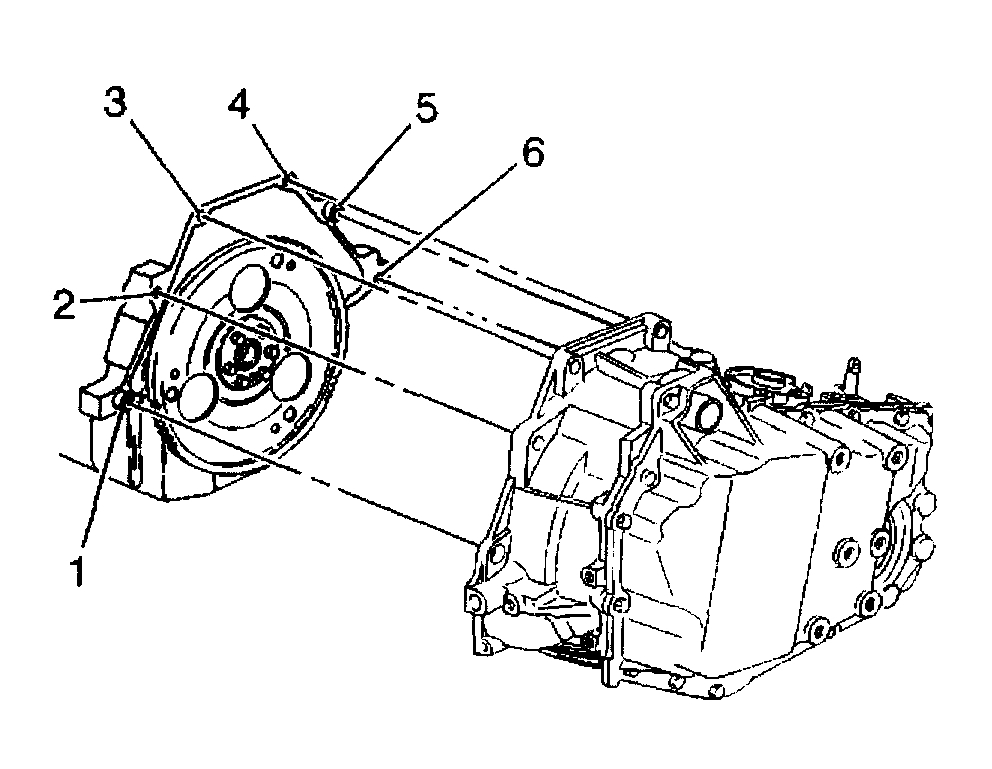
pic 7
4. Install the lower transaxle bolt (6) and stud (1).
Tighten the lower transaxle to engine and engine to transaxle bolts to 75 Nm (55 ft. lbs.).
5. Install the transaxle/transfer case brace.
6. Install the transmission cooler hoses.
7. Install the right and left axle shafts into the transaxle.
pic 8
8. Connect the vehicle speed sensor electrical connector.
9. Install the torque converter bolts.
10. Install the torque converter cover.
11. Install the filler tube bracket bolt.
12. Install the frame.
pic 9
13. If the vehicle is equipped with AWD, perform the following steps:
13.1. Install the propeller shaft.
13.2. Install the transfer case brace.
14. Install the front wheels.
15. Lower the vehicle.
16. Remove the engine support fixture.
17. Install the right side engine strut.
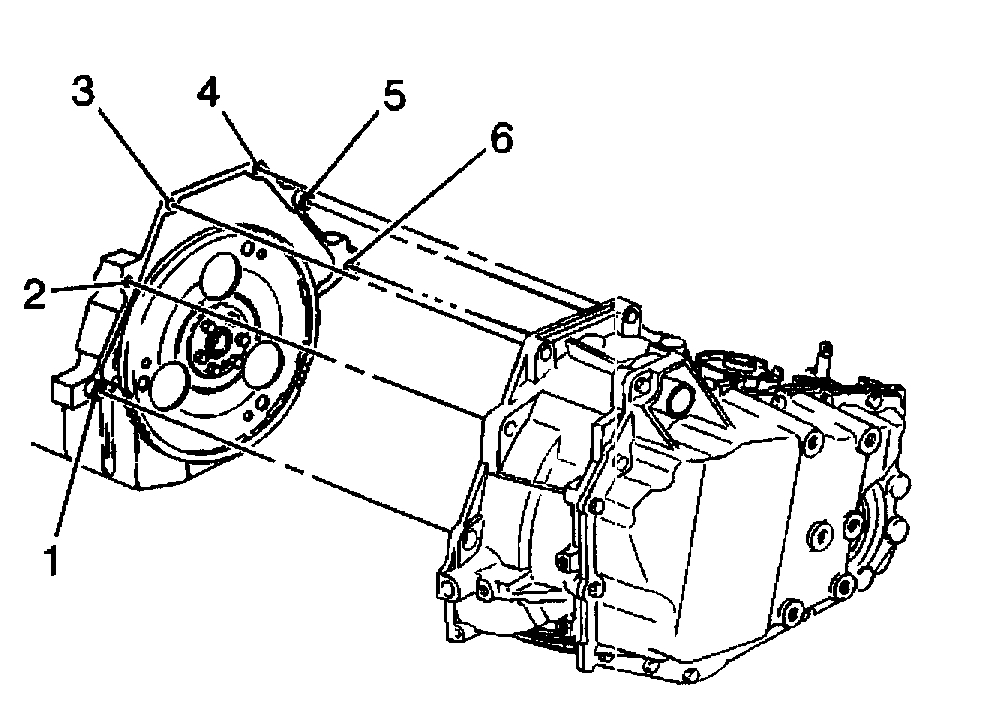
pic 10
18. Install the upper transaxle bolts (3, 4, 5) and stud (2).
Tighten the upper Transaxle bolts and stud to 75 Nm (55 ft. lbs.).
pic 11
19. Connect the wiring harness to the transaxle.
20. Install the transmission range selector cable bracket.
21. Install the automatic transmission range selector cable to the automatic transmission range selector lever.
22. Install the air cleaner assembly.
pic 12
23. Install the coolant recovery bottle.
24. Inspect and adjust the transaxle fluid level as needed.
_______________________
Let me know if this is what you needed or if you have other questions.
Take care,
Joe
Images (Click to enlarge)
Sep 17, 2020 at 6:35 PM