Wheel cylinder keeps popping open

Tiny
JULIANV
  • MEMBER
  • 2003 SATURN L200
  • 4 CYL
  • AUTOMATIC
  • 100,000 MILES
I changed the rear brakes on my car (the shoes, drum, springs and also wheel cylinder) unfortunately my rear driver's side wheel cylinder keeps popping open and leaks. What would be the cause? I have replaced both sides of the brakes and bleed the heck out of them and it is only the driver side that's having the problem. Help please.
Saturday, April 6th, 2019 AT 2:44 PM

8 Replies

Tiny
CARADIODOC
  • MECHANIC
  • 33,738 POSTS
Can you post a photo of the culprit? Without seeing the assembly, I can offer some suggestions to get you started. I've seen people try to pedal-bleed with a helper, and they forgot to install the brake drum first. The drum is what limits how far the shoes can travel. If they go too far, there's nothing to prevent the pistons in the wheel cylinder from going too far.

Be sure the shoes are sitting squarely on the six "lands" on the backing plate. Those must be lubricated too with special high-temperature brake grease. On some designs, the shoes can drop down into the groove around the backing plate, then the pistons will bypass the shoes and again, go too far. The shoe return springs hold the shoes up on the lands, but if the shoes are allowed to drop down first, they can become caught where the springs won't pull them up to their proper position. You won't get the drum on either.

I was involved with one car in the '80s that came from the factory with two different size wheel cylinders, and an elusive brake pull that no one could solve. I was rebuilding the caliper and wheel cylinder on one side, and my coworker was rebuilding them on the other side. After opening the correct wheel cylinder kit for my side, I set the other half of the parts on my buddy's work bench. Later he said I was using the wrong size parts. That's when we found the difference, and solved about a ten-year-old brake pull problem. It is also possible to get the wrong size wheel cylinder for the part number on the box. Usually that just means a smaller diameter piston, but in some applications it can mean a shorter wheel cylinder.

I also saw a fellow clip the ends of the star wheel adjuster assembly on the wrong places on the shoes. In his case that held the shoes apart too much, and he couldn't fit the drum on. On some applications, that assembly can be installed not extended out far enough, or in such a way that the shoes have to move too much before they contact the drum. That can let the pistons pop out.

If this only happens when driving the vehicle, GM had a real common problem in the '70s and '80s with backing plates that rusted out. The wheel cylinders were not bolted on like everyone else does. They had an hour-glass-shape cast into the back of the wheel cylinder that sat in a matching hole in the backing plate, then a round snap ring was supposed to hold it in place. Those holes in the backing plates rusted out, then the wheel cylinder could rotate when applied, and the pistons would miss the brake shoes and pop out. The fix for that was to replace the backing plates and wheel cylinders with normal parts that bolted together. The steel brake line often twisted the wheel cylinder back to its correct orientation, so by the time the drum was removed, the cause was not immediately evident. Consider checking your backing plate to see if the bolt hole tore out and is letting the wheel cylinder turn.
Was this
answer
helpful?
Yes
No
+2
Saturday, April 6th, 2019 AT 3:37 PM
Tiny
JULIANV
  • MEMBER
  • 4 POSTS
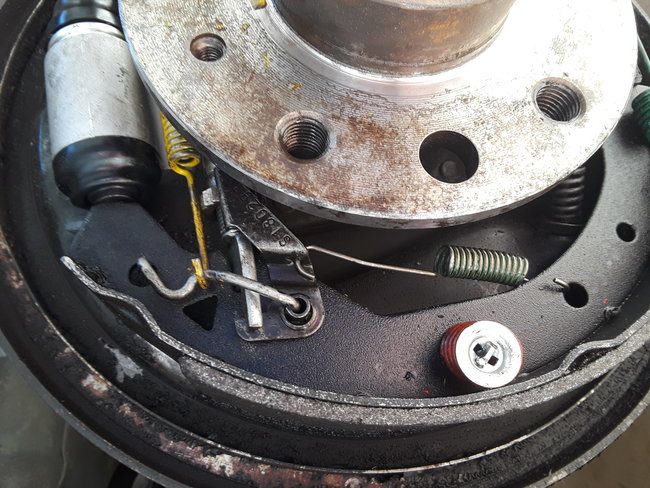
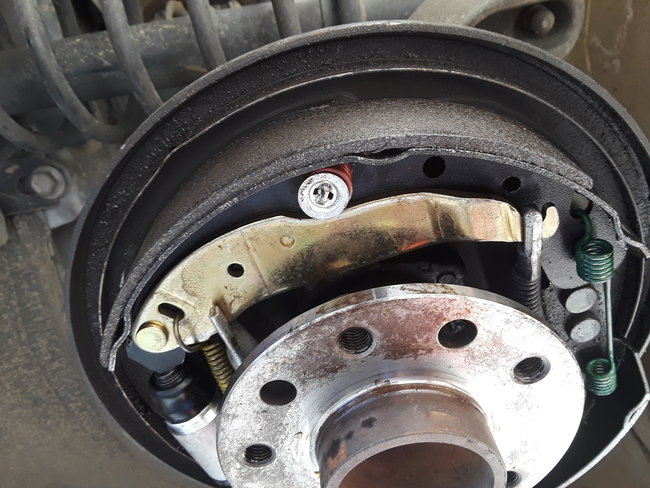
Here are the pictures and (wheel cylinder is fixed and double checked to make sure the seal is back to the way it should be):
Was this
answer
helpful?
Yes
No
Saturday, April 6th, 2019 AT 4:11 PM
Tiny
CARADIODOC
  • MECHANIC
  • 33,738 POSTS
Dandy. How about we just give up and fix it? I expanded your middle photo. This is called a "non-servo brake", meaning the front and rear shoes work independently, one going forward, and the other when going rearward. Chrysler used that on the K-cars, and when the front ones wore out, you could switch them and get double the life out of them. Here they put the parking brake lever on them, but if those can be transferred and if the linings are the same length, you can do that too. The lining length is important to maintain balanced braking front-to-rear.

With "duo-servo brakes" the front shoe has a shorter lining and its only purpose is to grab the rotating drum and try to rotate with it. It pushes on the star wheel adjuster which pushes the bottom of the rear shoe into the drum. The wheel cylinder pushes the top of that shoe into the drum, so the rear shoe does all the stopping, and it has a longer lining. Two forces are acting on it.

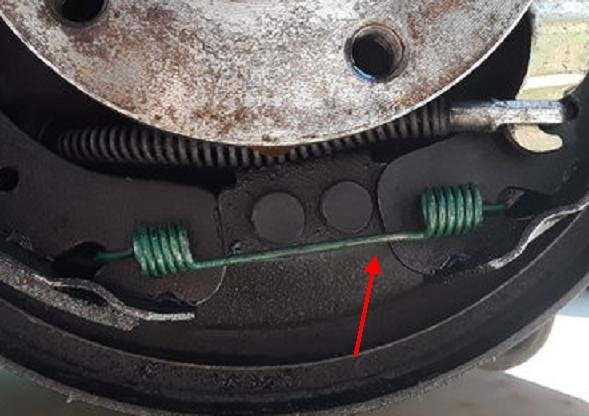
With the non-servo brake, you have a fixed anchor at the bottom. The two shoes don't interact at all. In this case, if you look at my nifty red arrow, you'll see the shoe is in front of that anchor. It should look the same as the front shoe. This will let the rear shoe rotate too far away from the wheel cylinder. I promise you are not the first person to do this. Every brake system specialist has done something like this. Some just admit and some don't. I'm surprised you were able to get the drum on without that shoe rubbing on it.
Was this
answer
helpful?
Yes
No
+1
Saturday, April 6th, 2019 AT 9:58 PM
Tiny
JULIANV
  • MEMBER
  • 4 POSTS
Thanks for the help and all the information you shared it was interesting and I learned a few things so thanks again. I'm heading to the car now to see how this goes, I'll let you know what happens and hopefully it's all good news.
Was this
answer
helpful?
Yes
No
Sunday, April 7th, 2019 AT 9:12 AM
Tiny
JULIANV
  • MEMBER
  • 4 POSTS
Thank your for all the help it was a great success and learning experience. Thanks I appreciate it.
Was this
answer
helpful?
Yes
No
Sunday, April 7th, 2019 AT 10:47 PM
Tiny
CARADIODOC
  • MECHANIC
  • 33,738 POSTS
You're a member of the club now. This happens to every professional at least once. Happy to hear you solved it.
Was this
answer
helpful?
Yes
No
Monday, April 8th, 2019 AT 11:22 PM
Tiny
ROYG3
  • MEMBER
  • 1 POST
  • 2001 SATURN L200
  • 150,000 MILES
Started on the driver side replacing the wheel cylinder. Haven't looked at the other side yet because of this bolt. Please tell me I don't have to remove or loosen the 4 nuts holding the hub on just to get room to the retainer bolt.
Was this
answer
helpful?
Yes
No
Wednesday, October 7th, 2020 AT 12:14 PM (Merged)
Tiny
JACOBANDNICKOLAS
  • MECHANIC
  • 108,170 POSTS
Hi,

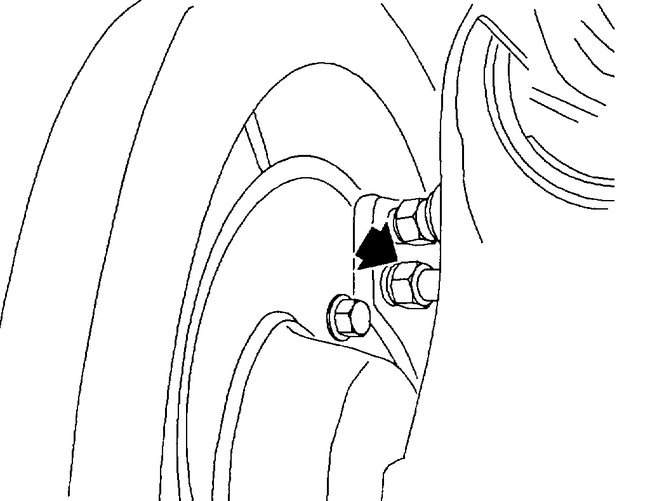
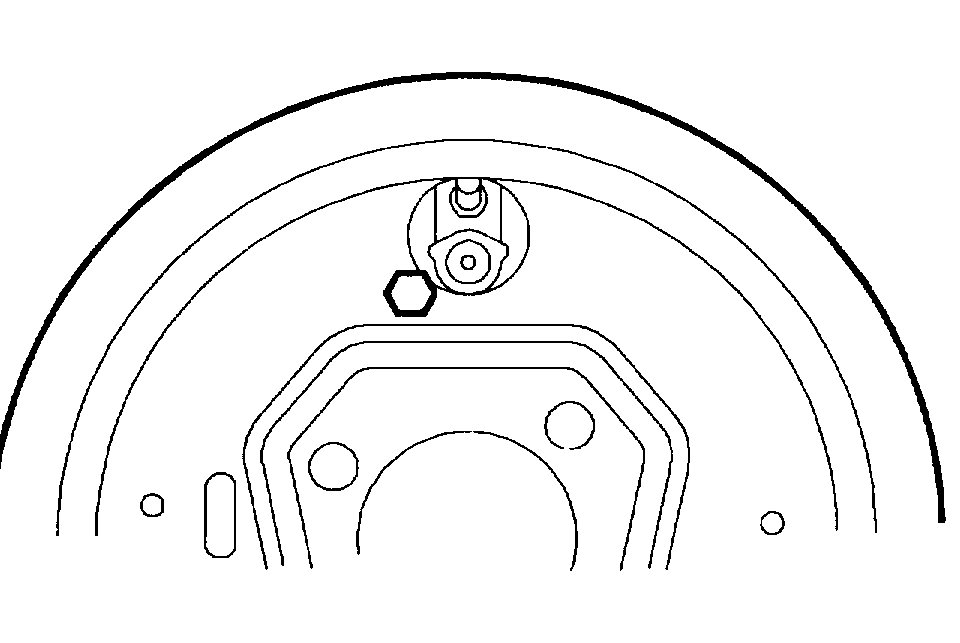
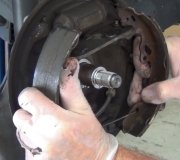
I'm not sure exactly what you are referring to. Here are the directions for removal and replacement and nothing indicates removal of the hub. The two attached pics correlate with the directions.

__________________________________

2001 Saturn L200 L4-2.2L VIN F
Procedures
Vehicle Brakes and Traction Control Hydraulic System Wheel Cylinder Service and Repair Procedures
PROCEDURES
WHEEL CYLINDER

REMOVAL

CAUTION: MAKE SURE VEHICLE IS PROPERLY SUPPORTED AND SQUARELY POSITIONED ON THE HOIST. TO HELP AVOID PERSONAL INJURY WHEN A VEHICLE IS ON A HOIST, PROVIDE ADDITIONAL SUPPORT FOR THE VEHICLE ON THE OPPOSITE END FROM WHICH COMPONENTS ARE BEING REMOVED.

1. Raise vehicle on hoist.
2. Remove rear wheel and tire assembly.

Pic 1

3. Disconnect brake pipe at rear wheel cylinder. Plug open brake pipes to prevent brake fluid loss and contamination.
4. Disassemble rear drum brake assembly.
5. Remove wheel cylinder fastener and remove wheel cylinder.

INSTALLATION

pic 2

1. Install new wheel cylinder onto backing plate with fastener.
Torque: Wheel Cylinder-to-Backing Plate Bolt: 9 Nm (80 inch lbs.)
2. Connect brake pipe onto wheel cylinder.
Torque: Brake Pipe-to-Rear Wheel Cylinder: 16 Nm (12 ft. Lbs.)
3. Completely assemble rear drum brake assembly.

NOTICE: Before installing wheels, remove rust or corrosion from wheel mounting surfaces and brake rotors. Failure to do so can cause wheel bolts to loosen in service.

4. Position wheel and tire assembly onto hub.
5. Install wheel bolts and tighten in a star pattern.
5.1 Hand tighten all five wheel bolts.
5.2 Use a torque wrench to tighten wheel bolts using a star pattern.
Torque: Wheel Bolts (Initial Torque): 63 Nm (46 ft. Lbs.)
5.3 Use a torque wrench to final tighten wheel bolts using a star pattern
Torque: Wheel Bolts (Final Torque): 125 Nm (92 ft. Lbs.)
6. Lower vehicle from hoist.
7. Bleed brakes.

____________________________________

Let me know if this helps or if you have other questions. If possible, upload a pic of what you are referring to.

Take care,
Joe
Was this
answer
helpful?
Yes
No
Wednesday, October 7th, 2020 AT 12:14 PM (Merged)

Please login or register to post a reply.

Sponsored links