You can continue this conversation with any other questions if they're related to this topic, but for new questions, we do ask you to start a new one. That's because these get categorized by topic and by model to make it possible for others to research a similar problem without writing their own post. Also, once you get the first reply, it becomes a private conversation between the two of us, unlike in other forums where anyone can jump in and confuse the issue. As such, when you ask a new question, one of the other experts might be much more qualified to answer, but he won't ever see your new question. By posting a new one, everyone gets the chance to reply. Often we will ignore a question because we know someone else is the better person to reply.
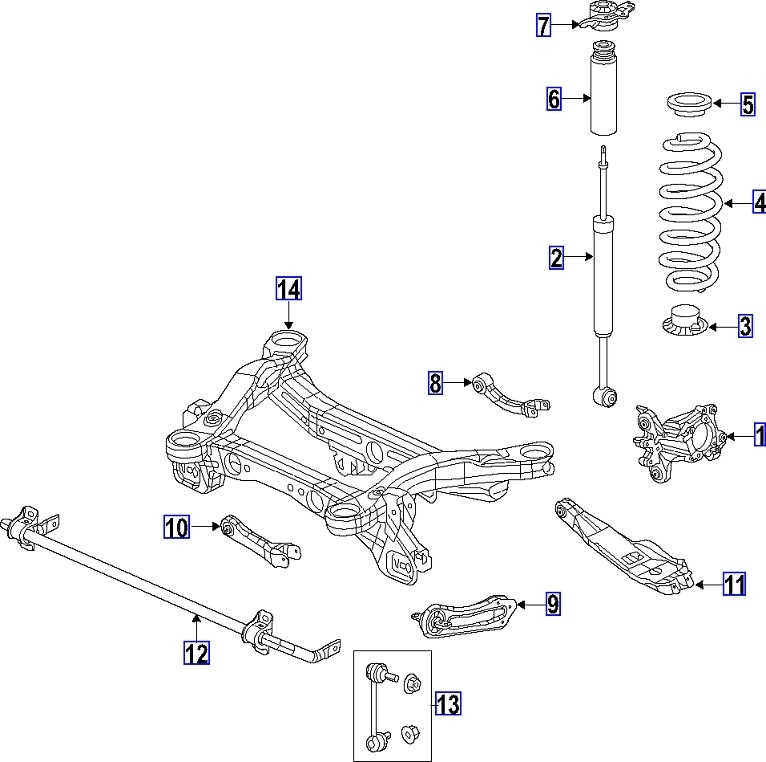
As for those bolts, welcome to my world. I live in Wisconsin where they throw a pound of salt onto an ounce of snow. One thing I didn't mention earlier is chassis ride height. Check that first. If it has sagged, the geometric relationship of the suspension parts will be all wrong. The wheels will go through the wrong motions as the vehicle bounces up and down, so there will be horrid tire wear even though the numbers on the alignment computer are perfect. Very often correcting ride height eliminates the need to make alignment adjustments. As an example, while working for a very nice Chrysler dealership in the 1990s, a lot of Dakotas came in with pulling and tire wear problems. In probably 80 percent of those, I found the right front to be very low, and of course, camber was way off on both front wheels. Simply cranking up the right torsion bar brought everything back, and no other adjustments were needed. For some reason, that sag only happened once per truck, and always on the right side.
On most models, ride height is corrected by replacing weak / aged coil springs. When you do have torsion bars, they interact from side to side. When you raise one corner up one inch with its torsion bar, the other side of the vehicle will go up about a half inch. Always start with the lowest side, then you may have to do nothing to the other side.
Ride height has less detrimental effect on small front-wheel-drive cars with strut suspension in the front, but the three-link systems need correct ride height to keep that geometric relationship to keep the wheel in alignment while it's bouncing down the road.
Getting back to those bolts, there's a good chance they aren't rusted to the metal inserts in the rubber bushings yet. If you have to remove one, coat it with anti-seize compound when you put it back in, but don't use that on the eccentric cam bolt head. That compound can easily allow the adjustment to shift because there won't be sufficient friction for the clamping force.
If you need just a little change in adjustment, you can get that even if the bolt is rusted to the bushing, but if you need a significant amount of change, remove the bolt and clean it up if it isn't turning freely. The goal with bolts in rubber bushings is to always do the final tightening with the vehicle sitting at normal ride height, never with it raised on a hoist with the suspension hanging down. Tightening the bolts that way clamps the bushing in a permanent twist when you set it down on the tires. Same with rusted cam bolts. You might get a rusted one to turn, but once tightened, that bushing is going to stretch one way beyond what it's designed to do as the car bounces up and down. That will lead to early failure.
I start by loosening the nut about two revolutions. Of course if it snaps off, the story changes to one of bolt replacement. Next, I try tapping it in with a hammer. If the bolt moves somewhat freely, I go under the bolt head with a squirt of "Spray White Lube". That's Chrysler's name for their lithium-based white grease. There's a lot of similar products. That has a liquid that flows into tight spots and takes the grease with it. Later, the liquid evaporates and leaves the grease behind. It's especially effective for squeaking door hinges too.
If the bolt doesn't move with a hammer, an air hammer is next, if there's room. (Please wear hearing protection). If that works, but was necessary, I pull that bolt all the way out, scrub it clean, then use the White Grase.
I should stop and mention to not use penetrating oil on these parts. We used to have a lot of customers come in once a year for a maintenance alignment. I was smug and thought I'd prevent rust by using Chrysler's "Rust Penetrant" on the tie rod end adjuster sleeves. Very bad ideal. That stuff sizzles and is really good for what it was meant for, sticking heat riser valves, but for tie rod ends, it effectively clears the threads for moisture to follow it in and rust the parts even tighter. At the next alignment, I needed a torch to free up those adjusters. Never had that problem after I started using the White Grease on them.
At its worst, if you really need to remove a cam bolt to replace a worn bushing, and it's really rusted tight, use a Sawzall, (reciprocating saw), to cut through the bolt on both sides of the bushing, inside the mounting bracket. If the bushing is okay and you just need to make the bolt adjustable again, you can work on the stubborn rusted parts on the workbench with a punch and a bigger hammer. Consider enlisting the help of the new guy to hold the punch!
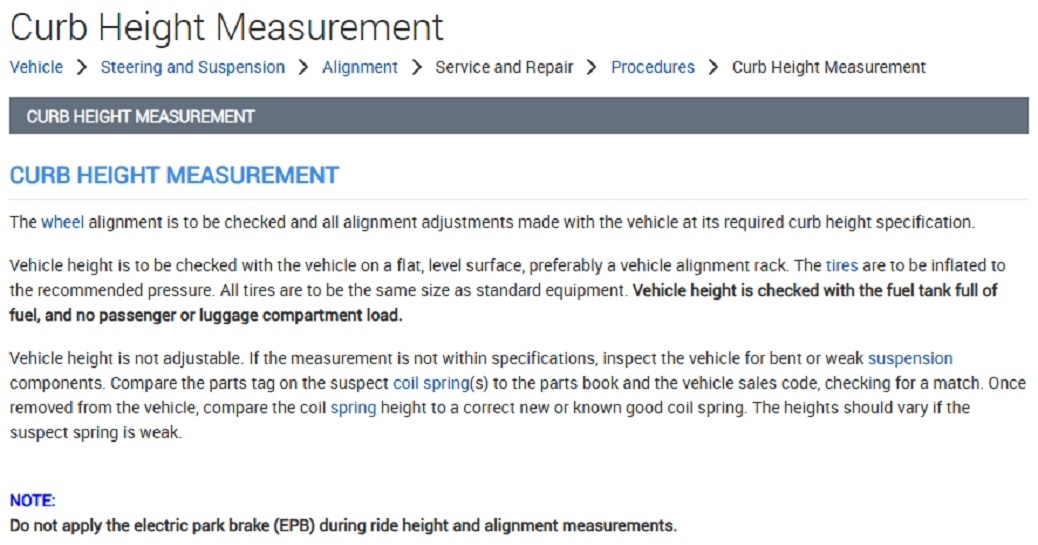
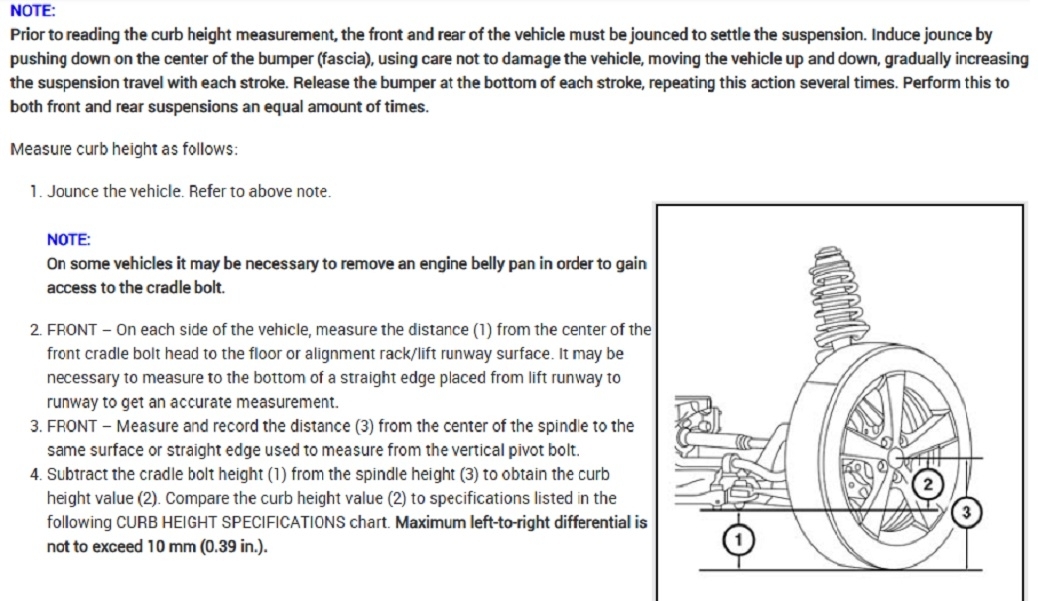
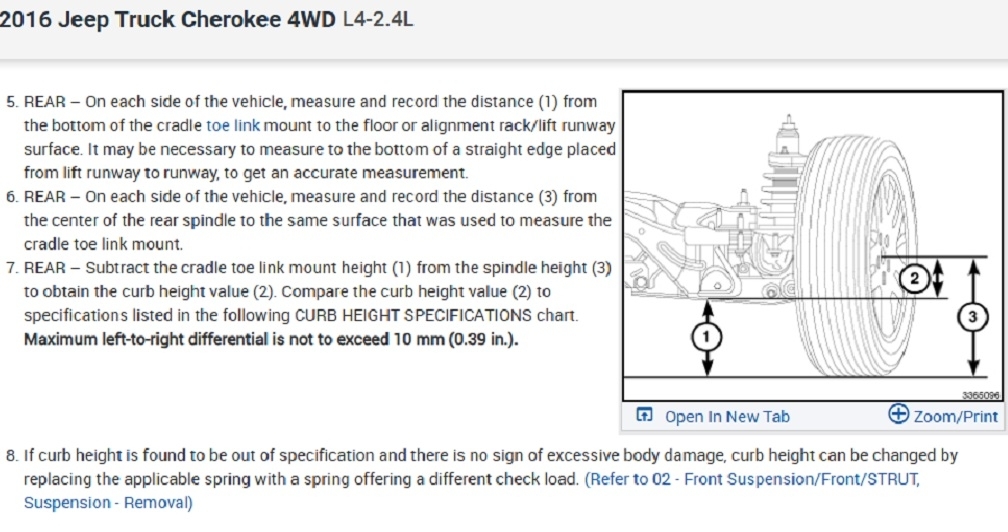
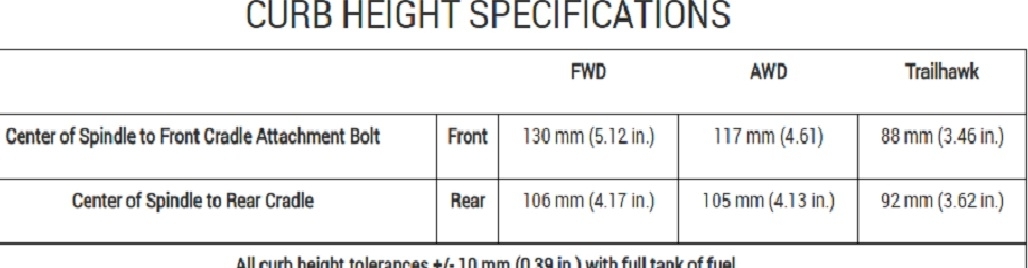
One thing I forgot to mention is the procedure for checking ride height. It looks complicated, but Chrysler has done it this way since at least the 1970s. Imagine if the height adjustments were perfect, then you drive all four tires up onto pieces of 2"x6" lumber. Most manufacturers have you measure from one specified point, often on the bumper or to a side marker light. By driving onto pieces of lumber, every measuring point will be 1 1/2" too high, yet nothing has changed the geometric relationship of the suspension parts. Chassis ride height hadn't changed. The same error occurs when you switch to an optional tire size. Now you have to know that was done, and you have to correct for that. With Chrysler's method of taking two readings and calculating the different, tire size doesn't matter. You're ending up with the correct reading that gives the correct geometric relationship of the steering and suspension systems
Images (Click to enlarge)
Dec 10, 2025 at 5:21 PM