Hi,
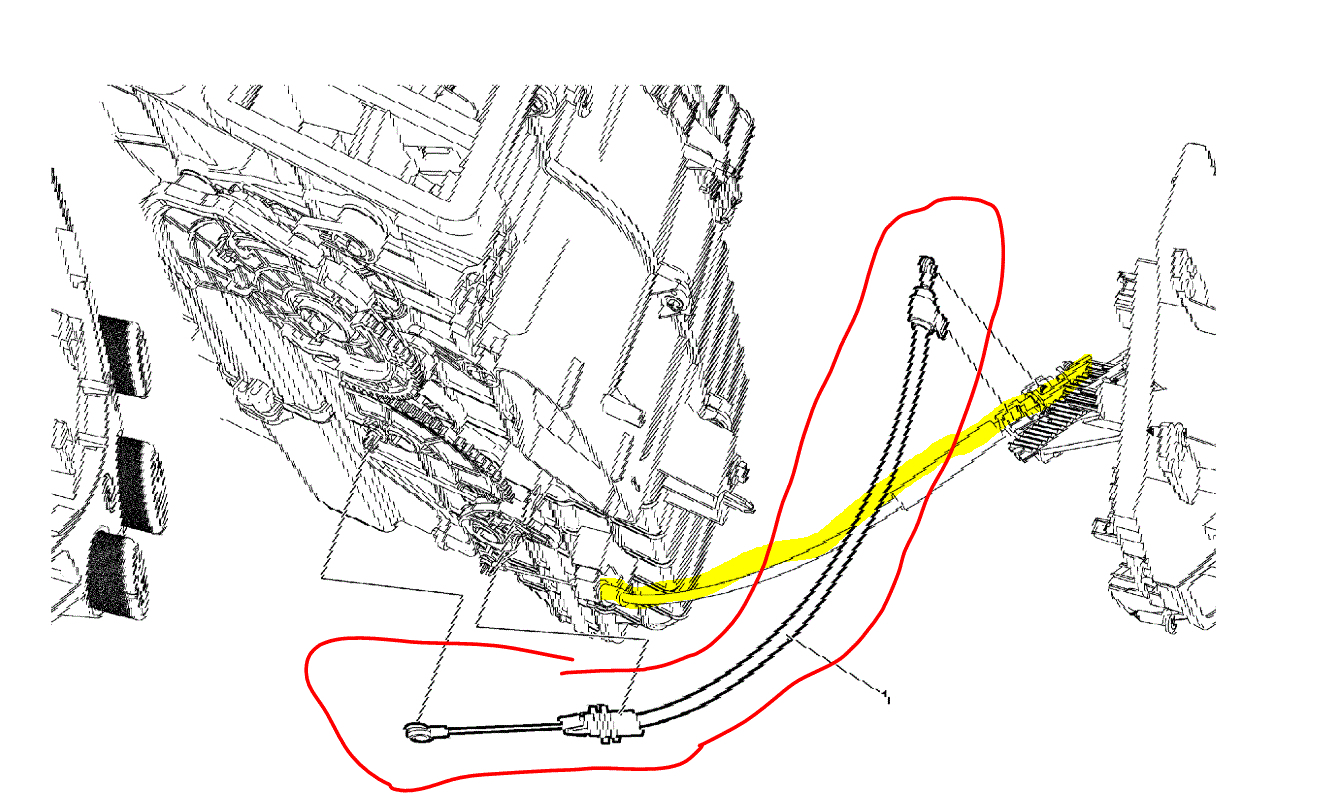
If you remove the panel from the controller on the dash, you will find the cables. One is for temperature control, one for mode (which is your focus), and one for fresh air. Basically, if you were to follow that cable back under the dash, it will lead you to the mode door actuator. Here are directions for removal of the panel in front where you make the adjustments. I attached the pics that correlate with the directions. In the picture, the mode door cable is indicated (number 2).
These directions are for controller replacement which isn't what you are doing. However, I provided them to help you gain access to the cable.
__________________________________________
2013 Chevrolet Spark L4-1.2L
Heater and Air Conditioning Control Replacement (Left Hand Drive)
Vehicle Heating and Air Conditioning Control Assembly Service and Repair Removal and Replacement Heater and Air Conditioning Control Replacement (Left Hand Drive)
HEATER AND AIR CONDITIONING CONTROL REPLACEMENT (LEFT HAND DRIVE)
Heater and Air Conditioning Control Replacement (Left Hand Drive)
Removal Procedure
Warning:
Refer to Battery Disconnect Warning See: Battery > Technician Safety Information > Battery Disconnect Warning.
1. Disconnect the negative battery cable. Refer to Battery Negative Cable Disconnection and Connection See: Negative > Removal and Replacement > Battery Negative Cable Disconnection and Connection.
2. Remove the instrument panel (I/P) compartment. Refer to Instrument Panel Compartment Replacement See: Glove Compartment > Removal and Replacement > Instrument Panel Compartment Replacement.
3. Remove the radio. Radio Replacement See: Radio/Stereo > Removal and Replacement > Radio Replacement.
pic 1
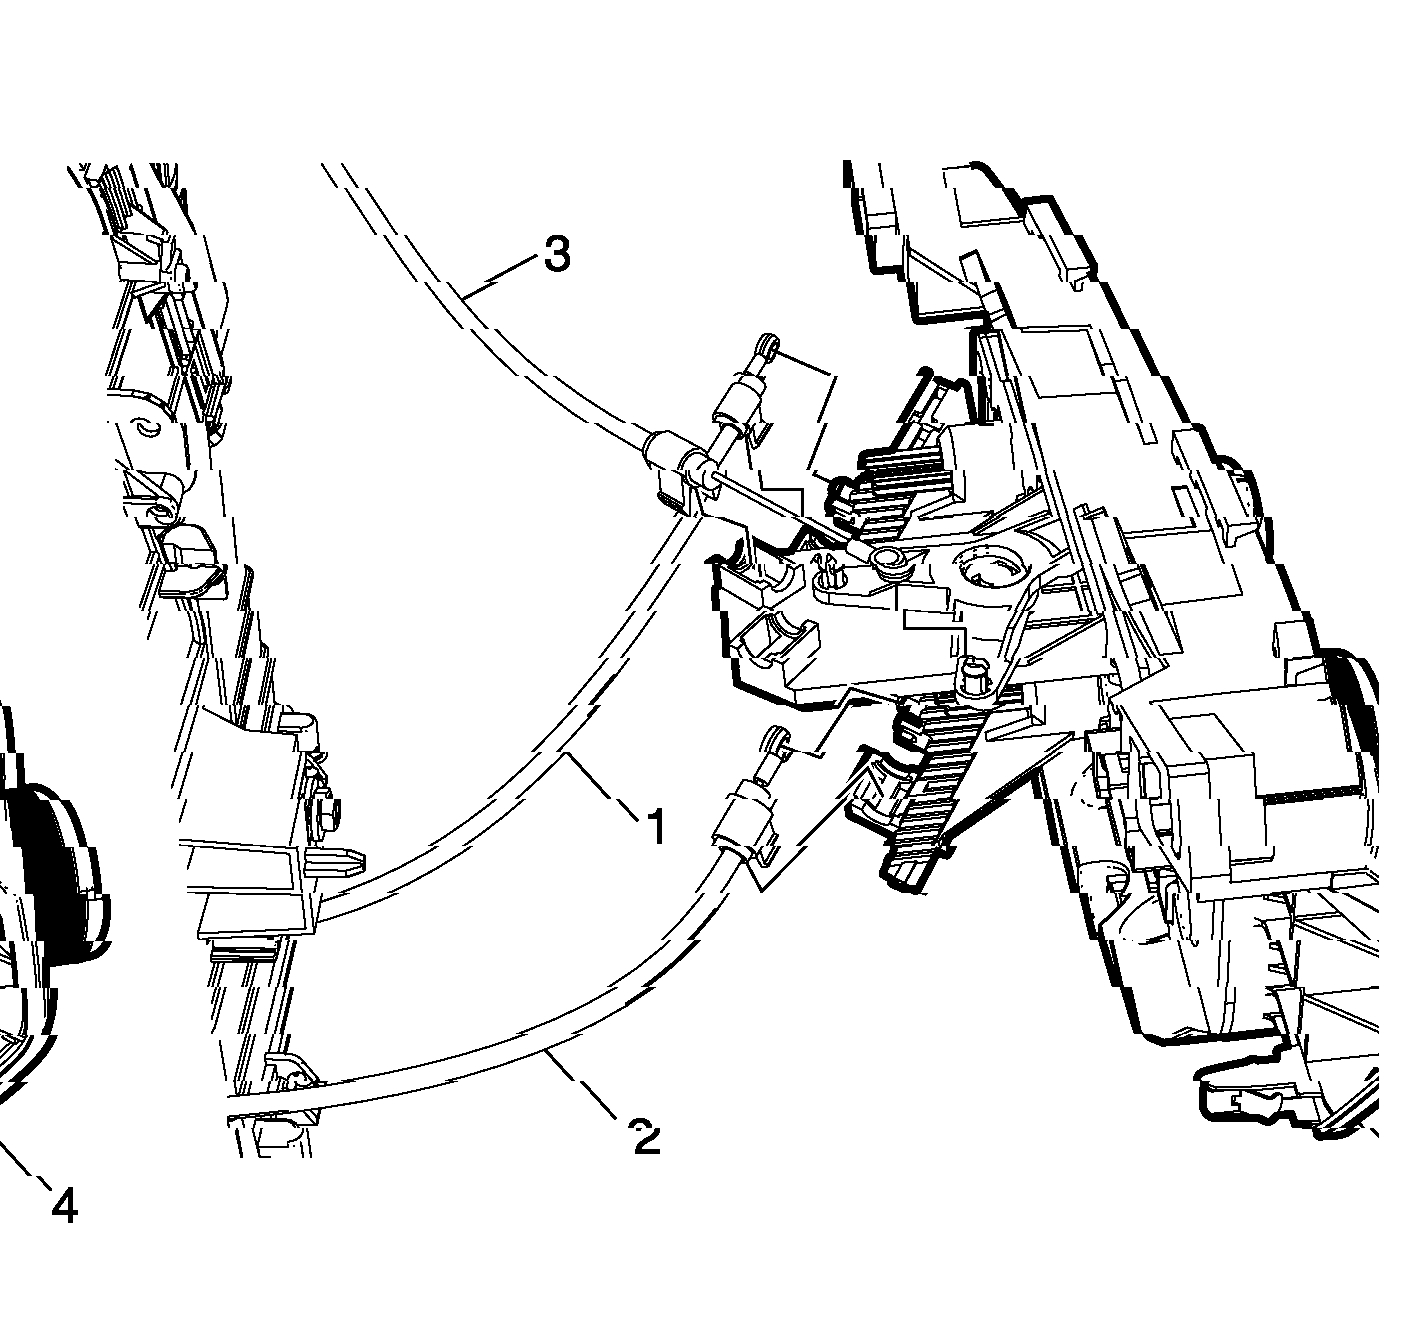
4. Remove the heater and air conditioning (A/C) control screws (1).
pic 2
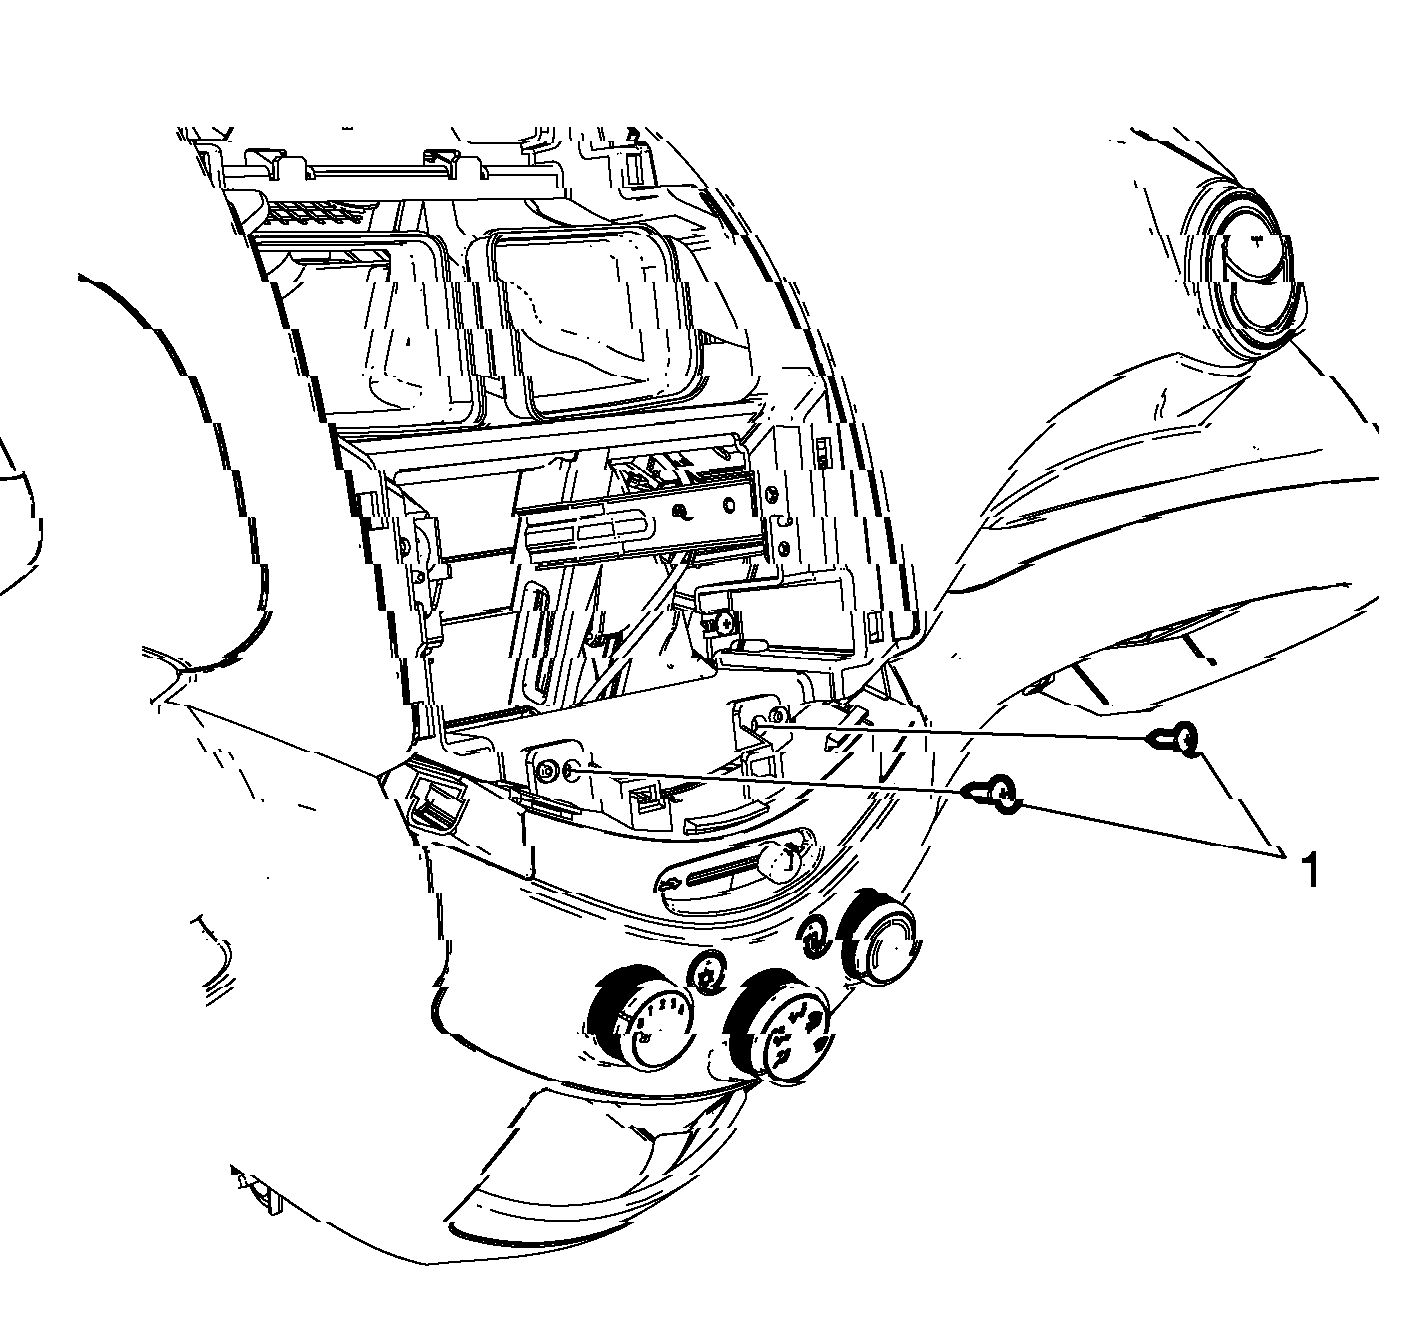
5. Remove the heater and A/C control (4) by pulling it out to provide clearance for the removal of the cables.
Note:
Note the location of the cables to facilitate their reinstallation.
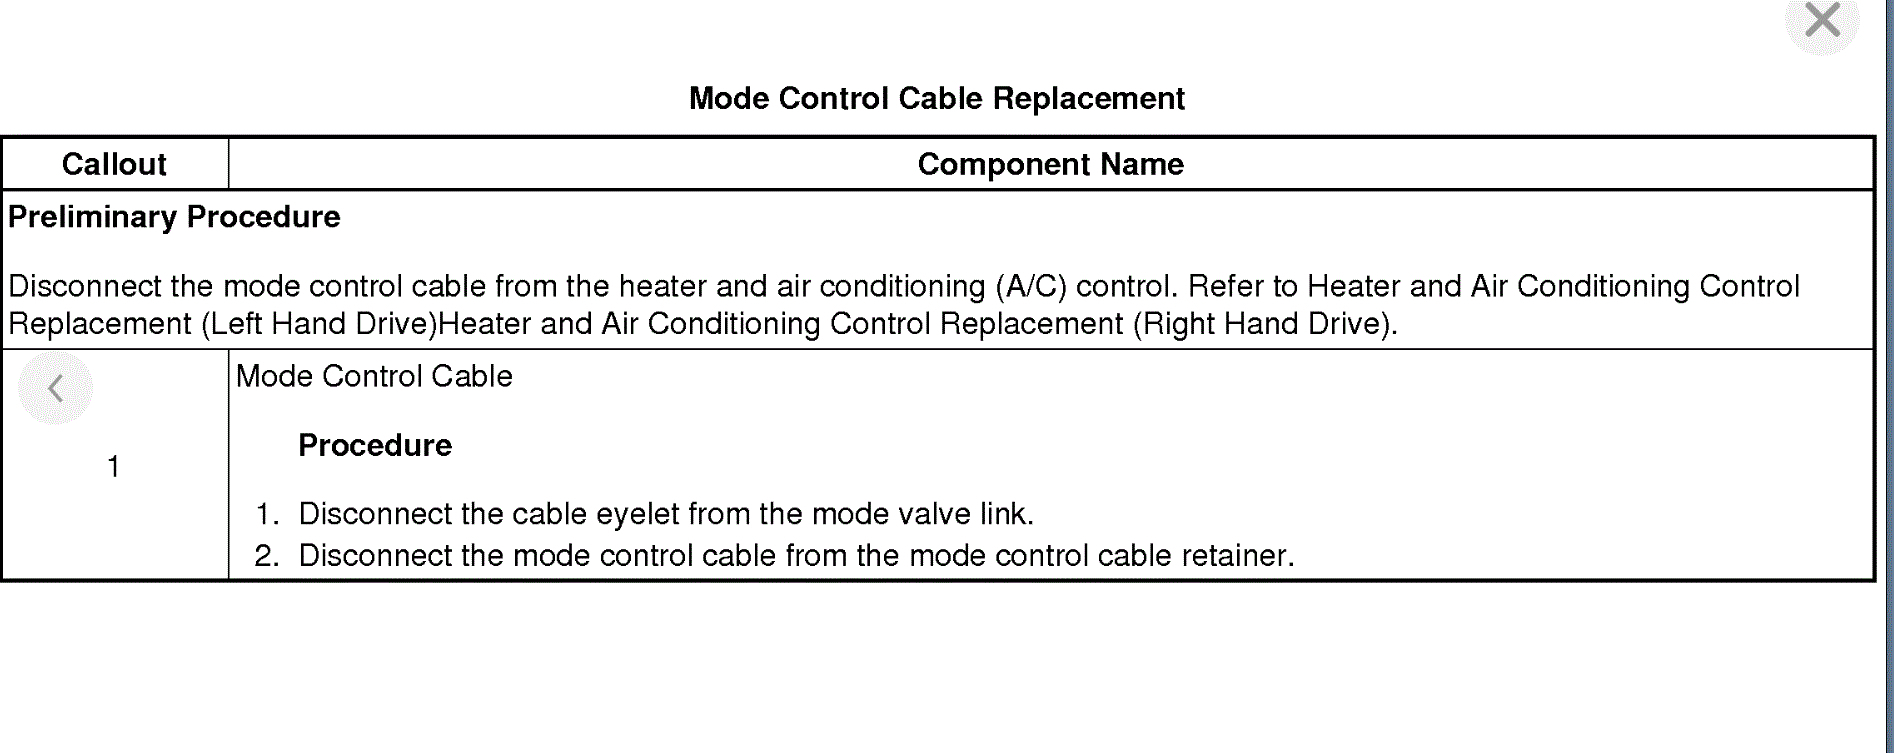
6. Disconnect the temperature control cable (1), mode control cable (2) and air inlet control cable (3).
7. Disconnect the electrical connectors.
Installation Procedure
pic 3
1. Connect the electrical connectors.
2. Connect the temperature control cable (1), mode control cable (2) and air inlet control cable (3).
3. Install the heater and A/C control (4) by gently inserting the heater and A/C control into the proper position on the I/P.
pic 4
Caution:
Refer to Fastener Caution See: Vehicle > Technician Safety Information > Fastener Caution.
4. Install the heater and A/C control screws (1) and tighten to 2.5 Nm (23 lb in).
5. Install the radio. Refer to Radio Replacement See: Radio/Stereo > Removal and Replacement > Radio Replacement.
6. Install the I/P compartment. Refer to Instrument Panel Compartment Replacement See: Glove Compartment > Removal and Replacement > Instrument Panel Compartment Replacement.
7. Connect the negative battery cable. Refer to Battery Negative Cable Disconnection and Connection See: Negative > Removal and Replacement > Battery Negative Cable Disconnection and Connection.
__________________
Let me know if this helps.
Joe
Images (Click to enlarge)
Mar 12, 2020 at 5:44 PM