Hi,
The easiest way to do it is on a lift. However, I'm not sure if you have access to one. Other than that, it is going to be tight and difficult to move around under the vehicle and to guide the lines where they belong.
Regardless, here are the directions. The attached pics correlate with the directions. Note: When you remove the retainer which holds the line on at the trans and radiator, be really careful not to lose it. They are small, hard to see, and like to fly off. If you look at pics 6 and 7, you will see the clips I'm referring to.
_____________________________________
2002 Chevy Truck TrailBlazer 4WD L6-4.2L VIN S
Procedures
Vehicle Transmission and Drivetrain Automatic Transmission/Transaxle Fluid Line/Hose Service and Repair Procedures
PROCEDURES
Transmission Fluid Cooler Hose/Pipe Replacement (Body Vin Code 3)
Removal Procedure
Important: The front and rear sections of the cooler lines can be serviced separately. Refer to the appropriate steps when servicing individual lines. Perform the following procedure when removing the cooler lines from the quick connect fittings.
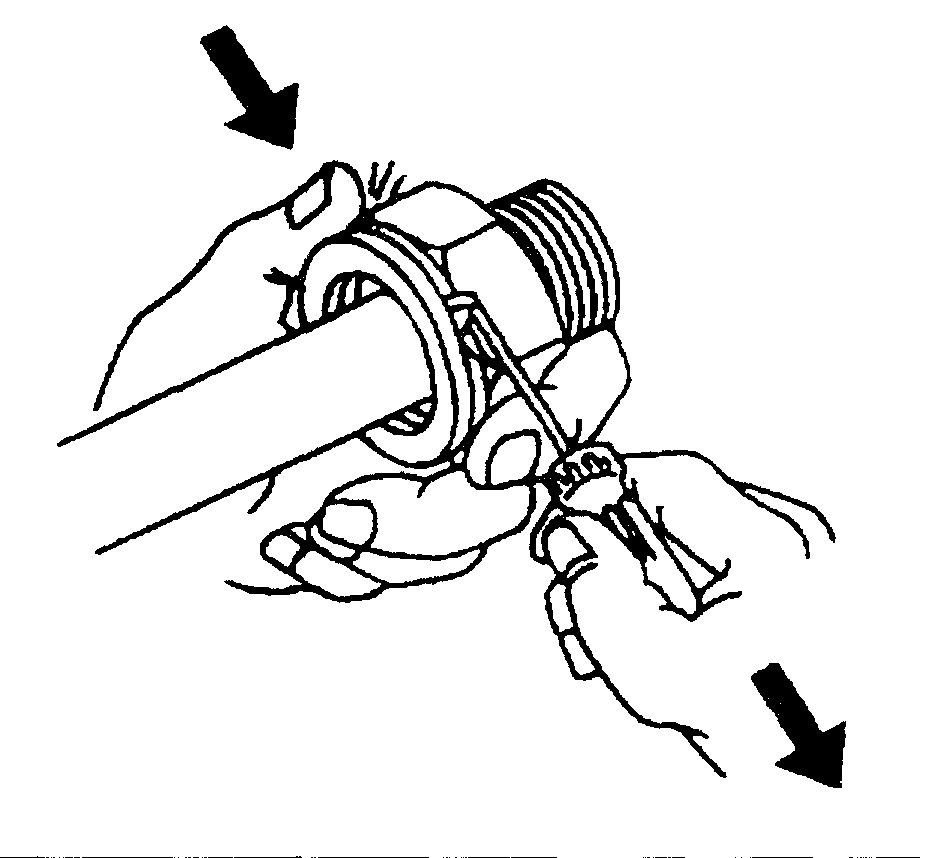
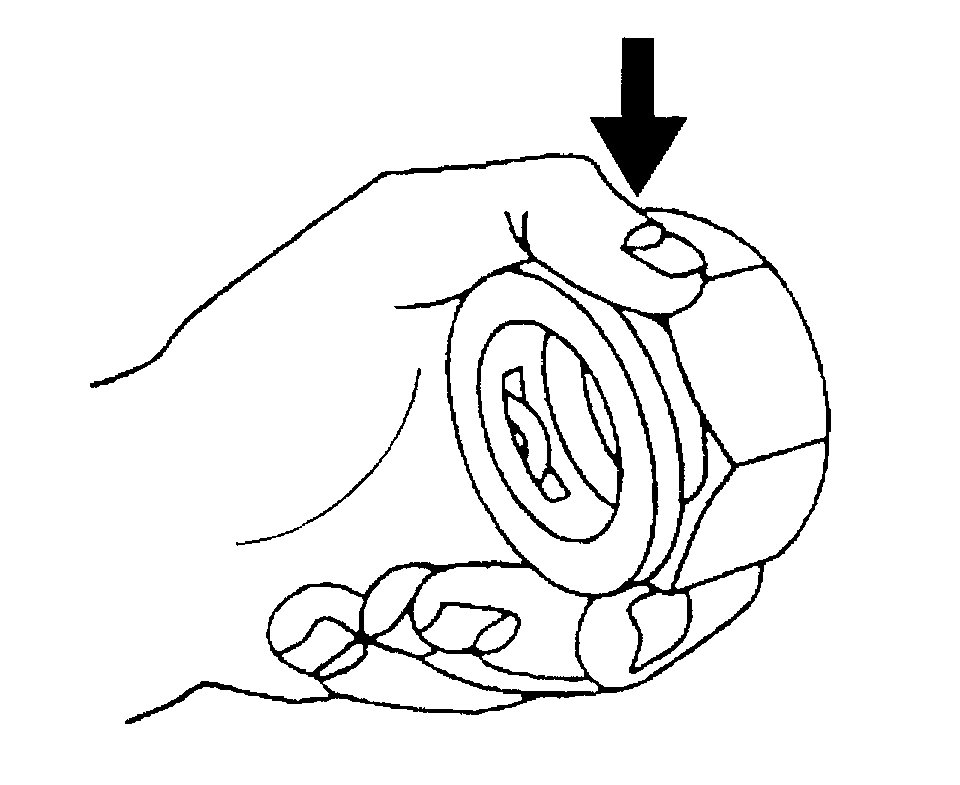
Pic 1
1. Pull the plastic cap back from the quick connect fitting and down along the cooler line about 5 cm (2 inch).
2. Using a bent-tip screwdriver, pull on one of the open ends of the retaining ring in order to rotate the retaining ring around the quick connect fitting until the retaining ring is out of position and can be completely removed.
3. Remove the retaining ring from the quick connect fitting.
4. Discard the retaining ring.
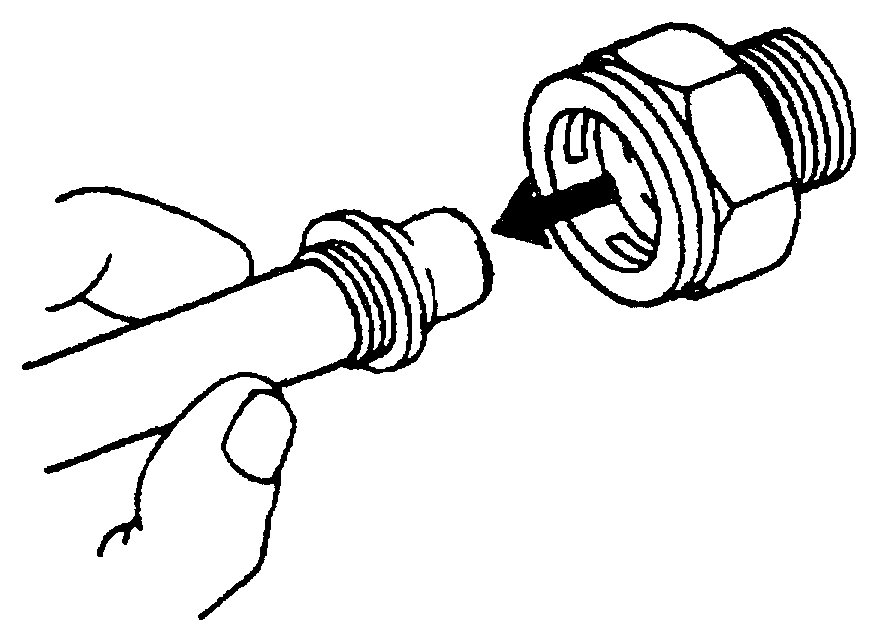
Pic 2
5. Pull the cooler line straight out from the quick connect fitting.
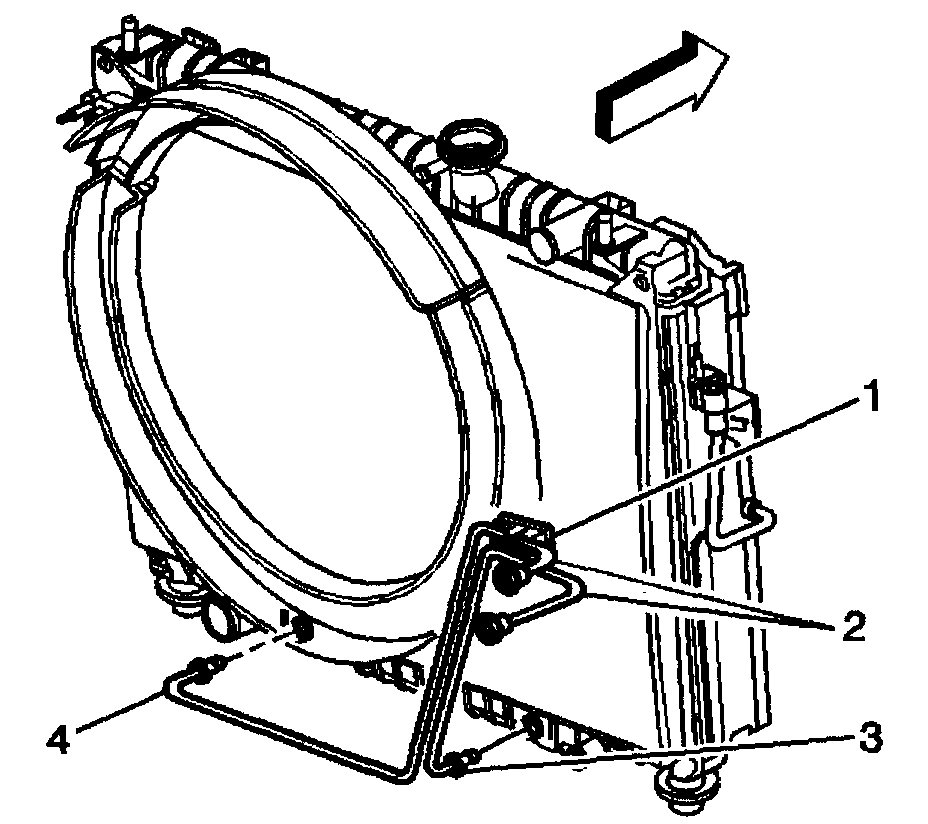
Pic 3
6. Raise the vehicle. Refer to Vehicle Lifting.
7. Place a drain pan under the vehicle.
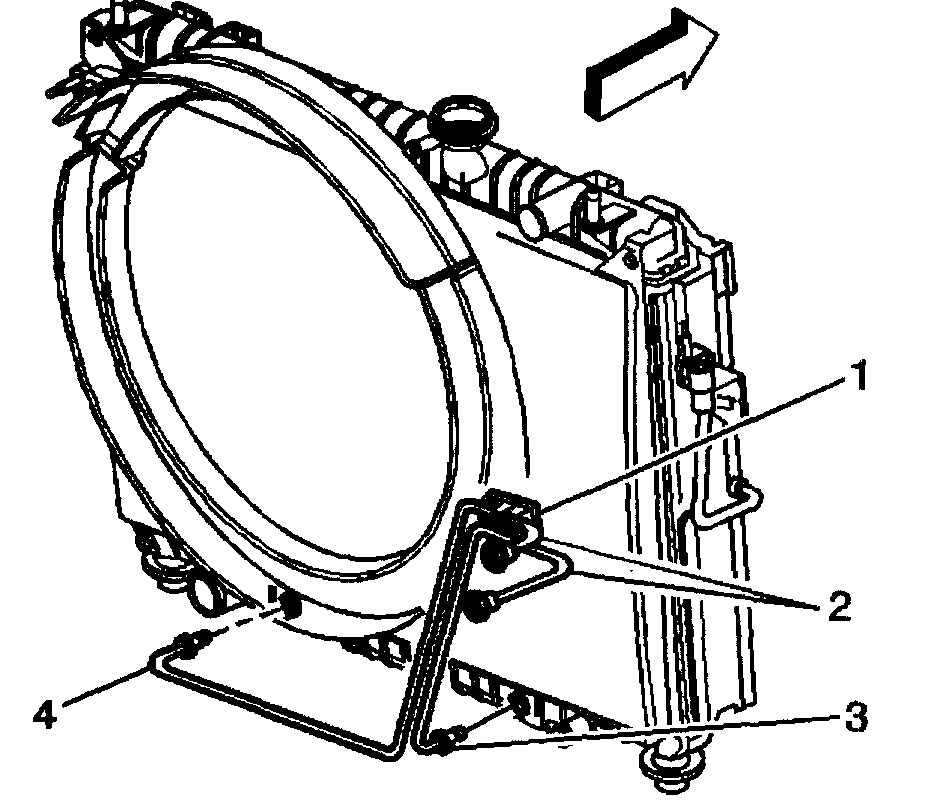
8. Remove the cooler lines (3, 4) from the radiator.
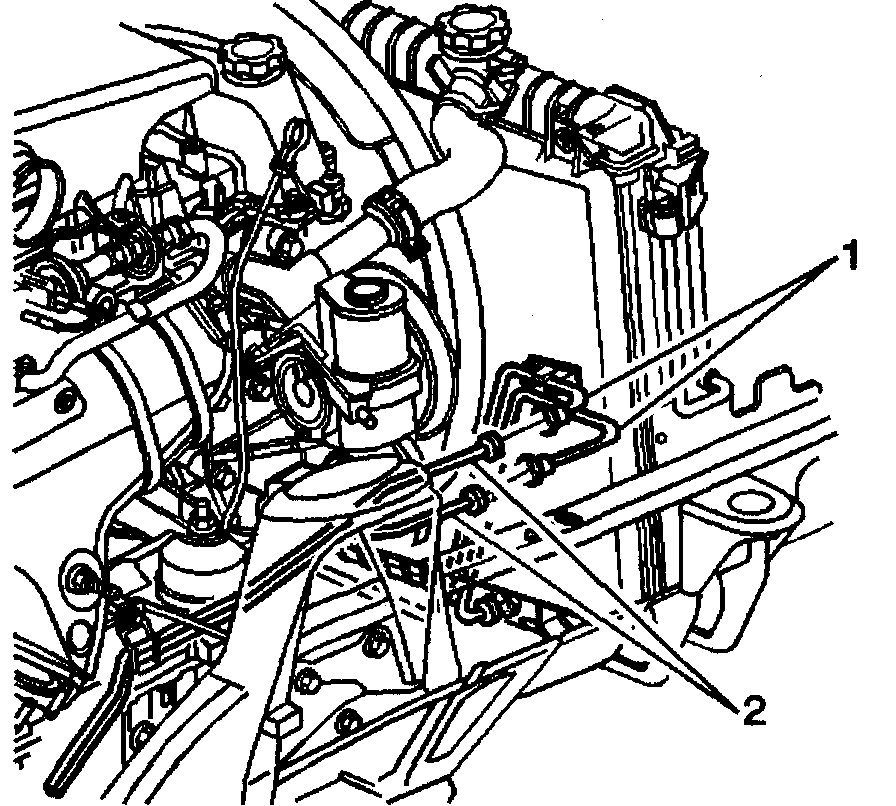
9. Separate the front and rear cooler lines at the quick connect fitting (2).
10. Remove the cooler lines from the retainer (1) located on the radiator shroud.
11. Remove the front sections of the cooler lines from the vehicle.
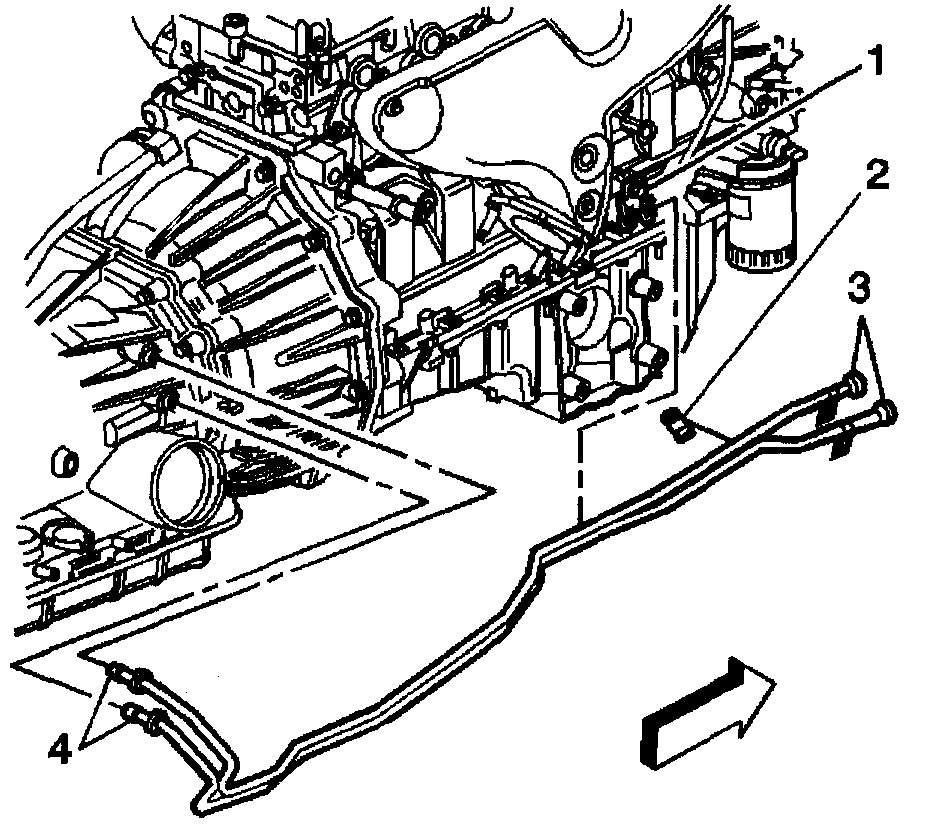
Pic 4
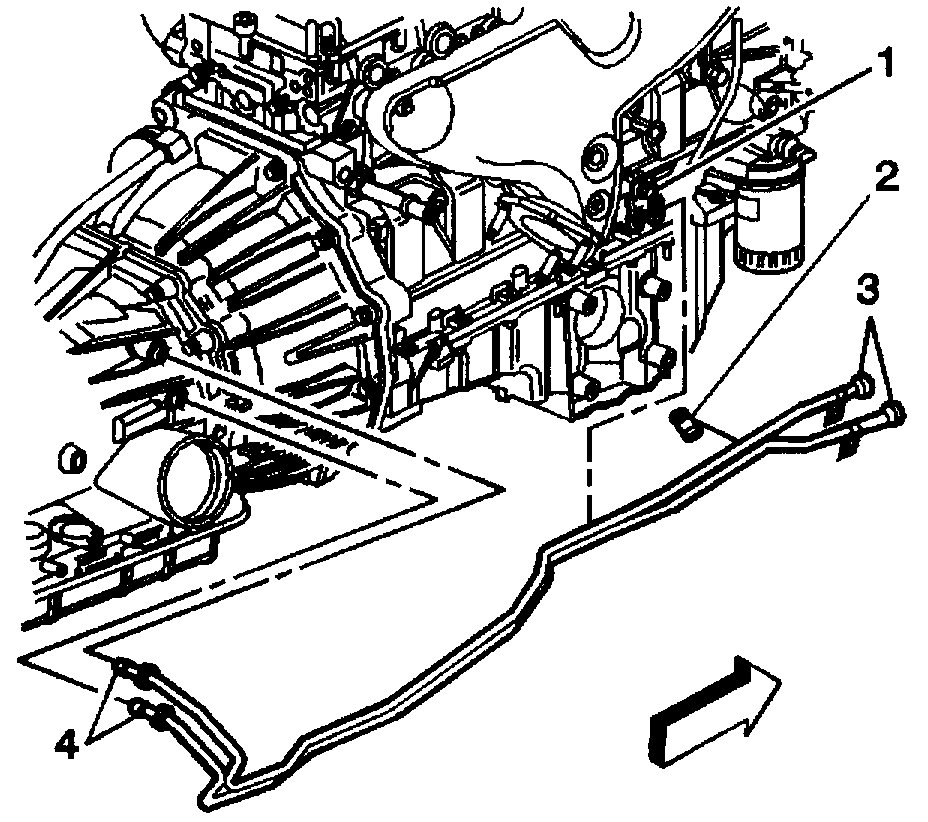
12. Remove the rear sections of the cooler lines from the retainer (1) located on the right side of the engine.
13. Remove the clip (2) that holds the cooler lines together.
14. Support the transmission with a transmission jack.
15. Remove the transmission support.
16. Remove the front exhaust pipe assembly.
17. Carefully lower the transmission to gain access to the cooler line fittings.
18. Place a drain pan under the vehicle.
19. Disconnect the oil cooler lines (4) from the transmission.
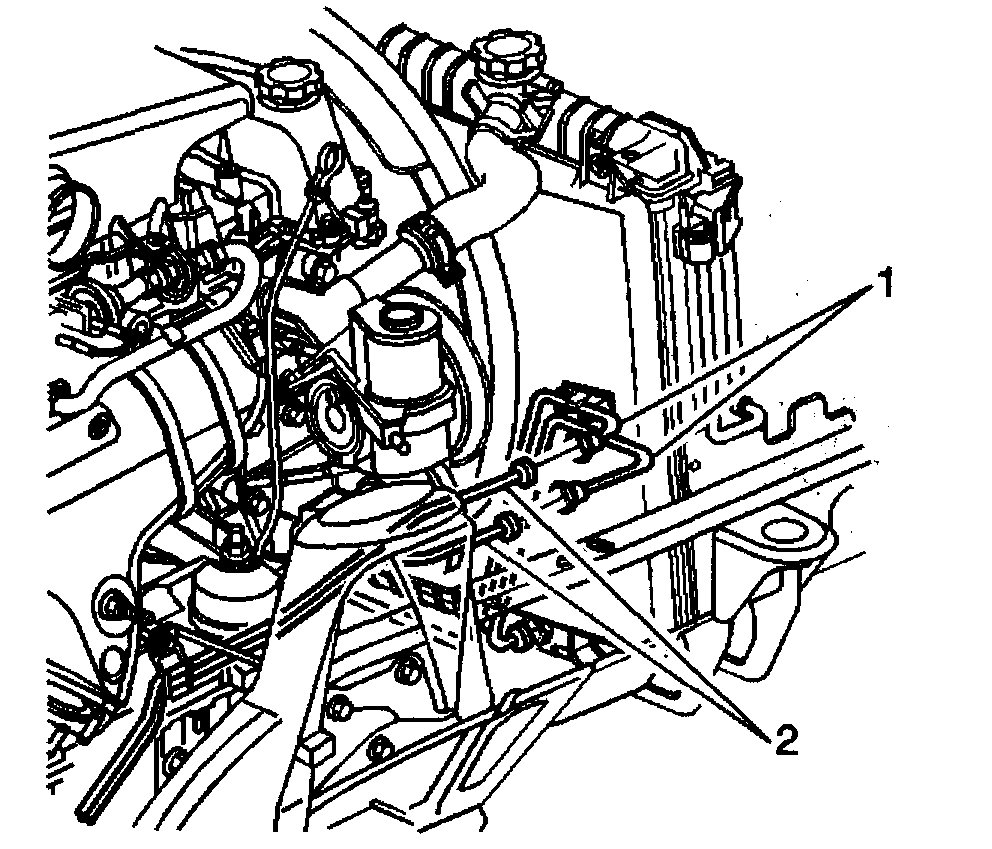
Pic 5
20. Disconnect the rear oil cooler lines (2) from the front oil cooler lines (1).
21. Remove the oil cooler lines from the vehicle.
Installation Procedure
pic 6
1. Install the transmission oil cooler lines to the vehicle.
Important:
Do not reuse any of the existing oil lines or oil line fittings if there is excessive corrosion.
Do not reuse any of the existing retaining rings that were removed from the existing quick Connect fittings. All retaining rings being installed must be new.
Ensure the following procedures are performed when installing the new retaining rings onto the fittings.
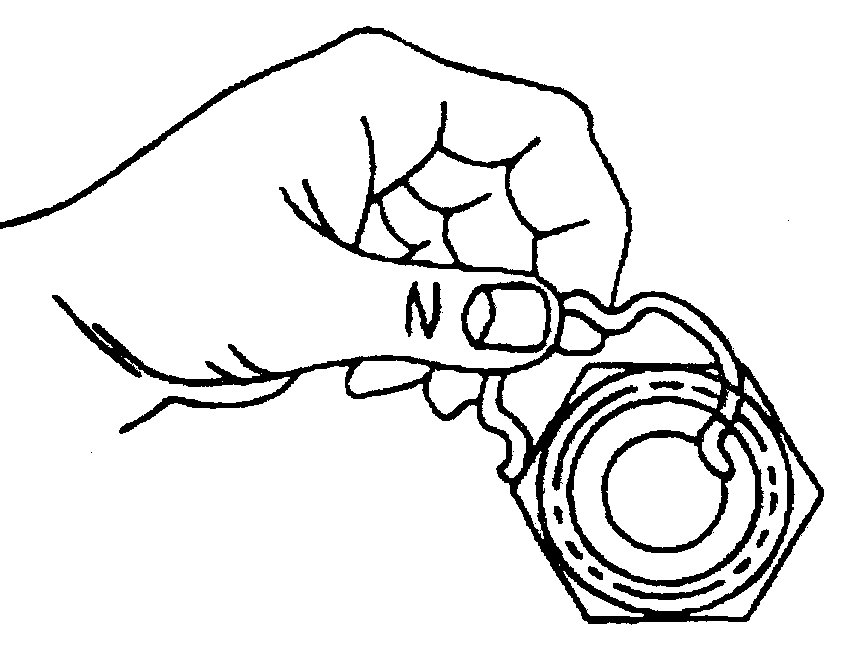
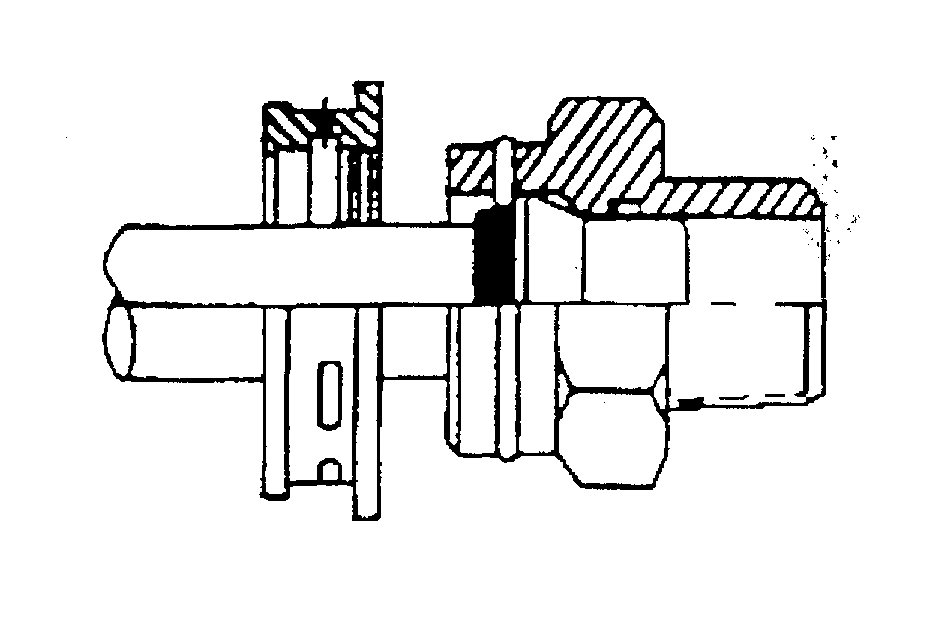
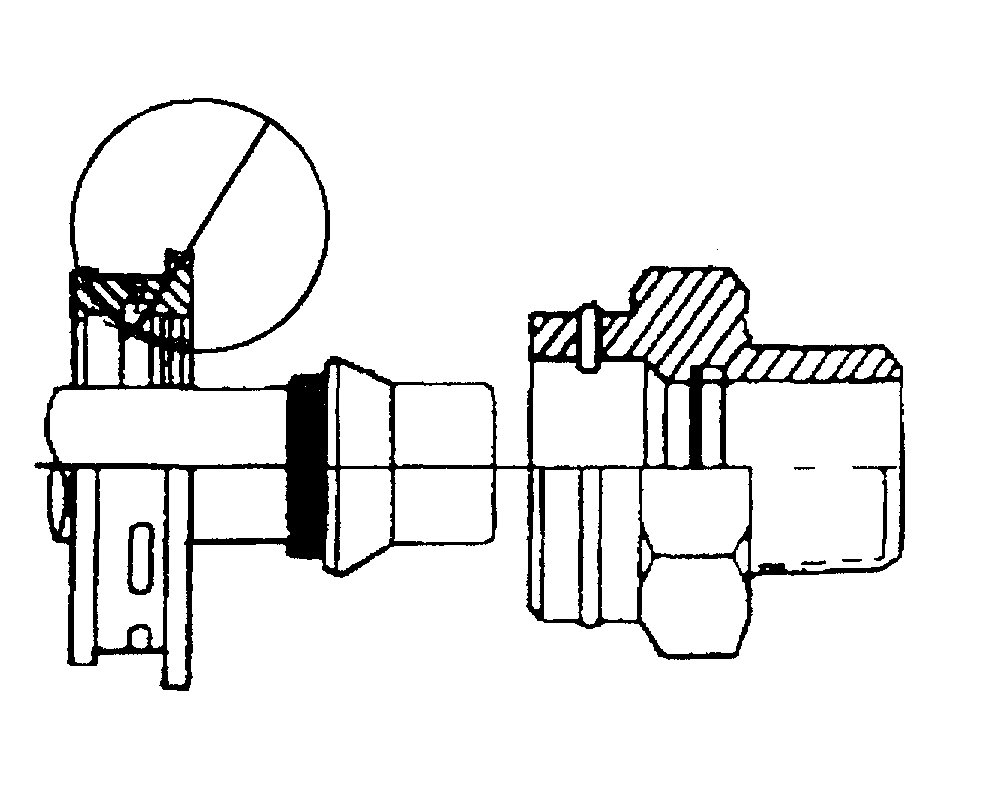
2. Install a new retaining ring (E-clip) into the quick connect fitting using the following procedure:
3. Hook one of the open ends of the retaining ring in one of the slots in the quick connect fitting.
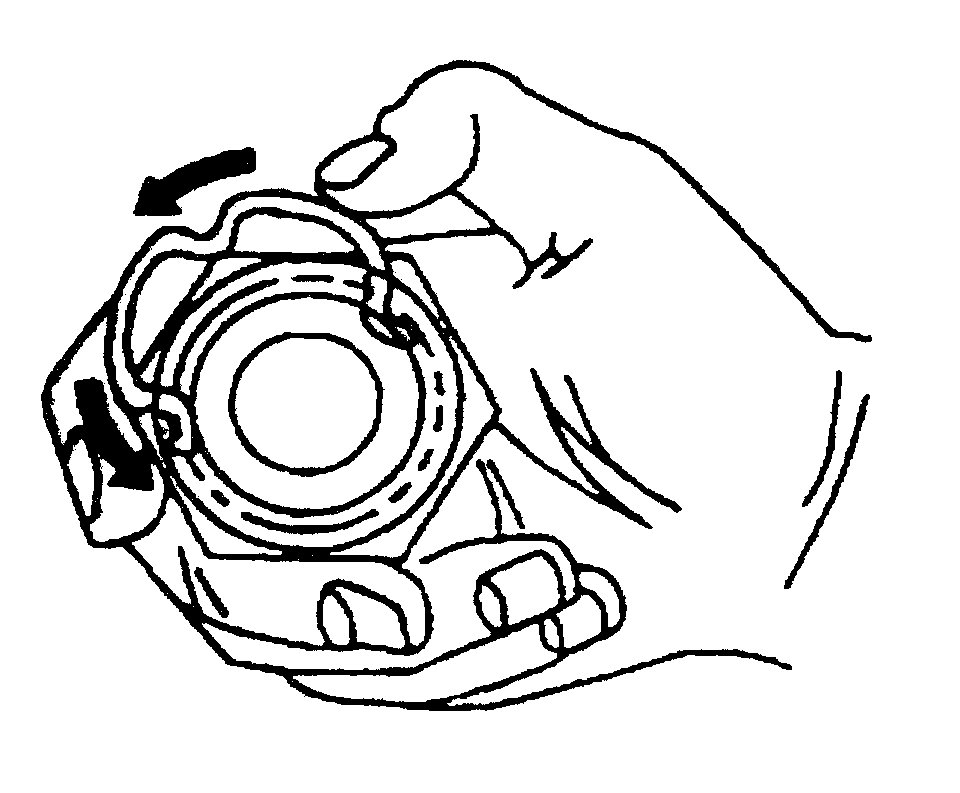
Pic 7
4. Rotate the retaining ring around the fitting until the retaining ring is positioned with all three ears through the three slots on the fitting.
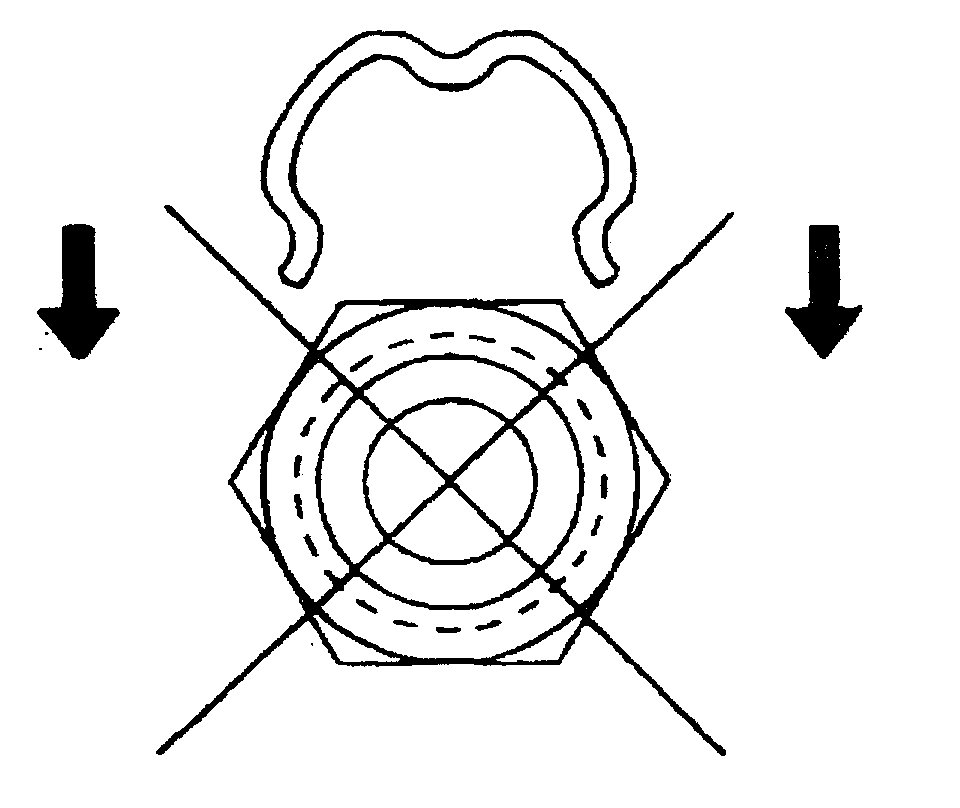
Pic 8
5. Do not install the new retaining ring onto the fitting by pushing the retaining ring.
Pic 9
6. Ensure that the three retaining ring ears are seen from inside the fitting and that the retaining ring moves freely in the fitting slots.
7. Install the new retaining ring (E-clip) into the remaining quick connect fittings.
Pic 10
Notice: Ensure that the cooler line being installed has a plastic cap on each end that connects to a quick connect fitting. If no plastic cap exists, or the plastic cap is damaged, obtain a new plastic cap and position on to the cooler line prior to the cooler line installation.
8. Connect the rear cooler lines (2) to the front cooler lines (1).
Pic 11
9. Install the cooler lines into the quick connect fitting.
10. Insert the cooler line end into the quick connect fitting until a click is either heard or felt.
Pic 12
11. Do not use the plastic cap on the cooler line in order to install the cooler line into the fitting.
12. Pull back sharply on the cooler line in order to ensure that the cooler line is fastened into the quick connect fitting.
Pic 13
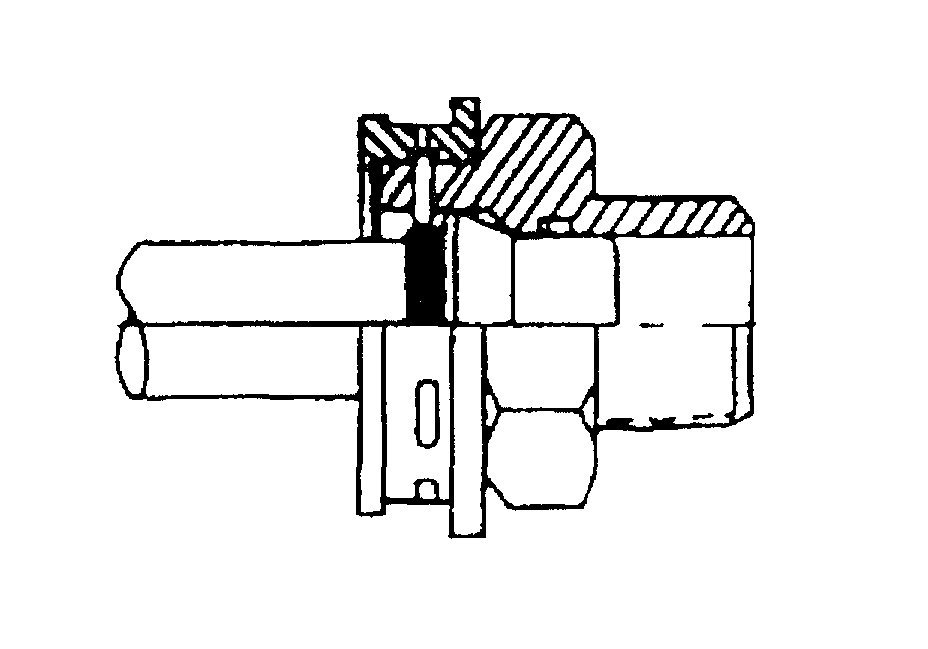
13. Position (snap) the plastic cap onto the fitting. Do not manually depress the retaining ring when installing the plastic cap onto the quick connect fitting.
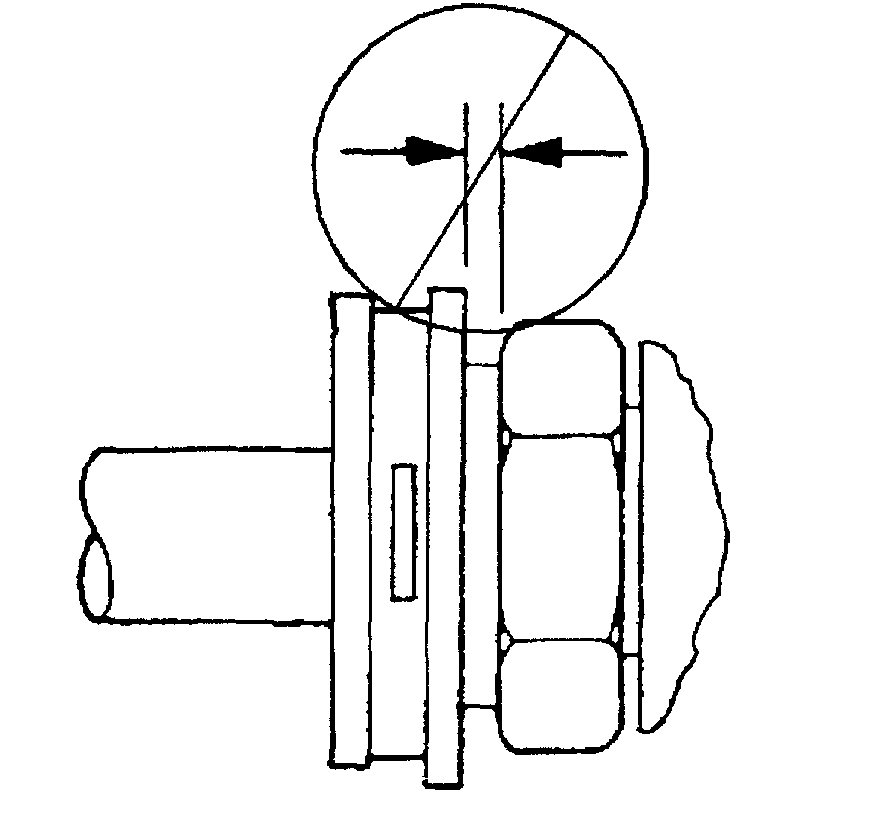
14. Ensure that the plastic cap is fully seated against the fitting.
Pic 14
15. Ensure that no gap is present between the cap and the fitting.
Pic 15
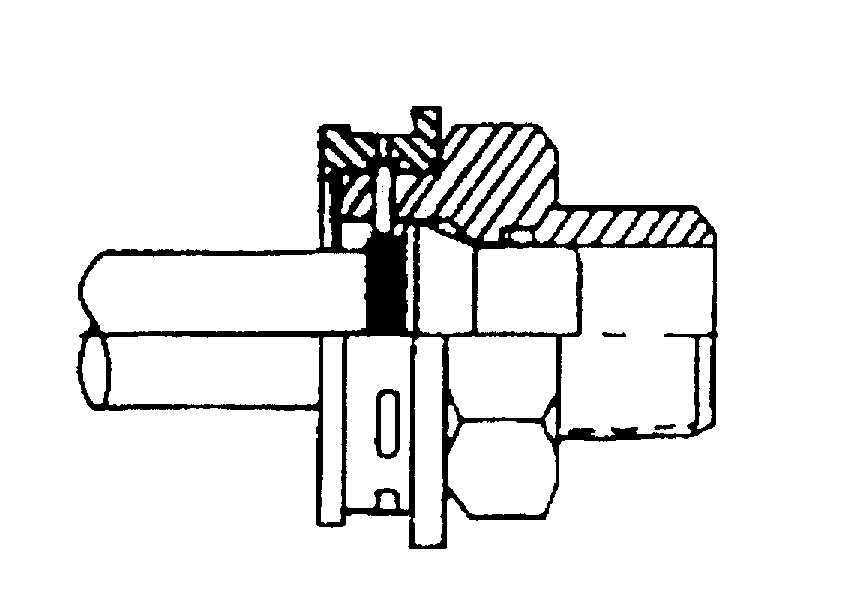
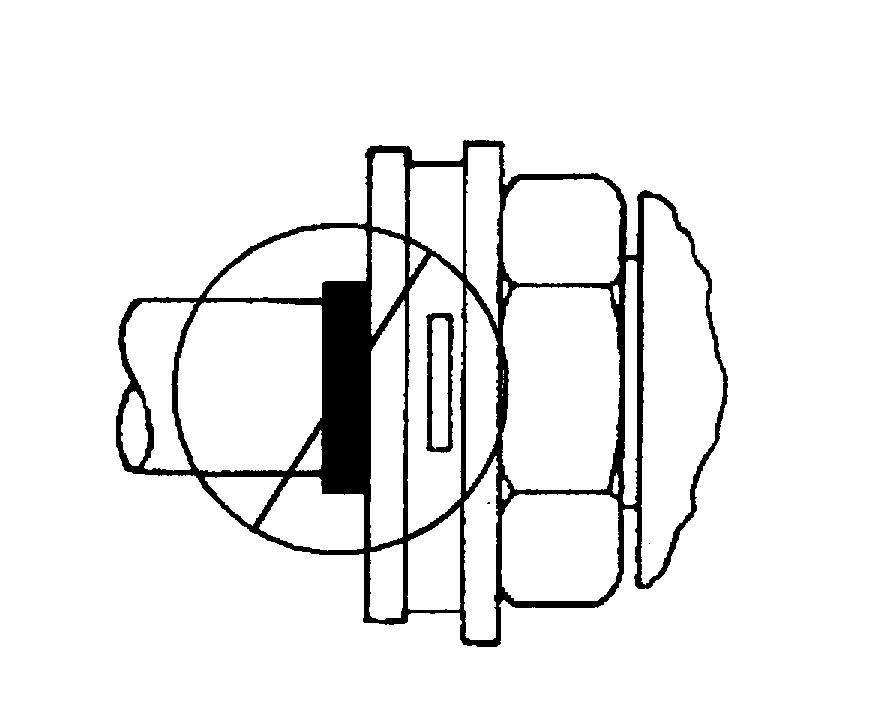
16. Ensure that the yellow identification band on the tube is hidden within the quick connect fitting.
Pic 16
17. A hidden yellow identification band indicates proper joint seating.
Pic 17
18. Install the cooling line ends (4) to the transmission.
19. Raise the transmission into position.
20. Install the front exhaust pipe assembly.
21. Install the transmission support.
22. Remove the transmission jack.
23. Install the clip (2) that holds the cooler lines together.
24. Install the cooler lines to the retainer (1) located on the right side of the engine.
Pic 18
25. Install the front sections of the cooler lines to the vehicle.
26. Install the cooler lines to the retainer (1 ) located on the radiator shroud.
27. Connect the front and rear cooler lines at the quick connect fitting (2).
28. Install the cooler lines (3, 4) to the radiator.
29. Remove the drain pan from under the vehicle.
30. Lower the vehicle.
31. Fill the transmission to the proper level with DEXRON III transmission fluid.
____________________
Let me know if this helps or if you have other questions.
Take care,
Joe
Images (Click to make bigger)
Friday, November 20th, 2020 AT 7:30 PM
