Hi and thanks for using 2CarPros.
With this type of job, I would recommend getting the parts from a dealer. You don't want to take a chance of having to replace them again in a year. IT isn't a simple job.
__________________
Here are the directions for removal and replacement of the front sub-frame assembly. You are not replacing the frame, so parts of these directions will not be relevant. The attached pictures correlate with the directions.
_________________
FRONT FRAME REPLACEMENT
Front Frame Replacement
Tools Required
* J 39580 Engine Support Table
* J 28467-A Engine Support Fixture
Removal Procedure
1. Install the J 28467-A in order to support the engine. Refer to Engine Support Fixture.
2. Raise and support the vehicle. Refer to Lifting and Jacking the Vehicle.
3. Remove the front tires and wheels. Refer to Tire and Wheel Removal and Installation.
4. Remove the stabilizer shaft. Refer to Stabilizer Shaft Replacement.
Picture 1
5. Remove the bolts retaining the steering gear to the engine frame.
6. Remove the ball joints from the steering knuckle. Refer to Lower Control Arm Replacement.
7. Remove the front air deflector. Refer to Front Air Deflector Replacement (See: Air Dam > Removal and Replacement > Front Air Deflector Replacement) in Body Front End.
8. Remove the brake pressure modulator valve. Refer to Brake Pressure Modulator Valve Replacement.
Picture 2
9. Disconnect the road sensing suspension links (1) from the lower control arm ball studs.
10. Remove the A.I.R. Pump. Refer to Secondary Air Injection Pump Replacement.
Picture 3
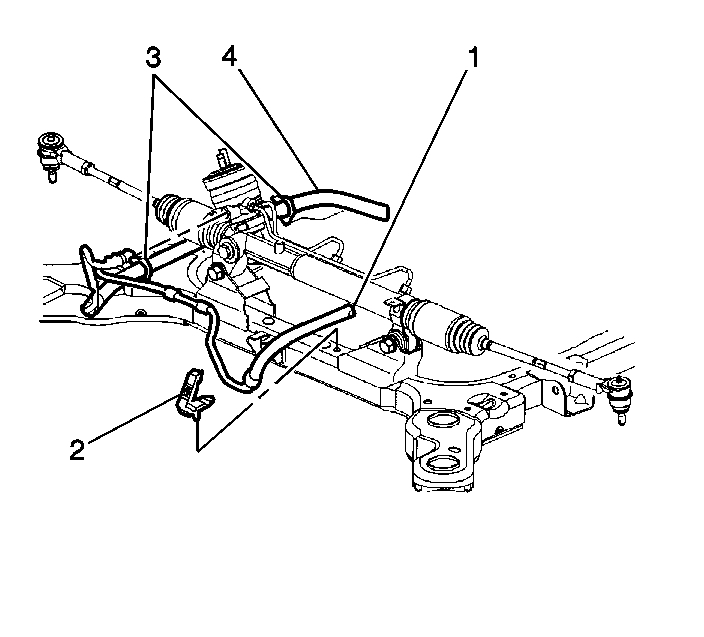
11. Remove the brackets (2) retaining the power steering line (1) at the frame.
12. Remove the retainer clips (3) retaining the power steering line (4) along the left side of the engine frame.
13. Using mechanics wire, retain the steering gear to the body.
Picture 4
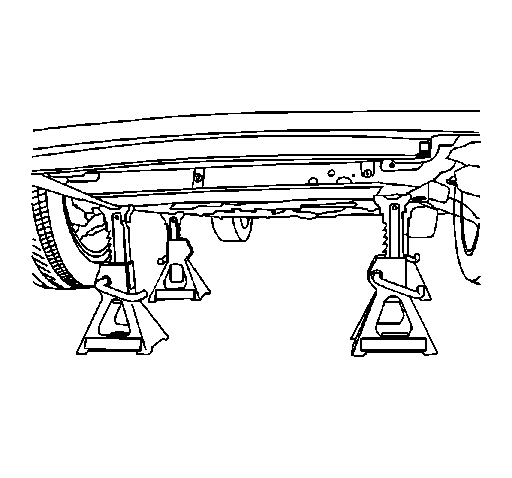
14. Lower vehicle until engine frame rests on suitable jack stands or J 39580.
Picture 5
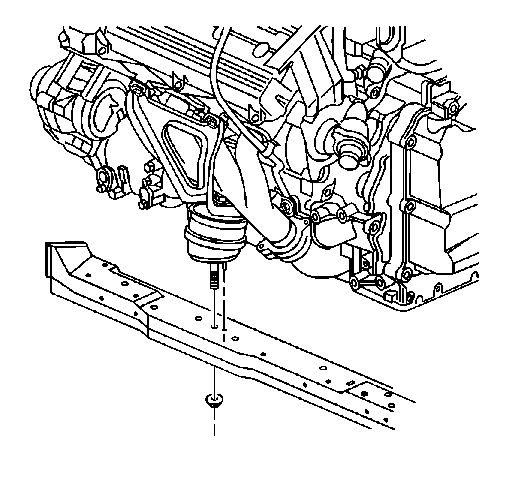
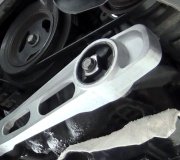
15. Remove the fastener retaining the front engine mount to the engine frame.
Picture 6
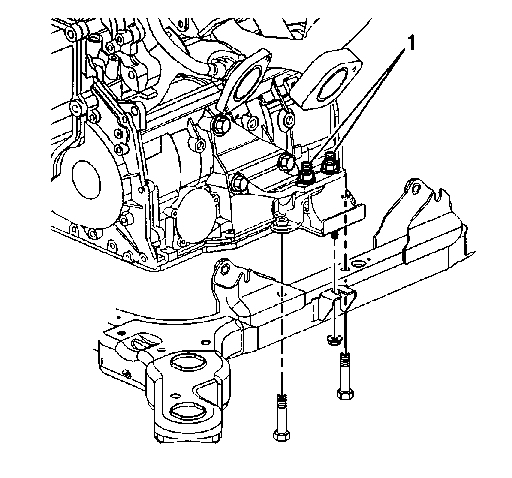
16. Remove the fasteners retaining the rear trans-axle mount (1) to the engine frame.
Picture 7
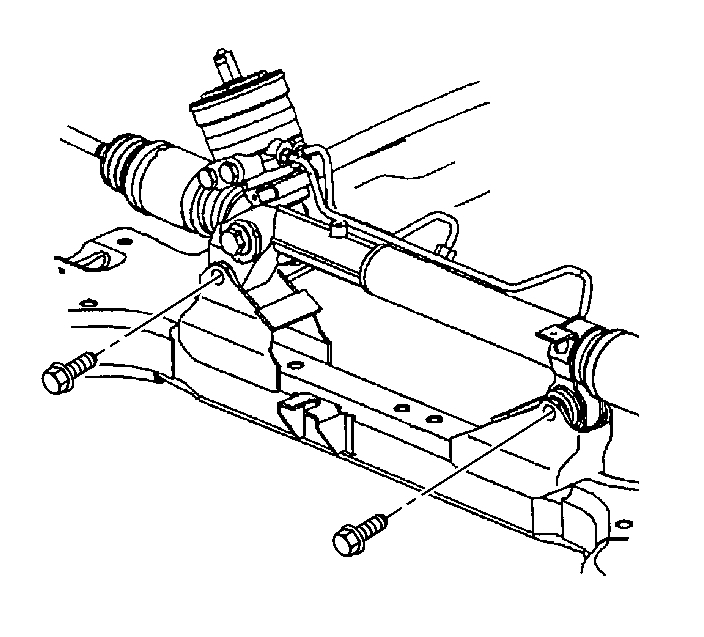
17. Remove the engine frame insulator bolts (3) retaining the engine frame (2) to the vehicle.
18. Raise vehicle away from engine frame.
Picture 8
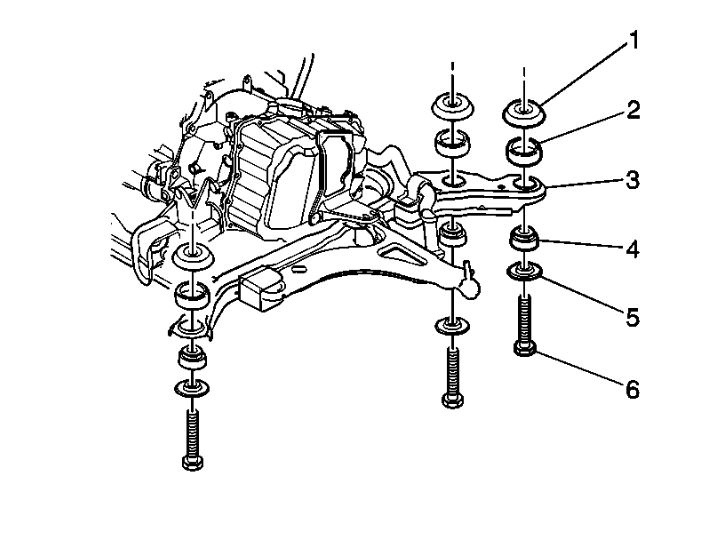
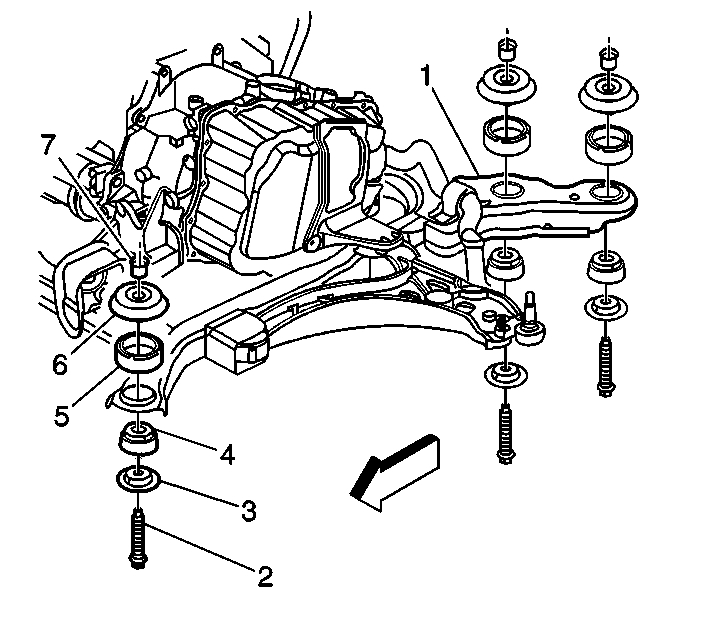
19. Separate the engine frame insulators from the engine frame in the following order:
1. Remove the bolts (2) from the engine frame (1).
2. Remove the lower insulator retainer (3) from the lower insulator (4).
3. Remove the lower insulator (4) from the engine frame (1).
4. Remove the retainer (7) and the upper spacer (6) from the upper insulator (5).
Remove the upper insulator (5) from the engine frame (1).
20. Remove the control arms. Refer to Lower Control Arm Replacement.
Installation Procedure
1. Install the control arms. Refer to Lower Control Arm Replacement.
Picture 9
2. Assemble the engine frame insulators to the engine frame in the following order:
1. Install the upper insulator (5) into the engine frame (1).
2. Install the retainer (7) and the upper spacer (6) onto the upper insulator (5).
3. Install the lower insulator (4) into the engine frame (1).
4. Install the lower insulator retainer (3) onto the lower insulator (4).
5. Install the bolts (2) into the engine frame (1).
3. Lower the vehicle to the engine frame.
Picture 10
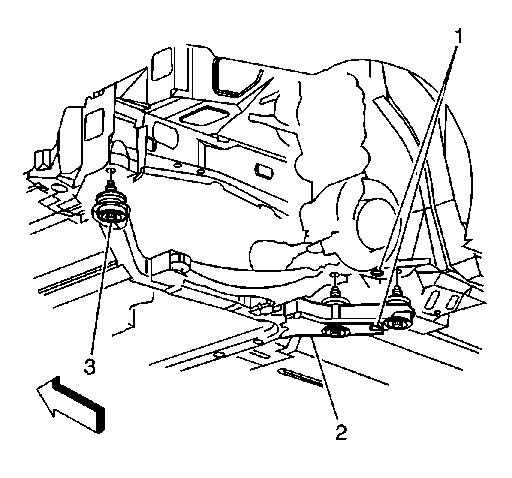
4. Using dowel pins in the alignment holes (1), align the engine frame (2) with the vehicle.
Notice: Refer to Fastener Notice in Cautions and Notices.
5. Install the engine frame insulator retainer bolts (3) in order to retain the engine frame (2) to the vehicle.
Tighten the retainers to 191 N.M (141 lb ft).
Picture 12
6. Raise the vehicle away from the jack stands supporting the engine frame or J 39580.
Picture 13
7. Install the fasteners in order to retain the rear trans-axle mount (1) to the bracket.
Tighten the retainers to 50 N.M (37 lb ft).
Picture 14
8. Install the fastener in order to retain the front engine mount to the engine frame.
Tighten the fastener to 41 N.M (30 lb ft).
Picture 15
9. Install the fasteners in order to retain the steering gear to the engine frame.
Tighten the retainer bolt to 120 N.M (89 lb ft).
Picture 16
10. Install the bracket (2) to retain the power steering line (1) at the engine frame.
11. Install the retainer clips (3) retaining power steering line (4) along engine frame rail.
12. Install the A.I.R. Pump to the vehicle. Refer to Secondary Air Injection Pump Replacement.
13. Install the brake pressure modulator valve. Refer to Brake Pressure Modulator Valve Replacement.
Picture 17
14. Install the real time dampening sensor links (1) to the lower control arm ball studs.
15. Install the front air deflector. Refer to Front Air Deflector Replacement (See: Air Dam > Removal and Replacement > Front Air Deflector Replacement) in Body Front End.
16. Install the ball joints to the steering knuckle. Refer to Lower Control Arm Replacement.
17. Install the front tires and wheels. Refer to Tire and Wheel Removal and Installation.
18. Install the stabilizer shaft. Refer to Stabilizer Shaft Replacement.
19. Lower the vehicle.
20. Remove the engine support fixture. Refer to Engine Support Fixture.
__________________________________
If you have questions or need help, let me know.
Joe
Images (Click to make bigger)
Monday, March 4th, 2019 AT 6:03 PM