Hi,
By blocking the return, it raises the fuel pressure at the rail. I realize that you have already replaced a lot, including fuel-related components. However, have you checked to confirm the pressure is within the manufacturer's specs?
Here are the directions and specs:
___________________
1995 Mitsubishi Truck Montero LS 4WD V6-2972cc 3.0L SOHC 24 Valve
Fuel Pressure Inspection
Vehicle Powertrain Management Fuel Delivery and Air Induction Fuel Pump Fuel Pressure Testing and Inspection Component Tests and General Diagnostics Fuel Pressure Inspection
FUEL PRESSURE INSPECTION
FUEL PRESSURE TESTING
Preparation
1. Reduce the internal pressure of the fuel pipes and hoses.
2. Remove the fuel pressure regulator at the fuel rail side.
CAUTION: Cover the fuel pressure regulator with a shop towel to prevent splashing of fuel that could be caused by some residual pressure in the fuel pipe line.
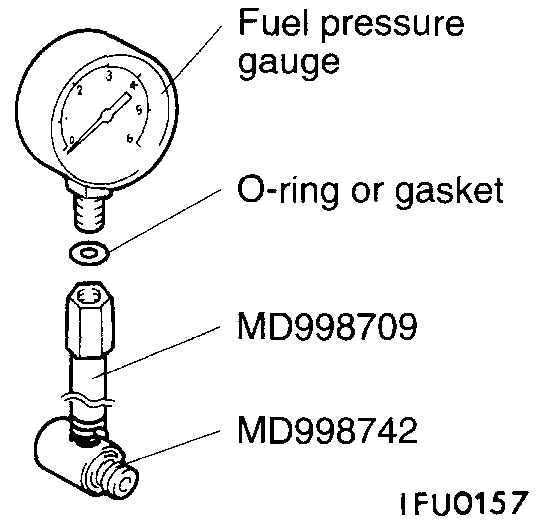
pic 1
3. Connect a fuel pressure gauge to the special tool, placing an adequate 0-ring or gasket between the gauge end special tool to prevent fuel leaks.
4. After carrying out step (3), install the special tool between the fuel rail and the fuel pressure regulator.
Testing the Fuel Pressure - Engine Running
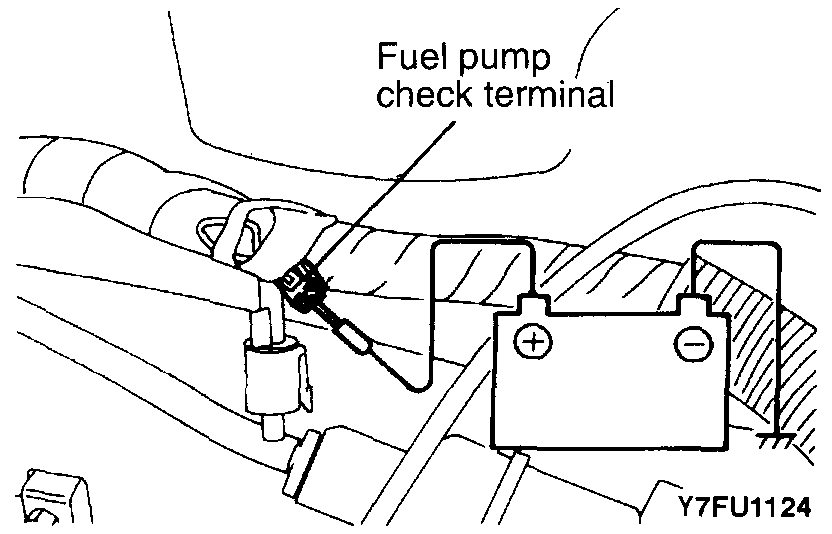
pic 2
1. Connect a jumper wire to the terminal for activation of the fuel pump and to the positive battery terminal to activate the fuel pump. With fuel pressure applied, check that there is no fuel leakage from the fuel pressure gauge and the special tool connection part.
2. Disconnect the jumper wire from the terminal for activation of the fuel pump to stop the fuel pump.
3. Start the engine and let it idle.
4. Measure the fuel pressure during idling.
Standard value: Approx. 270 kPa (38 psi) at curb idle
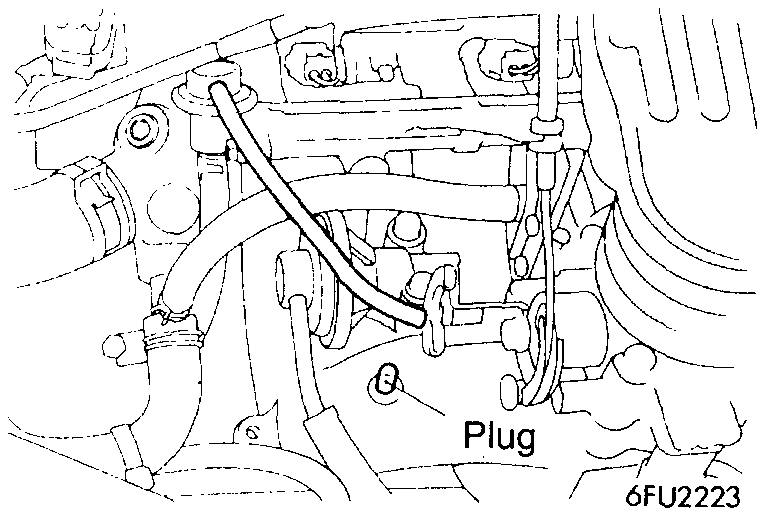
pic 3
5. Disconnect the vacuum hose (blue stripe) from the intake manifold and then plug the nipple.
6. Measure the fuel pressure in this condition.
Standard value: 330-370 kPa (47-53 psi) at curb idle speed
7. Check that the fuel pressure during idling does not decrease even after the engine is raced a few times.
8. Use a finger to gently press the fuel return hose while repeatedly racing the engine, and check that there is fuel pressure in the return hose also.
NOTE: There will be no fuel pressure in the return hose if there is insufficient fuel flow.
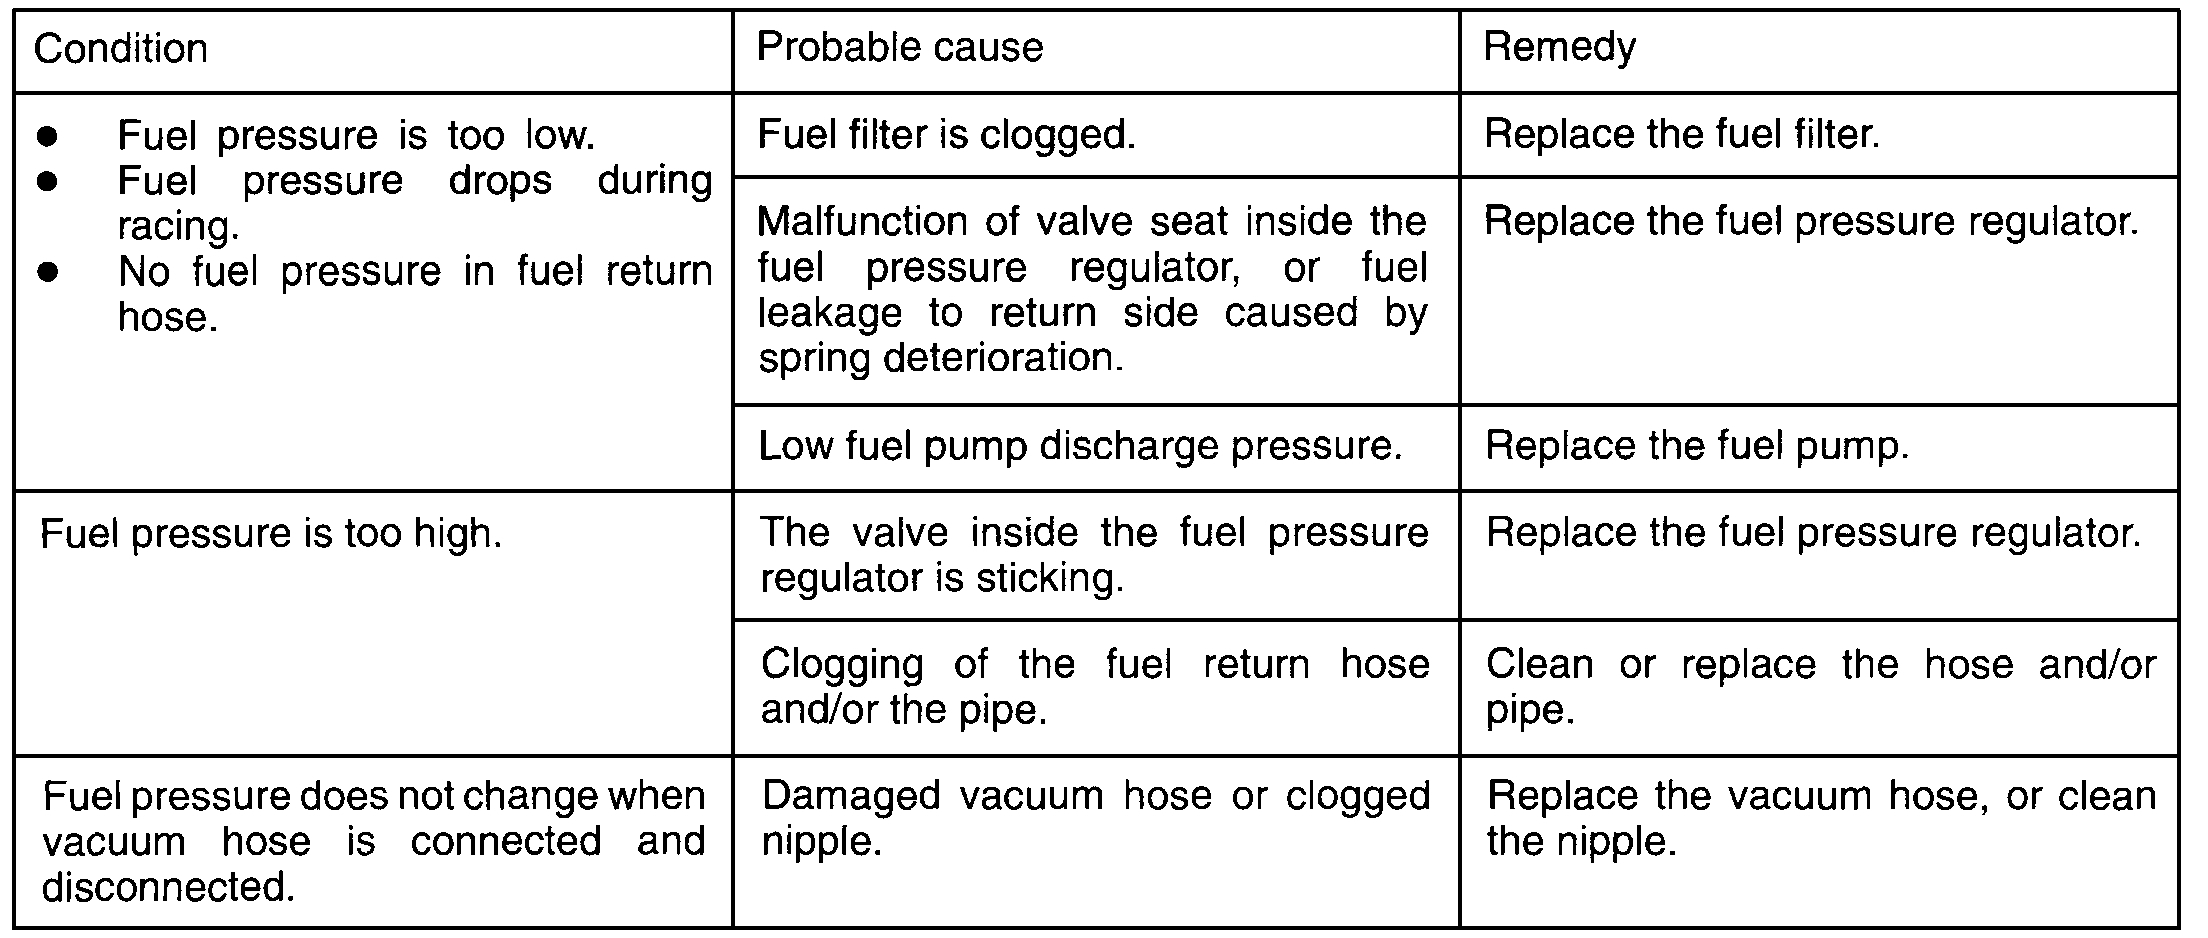
pic 4
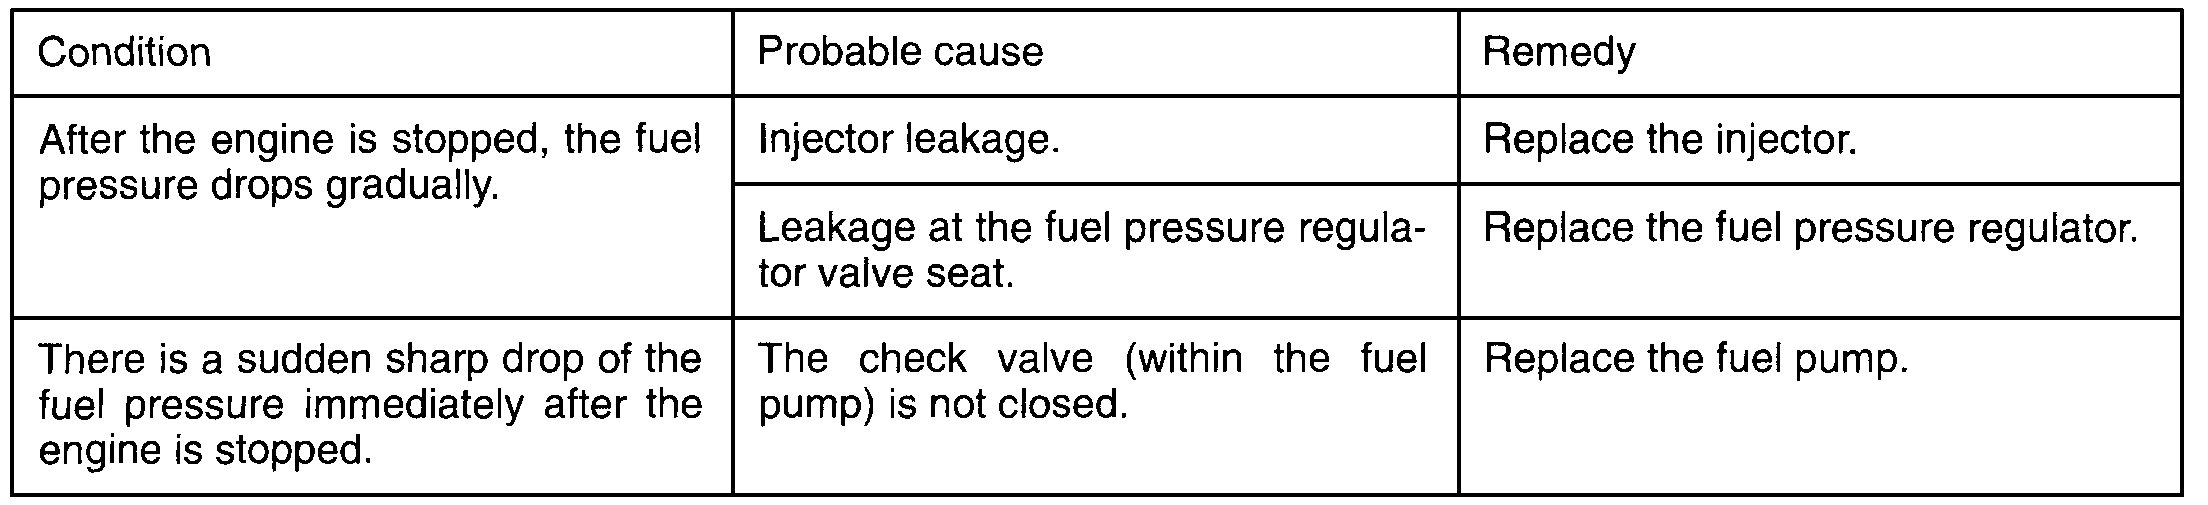
9. If the fuel pressure measured in steps (4) to (6) is outside the standard value range, check for the probable cause by referring to the table above, and then make the appropriate repair.
Testing the Fuel Pressure Leakdown - Engine Off
pic 5
Stop the engine and check for a change of the value indicated by the fuel pressure gauge. The condition is normal if there is no decrease in the indicated value within two minutes. If there is a decrease in the indicated value, monitor the speed of the decrease, and, referring to the table above, determine the cause of the problem and make the appropriate repair.
Restoring the Fuel System to Pre-Test Condition
1. Reduce the internal pressure of the fuel pipes and hose.
2. Disconnect the fuel pressure gauge and the special tool from the fuel rail.
CAUTION: Because there will be some residual pressure in the fuel pipe line, use a shop towel to cover so that fuel doesn't splatter.
3. Replace the 0-ring at the end of the high-pressure fuel hose with a new one.
4. After connecting the high-pressure fuel hose to the fuel rail, tighten the installation bolt to the specified torque.
Tightening torque: 5 Nm (3.6 ft.lbs)
5. Check that there is no fuel leakage.
- Apply battery positive voltage to the terminal for activation of the fuel pump so as to activate the fuel pump.
- With fuel pressure applied, check for leakage of the fuel line.
_______________________________
Let me know. Keep in mind, it could be low fuel pressure.
Take care,
Joe
Images (Click to enlarge)
Oct 19, 2020 at 9:12 PM