Wiper Module And Motor Assembly
Removal
1. Remove wiper arm finish cap and wiper arm fastener. Lift wiper blade assembly away from windshield and remove wiper arm from pivot.
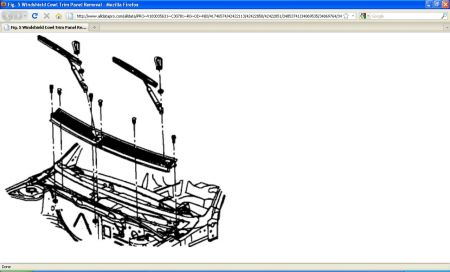
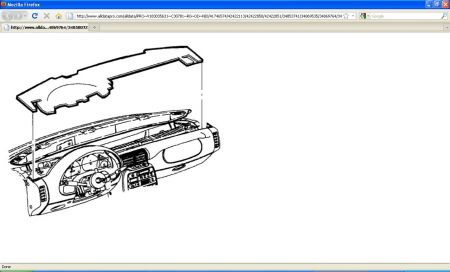
Fig. 5 Windshield Cowl Trim Panel Removal
2. Remove fasteners at windshield edge of cowl trim panel. Open hood and remove remaining cowl trim panel fasteners, and remove cowl trim panel after disconnecting washer hose.
3. Disconnect windshield washer hose.
Important: Exercise care when removing instrument panel top cover to keep from scratching windshield garnish moldings.
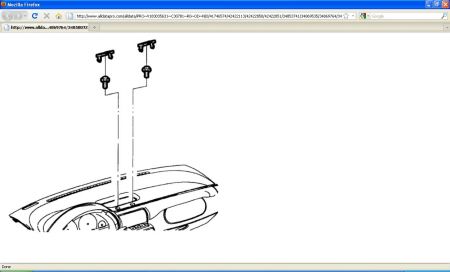
4. Remove upper trim panel extensions by carefully lifting up at clip locations, starting at the rear above end cap.
5. Remove upper trim panel screw caps by carefully prying up with a small screwdriver.
6. Remove upper trim panel screws.
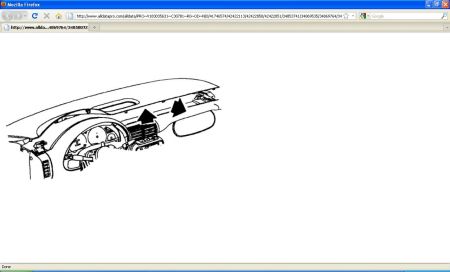
7. Lift upper trim panel at clip locations on rear edge to disengage clips.
8. Pull panel rearward out of clips at bottom of windshield.
9. Remove upper trim panel.
10. Remove upper trim panel insulator.
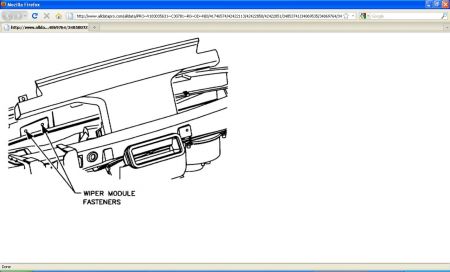
11. Loosen A/C defroster duct and move to the right to expose wiper module fasteners.
Note: Use care when removing wiper module from cowl to avoid pivots contacting windshield
12. Remove wiper module fasteners, partially remove wiper module and disconnect wiring from motor and module frame. Remove wiper module.
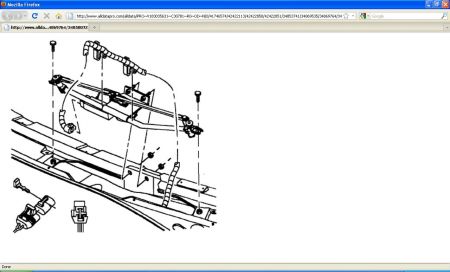
13. Remove crank arm nut and disconnect crank arm from motor shaft.
14. Remove wiper motor fasteners and remove wiper motor from wiper module.
Installation
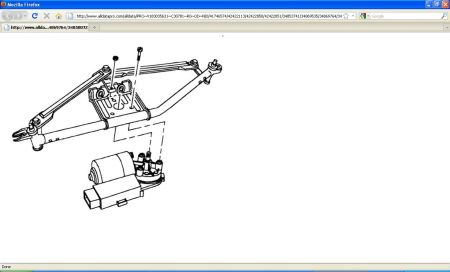
Important: If installing new wiper motor, remove wiper motor crank arm from new wiper motor assembly and discard.
1. Connect wiring to new wiper motor and turn wiper control on momentarily. Once wiper control is turned off, wiper motor will be in the PARK position.
2. Install wiper motor onto wiper module.
Torque: 10 Nm (89 in-lbs)
3. Position wiper motor crank arm at 9 o'clock position, and install on wiper motor shaft.
4. Apply Loctite � 242 (or equivalent) to wiper crank arm attaching nut and install.
Torque: 28 Nm (21 ft-lbs)
5. Partially install wiper module assembly, connect wiring to wiper motor and to module frame.
6. Install wiper module assembly.
Torque: 10 Nm (89 in-lbs)
7. Turn wiper switch ON momentarily. Once wiper switch is turned Off, wiper mechanism should be in PARK position with wiper motor crank arm in 9 o'clock position.
8. Connect washer hose to washer nozzle.
Fig. 5 Windshield Cowl Trim Panel Removal
9. Install cowl trim panel.
Note: Use new nuts. Torque retention of old nuts may not be sufficient.
10. Install wiper arms and fasteners.
Torque: 28 Nm (21 ft-lbs)
11. Install A/C defroster duct assembly.
12. Install upper trim panel insulator.
Important: Make sure to tuck in all flaps.
13. Install upper trim panel into clips at base of windshield.
14. Lower panel and push down at clip locations to secure.
15. Install and tighten screws.
16. Install screw caps.
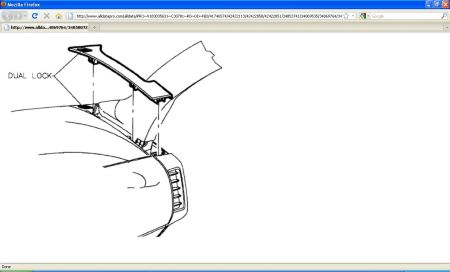
17. Install upper trim panel extensions by pushing down at clip and dual-lock locations.
18. Enable the SIR System.
You need a t-15 torx screwdriver a metric wrench and socket set with a 7mm socket.It's not that hard to do is your handy with car's.
Friday, October 1st, 2010 AT 3:49 PM
