Hi and thanks for using 2carpros.com
Here are the directions to replace the glow plugs. However, the intake manifold needs removed first. I will add those directions after glow plug replacement. The attached pictures correlate with the directions.
___________________
12 23 505 - Replacing all glow plugs (M57 / M57TU / M47TU / M47T2 / M57T2)
Special tools required:
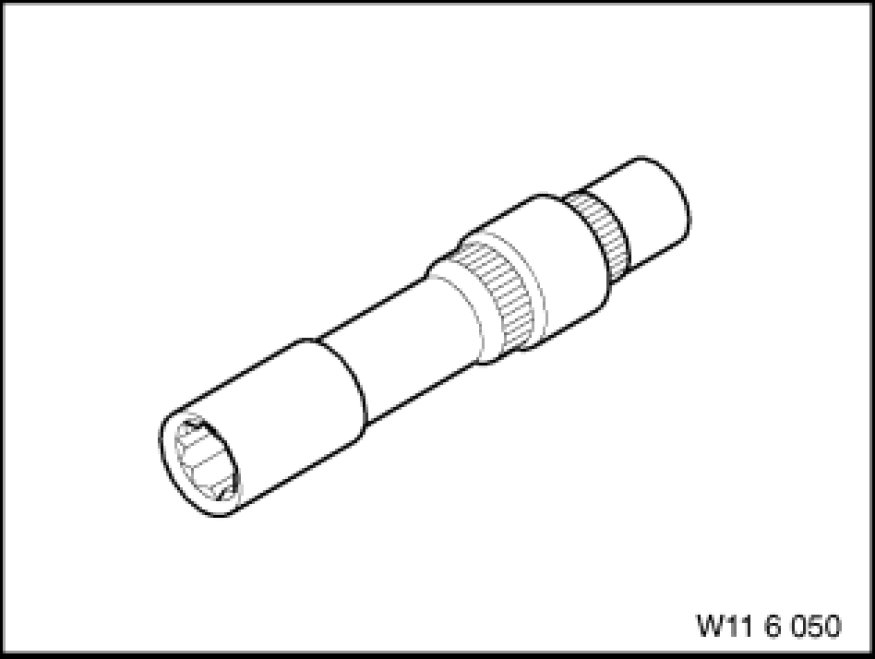
- 11 6 050 See: Engine > Electrical / Mechanical Repair > 11 6 050 Socket Wrench Socket WAF 10
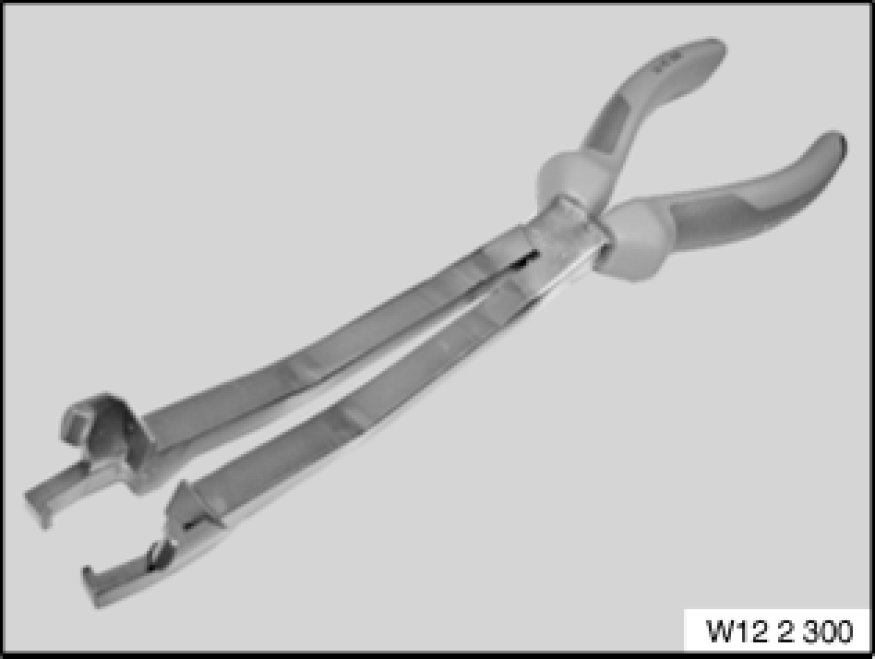
- 12 2 300 See: Glow Plug System > Electrical / Mechanical Repair > 12 2 300 Special Pliers for Glow Plug Connector
see pics 1 and 2
Note:
Read out fault memory of DDE control unit (DDE = Digital Diesel Electronics).
Switch off ignition.
If malfunctions occur at the glow elements, it is absolutely essential to check the fuses behind the glovebox.
For further information on troubleshooting, refer to Diagnosis and Information System (DIS).
Necessary preliminary tasks:
- Disconnect negative battery cable
- Remove intake air manifold See: Intake Manifold > Removal and Replacement
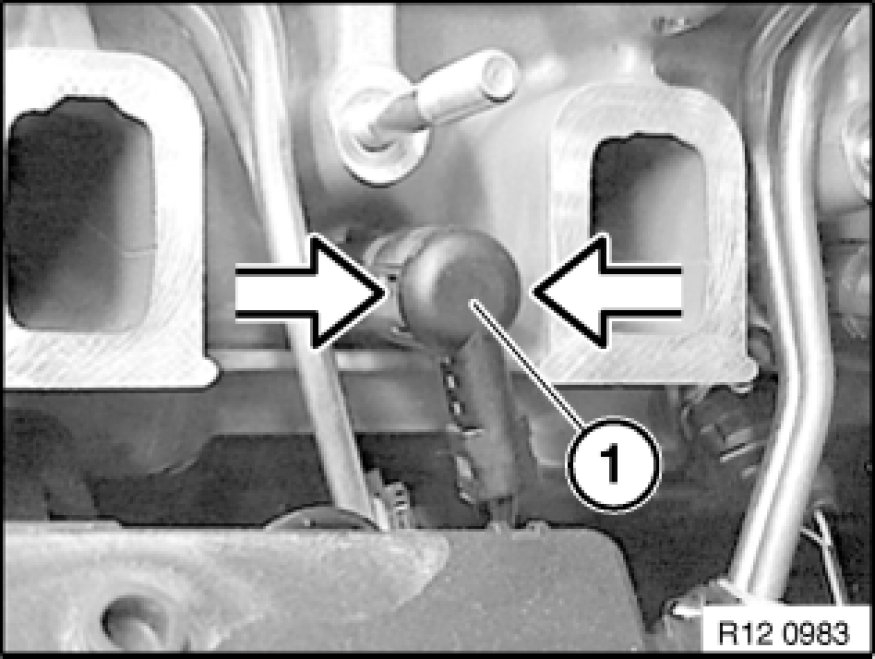
see pic 3
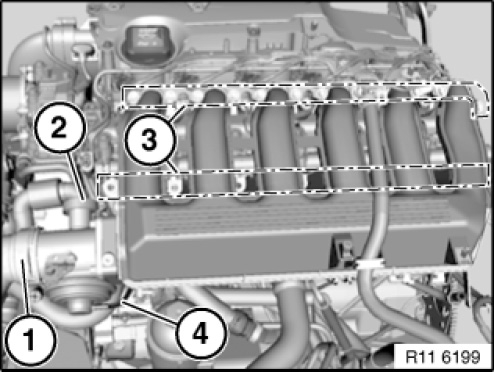
Unlock plug (1) with special tool 12 2 300 See: Glow Plug System > Electrical / Mechanical Repair > 12 2 300 Special Pliers for Glow Plug Connector and detach.
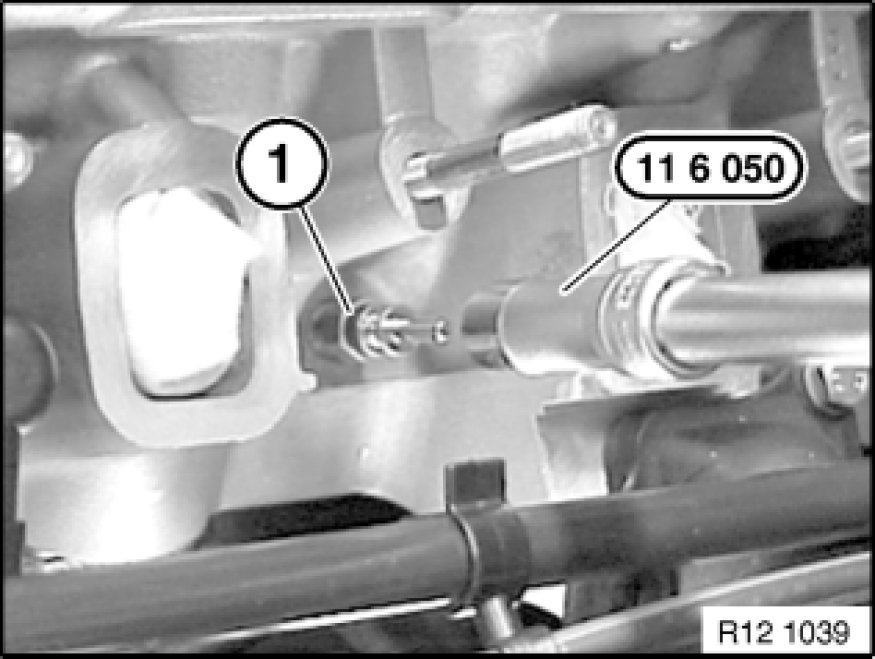
see pic 4
Release glow plugs (1) with special tool 11 6 050 See: Engine > Electrical / Mechanical Repair > 11 6 050 Socket Wrench Socket WAF 10.
Tightening torque 12 23 2AZ See: Glow Plug System > Mechanical > 12 23 Glow Plugs.
Note:
If necessary, drill out special tool 11 6 050 See: Engine > Electrical / Mechanical Repair > 11 6 050 Socket Wrench Socket WAF 10 with a 9.5 mm dia. twist drill bit approx. 20 mm deep.
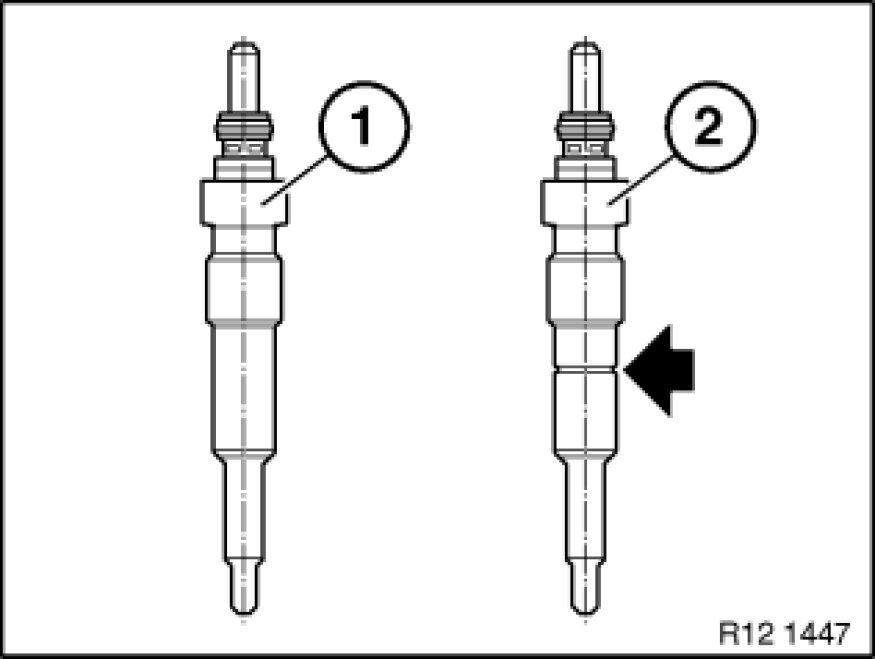
see pic 5
Installation:
Different glow elements in M47 and M47TU engines!
M47 glow elements (1) without designation groove.
M47TU rapid start glow elements (2) with designation groove and silver surface.
Note:
Check stored fault messages.
Now clear the fault memory.
__________________________________________________________________________________________
Here are the directions for removal and replacement of the intake manifold.
11 61 050 Removing and installing air intake plenum (M57T2)
Necessary preliminary tasks:
- Remove heater end panel centre units compartment (only E65, E9x)
- Remove trailing link (E60/E61)
- Remove trailing link (E83)
- Remove trailing link (E9x)
- Remove intake silencer housing (E70)
- Remove acoustic cover at front and rear
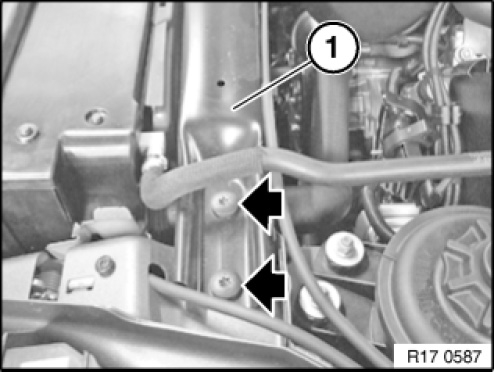
See pic 6
(E7x only)
Unclip Bowden cable for engine compartment lid actuator from transverse reinforcement (1).
Release screws on left and right sides.
Tightening torque 51 71 4AZ.
Remove transverse reinforcement (1).
Pic 7
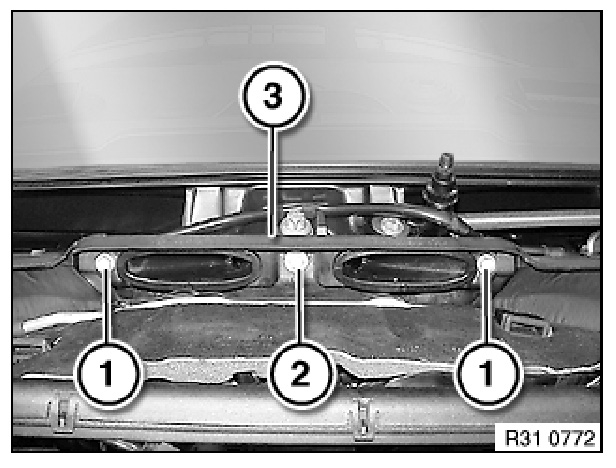
(E9x only)
Release screws (1, 2).
Remove heater end panel (3).
Installation note:
Make sure heater end panel is correctly seated.
pic 8
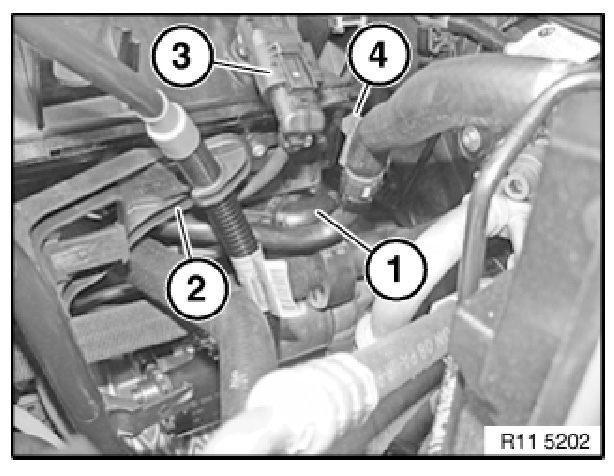
Disconnect plug connection (1) on swirl-flap actuator.
Release screw (2) on dipstick.
Disconnect plug connection for pressure sensor (3).
Unclip vacuum line (4) from holder.
pic 9
Disconnect plug connection (1) on right pressure pipe.
pic 10
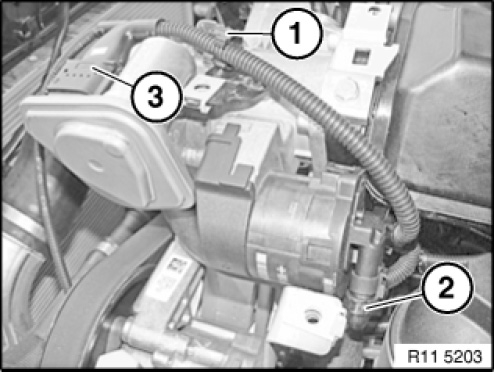
Open cable clips (1).
Disconnect plug connection (2) from exhaust-gas recirculation valve.
Disconnect plug connection (3) from electromotive throttle actuator.
pic11
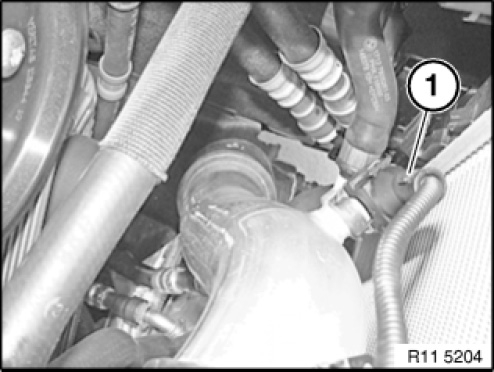
Unlock and detach charge air hose (1).
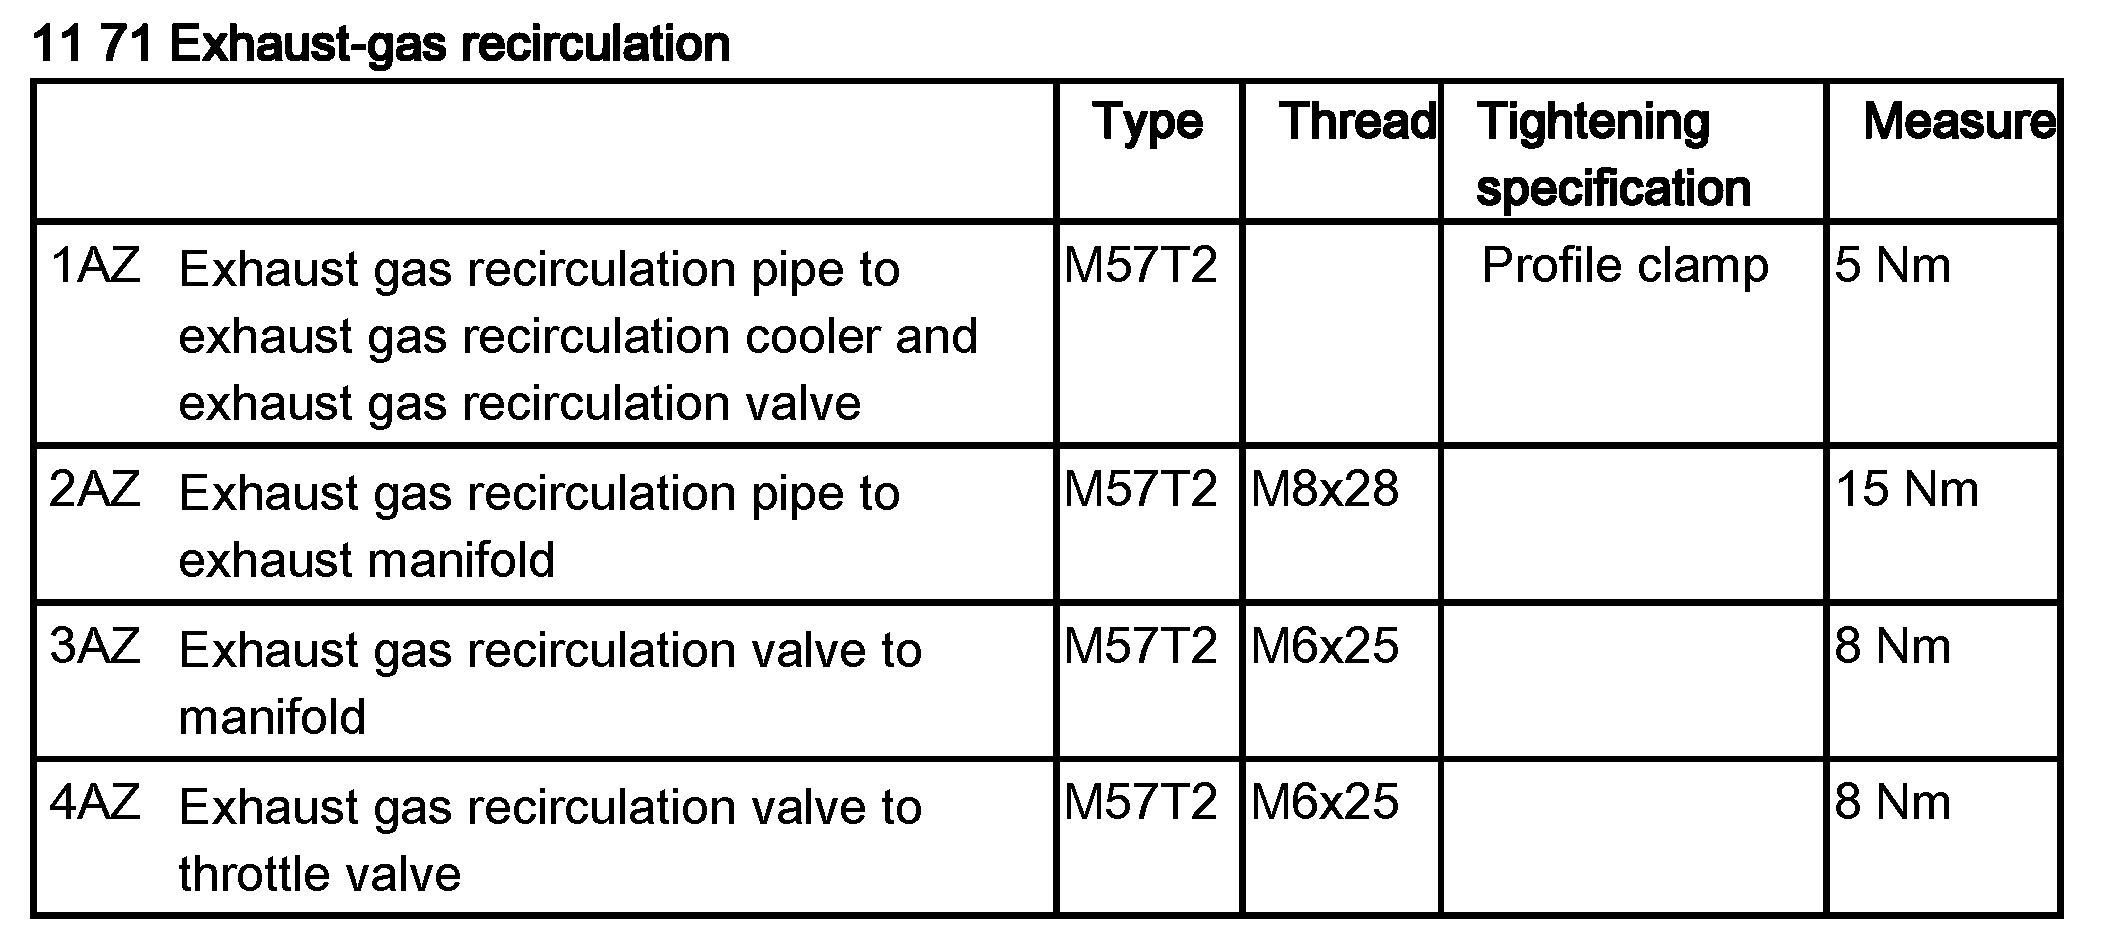
Release profile clamp (2) for exhaust gas recirculation line.Tightening torque 11 71 1AZ.
Release screw connection along lines (3).
Tightening torque 11 61 1AZ.
NOTE: Picture shows M57T2 Europe.
Installation note:
Replace all gaskets.
Assemble engine.
Check function of DDE.
pic 12 - 15
______________________
Let me know if this helps or if you have other questions.
Joe
Images (Click to enlarge)
Jan 22, 2019 at 8:12 PM