Welcome to 2CarPros.
Here are the directions for the mirror itself. There are two sets here because I don't know which one you have. The attached pictures correlate with these directions.
__________________________________________
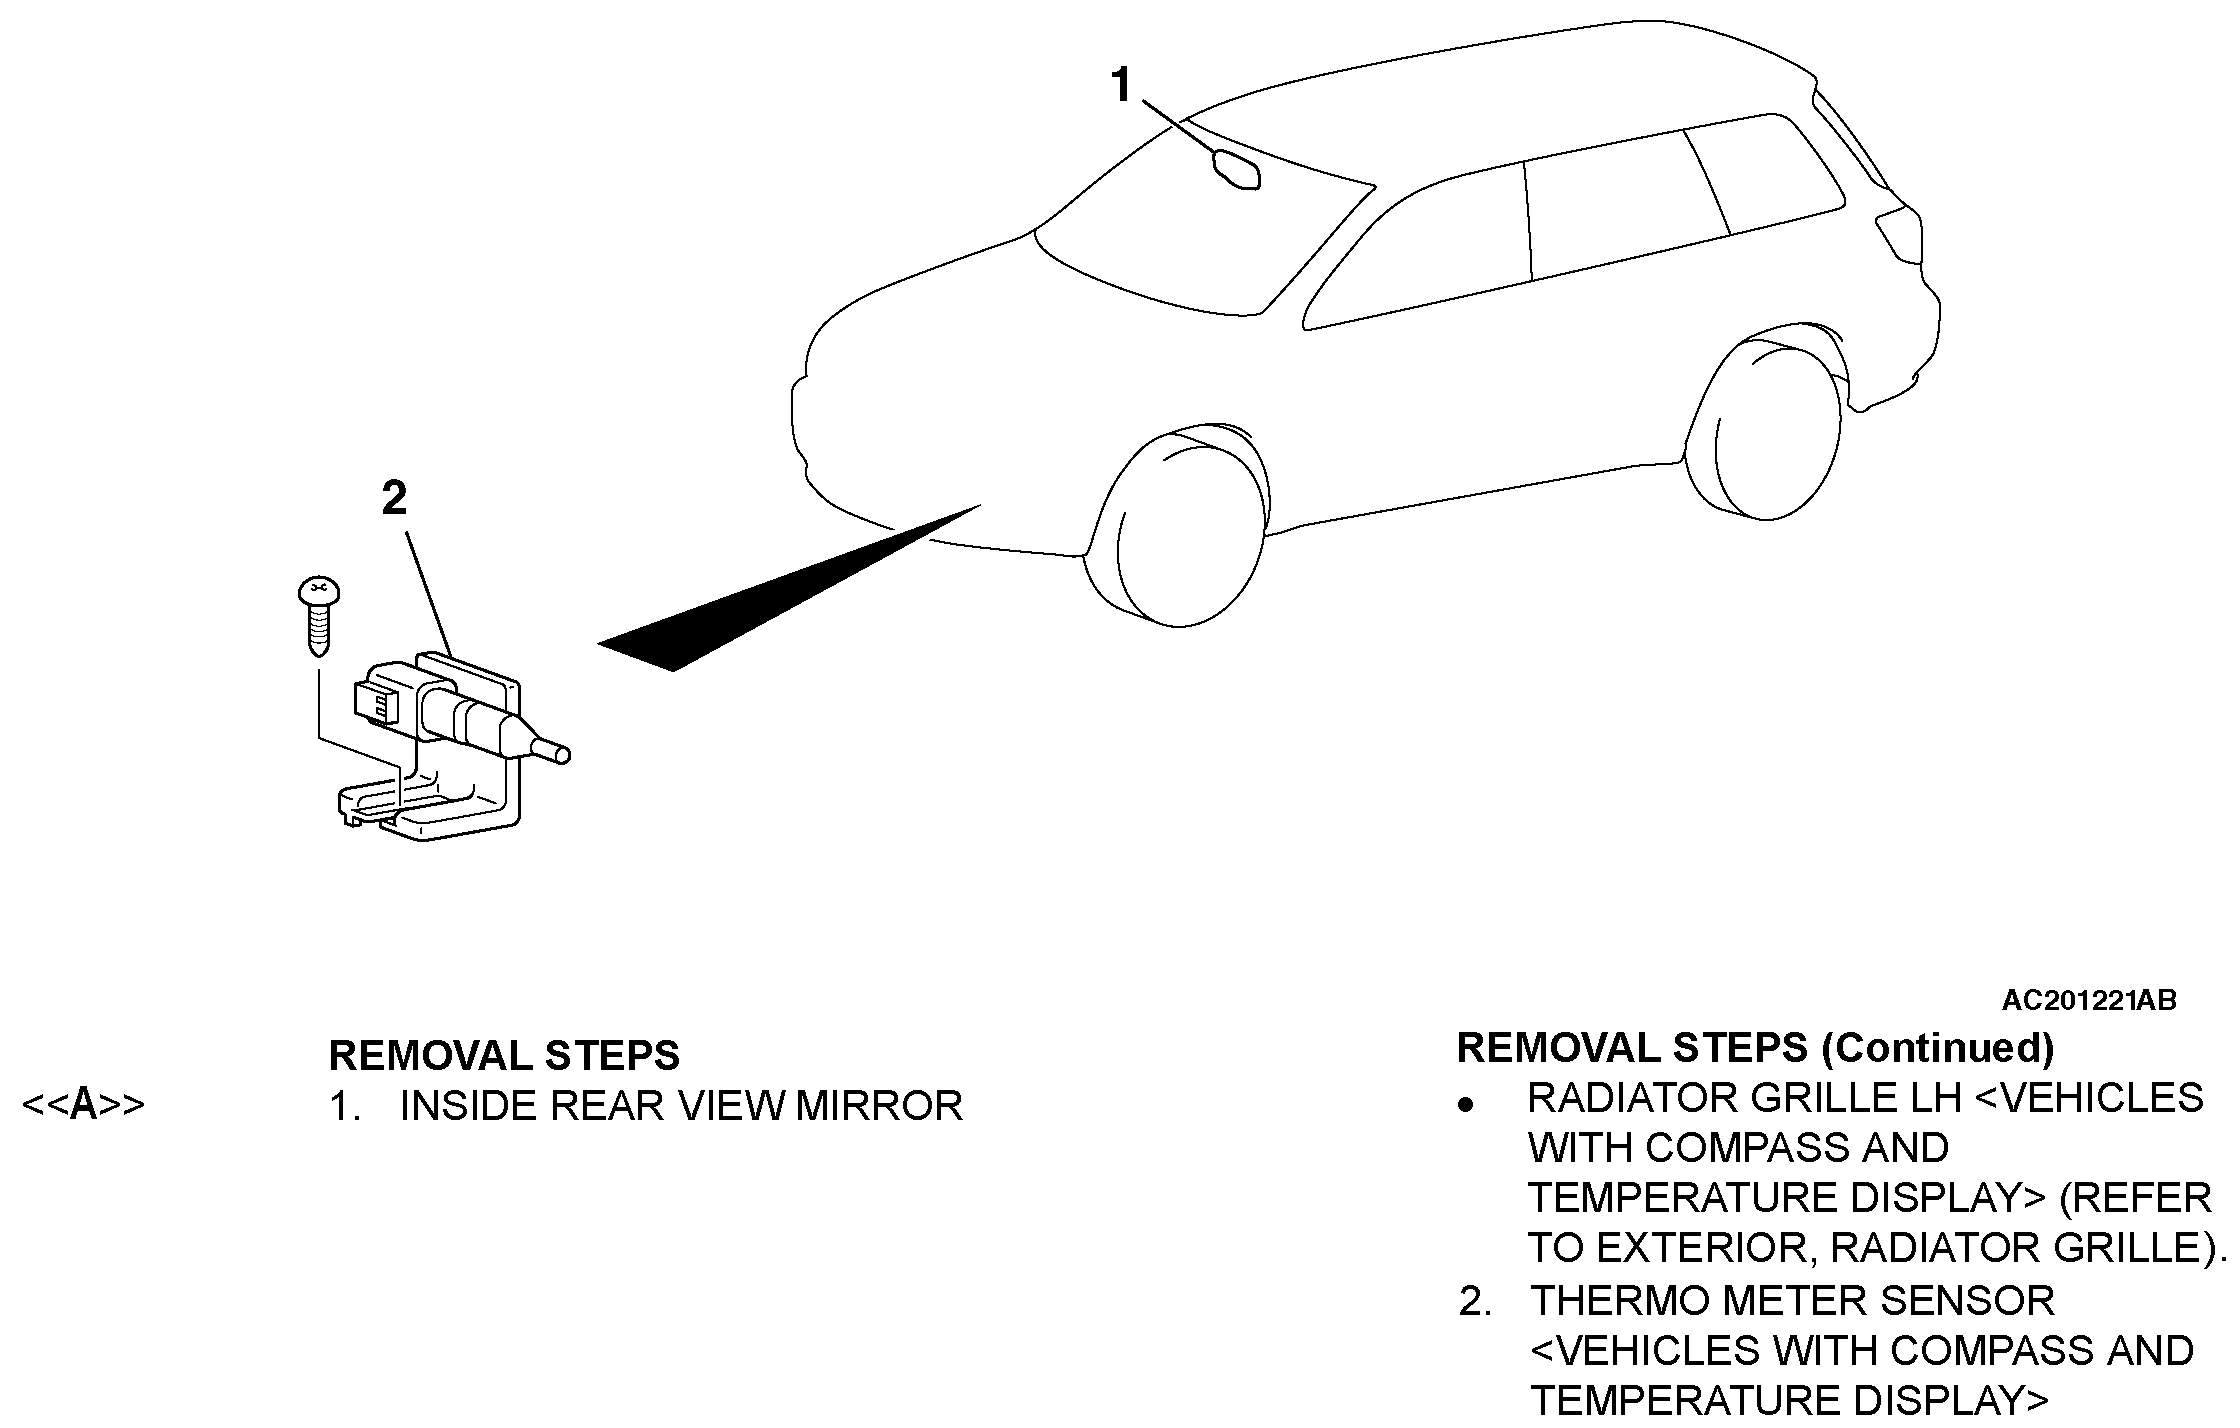
INSIDE REAR VIEW MIRROR
REMOVAL AND INSTALLATION
Removal Steps 1-2
Picture 1
REMOVAL SERVICE POINTS
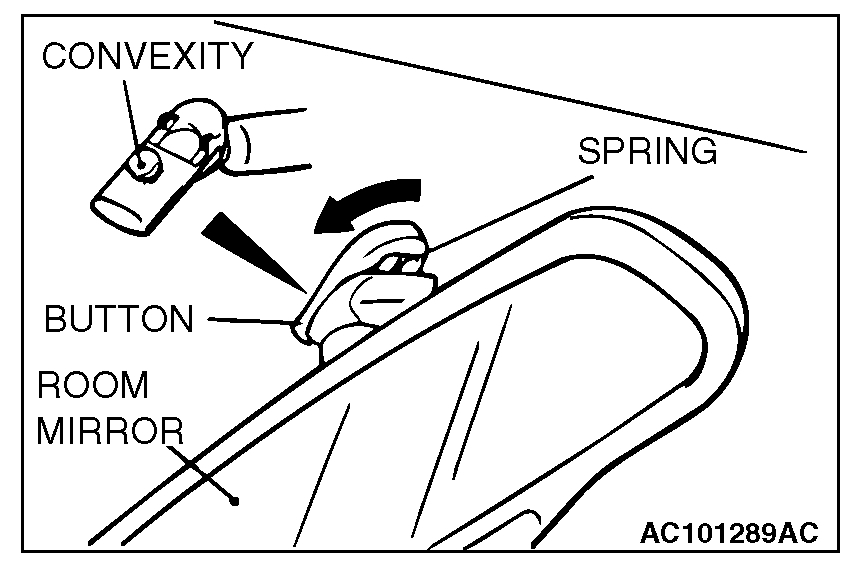
[[A]] INSIDE REAR VIEW MIRROR REMOVAL
[Vehicles with compass and temperature display]
Picture 2
Pull out the mirror in the bottom direction after turning it 90 degrees in the direction of the arrow, as shown.
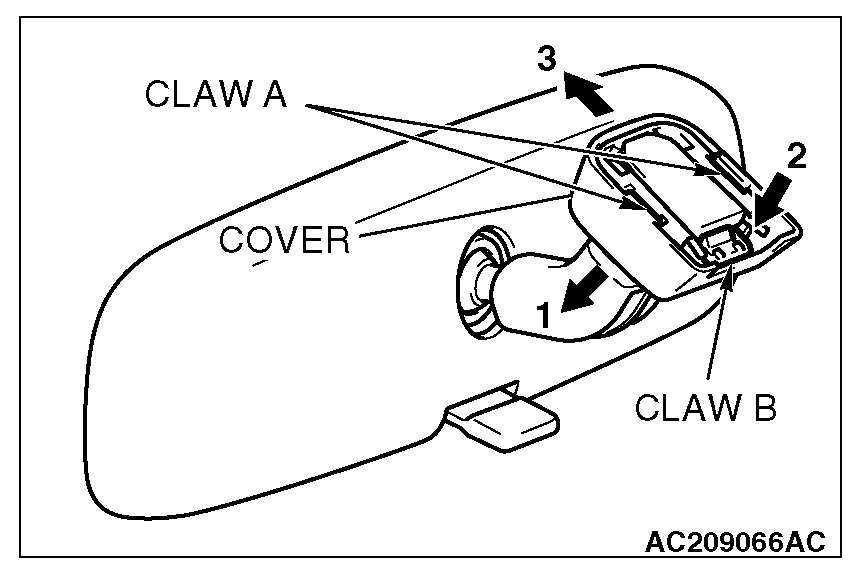
[Vehicles without compass and temperature display]
Picture 3
1. Disengage the claw A and lower the cover toward arrow 1 direction.
2. Push the claw B toward arrow 2 direction to unlock, and pull out the mirror toward arrow 3 direction.
_____________________________
Now, for the mount that is attached to the glass, you will need a helper. From the outside, have a helper use a heat gun or blow dryer to soften the adhesive that holds the mount to the glass. While that is being done, gently wiggle the mount free. I assume since the glass has been replaced, you are removing this from a bad windshield, so just protect your eyes and hands and don't be afraid to use a scraper to help loosen it.
_____________________________
Now, I would recommend positioning the mount in the exact position it was on the old glass. Go to the local parts store and purchase a repair kit to install an interior mirror. They are not expensive and they are easy to use. Just make sure you place the mount in the right position. Also, simply follow the manufacturer's directions listed on the product you get.
____________________________
Let me know if this helps or if you have other questions.
Take care,
Joe
Images (Click to enlarge)
Apr 13, 2019 at 7:06 PM