Hi,
Do you have the adjuster closed fully? If it wasn't readjusted, the new shoes will be open too far and cause this. I am going to provide the directions for rear brake / drum replacement on this specific vehicle. You can recheck what you have done. Also, when you get to the installation portion, you will see the directions for adjustment. The attached pics correlate with the directions.
I suspect this is the cause of the problem. This doesn't have a typical design.
_____________________________________________
2004 Kia Rio L4-1.6L
Procedures
Vehicle Brakes and Traction Control Drum Brake System Service and Repair Procedures
PROCEDURES
REAR DRUM BRAKE
pic 1
COMPONENT
REMOVAL
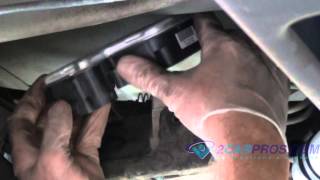
1. Raise and support the vehicle after releasing the parking brake
2. Remove the wheel and tire.
3. Remove the hub cap.
Pic 2
4. Use a small cape chisel to raise the staked edge of the lock nut.
NOTE: Use carefully not to damage the groove and threads of spindle.
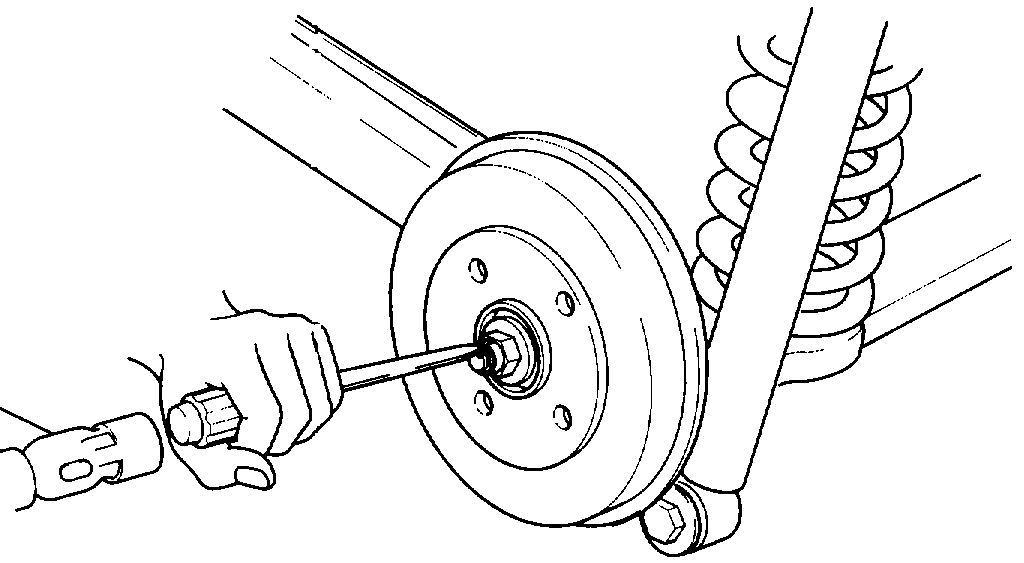
Pic 3
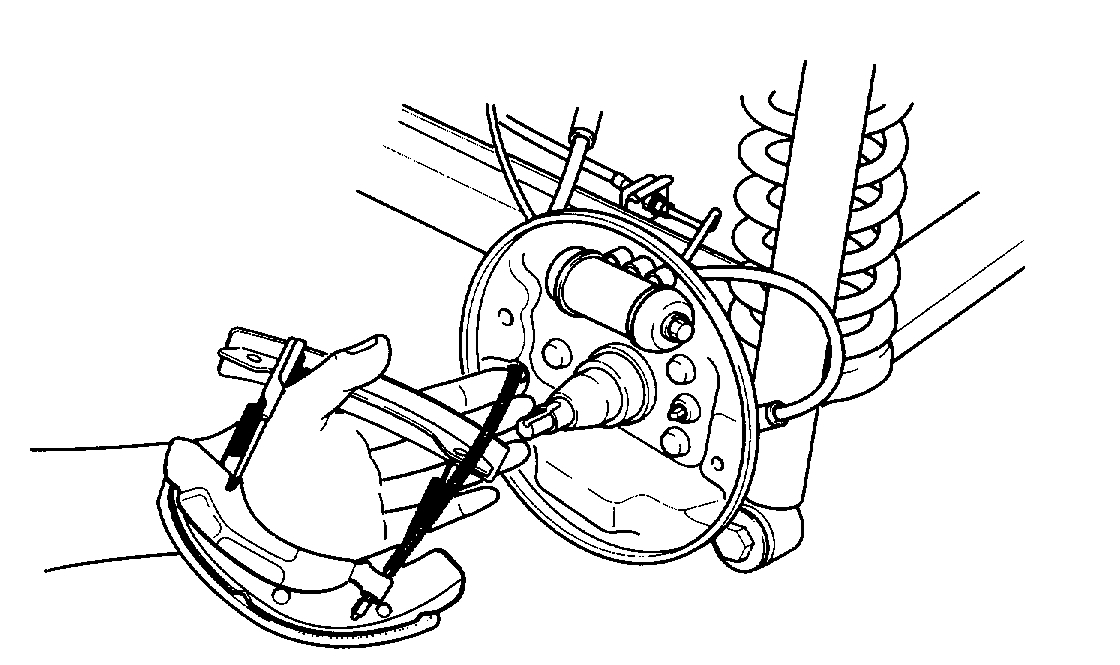
5. Remove the drum, washer and bearings as an assembly from the spindle.
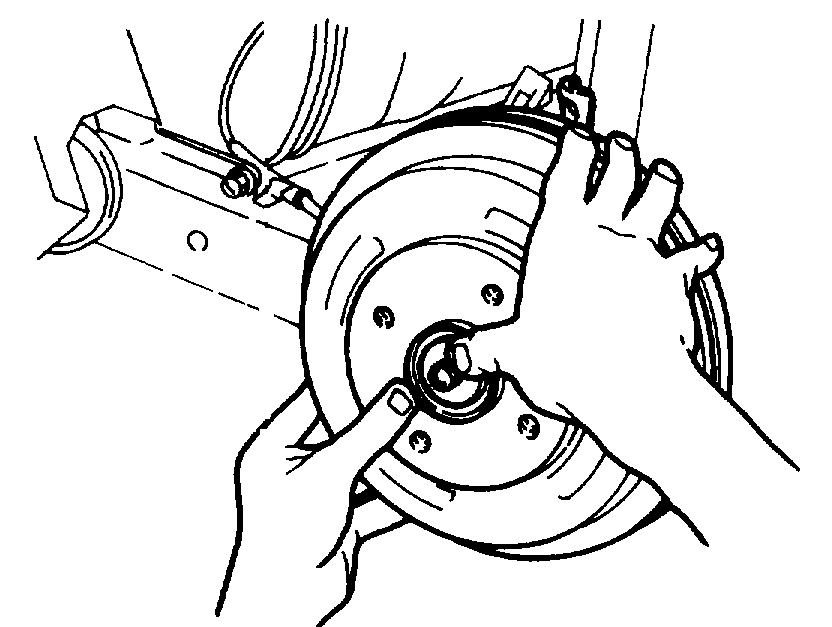
Pic 4
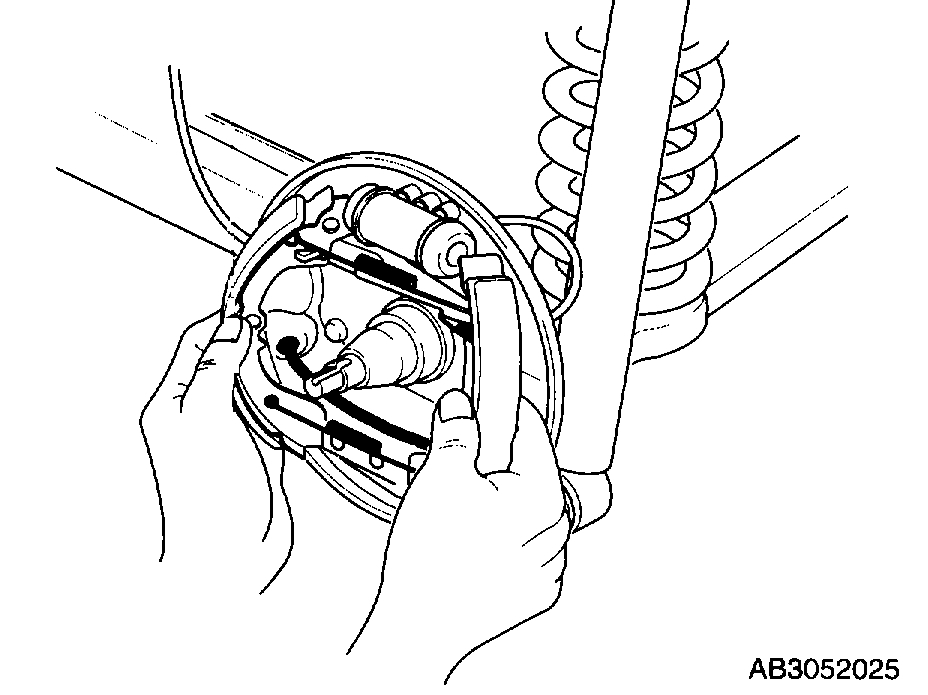
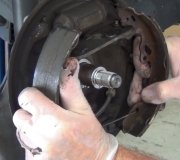
6. Remove the brake shoe hold-down springs and pins.
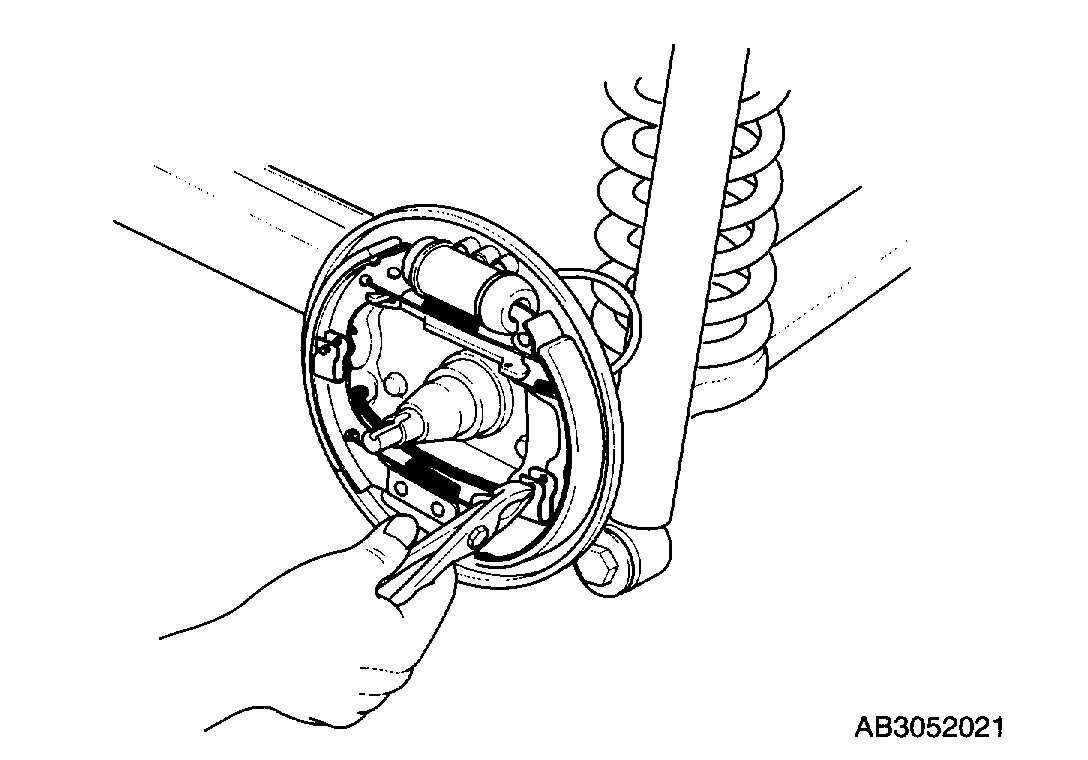
Pic 5
7. Remove the brake shoe assembly.
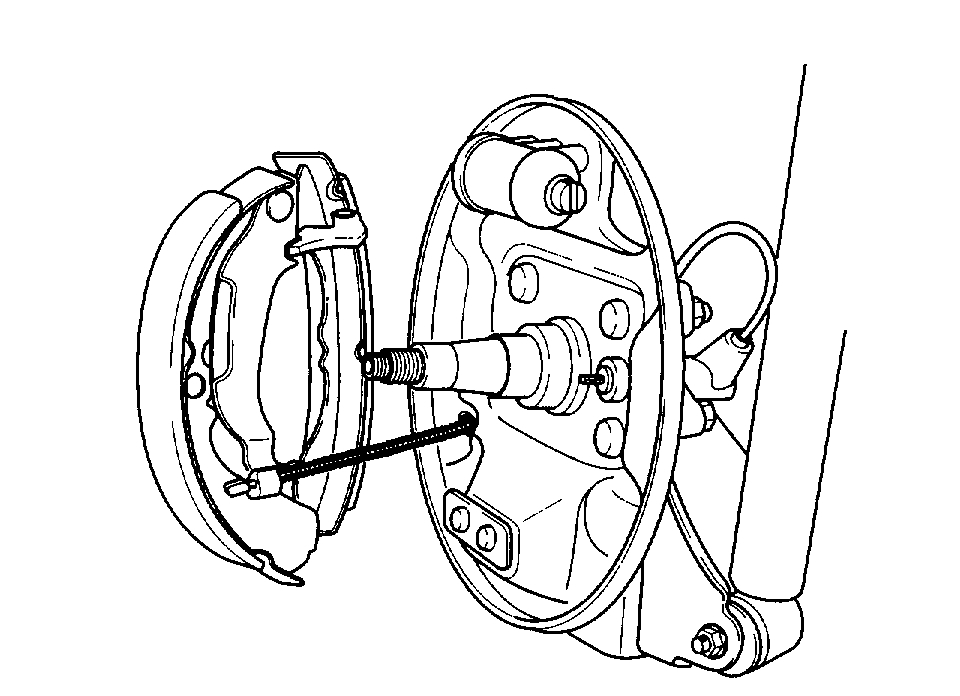
Pic 6
8. Remove the parking brake cable from the brake shoe assembly.
9. Remove the wheel cylinder brake pipe.
10. Remove the wheel cylinder attaching bolt.
11. Remove the anti-rattle spring from brake shoe assembly.
12. Remove the operating lever after removing the return spring.
13. Remove the parking brake operating lever retainer.
INSPECTION
1. Inspect the inside of the brake drum for scratches and uneven or abnormal wear.
2. Repair minor damage or replace if damage is excessive.
Pic 7
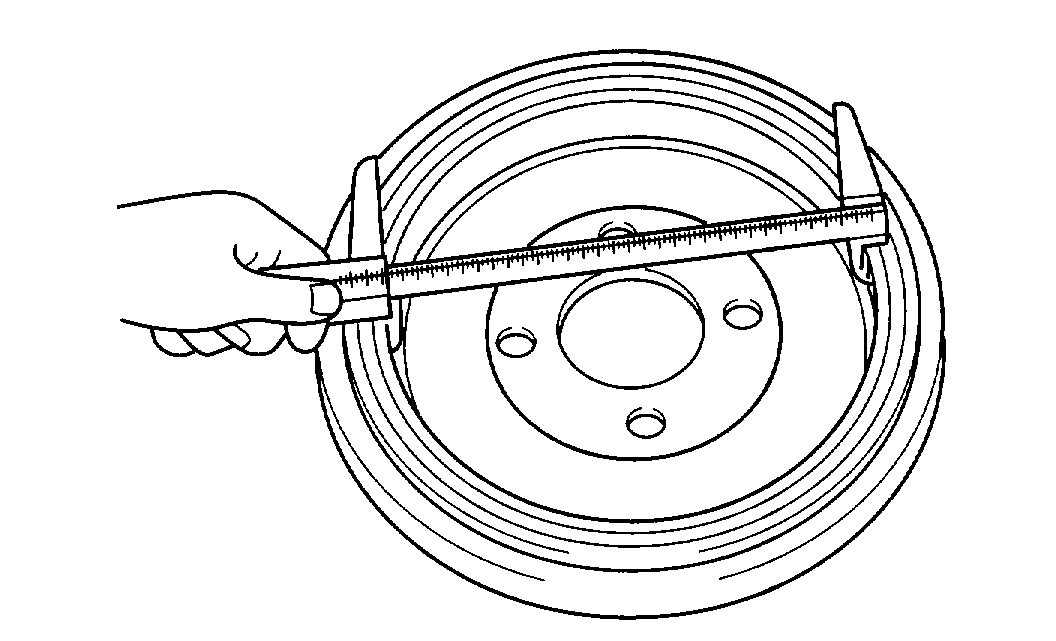
3. Measure the inside diameter of the brake drum using Brake Drum Micrometer or equivalent.
Pic 8
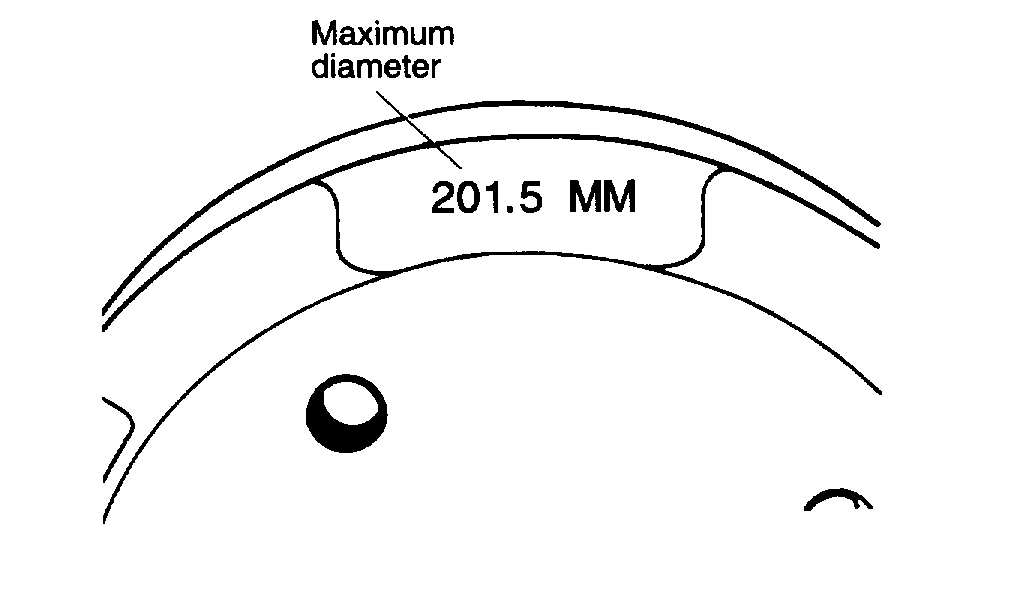
4. The standard inner drum diameter is 7.87 inches (200 mm). The maximum diameter is 7.91 inch (201 mm).
CAUTION: Be sure to check the drum-to-shoe contact after repairing or replacing the brake drum.
5. Check the brake linings for peeling, cracks, or extremely uneven wear.
6. If the brake lining thickness is less than 0.04 inch (1.0 mm), replace the brake shoes.
INSTALLATION
1. Clean the backing plate with an approved vacuum cleaner.
Pic 9
2. Lubricate the contact face of the backing plate and brake shoes.
NOTE: Be careful not to attach grease to lining surface.
3. Install the wheel cylinder to the backing plate.
4. Install the wheel cylinder brake pipe.
5. Install the parking brake operating lever after installing the brake shoe assembly. Lubricate the contact face of strut and adjust lever.
Pic 10
6. Put the parking brake cable into the operating lever.
Pic 11
7. Position the brake shoe assembly to the wheel cylinder.
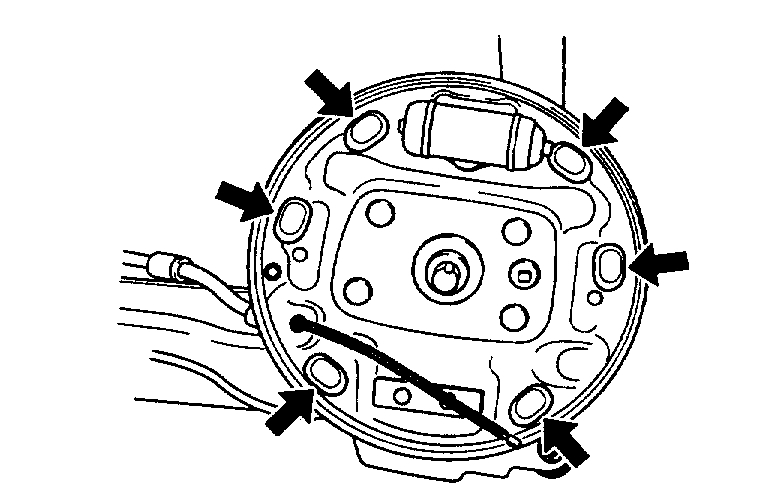
8. Install the brake shoe hold-down pin and spring clip.
Pic 12
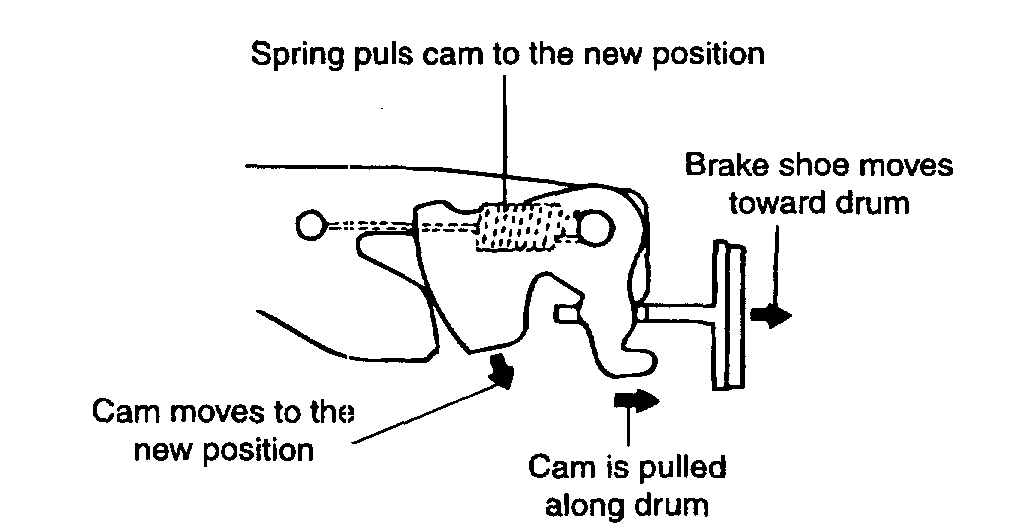
9. Set the self-adjuster to the fully released position.
10. Place a screwdriver against the adjuster cam and push it to the released position.
11. Install the drum, washer and bearing to the spindle.
12. Push the brake pedal several times to the self-adjuster.
13. Firmly fix the lock nut to the groove.
14. Install the hub cap.
____________________________________________
Let me know if this helps. If you have other questions, let me know that as well.
Take care,
Joe
Images (Click to make bigger)
Wednesday, April 8th, 2020 AT 5:56 PM