Hi and thanks for using 2CarPros.
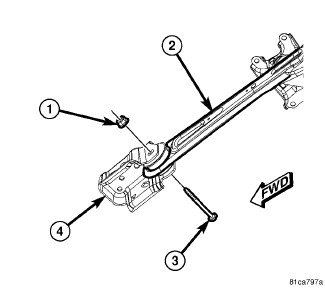
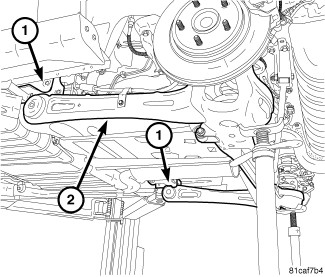
Since it stops when you apply the brakes, either it is related to the brake itself or a worn busing in the rear axle assembly. When brakes are applied, directional pressure is placed on the bushings. If they checked the brakes, caliper, and caliper mount and everything is tight, Inspect the rear trailing arm busing. It is a metal component that attached the rear axle to the frame of the vehicle. See picture 1.
__________________________________________
If you find the busing is worn and loose, here are the directions for replacement of bushings. All remaining pics correlate with these directions.
_________________________________________
REAR AXLE TRAILING ARM BUSHING(S) - INSTALLATION
INSTALLATION
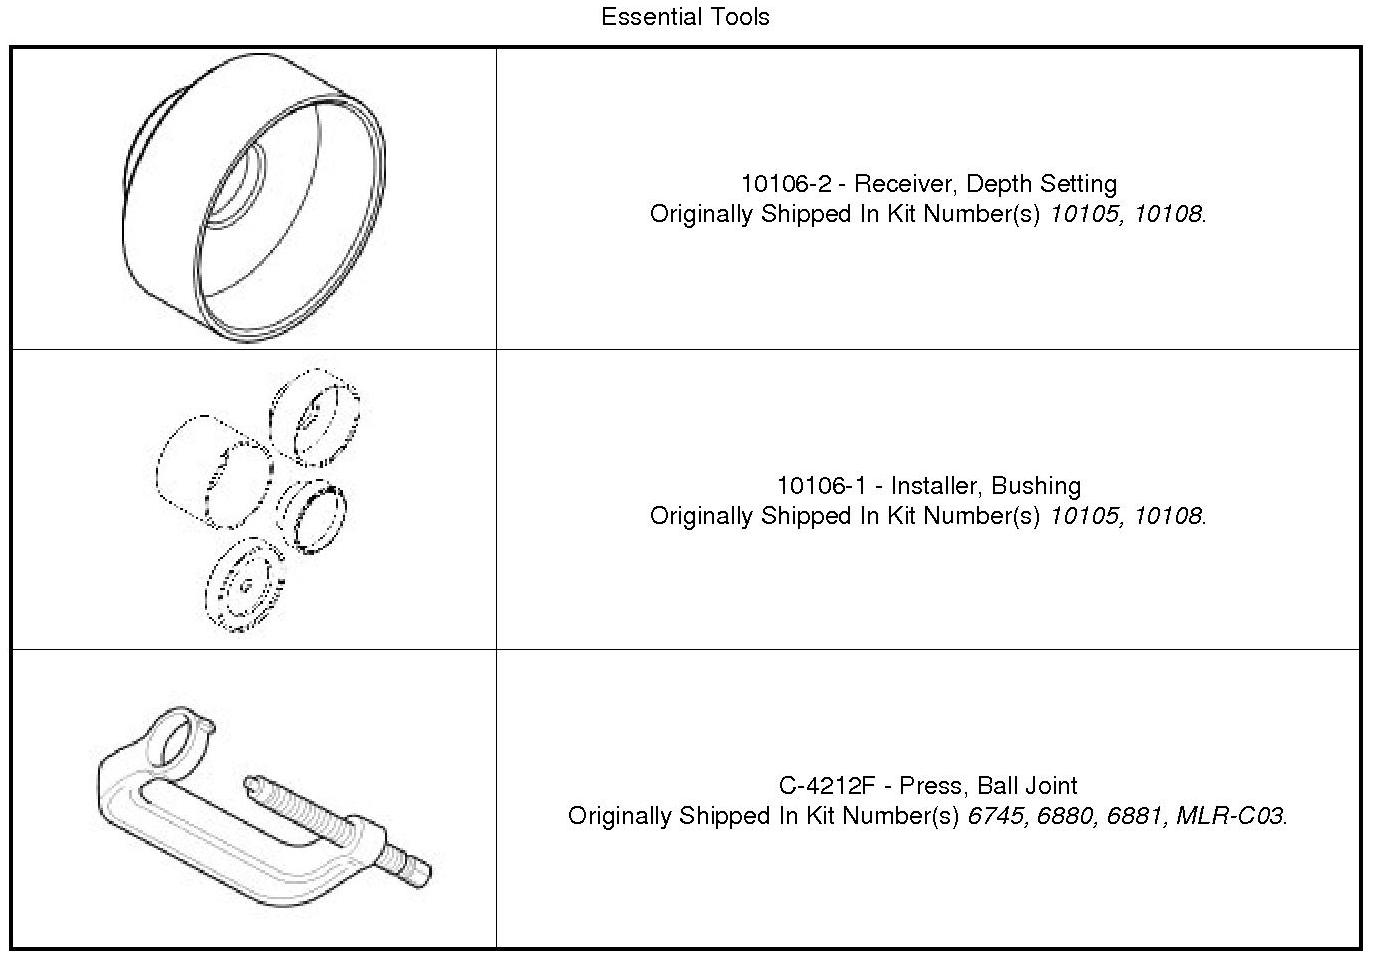
Special Tools:
CAUTION: Bushing must be correctly positioned in axle trailing arm to insure proper operation. If bushing orientation is off by more than 10 degrees in either direction, NVH issues can occur.
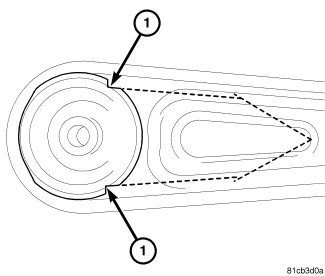
1. Position NEW bushing in axle trailing arm bore from outboard side as shown. Line up notches (1) as shown to point directly toward rear of arm.
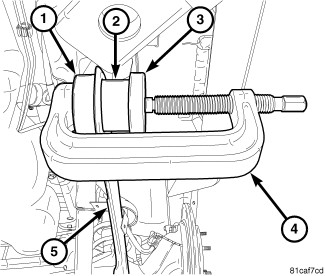
2. Assemble special tools Receiver (1) and Installer (3) on Press (4).
3. Place special tool assembly over bushing (2) and trailing arm (5) as shown. Use care not to rotate bushing when installing special tools. When properly installed, Press screw-drive will be toward outside of vehicle.
4. Using hand tools, slowly tighten Press (4) screw-drive, pressing bushing into trailing arm. Tighten Press screw-drive until integrated stop is met. Do not overtighten.
5. Remove tools from axle trailing arm and inspect bushing making sure it is positioned as requested in 1.
6. If the opposite side bushing needs to be installed, repeat 1 through 5 on that side of the vehicle.
7. Reposition forward ends of axle trailing arms (2) downward into mounting brackets (1).
8. Due to track bar mounting, it will be easiest to locate right side pivot thru-bolt mounting hole first. Once located, insert a screwdriver or drift punch through hole in right forward mounting bracket and bushing to temporarily hold it in place.
9. On left side of vehicle, Insert thru-bolt (3) through mounting bracket (4) and bushing. Install nut (1) on end of thru-bolt. Do not tighten at this time.
10. On right side of vehicle, remove previously installer screwdriver or drift punch and Insert thru-bolt (3) through mounting bracket (4) and bushing. Install nut (1) on end of thru-bolt. Do not tighten at this time.
11. Remove jack stands from under rear axle.
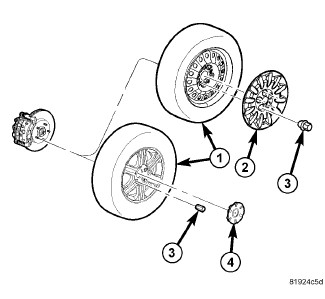
12. On each side of vehicle, install tire and wheel assembly (1) See: Wheels and Tires > Removal and Replacement > Tires And Wheels - Installation. Install and tighten wheel mounting nuts (3) to 135 Nm (100 ft. lbs.).
13. Lower vehicle.
14. Position vehicle on alignment rack/drive-on lift. Raise lift as necessary to access the rear suspension while keeping vehicle at curb (riding) height.
15. Tighten both trailing arm mounting bracket pivot thru-bolts (3) to 175 Nm (129 ft. lbs.).
________________________________________
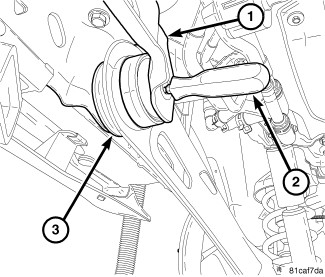
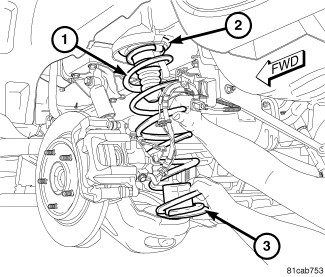
Two other things I would recommend checking are the tracking bar and coil spring itself for cracking. See picture 9 for tracking bar picture and 10 for coil spring.
_______________________________________
Check these things and let me know what you find or if you have other questions.
Take care,
Joe
Images (Click to enlarge)
Dec 12, 2018 at 8:13 PM