Hi and thanks for using 2CarPros.com.
First, here is a link that discusses in general how to replace one:
https://www.2carpros.com/articles/how-to-replace-a-brake-master-cylinder
Next, the nut that you are referring to is a pain due to access. The way I have done it in the past is using a 1/4" drive ratchet, an extension, and a swivel. Other than that, it will drive you crazy.
I do not know if you need them, but here are the directions specific to your vehicle for part replacement. All attached pictures correlate with these directions.
___________________________________________
VACUUM BOOSTER REPLACEMENT
REMOVAL
1. On RHD vehicles remove the coolant reserve/overflow tank. Refer to Cooling System.
2. Disconnect brake lines at master cylinder.
3. Disconnect wire at combination valve differential pressure switch.
4. Remove nut mounting combination valve bracket to booster studs and remove valve.
5. Remove nuts mounting master cylinder to booster studs and remove cylinder.
6. Disconnect vacuum hose from booster check valve.
7. Remove knee blocker under the steering column.
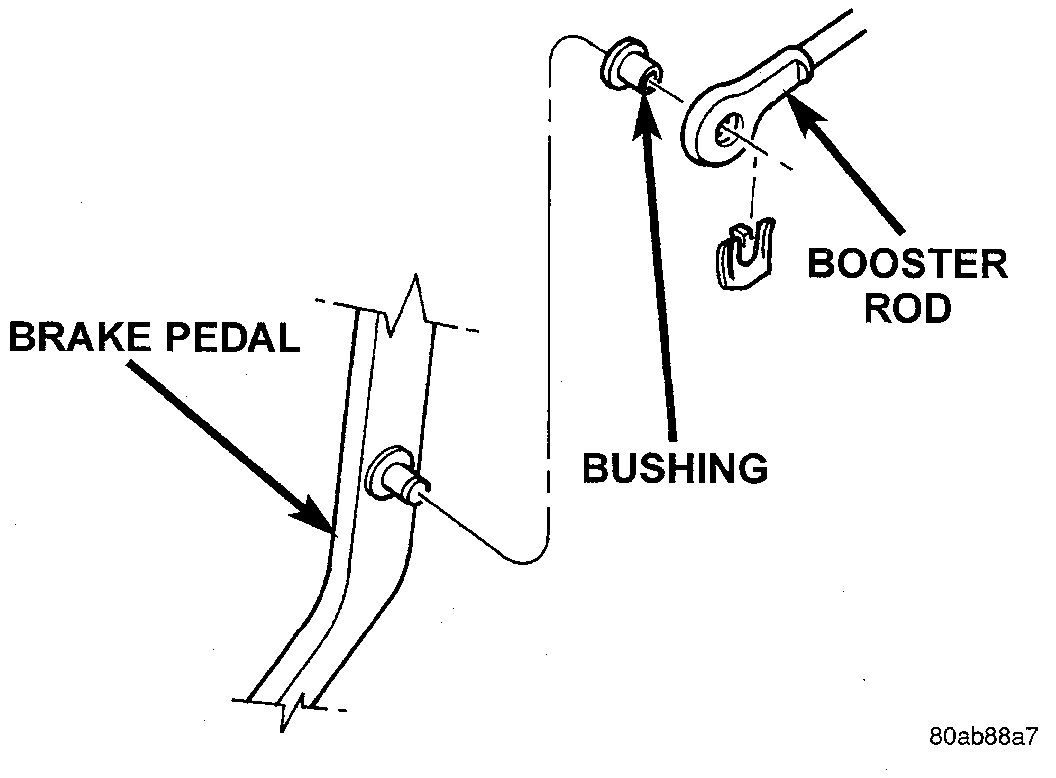
8. Remove retaining clip that secures booster push rod to brake pedal.
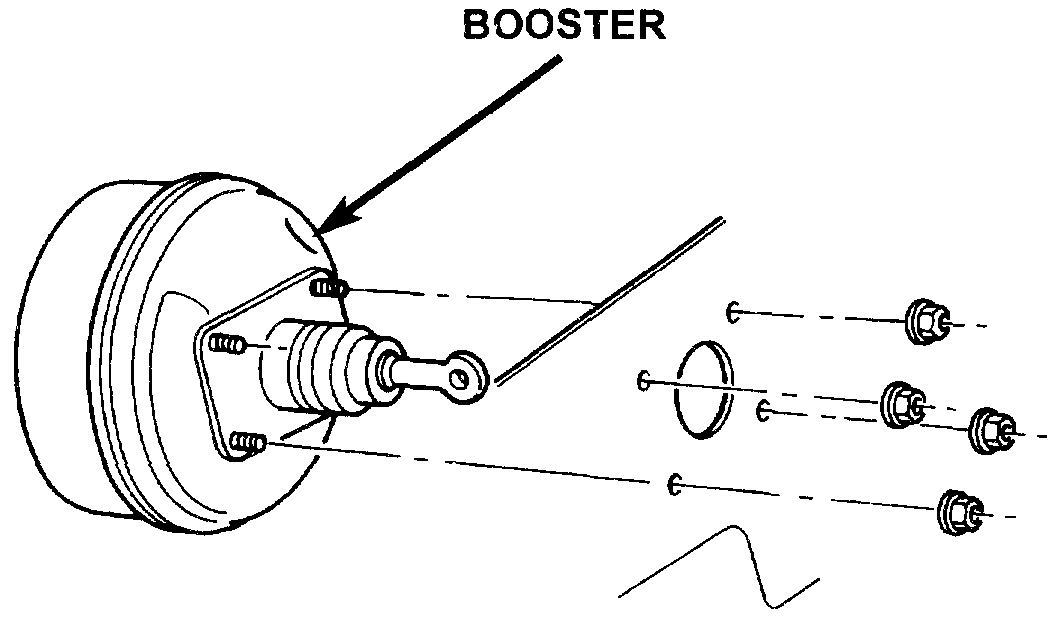
Booster Mounting
9. Remove nuts attaching booster to passenger compartment side of dash panel.
10. In engine compartment, slide booster studs out of dash panel, tilt booster upward, and remove booster from engine compartment.
11. Remove dash seal from booster.
INSTALLATION
1. Install dash seal on booster.
2. Align and position booster on dash panel.
3. In passenger compartment, install booster mounting nuts. Tighten nuts just enough to hold booster in place.
4. Slide booster push rod onto the brake pedal. Then secure push rod to pedal pin with retaining clip.
NOTE: Lubricate the pedal pin and bushing with Mopar multi-mileage grease before installation.
5. Tighten booster mounting nuts to 39 Nm (29 ft. lbs.).
6. Install the knee blocker.
7. If original master cylinder is being installed, check condition of seal at rear of master cylinder. Replace seal if cut, or torn.
8. Clean cylinder mounting surface of brake booster. Use shop towel wetted with brake cleaner for this purpose. Dirt, grease, or similar materials will prevent proper cylinder seating and could result in vacuum leak.
9. Align and install master cylinder on booster studs. Install mounting nuts and tighten to 17.5 Nm (155 inch lbs.).
10. Connect vacuum hose to booster check valve.
11. Connect and secure brake lines to combination valve and master cylinder. Start all brake line fittings by hand to avoid cross threading.
12. Install combination valve on booster studs. Tighten bracket mounting nuts to 17.5 Nm (155 inch lbs.).
13. Connect wire to combination valve switch.
14. On RHD vehicles install the coolant reserve/overflow tank. Refer to Cooling System.
15. Fill and bleed brake system.
16. Verify proper brake operation [before moving vehicle.
___________________________
I hope this helps. Let me know if you have other questions.
Take care,
Joe
Images (Click to enlarge)
May 20, 2021 at 10:18 AM