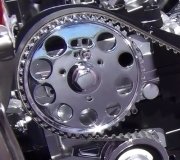
Okay, the 2.0L engine is only one with a belt. Others have chain. Below are replacement steps for your vehicle's timing chain.
Disconnect the negative battery cable.
Drain the cooling system and the engine oil.
Remove the front timing cover.
With the engine at TDC, rotate the crankshaft to align the timing marks on the sprockets so that they are as close as possible.
Remove the timing chain damper assembly.
Unfasten the camshaft sprocket-to-camshaft bolt(s), then remove the camshaft sprocket and chain and, if equipped, the thrust bearing
Remove the crankshaft sprocket/gear by sliding it forward.
8. Clean the gasket mounting surfaces. Inspect the timing chain and the sprockets for damage and/or wear, then replace any damaged parts.
To install:
Position the crankshaft so the No. 1 piston is at TDC of its compression stroke. On the 2.5L engine, install the thrust bearing.
Temporarily install the sprocket/gear on the camshaft, then position the camshaft so the timing mark on the gear is pointing straight down.
Assemble the timing chain to the gears so the timing marks are aligned, mark-to-mark.
Install the camshaft sprocket attaching bolt(s).
Install the camshaft thrust bearing, if not already done.
Install the timing chain damper.
Install the front cover and all related parts.
Connect the negative battery cable, then start the engine and check for leaks.
Saturday, January 23rd, 2010 AT 6:16 PM


