P0446 error code EVAP

Tiny
TRA
  • MEMBER
  • 2001 CHEVROLET LUMINA
  • 3.1L
  • AUTOMATIC
  • 60,000 MILES
Can engine cleaner/degreaser be used in place of carburetor spray in the test for vacuum hose leak near the manifold and elsewhere?
Thursday, October 18th, 2018 AT 6:44 PM

6 Replies

Tiny
ASEMASTER6371
  • MECHANIC
  • 52,797 POSTS
Good evening.

No, do not use engine cleaner for this.

It is better to have a smoke test done to determine the vacuum leak. With these engines, the idles do not change when the cleaner does find the leak like they used to do in the old days.

The smoke test will emit a smoke at the point of leaking and there will be no risk of fire.

Roy

https://www.2carpros.com/articles/how-to-use-an-engine-vacuum-gauge
Was this
answer
helpful?
Yes
No
Thursday, October 18th, 2018 AT 7:09 PM
Tiny
JACOBANDNICKOLAS
  • MECHANIC
  • 108,192 POSTS
Hi and thanks for using 2CarPros.com.

No, it will not work. The reason carburetor cleaner is used is because it is extremely flammable and if it enters the engine via a vacuum leak, the engine RPM's will increase.

Please keep in mind, checking for leaks with items such as carburetor cleaner or starting fluid can be dangerous and cause fires. Make sure to have a fire extinguisher nearby that is designed for engine type fires.

If you want to play it safe, use a vacuum gauge/pump to check for leaks. Here is a link that shows how it is done. This link also discusses using carburetor cleaner.

https://www.2carpros.com/articles/how-to-use-an-engine-vacuum-gauge

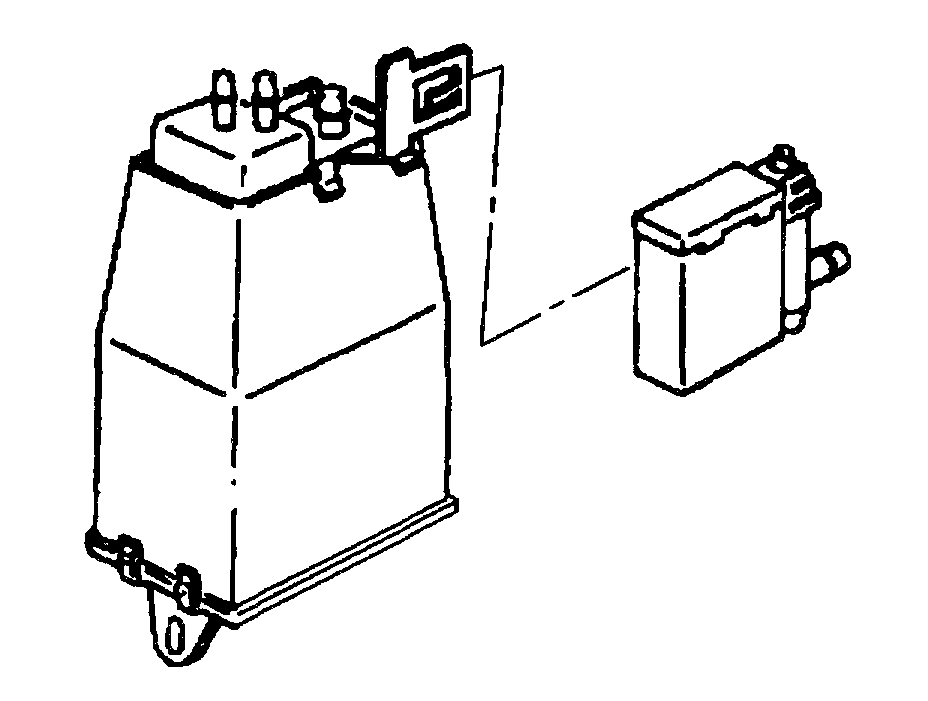
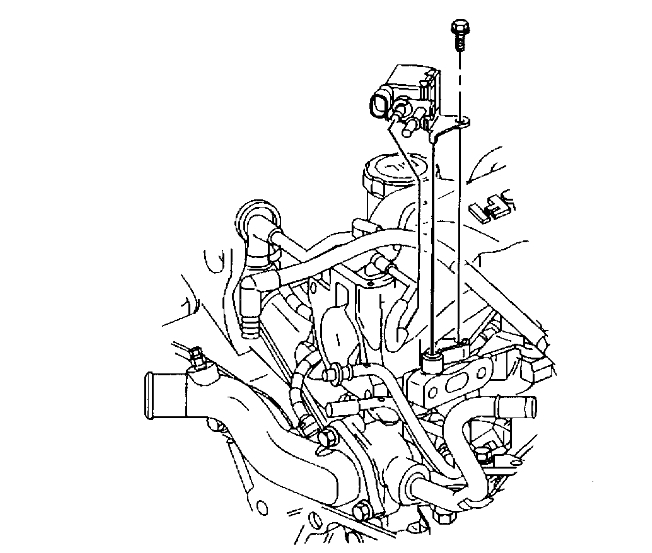
Keep in mind, the code indicates a problem with the EVAP vent system. The vent valve is under the vehicle near the fuel tank. I have attached a picture of what to look for. Also, here are the directions for replacement if you decide this is the issue.

____________________________

REMOVAL PROCEDURE
1. Raise the vehicle. Refer to Lifting and Jacking the Vehicle in General Information.
2. Bend the EVAP vent valve retaining tab.
3. Remove the valve from the EVAP vent valve bracket.
4. Disconnect the EVAP vent valve electrical connector.
5. Loosen the vent hose clamp and remove the vent hose from the EVAP vent valve.
6. Remove the EVAP vent valve from the vehicle.

INSTALLATION PROCEDURE
1. Connect the vent hose to the EVAP canister vent valve and tighten the hose clamp.
2. Connect the EVAP vent valve electrical connector.
3. Install the EVAP vent valve to the EVAP vent valve bracket.
4. Bend the EVAP vent valve retaining tap.
5. Lower the vehicle.
______________________________________________

I hope this helps. Let me know if you have other questions.

Take care,
Joe

Was this
answer
helpful?
Yes
No
Thursday, October 18th, 2018 AT 7:12 PM
Tiny
TRA
  • MEMBER
  • 41 POSTS
I tried YouTube to find too. Can you show any pictures or tell me exactly where this whole evap circuit control unit would be? I have only found one piece of information. That indicates it is supposed to be right behind one of the tires (back passenger side) under the car. On my 2001 Lumina I do not see anything there that looks like it.
Was this
answer
helpful?
Yes
No
Monday, November 26th, 2018 AT 10:14 PM
Tiny
ASEMASTER6371
  • MECHANIC
  • 52,797 POSTS
Good morning,

I attached pictures of the canister and the purge valve for you to view.

Joe gave you the view of the vent valve already.

Roy

REMOVAL PROCEDURE
1. Turn OFF the ignition.
2. Raise the vehicle. Refer to Lifting and Jacking the Vehicle in General Information.
3. Remove the driver side rear wheel and housing liner.
4. Remove the hoses from canister. Mark the hoses to ensure correct installation on new canister.

IMPORTANT: Inspect the canister hoses for damage or deterioration. Refer to Emission Hose Routing Diagram for proper routing of canister hoses. When replacing the lines, use the correct replacement part.

5. Remove the canister and latch assembly from the canister bracket.
6. Release the latch securing the canister.
7. Remove the canister.

REMOVAL PROCEDURE
1. Turn OFF the ignition.
2. Note the position of the EVAP hoses for installation.
3. Disconnect the electrical connector and hoses from the EVAP canister purge valve.
4. Remove the bolt from the valve mounting bracket.
5. Remove the EVAP vent valve.
Was this
answer
helpful?
Yes
No
+2
Tuesday, November 27th, 2018 AT 4:21 AM
Tiny
TRA
  • MEMBER
  • 41 POSTS
So driver's side then instead. Okay, thanks.
Was this
answer
helpful?
Yes
No
Tuesday, November 27th, 2018 AT 5:22 PM
Tiny
ASEMASTER6371
  • MECHANIC
  • 52,797 POSTS
You are welcome.

Let us know if you have any more questions.

Roy
Was this
answer
helpful?
Yes
No
Wednesday, November 28th, 2018 AT 4:50 AM

Please login or register to post a reply.

Sponsored links