Hi and thanks for using 2CarPros.com
Since all electrical components are good and doing as they should, the other thing that could cause this is a slipping belt or an idle that is too low.
First and easiest, make sure the engine idle speed is around 800 rpm's when the vehicle is in gear, idling, and the AC is on. If it drops below that, chances are the alternator will not produce enough current to charge the battery.
If the idle is below what I suggested, remove the idle air control valve. It is located on the throttle body. Make sure there is no excessive carbon in the valve or where it mounts into the throttle body. Note: The engine idle speed is controlled by the valve, which receives a signal from the power control module (PCM). The idle speed cannot be adjusted.
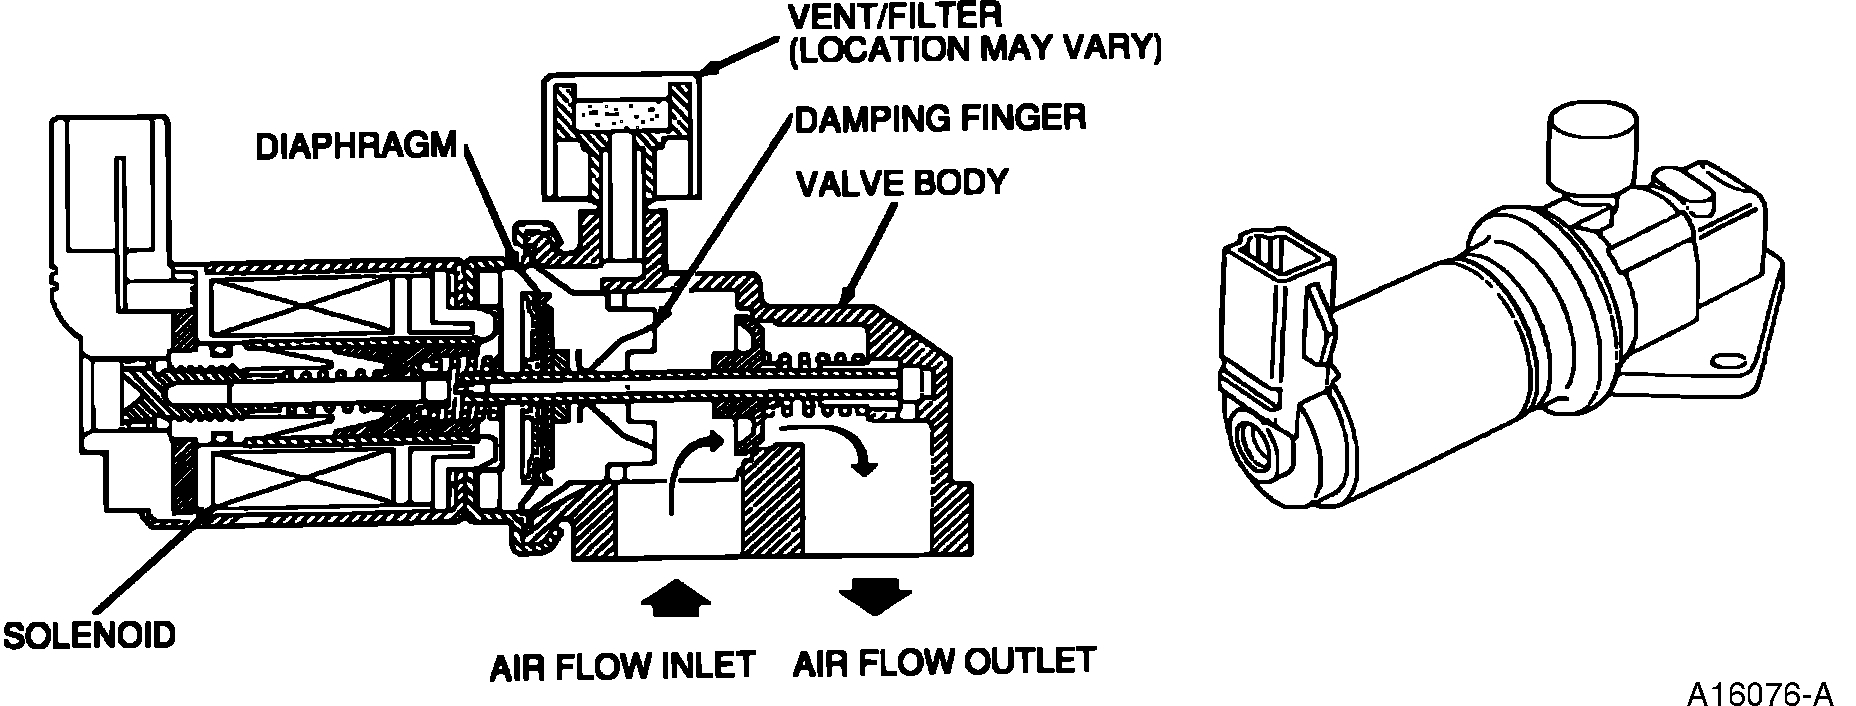
Also, if the IAC is excessively dirty, it really is not cleanable. It should be replaced. Picture 1 shows what it looks like.
Here are the directions for removing and replacing it.
__________________________________
NOTE: The Idle Air Control (IAC) valve cannot be cleaned. The IAC valve must be replaced.
CAUTION: Do not use Carburetor Tune-Up Cleaner D9AZ-19579-BA (ESR-M14P9-A) or any other type solvent or damage to the valve internal components may result.
REMOVAL
1. Disconnect battery ground cable.
2. Disconnect the IAC valve electrical connector from the engine control sensor wiring.
3. Remove the two IAC valve retaining screws.
4. Remove the IAC valve.
5. Remove and discard IAC valve gasket.
INSTALLATION
NOTE: If scraping is necessary, be careful not to damage IAC valve or intake manifold gasket surfaces, or drop material into intake manifold.
1. Clean IAC valve gasket mating surfaces.
2. Using a new IAC valve gasket, install IAC valve. Reverse removal procedure for installation.
3. Tighten retaining screws to 8-12 Nm (71-106 in lb).
4. Rotate screws an additional 85-95 degrees (clockwise).
5. Connect battery ground cable.
NOTE: When the battery has been disconnected and reconnected, some abnormal drive symptoms may occur while the powertrain control module relearns its adaptive strategy. The vehicle may need to be driven 10 miles or more to relearn the adaptive strategy.
________________________________________
If idle speed isn't a concern, we need to check the belt tension. Also, I remember a technical service bulletin related to alternator replacement. Basically, there is a place on the manifold that will not allow the alt to fully seat. As a result, the alternator doesn't sit flush. It could be causing a tension issue.
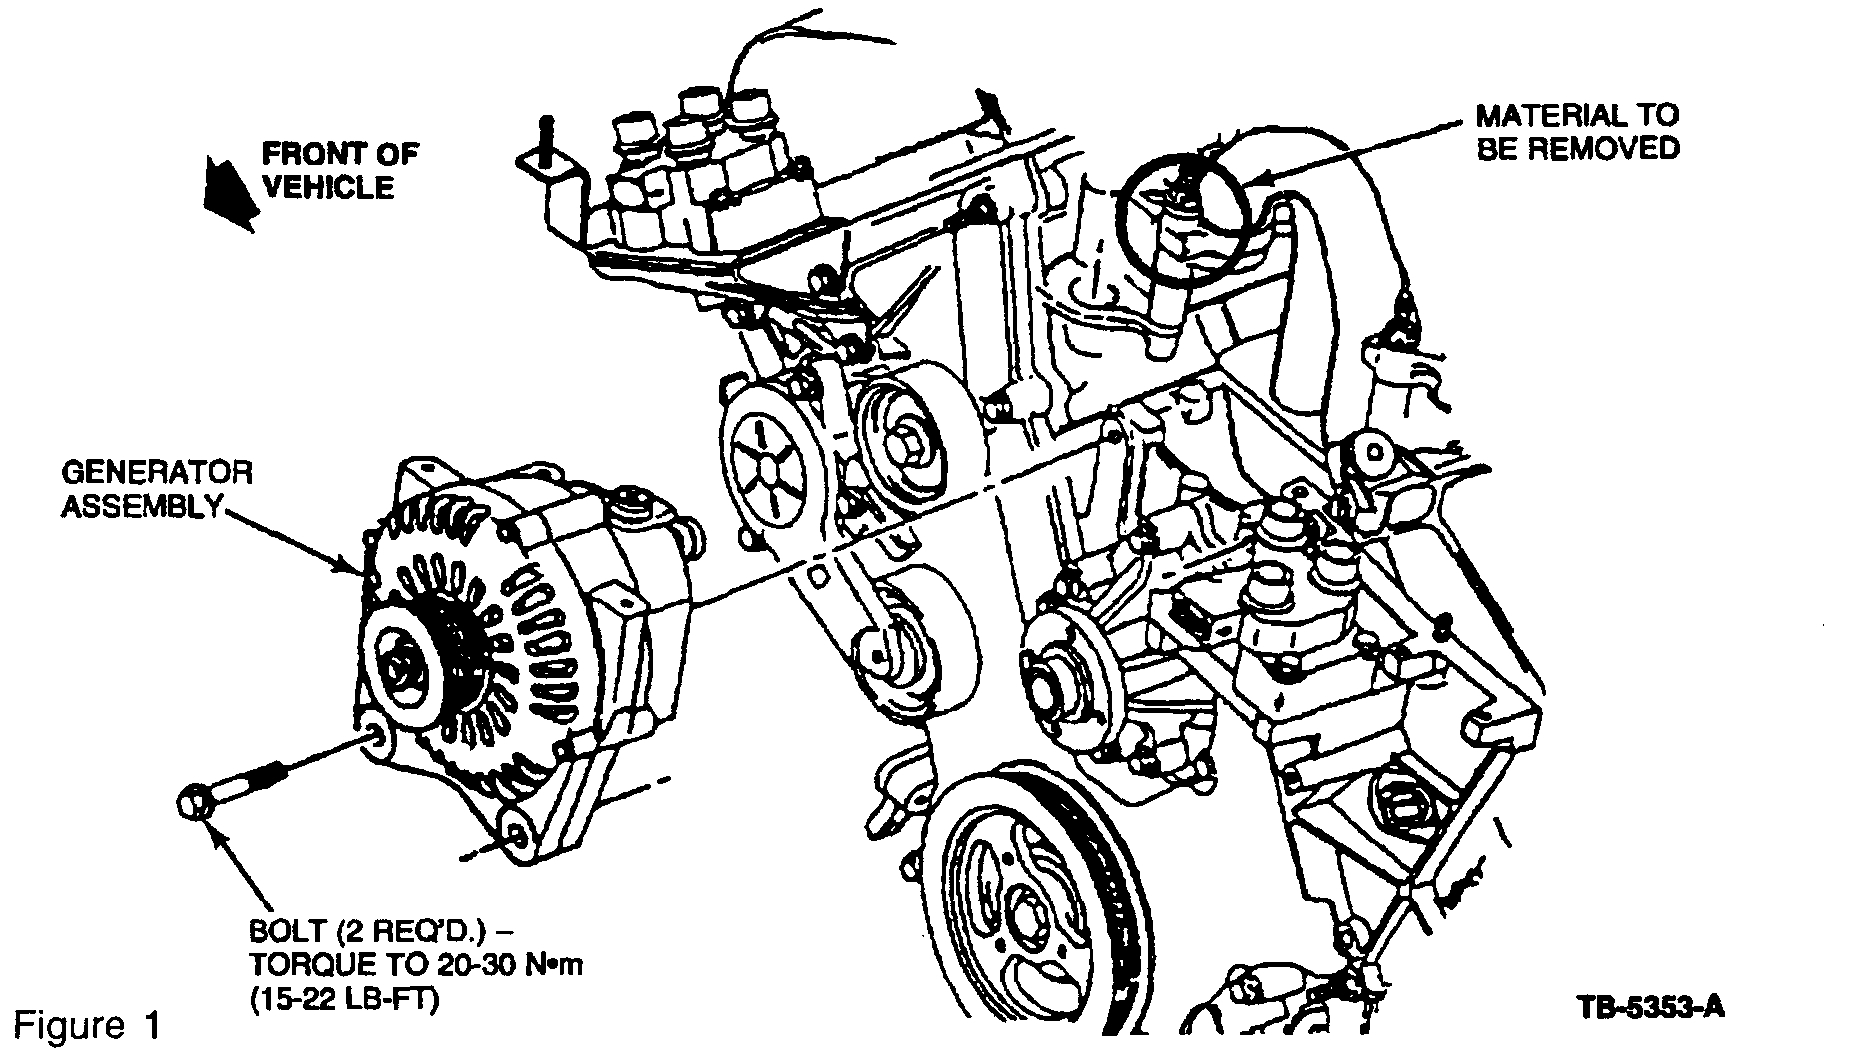
After writing that, I looked for the TSB and found it. Take a look at this. Picture 2 shows where it hits.
Article No.
97-26-8
12/22/97
GENERATOR - REPLACEMENT PROCEDURE - SERVICE TIP
LINCOLN-MERCURY:
1993-95 MARK VIII
ISSUE:
Replacement generators may interfere with a tab located at the base of the intake manifold and may not fit properly.
ACTION:
Remove the tab to allow proper clearance for the replacement generator. Refer to the following Service Procedure for details.
SERVICE PROCEDURE
1. Remove the defective generator as outlined in the appropriate Mark VIII Service Manual.
2. Locate the tab on the intake manifold casting at the base of the mounting hole boss which is located at the front of the manifold nearest the # 1 cylinder. Refer to Figure 1.
3. Hand file or grind the tab down to the profile of the mounting boss (approximately 5 mm (0.19")).
4. Loosely install the generator and verify there is no interference between the generator and the manifold.
5. Untape the christmas tree clip which is located on the wiring harness just prior to the B+ and regulator attachments.
6. Move the clip 25 mm (1") farther away from the attachments and retape the clip to the mounting point. Tie back any loose wire harness with tie-straps to prevent wire harness chafe or rub through.
7. Reinstall the generator following the procedure outlined in the Service Manual.
__________________________-
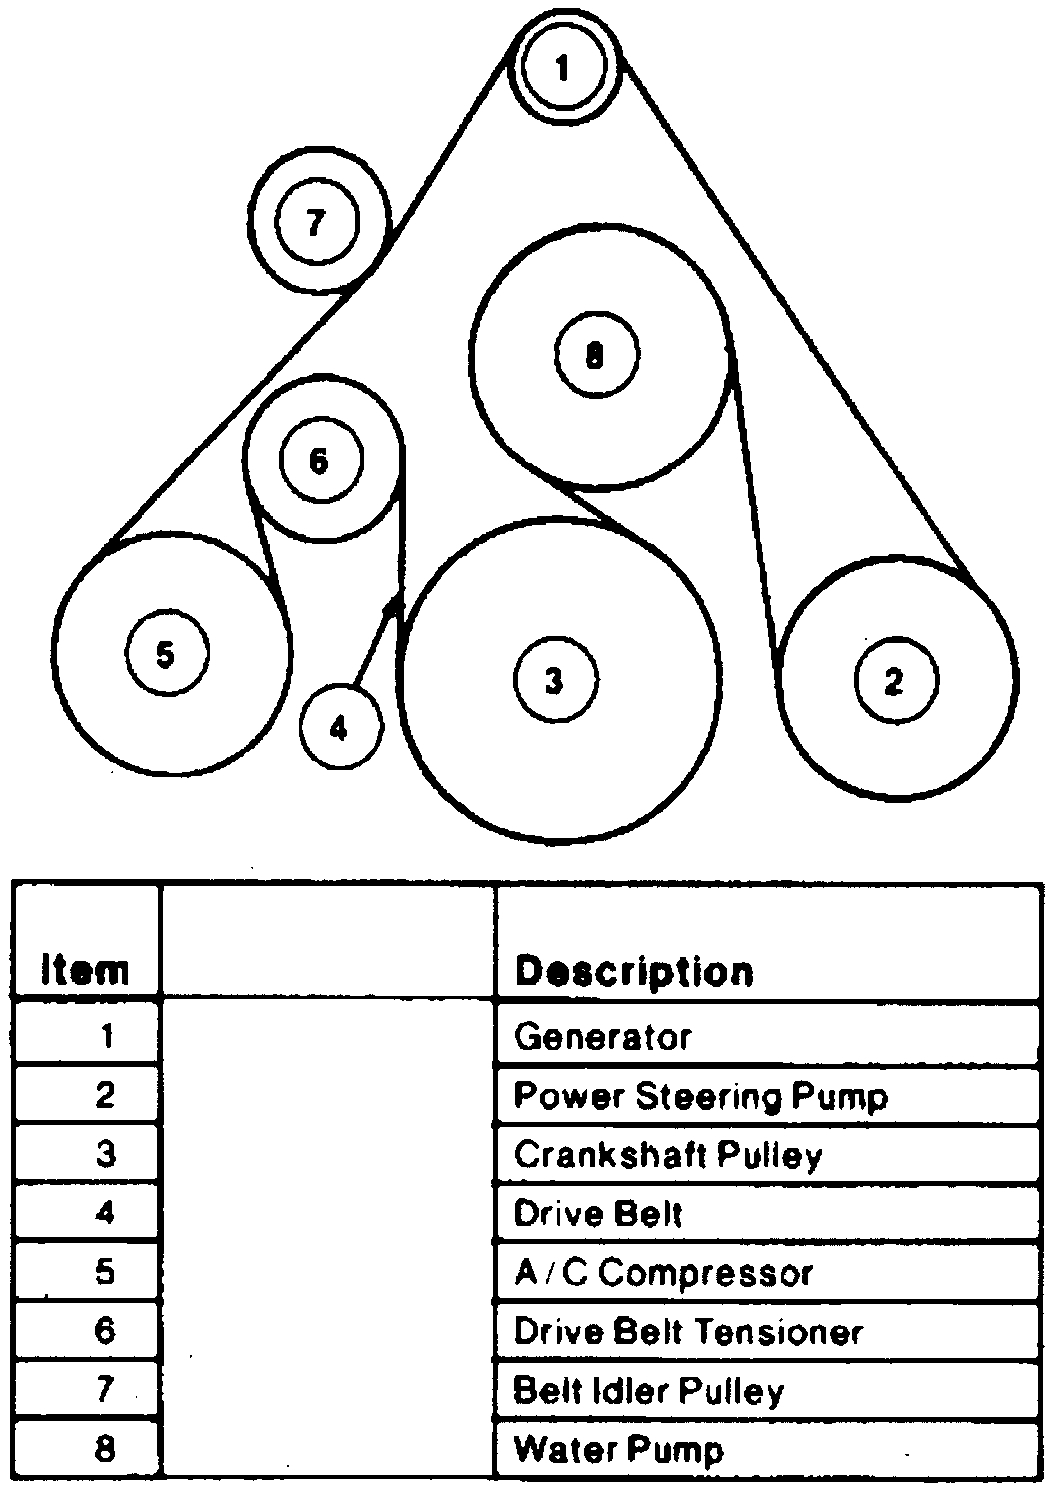
If that is not an issue, I question the belt. I realize they tighten with a self adjuster, but the belt can be worn or the tension-er could be weak. Automatic belt tensioners are spring loaded devices which set and maintain the drive belt tension. Automatic tensioners have belt wear indicator marks. If the indicator mark is not between the indicator lines, the belt is worn or an incorrect belt is installed. Check to make sure the belt is tight and not worn. Also, confirm proper routing. Picture 3 indicates the correct routing for your vehicle.
Let me know if any of this helps. Also, if you have other questions, let me know.
Since this only happens at idle, I suspect it is an RPM issue. That is my first suspect, so I suggest looking at that first. You may need to replace the idle air control valve.
Take care and let me know.
Joe
Images (Click to enlarge)
Nov 10, 2018 at 9:00 PM