Removal
CAUTION:Replacement of nuts and bolts: Various thread-locking devices are used on nuts and bolts throughout the vehicle. These devices restrict the number of times a nut or bolt can be used. GENERAL INFORMATION article for further information.
Raise the rear of the vehicle and support on axle stands.
Remove the relevant rear wheel. Refer to WHEELS & TIRES article.
CAUTION:Do not suspend the caliper from the brake hose as this will damage the hose.
Remove the brake caliper from the carrier.
Remove the caliper spring clip.
Remove the guide pin dust caps.
Slacken and withdraw the guide pins.
Remove the caliper from the carrier and secure to the suspension mounting bracket using a tie strap.
Fig. 42: Removing Brake Caliper From Carrier
Courtesy of JAGUAR CARS, INC.
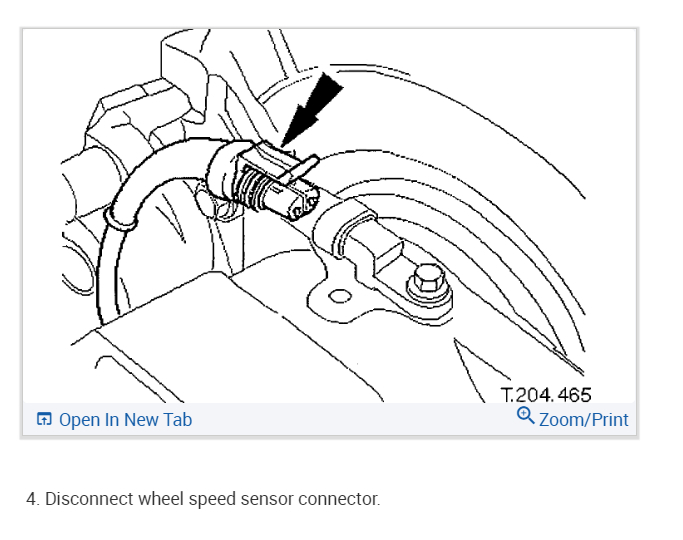
Disconnect the wheel speed sensor electrical connector.
Fig. 43: Disconnecting Wheel Speed Sensor Electrical Connector
Courtesy of JAGUAR CARS, INC.
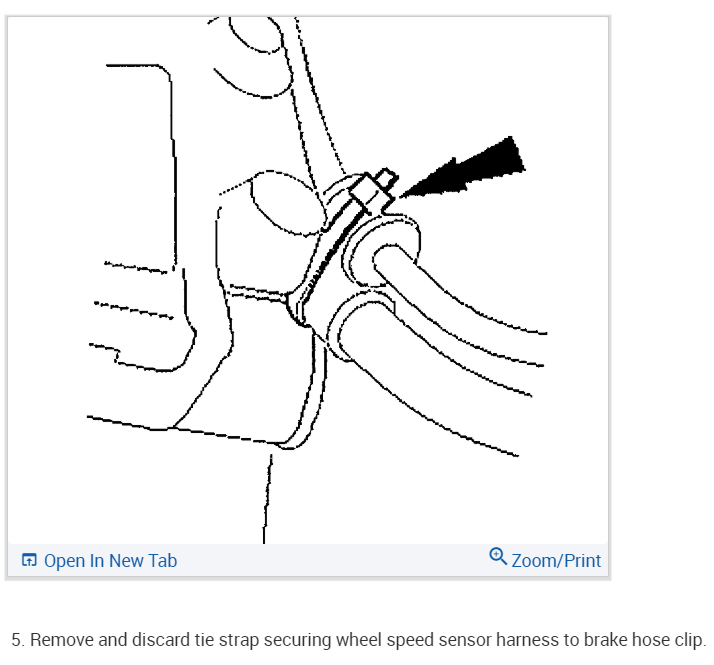
Remove and discard the tie strap securing the wheel speed sensor harness to the brake hose clip.
Fig. 44: Removing Tie Strap Securing Wheel Speed Sensor Harness To Brake Hose Clip
Courtesy of JAGUAR CARS, INC.
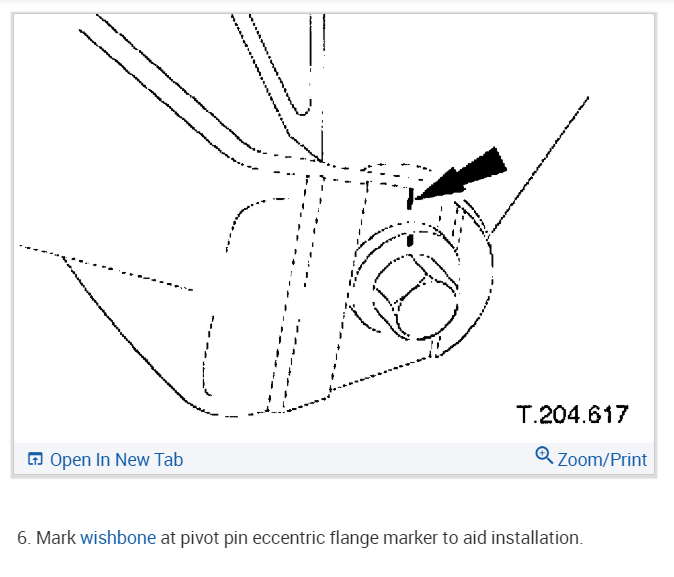
Mark the wishbone at the pivot pin eccentric flange marker to aid installation.
Fig. 45: Marking Wishbone At Pivot Pin Eccentric Flange Marker To Aid Installation
Courtesy of JAGUAR CARS, INC.
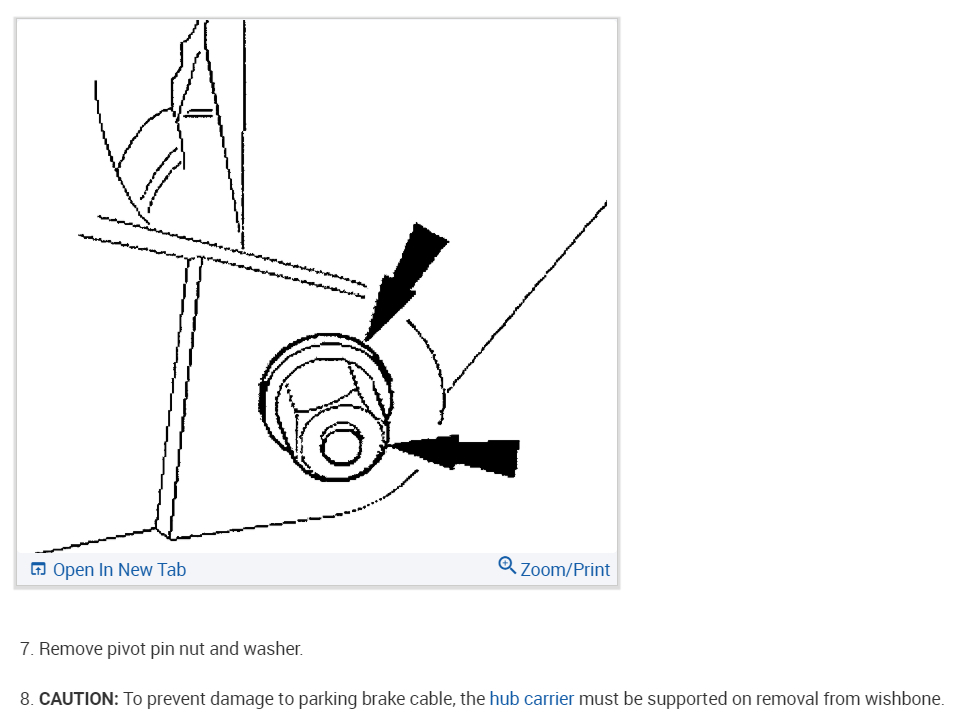
Remove the pivot pin nut and washer.
Fig. 46: Removing Pivot Pin Nut And Washer
Courtesy of JAGUAR CARS, INC.
CAUTION:To prevent damage to the parking brake cable, the hub carrier must be supported on removal from the wishbone.
Remove the hub carrier from the wishbone.
Remove the pivot pin from the hub carrier.
Withdraw the hub carrier and support on a block of wood.
Fig. 47: Removing Hub Carrier From Wishbone
Courtesy of JAGUAR CARS, INC.
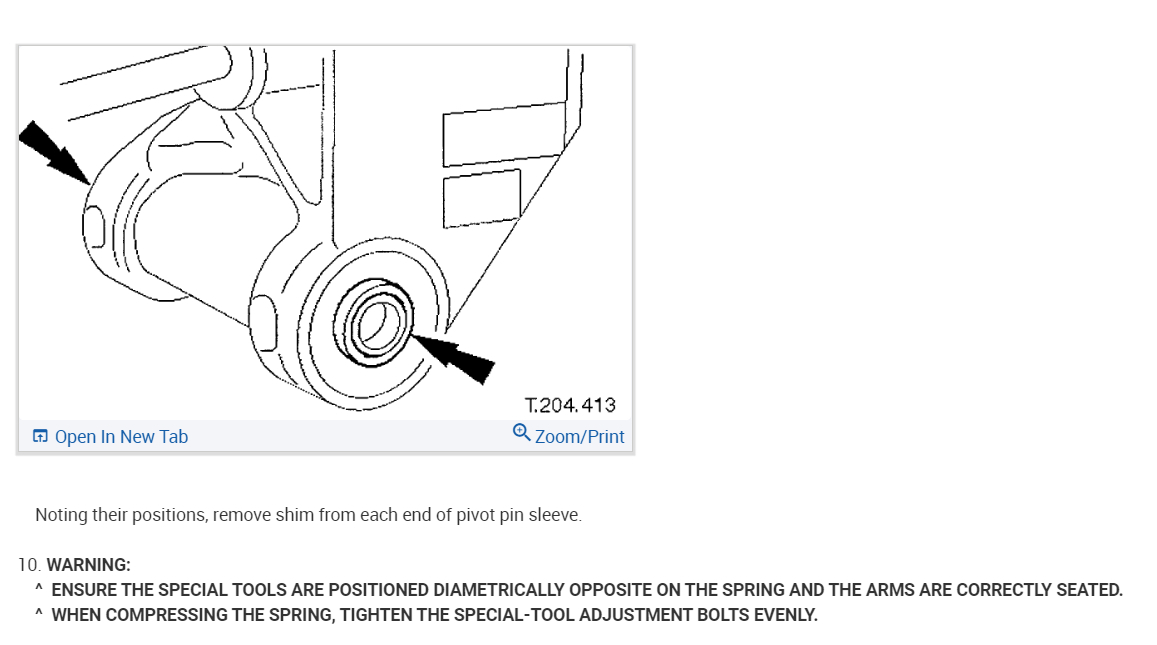
CAUTION:Note the position of the shims during removal. They must be returned to their original position during installation.
Fig. 48: Removing Shim From Each End Of Pivot Pin Sleeve
Courtesy of JAGUAR CARS, INC.
Noting their positions, remove the shim from each end of the pivot pin sleeve.
WARNING:ENSURE THE SPECIAL TOOLS ARE POSITIONED DIAMETRICALLY OPPOSITE ON THE SPRING AND THE ARMS ARE CORRECTLY SEATED.
WARNING:WHEN COMPRESSING THE SPRING, TIGHTEN THE SPECIAL-TOOL ADJUSTMENT BOLTS EVENLY.
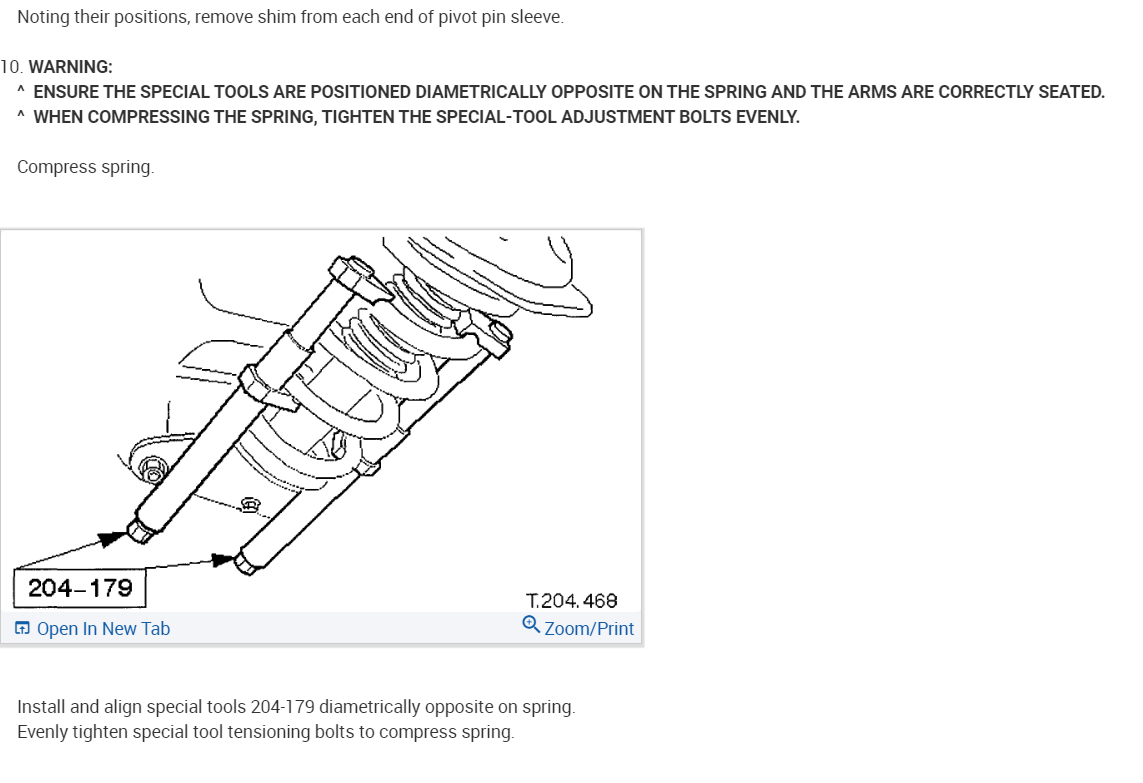
Compress the spring.
Install and align the special tools 204-179 diametrically opposite on the spring.
Evenly tighten the special tool tensioning bolts to compress the spring.
Fig. 49: Compressing Spring
Courtesy of JAGUAR CARS, INC.
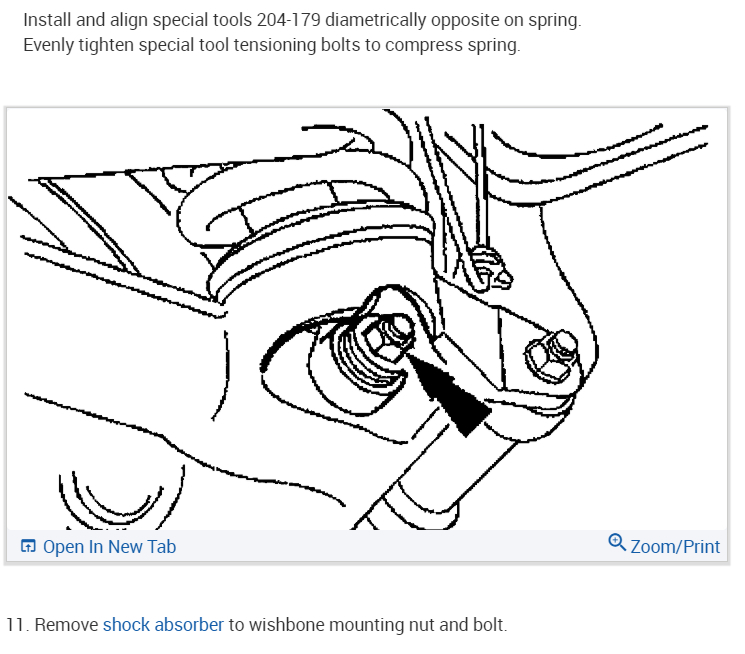
Remove the shock absorber to wishbone mounting nut and bolt.
Fig. 50: Removing Shock Absorber To Wishbone Mounting Nut And Bolt
Courtesy of JAGUAR CARS, INC.
Remove the nuts securing the shock absorber and spring upper mounting to the body.
Fig. 51: Removing Nuts Securing Shock Absorber And Spring Upper Mounting To Body
Courtesy of JAGUAR CARS, INC.
Using the special tools 204-179-1, secure the upper mounting to the spring.
Fig. 52: Securing Upper Mounting To Spring
Courtesy of JAGUAR CARS, INC.
Using a jack, retract the shock absorber through the wishbone aperture.
Fig. 53: Retracting Shock Absorber Through Wishbone Aperture
Courtesy of JAGUAR CARS, INC.
Position a bolt through the spring coils and shock absorber lower-bush, to temporarily locate the shock absorber.
Fig. 54: Positioning Bolt Through Spring Coils And Shock Absorber Lower-Bush
Courtesy of JAGUAR CARS, INC.
Partially lower the jack for access to the top of the shock absorber.
On vehicles with adaptive damping:
Disconnect the shock absorber electrical connector by pressing the lugs down and pulling the connector up.
Fig. 55: Disconnecting Shock Absorber Electrical Connector By Pressing Lugs Down And Pulling Connector Up
Courtesy of JAGUAR CARS, INC.
Lower and remove the jack.
Remove the shock absorber and spring assembly from the vehicle and place the assembly on a work bench.
Clean the upper mounting spring location.
Remove the pigtail seat and clean the wishbone lower spring location.
Fig. 56: Removing Pigtail Seat And Cleaning Wishbone Lower Spring Location
Courtesy of JAGUAR CARS, INC.
With assistance, manually compress the shock absorber and withdraw the bolt from the spring coils.
Fig. 57: Compressing Shock Absorber And Withdrawing Bolt From Spring Coils
Courtesy of JAGUAR CARS, INC.
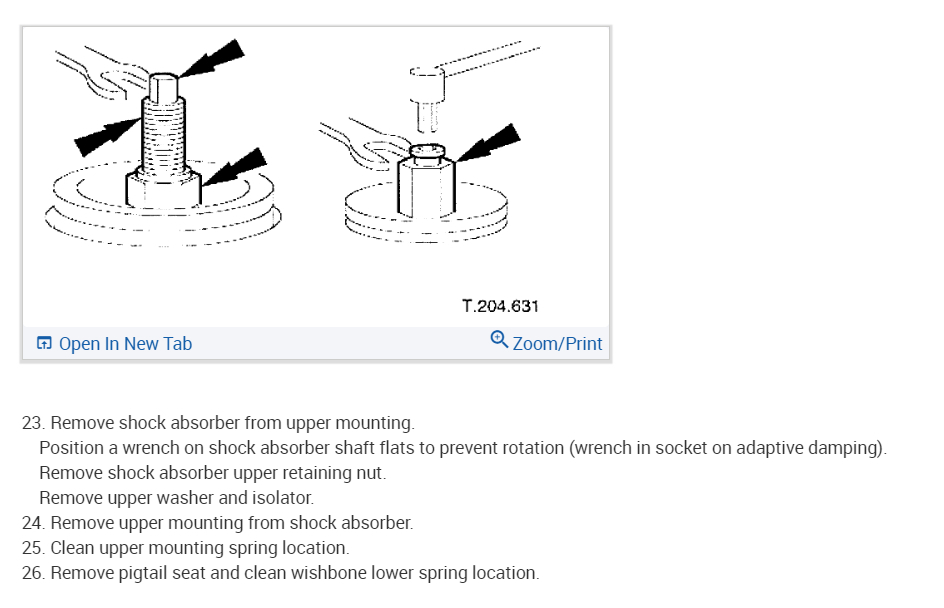
Remove the shock absorber from the upper mounting.
Position a wrench on the shock absorber shaft flats to prevent rotation (wrench in socket on vehicles with adaptive damping).
Remove the shock absorber upper retaining nut.
Remove the upper washer and isolator.
Fig. 58: Removing Shock Absorber From Upper Mounting
Courtesy of JAGUAR CARS, INC.
Remove the special tools 204-179-1 and remove the upper mounting from the spring.
Fig. 59: Removing Upper Mounting From Spring
Courtesy of JAGUAR CARS, INC.
Remove the shock upper mounting assembly from the spring.
Remove the spring upper isolator.
Remove the upper spring pan.
Remove the packing ring.
Dec 31, 2009 at 9:24 AM