Intake manifold replaced, no start

Tiny
JOHNMASON15034
  • MEMBER
  • 2006 AUDI S4
  • 4.2L
  • V8
  • 4WD
  • AUTOMATIC
  • 161,012 MILES
I went to replace the whole intake manifold on my car with a salvaged one that was tested to be solid. It came with a new fuel rail and injectors so I figured I’d just use those instead of the current ones on the vehicle (even tho the current ones on the car had no issues) I figured use the ones I just got because they have less miles. So I remove the old gasket, used fuel resistant gasket maker to reseal, reconnected injector connectors and fuel line to fuel rails. I let the gasket maker set for a day came back tried to start the car and it wouldn’t start. Not even a bit. It would crank until the battery died but no start. I swapped out the old injectors thinking well maybe the injectors were bad, still no start. I take the intake back off and the gasket maker was still wet and had dripped into the intake ports where the valves were. I cleaned it all out as best I could, tried to start it again and again crank but no start. Mind you the car had no issue but an intake leak before hand and I’m not sure what to do at this point. Please help. Could the fuel rails have air in them? Is it because the gasket maker didn’t seal the intake? I’m not sure what to do so if I could get some guidance it would be a big help.
Tuesday, December 18th, 2018 AT 7:26 PM

9 Replies

Tiny
JACOBANDNICKOLAS
  • MECHANIC
  • 108,310 POSTS
Hi and thanks for using 2CarPros.

First, if you only used gasket maker, take it apart, clean the gasket maker off, and install the correct gaskets.

I have sent the directions three times and it won't send. I am going to try this on two different replies. This will include the specific directions for replacement. The next will be the pictures.

Make sure the guide pins aren't holding the manifold up from properly attaching.
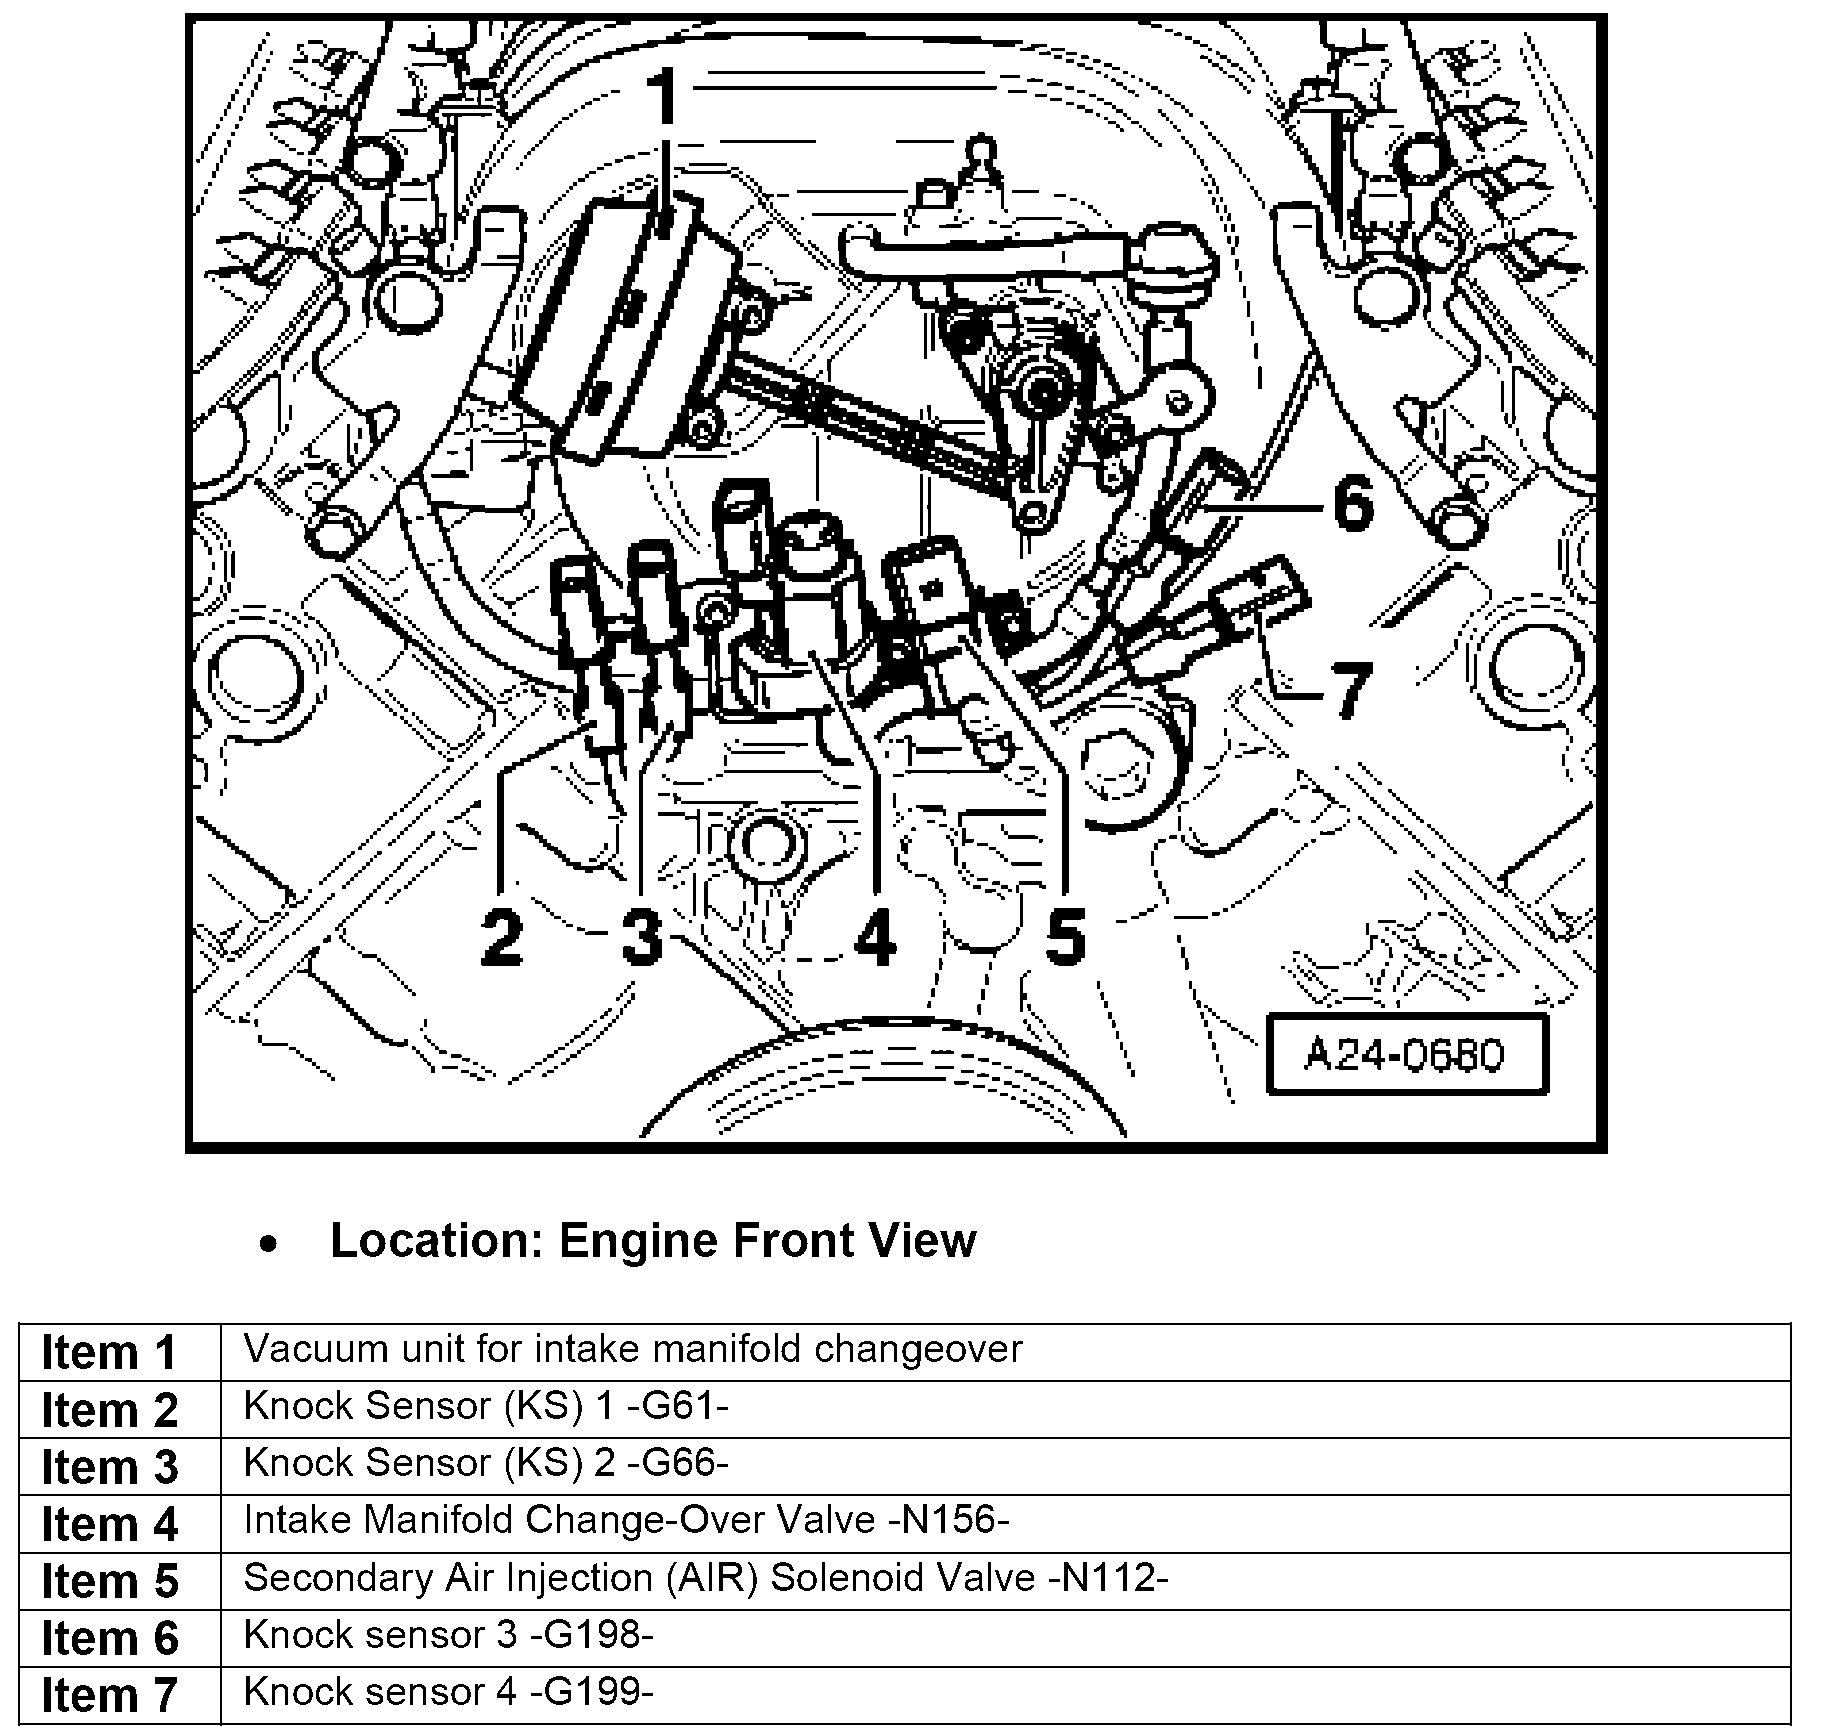
_____________________________

INTAKE MANIFOLD
Intake Manifold

Removing

All cable ties opened or cut during engine removal must be reinstalled at the same locations during installation.

- Bring lock carrier into service position. Refer to => [ Lock Carrier, Moving into Service Position ] See: Engine > Removal and Replacement > Lock Carrier, Moving Into Service Position.

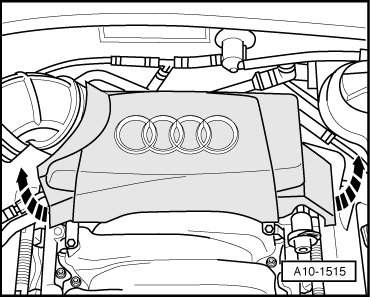
- Remove rear engine cover - arrows -.

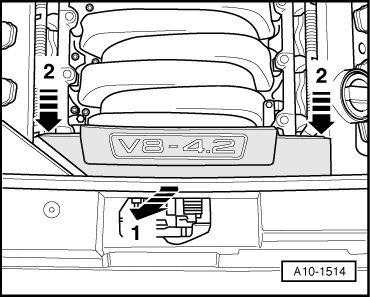
- Remove front engine cover - arrows 1 and 2 -.

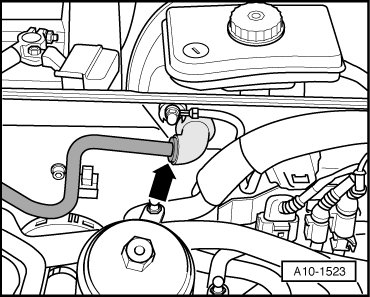
- Disconnect vacuum line - arrow - to brake booster at bulkhead.

- If installed, disconnect vacuum line - arrow - to vacuum reservoir.

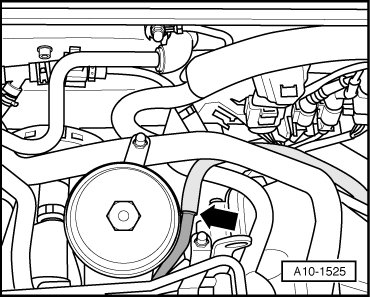
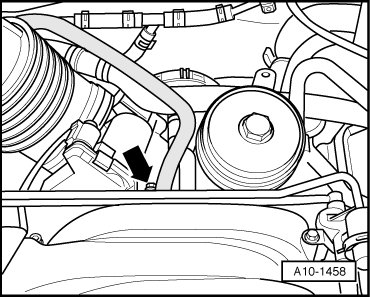
- Disconnect vacuum hose - arrow - from intake manifold.

- Disconnect electrical connection - 1 - at throttle valve control module (J338).

- Disconnect vacuum hose - 2 -.

- Remove air guide hose - 3 -.

- Disconnect crankcase ventilation hose - 4 - at intake pipe.

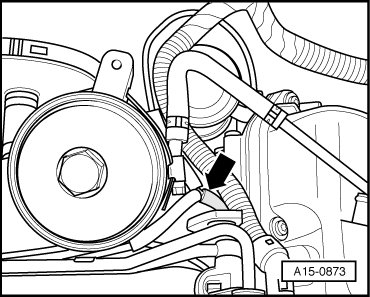
- If installed, disconnect vacuum line at area designated with - arrow -.

- Remove electrical harness connectors - 1 to 4 - toward front from brackets on intake pipe.

The electrical connections must not be separated.

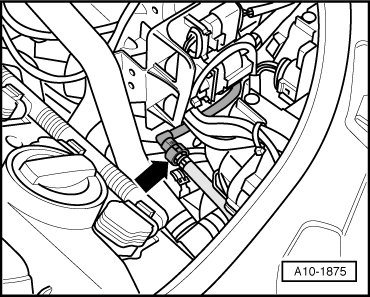
- Disconnect vacuum hose - arrow - at T-piece.

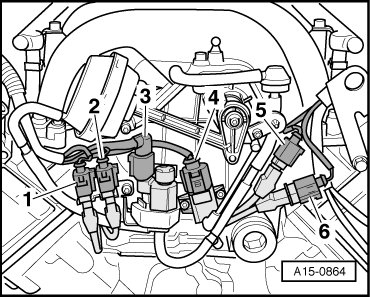
- Disconnect connector strips - 1 - and - 5 - at fuel injectors.

- For vehicles with fuel return line, disconnect vacuum line - 4 - on fuel pressure regulator.

- Remove retaining bolts - 2 - and - 3 - for fuel rail pipe.

- Remove fuel distributor together with fuel injectors from intake manifold simultaneously upward and place it on a clean rag in engine compartment.

Carefully protect the removed fuel injectors from contamination.

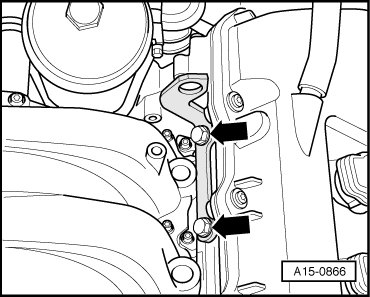
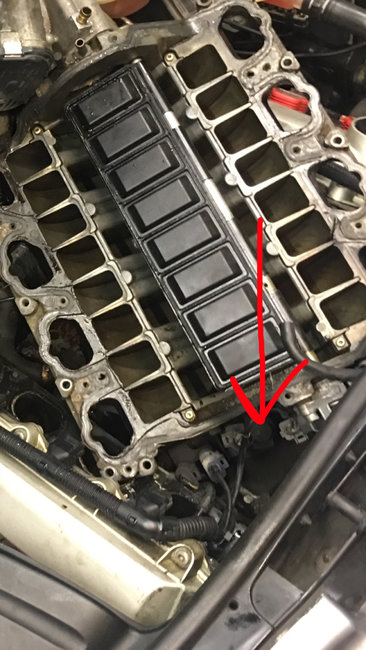
- Remove left rear engine lifting eye - arrows -.

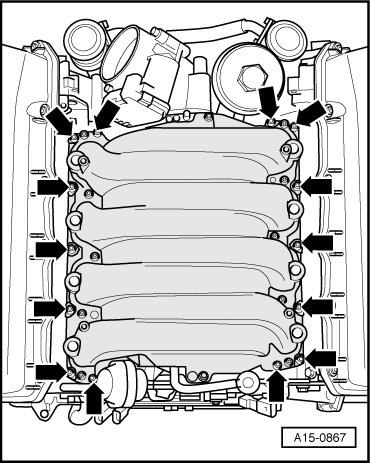
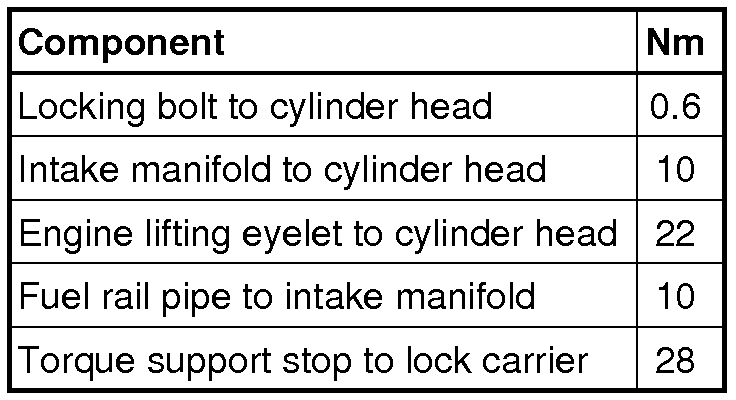
- Remove intake manifold bolts - arrows - and remove it.

Plug the intake ports of the cylinder head with clean rags.

Installing

Installation is in reverse order of removal, note the following:

Replace gaskets and O-rings.

Secure all hose connections using hose clamps appropriate for the model type.

During installation, all cable ties must be re-installed at the same location.

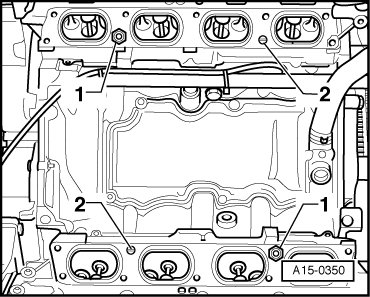
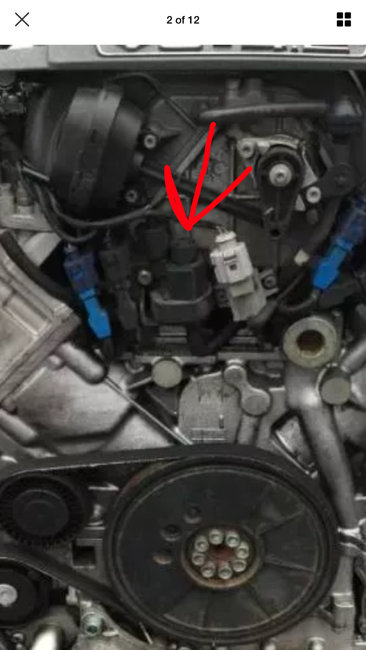
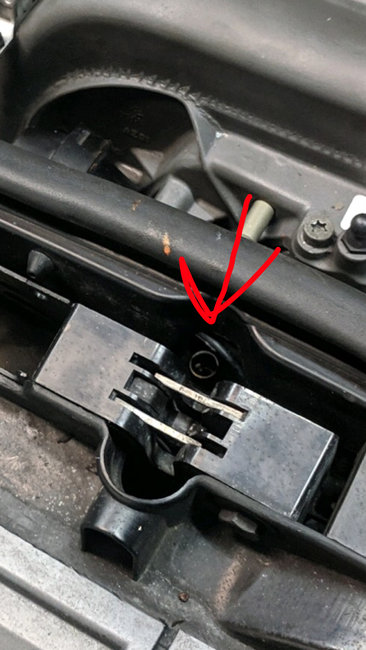
- Replace intake manifold gaskets, thereby removing the locking bolt - 1 -.

- Be aware of the alignment pins - 2 - when setting the intake manifold in place.

- Fasten intake manifold bolts in a diagonal sequence and in steps - arrows -.

- Install lock carrier with attachments. Refer to =>
Radiator Support See: Radiator Support > Removal and Replacement

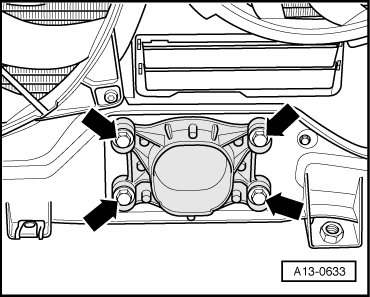
- Place torque support on rubber buffer for torque support and tighten bolts - arrows -.

- Install front bumper cover.

- Check headlight adjustment.

Tightening Specifications

Let me know if this helps.

Joe
Was this
answer
helpful?
Yes
No
+1
Tuesday, December 18th, 2018 AT 8:35 PM
Tiny
JACOBANDNICKOLAS
  • MECHANIC
  • 108,310 POSTS
Okay, I think this may work. One other thought, make sure to properly torque everything. The last picture shows torque specs.

Joe
Was this
answer
helpful?
Yes
No
+1
Tuesday, December 18th, 2018 AT 8:38 PM
Tiny
JOHNMASON15034
  • MEMBER
  • 5 POSTS
Okay will do. The no start wouldn’t have anything to do will disconnecting the fuel line would it?
Was this
answer
helpful?
Yes
No
+1
Wednesday, December 19th, 2018 AT 4:38 AM
Tiny
JACOBANDNICKOLAS
  • MECHANIC
  • 108,310 POSTS
Hi:

Disconnecting the fuel like shouldn't have caused this. However, make sure the fuel pressure is within spec and make sure you have spark to the plugs.

Let me know how it goes for you.

Joe
Was this
answer
helpful?
Yes
No
Wednesday, December 19th, 2018 AT 7:50 PM
Tiny
JOHNMASON15034
  • MEMBER
  • 5 POSTS
Would you happen to know what this is? It seems a tube of some sort and it’s now missing the cap or plug and I have no clue what it’s called or if it would have anything to do with my no start issue.
Was this
answer
helpful?
Yes
No
-1
Wednesday, December 19th, 2018 AT 7:56 PM
Tiny
JACOBANDNICKOLAS
  • MECHANIC
  • 108,310 POSTS
Welcome back:

I believe what you are pointing to is the intake manifold changeover valve. Yes, that can cause running issues, but it should still run.

Take a look at the picture I attached and see if that is the component you have in your pictures. It's number 4 in my picture. Also, let me know if it is electric or vacuum on your vehicle.
Was this
answer
helpful?
Yes
No
Wednesday, December 19th, 2018 AT 8:35 PM
Tiny
JOHNMASON15034
  • MEMBER
  • 5 POSTS
Okay, turns out I have got multiple misfires, and multiple injector circuits open. Any suggestions?
Was this
answer
helpful?
Yes
No
Thursday, December 20th, 2018 AT 7:23 PM
Tiny
JOHNMASON15034
  • MEMBER
  • 5 POSTS
It’s got a serious miss for some reason.
Was this
answer
helpful?
Yes
No
-1
Thursday, December 20th, 2018 AT 7:53 PM
Tiny
JACOBANDNICKOLAS
  • MECHANIC
  • 108,310 POSTS
Did you retrace the wiring to the injectors? If you are showing an open, that tells me either one of the pins in the connector isn't touching or you accidentally damaged wiring. Since the circuit is open, the affected injector isn't working and causing the misfire.
Was this
answer
helpful?
Yes
No
Thursday, December 20th, 2018 AT 9:12 PM

Please login or register to post a reply.

Sponsored links