Welcome to 2CarPros.
Honestly, I can help you with the removal and replacement of a direct fit part, but I have no idea if the other will work. There are specific mounting points, radiators have different capacities, they have different core thickness for different coolant abilities, if your car is an automatic, then it will have transmission cooling lines to it in a specific place, the radiator hoses could be located in different places and could be different sizes, the cooling fans have to mount to it and the list goes on. Without being there, I have no idea what exactly you are facing. I strongly recommend getting a direct fit part in this case.
_________________________________
Here are the directions for replacing the radiator with a direct fit part. The attached pics correlate with the directions. You will see in the pics, there are a lot of mounting points for different things that are needed and will most likely not be the same on the Suzuki radiator.
_________________________________
PROCEDURES
RADIATOR
REMOVAL
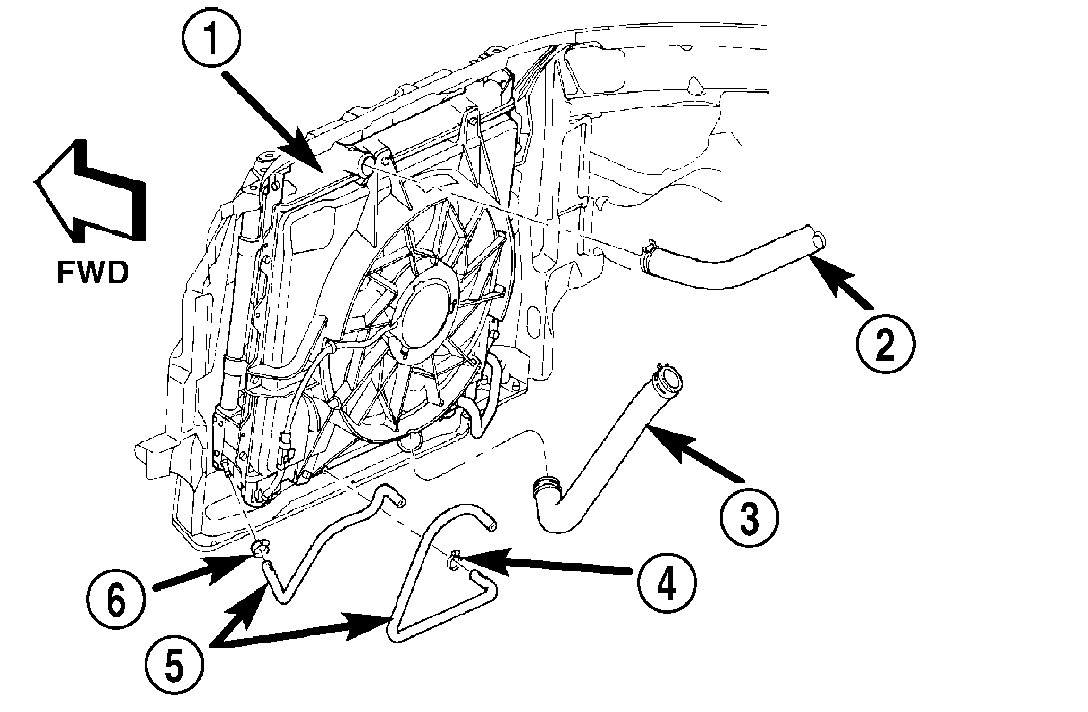
pic 1
WARNING: Do not open the radiator draincock with the system hot and under pressure because serious burns from coolant can occur.
NOTE: It is not necessary to discharge the air conditioning system to remove the radiator.
1. Drain cooling system.
2. Remove radiator fan.
3. Turbocharger Equipped Vehicles: Disconnect and cap the power steering hoses.
4. Disconnect lower radiator hose (3).
5. Non-Turbo Vehicles with Automatic Transmission: Remove two fasteners attaching transmission oil cooler to radiator.
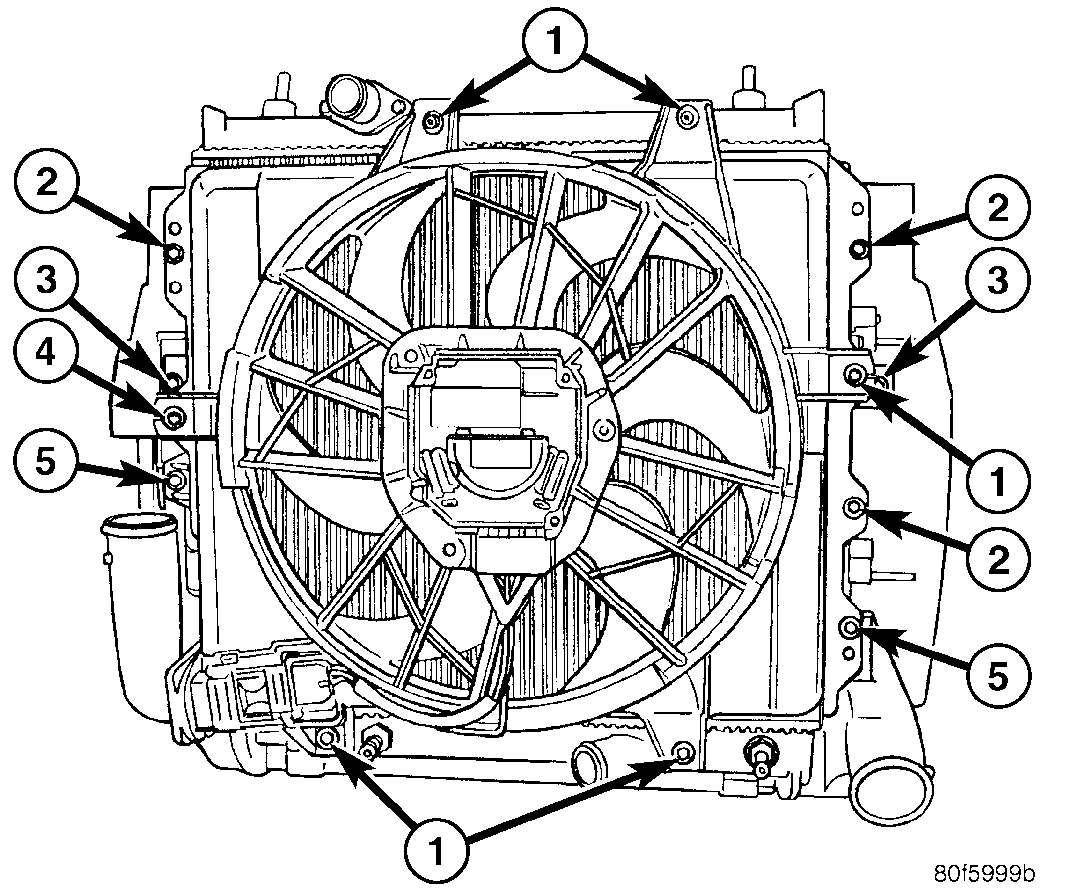
pic 2
6. Non-Turbo Vehicles: Remove lower radiator air seal from side radiator air seals (2, 3).
pic 3
7. Remove fasteners (2) attaching AC condenser to radiator. Reposition AC condenser.
8. Turbocharger Equipped Vehicles: Remove fasteners (5) attaching charge air cooler to radiator.
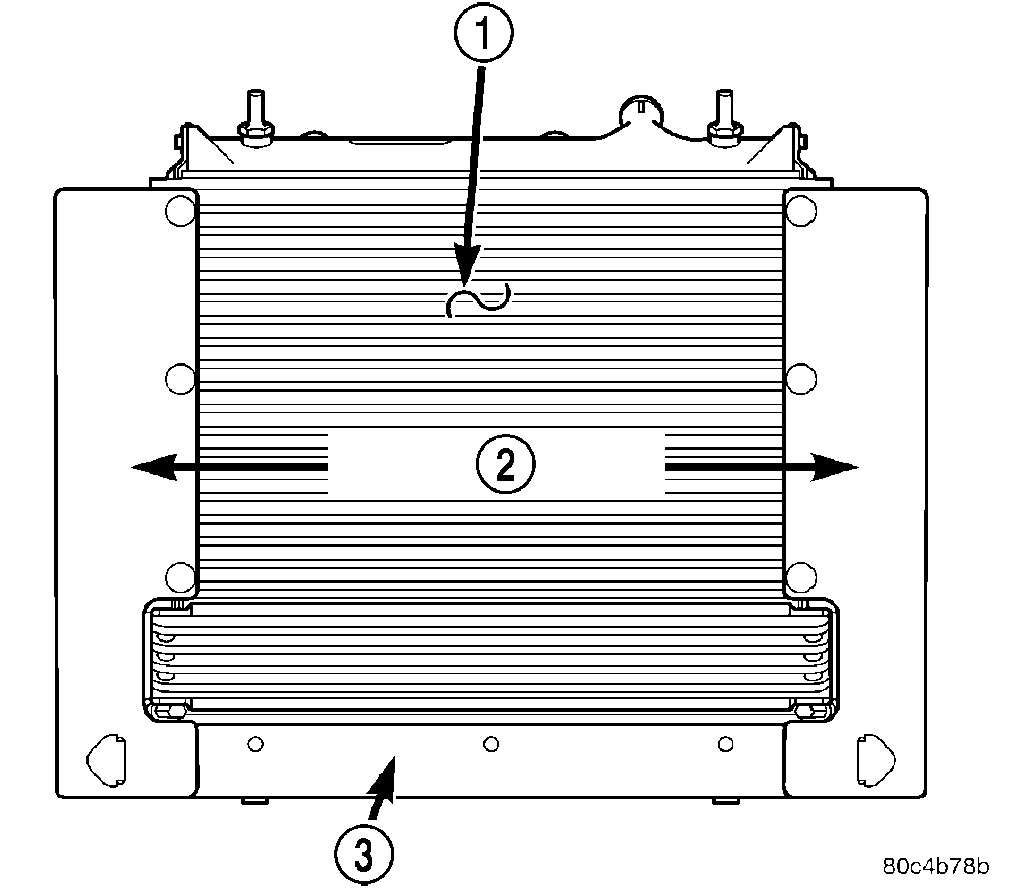
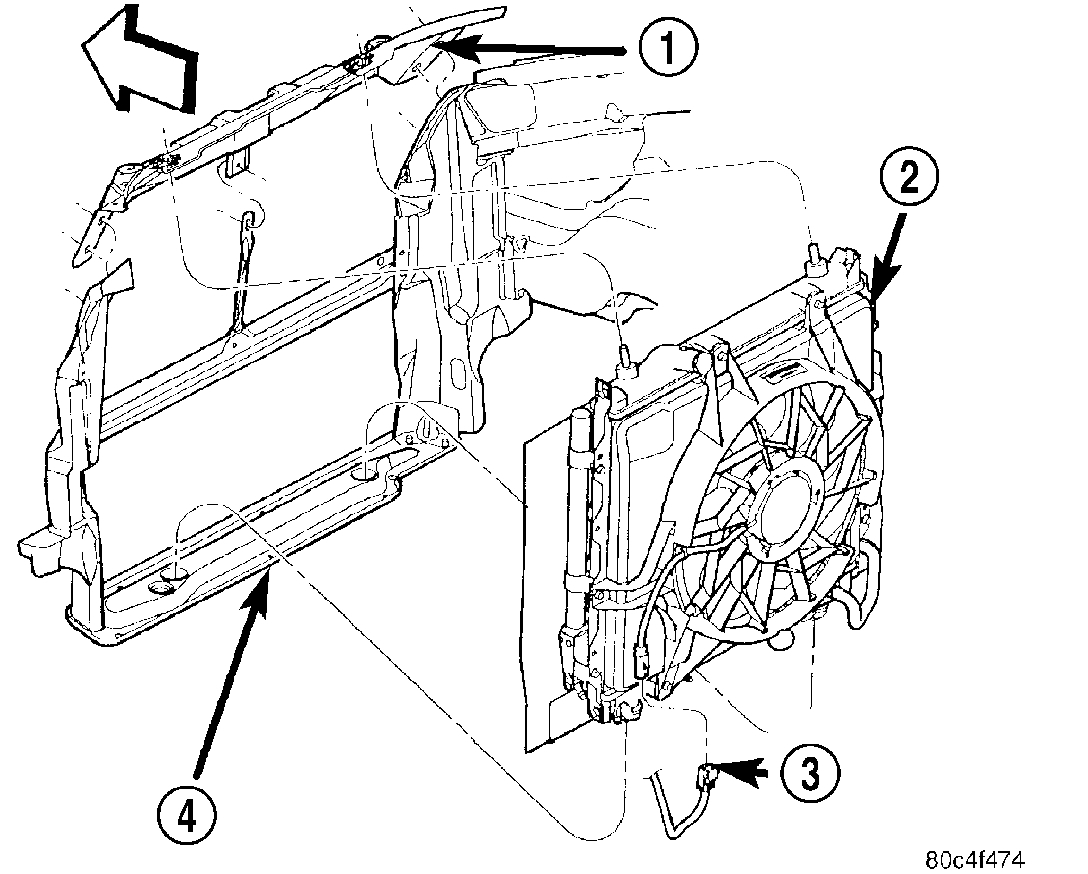
pic 4
9. Remove radiator assembly (2) by lifting it up from the engine compartment. Care should be taken not to damage the cooling fins and tubes during removal.
10. Non-Turbo Vehicles: Remove the lower air seal from radiator.
CLEANING
Clean radiator fins are necessary for good heat transfer. The radiator and air conditioning fins should be cleaned when an accumulation of debris has occurred. With the engine cold, apply cold water and compressed air to the back (engine side) of the radiator to flush the radiator and/or A/C condenser of debris.
INSPECTION
Inspect the radiator tanks for cracks, broken or missing fittings also inspect the joint where the tanks seam up to the radiator core for signs of leakage and/or deteriorating seals.
Inspect radiator core for corroded, bent or missing cooling fins. Inspect the core for bent or damaged cooling tubes.
INSTALLATION
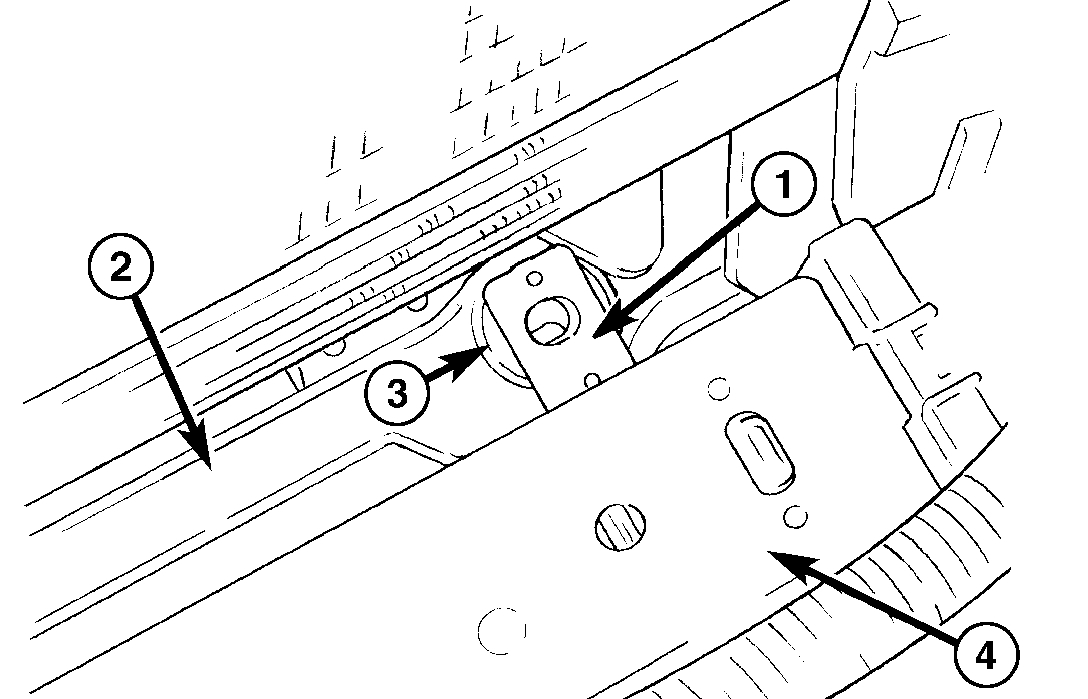
pic 5
1. Non-Turbo Vehicles: Install the lower air seal to radiator.
NOTE: Turbocharger Equipped Vehicles: When lowering radiator, make sure lower radiator pins engage properly through charge air cooler locating tabs (1).
2. Position radiator into mounting position.
3. Position A/C condenser against radiator. Hand start fasteners.
4. Turbocharger Equipped Vehicles: Install fasteners attaching charge air cooler to radiator. Torque fasteners to 8 Nm (70 inch lbs.).
pic 6
5. Install radiator fan/shroud assembly. Hand start fasteners.
6. Torque all condenser fasteners to 8 Nm (70 inch lbs.).
7. Torque all radiator fan fasteners to 6 Nm (55 inch lbs.).
8. Non-Turbo Vehicles with Automatic Transmission: Install fasteners attaching transmission oil cooler to radiator. Torque fasteners to 8 Nm (70 inch lbs.).
9. Raise vehicle on hoist.
pic 7
10. Non-Turbo Vehicles: Connect the lower air seal to the side air seals.
11. Connect lower radiator hose. Align the hose and position the clamp so it will not interfere with engine components.
12. Connect the radiator fan electrical connector.
13. Turbocharger Equipped Vehicles: Connect the power steering hoses.
14. Close radiator draincock.
15. Lower vehicle.
pic 8
16. Turbocharger equipped vehicles: Inspect radiator inlet neck O-ring. Replace if necessary. Install radiator inlet neck. Torque fasteners to 6 Nm (55 inch lbs.).
17. Connect upper radiator hose. Align the hose and position the clamp to prevent interference with the engine or hood.
18. Install upper radiator closure panel and center brace.
19. Install grille.
20. Install battery tray and battery.
21. Connect positive battery cable. Connect negative battery cable.
22. Install air cleaner housing assembly.
23. Fill cooling system with coolant.
24. Operate engine until it reaches normal operating temperature. Check cooling system for correct fluid level.
25. Turbocharger Equipped Vehicles: Check power steering fluid level. Fill as needed.
______________________
Let me know if this helps or if you have other questions.
Take care,
Joe
Images (Click to enlarge)
Jun 20, 2019 at 7:47 PM