1. Disconnect battery negative terminal
2. Lift off and secure vacuum tubing from the top of the rubber air intake connector which connect the top of the air filter to the throttle body
3. Remove remaining vacuum tubing from the rubber air intake connector, remove the screw clamp at the throttle body and remove the rubber air intake connector
4. Disconnect and plug the power steering hose at the power steering pump, detach the hose from securing mounts and secure the hose away from the area of interest
5. Detach the 1-1/2" diameter wiring harness from its mounting points and secure it away from the area of interest - a bungee or rubber strap secured to the underside of the hood works nicely
6. Remove the cotter pin from each of the two transmission linkage cables and disconnect each linkage from its transmission attachment points
7. Remove transmission cable bracket retaining clips from each of the two transmission linkage cables and disinsert both transmission linkage cables from the bracket
8. Remove the three nuts from the transmission cable bracket, remove the bracket and secure the transmission linkage cables away from the area of interest
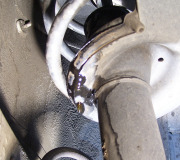
9. Inspect the heater coolant tubing and replace if worn. You may wish to disconnect the heater coolant tubing in the area of the speed sensor to gain working room; if so, cap the tubing or capture the coolant. NOTE: if you remove the heater tubing then replace the tension spring clamp with a screw-driven clamp - you do not want to have to undo everything to replace a leaking connection
10. Examine the wiring connector of the replacement speed sensor to determine the location and mechanism of the connector locking points. Carefully disconnect the wiring connector and also the plastic wiring stay located approximately 2" from the connector
11. Remove the two bolts that secure the feet of the speed sensor to the transmission case
12. Carefully lift the speed sensor vertically taking care to identify and to keep track of the keyed drive shaft spindle and its orientation, noting that the keyed side is inserted vertically and downwards into the transmission case
13. Inspect and clean the area
13. Orient, insert and verify proper seating of the new keyed drive shaft spindle
14. Carefully seat the replacement speed sensor and secure
15. Assembly is essentially the reverse of disassembly
16. Be sure to verify proper coolant level and replace to specifications as needed
Tuesday, August 31st, 2010 AT 5:39 PM