Welcome to 2CarPros.
Usually, they will even make a knocking sound. The outside pulley is actually mounted on rubber, so it if is moving around, it needs replaced.
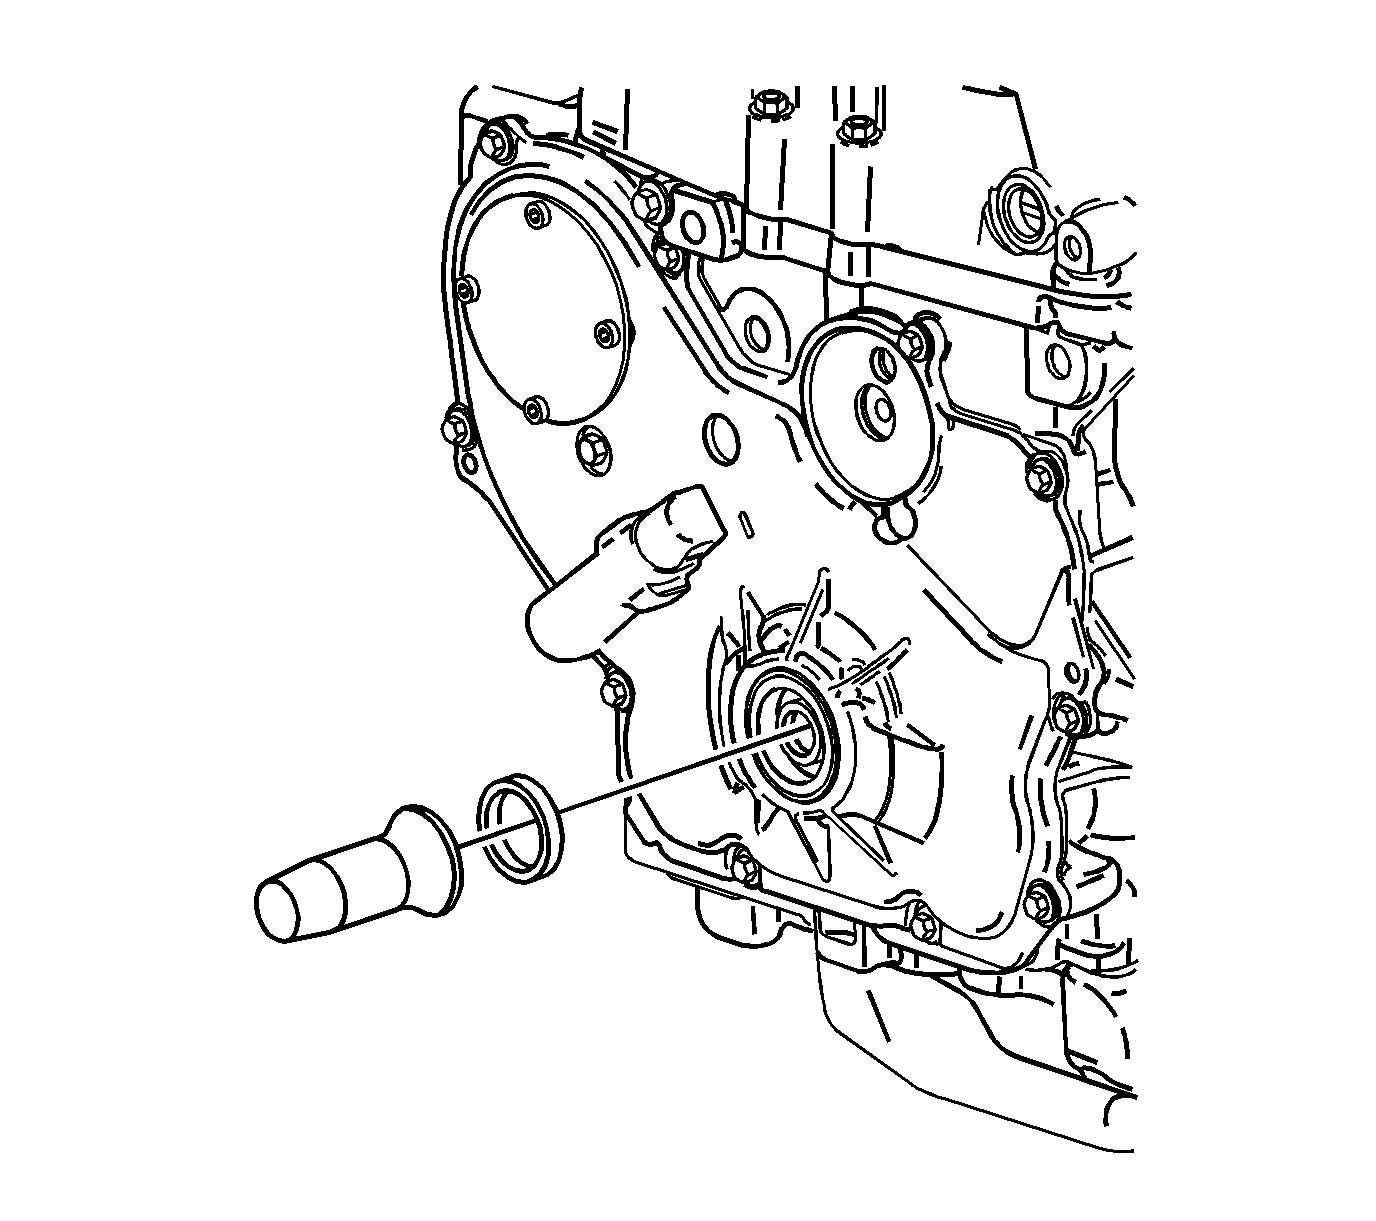
Here are the directions for replacing it. I don't know if you have a 4 or 6 cylinder, so I will add the directions for both. The attached pics correlate with the directions and you will need a puller to remove it. Most parts stores will lend or rent one to you.
______________________________
4 cylinder
2011 Chevrolet Malibu L4-2.4L
Removal and Replacement
Crankshaft Balancer Replacement (LE5)
Special Tools
* J 38122-A Harmonic Balancer Holder
* J 45059 Angle Meter
Removal Procedure
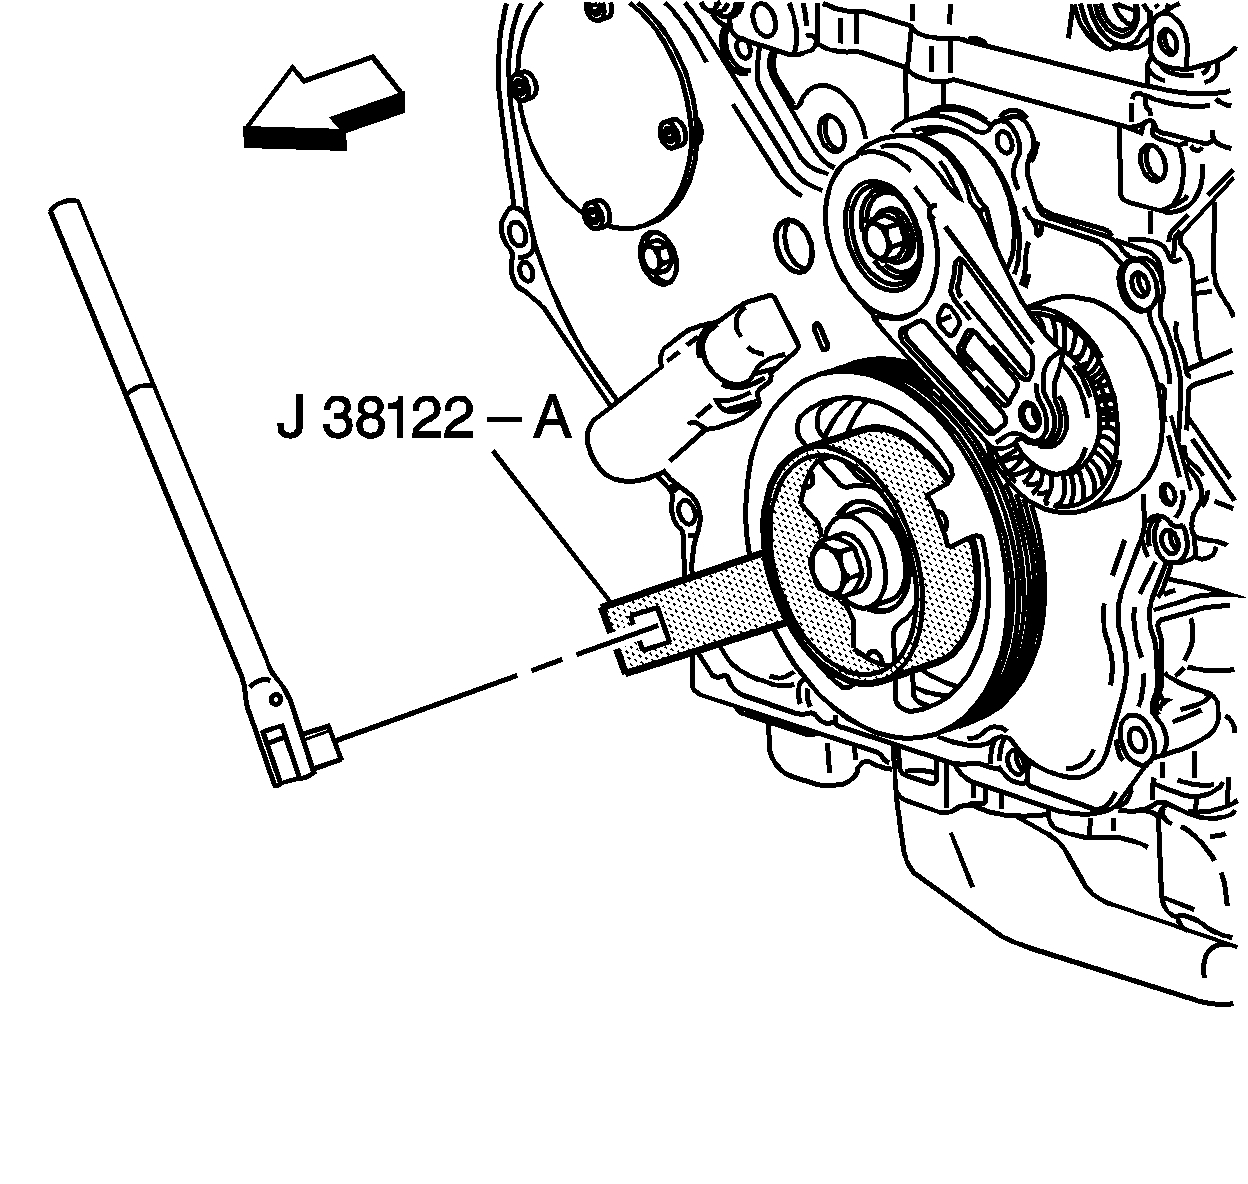
pic 1
1. Remove the drive belt. Refer to Drive Belt Replacement (LE5) (See: Drive Belt > Removal and Replacement).
2. Use J 38122-A to prevent the crankshaft from rotating while loosening the crankshaft balancer bolt.
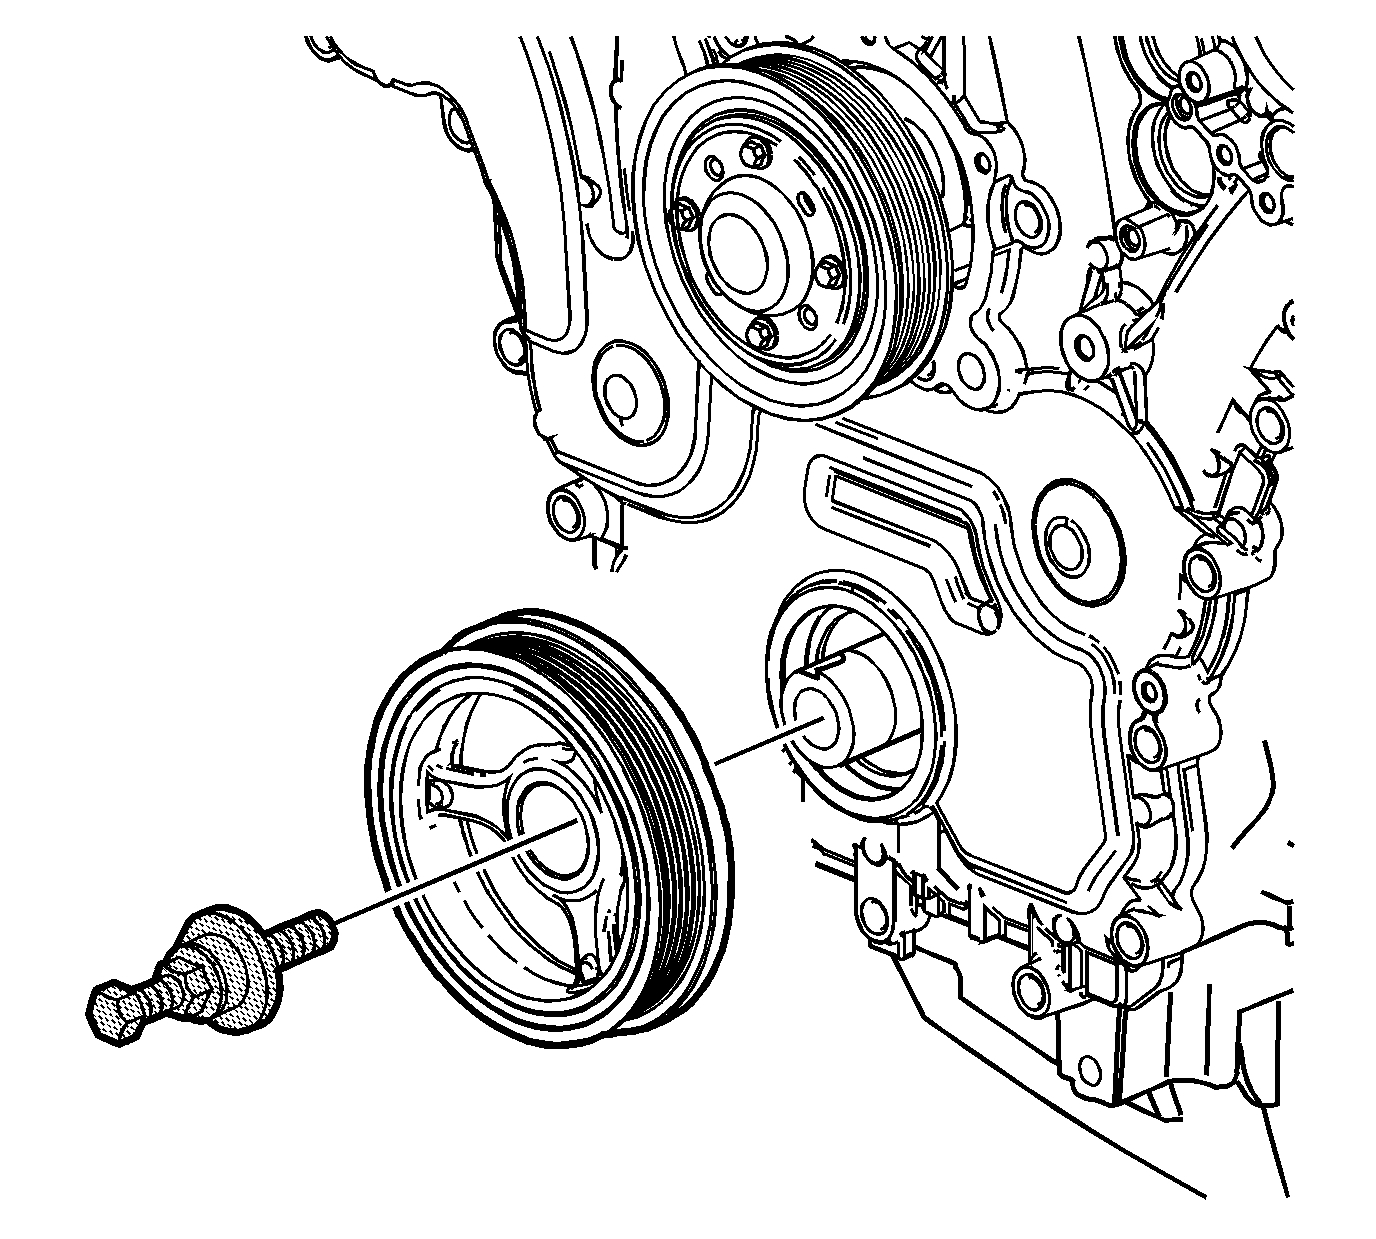
3. Remove and discard the crankshaft balancer bolt.
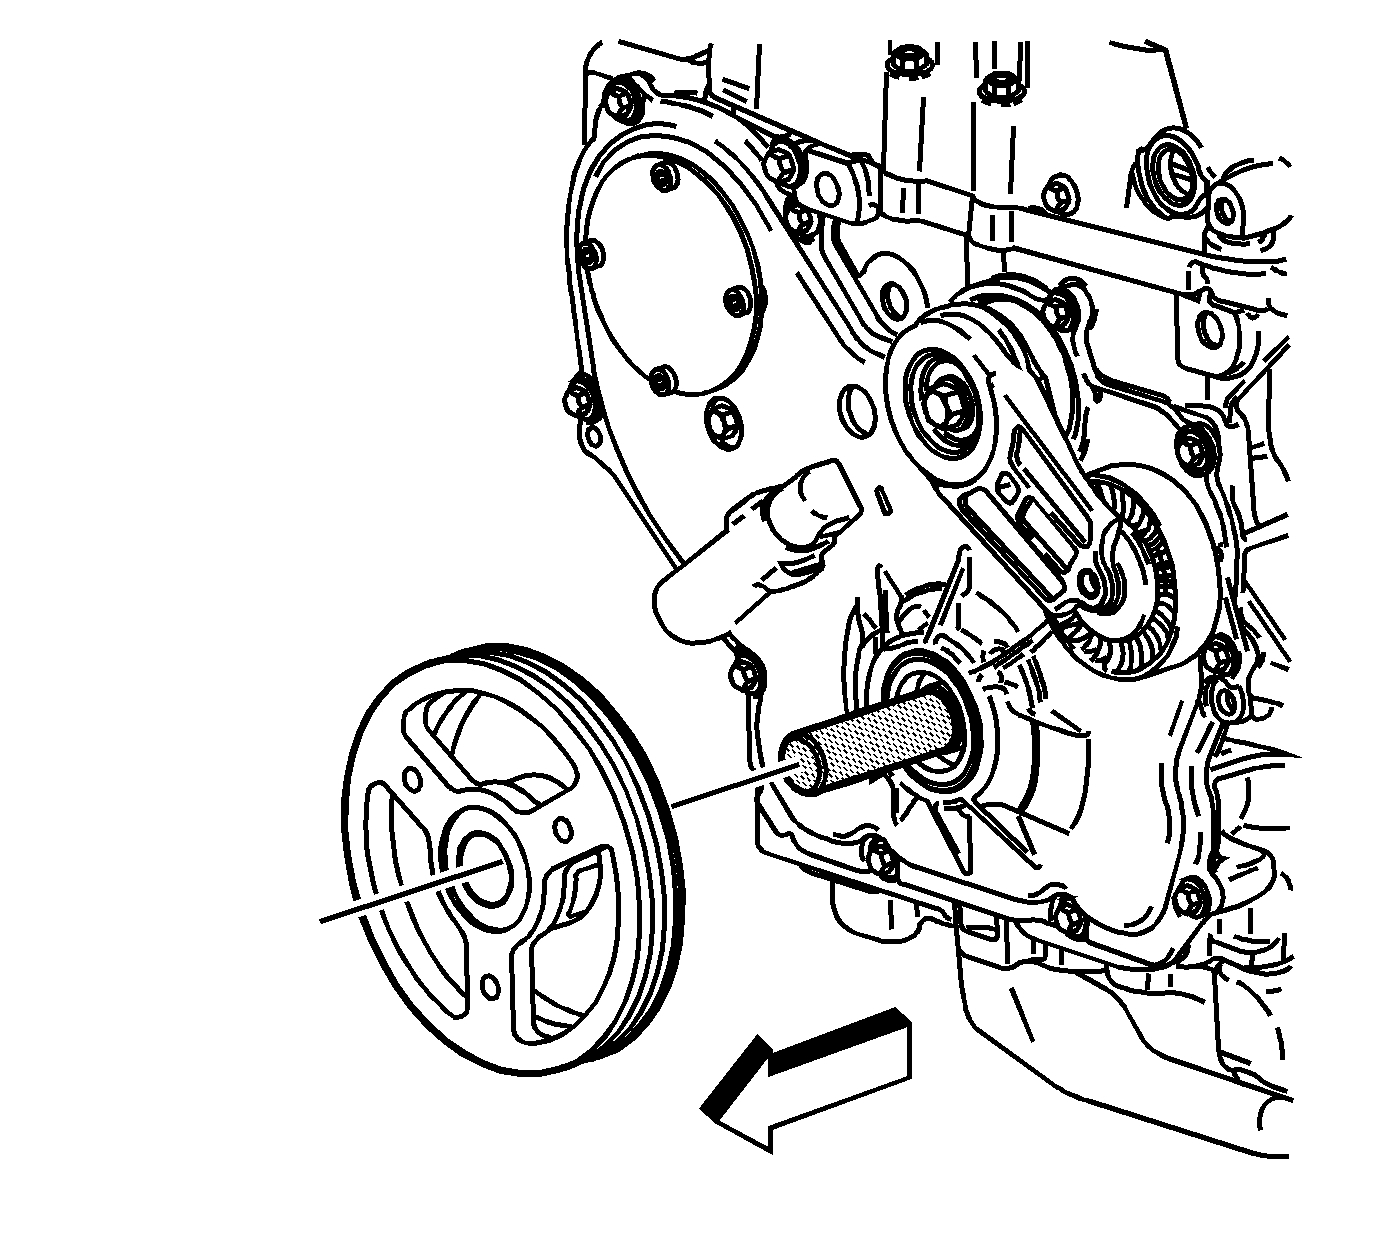
pic 2
4. Remove the crankshaft balancer.
Installation Procedure
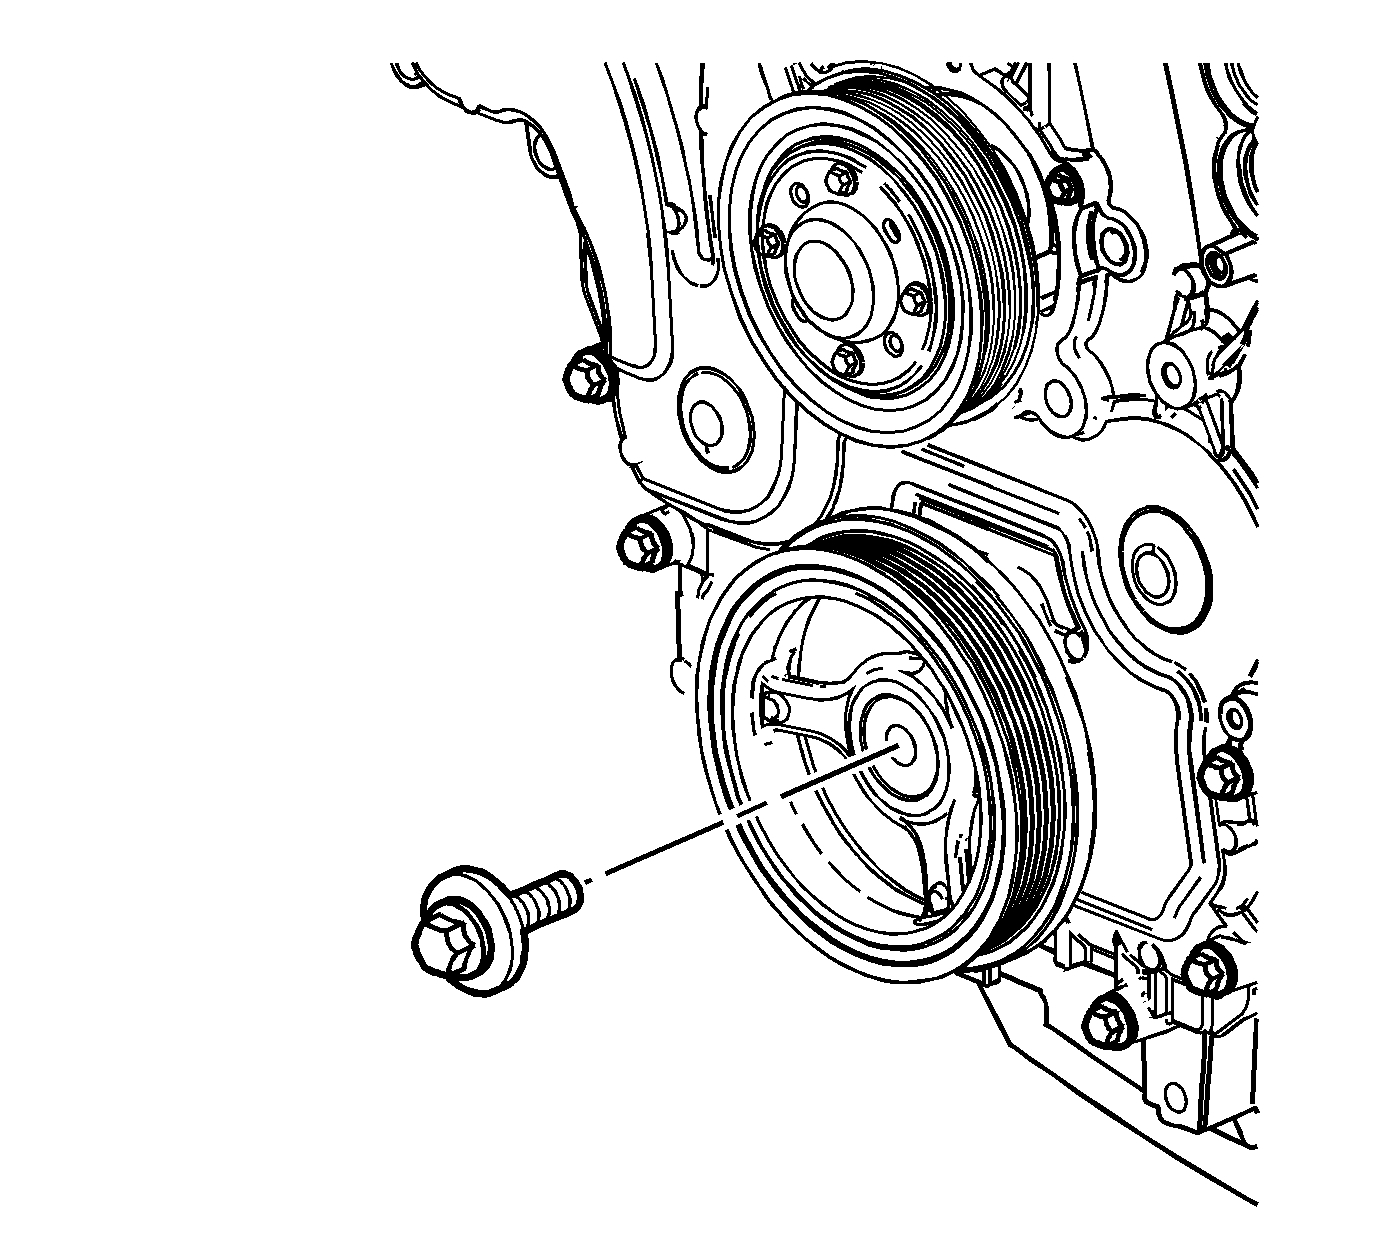
pic 3
1. Position the crankshaft balancer.
2. Install a NEW crankshaft balancer bolt.
pic 4
3. Use the J 38122-A to hold the crankshaft balancer in order to prevent the balancer from rotating while tightening the bolt.
Caution: Refer to Fastener Caution (See: Vehicle > Vehicle Damage Warnings > Fastener Caution).
4. Tighten the crankshaft balancer bolt to 100 Nm (74 lb ft) plus an additional 125 degrees using the J 45059 .
5. Install the drive belt. Refer to Drive Belt Replacement (LE5) (See: Drive Belt > Removal and Replacement).
+++++++++++++++++++++++++++++++++++++++++++++++++
Here is the info on the 6 cylinder. It is more involved.
2011 Chevrolet Malibu V6-3.6L
Vehicle Engine, Cooling and Exhaust Engine Cylinder Block Assembly Harmonic Balancer - Crankshaft Pulley Service and Repair Removal and Replacement
Crankshaft Balancer Replacement
Special Tools
* EN-46106 - Flywheel Holding Tool
* J-38416-2 - Crankshaft Button
* J-41816 - Crankshaft Balancer Remover
* J-41998-B - Crankshaft Balancer Installer
* J-45059 - Angle Meter
Removal Procedure
1. Remove the drive belt. Refer to Drive Belt Replacement (See: Drive Belt > Removal and Replacement).
2. Install the engine support fixture. Refer to Engine Support Fixture (LY7) (See: Engine > Removal and Replacement > Engine Support Fixture).
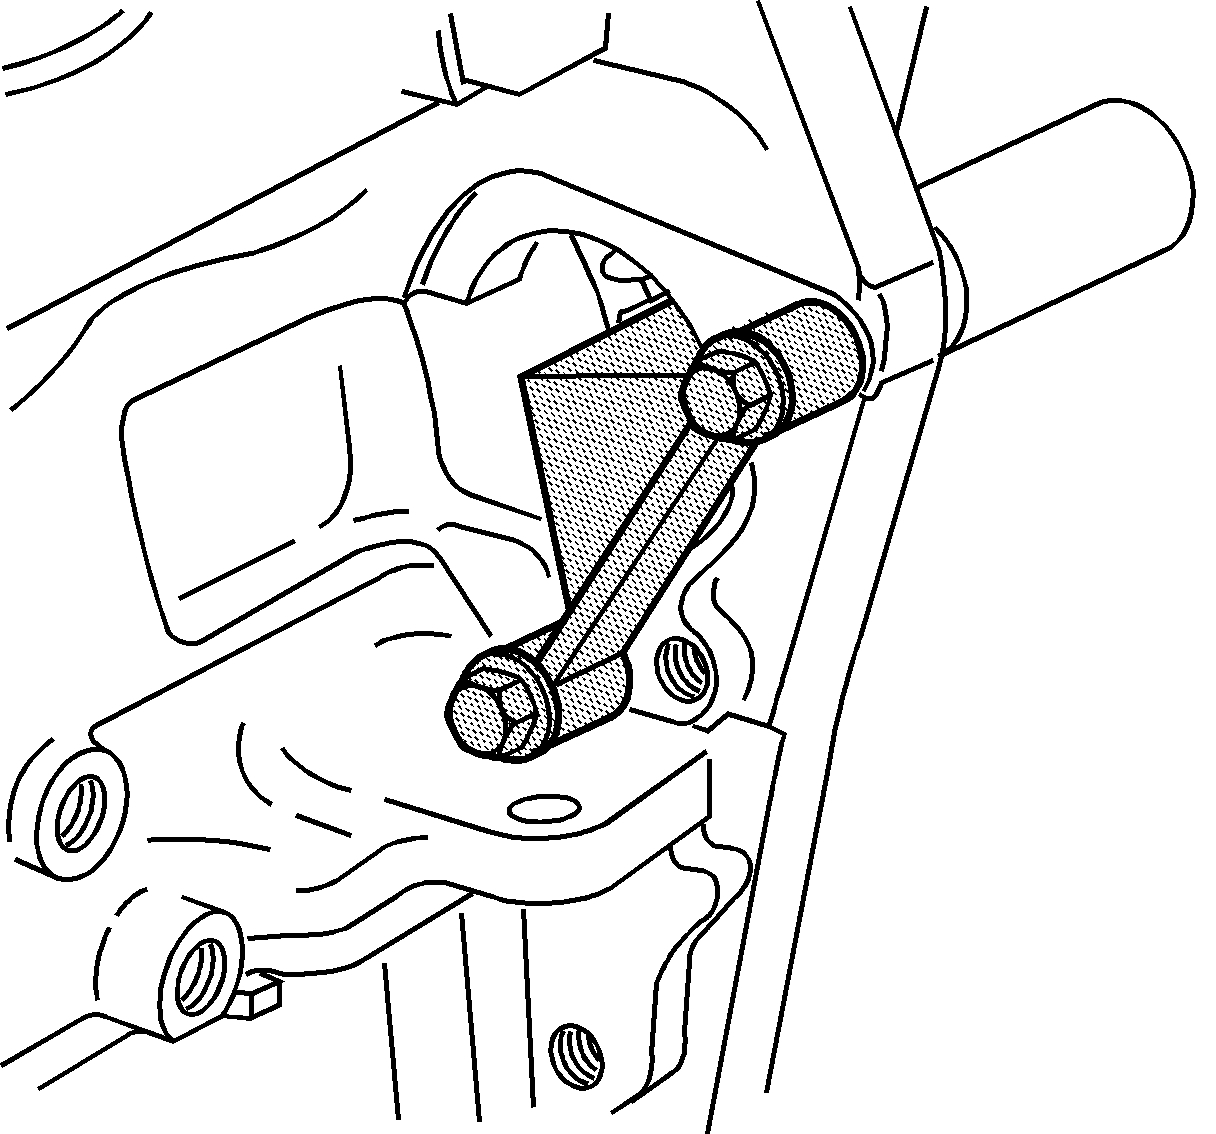
3. Remove the engine mount. Refer to Engine Mount Replacement - Right Side (See: Engine Mount > Removal and Replacement > Engine Mount Replacement - Right Side).
4. Remove the starter. Refer to Starter Replacement (LY7) (See: Starter Motor > Removal and Replacement)Starter Replacement (LE5/LE9) (See: Starter Motor > Removal and Replacement).
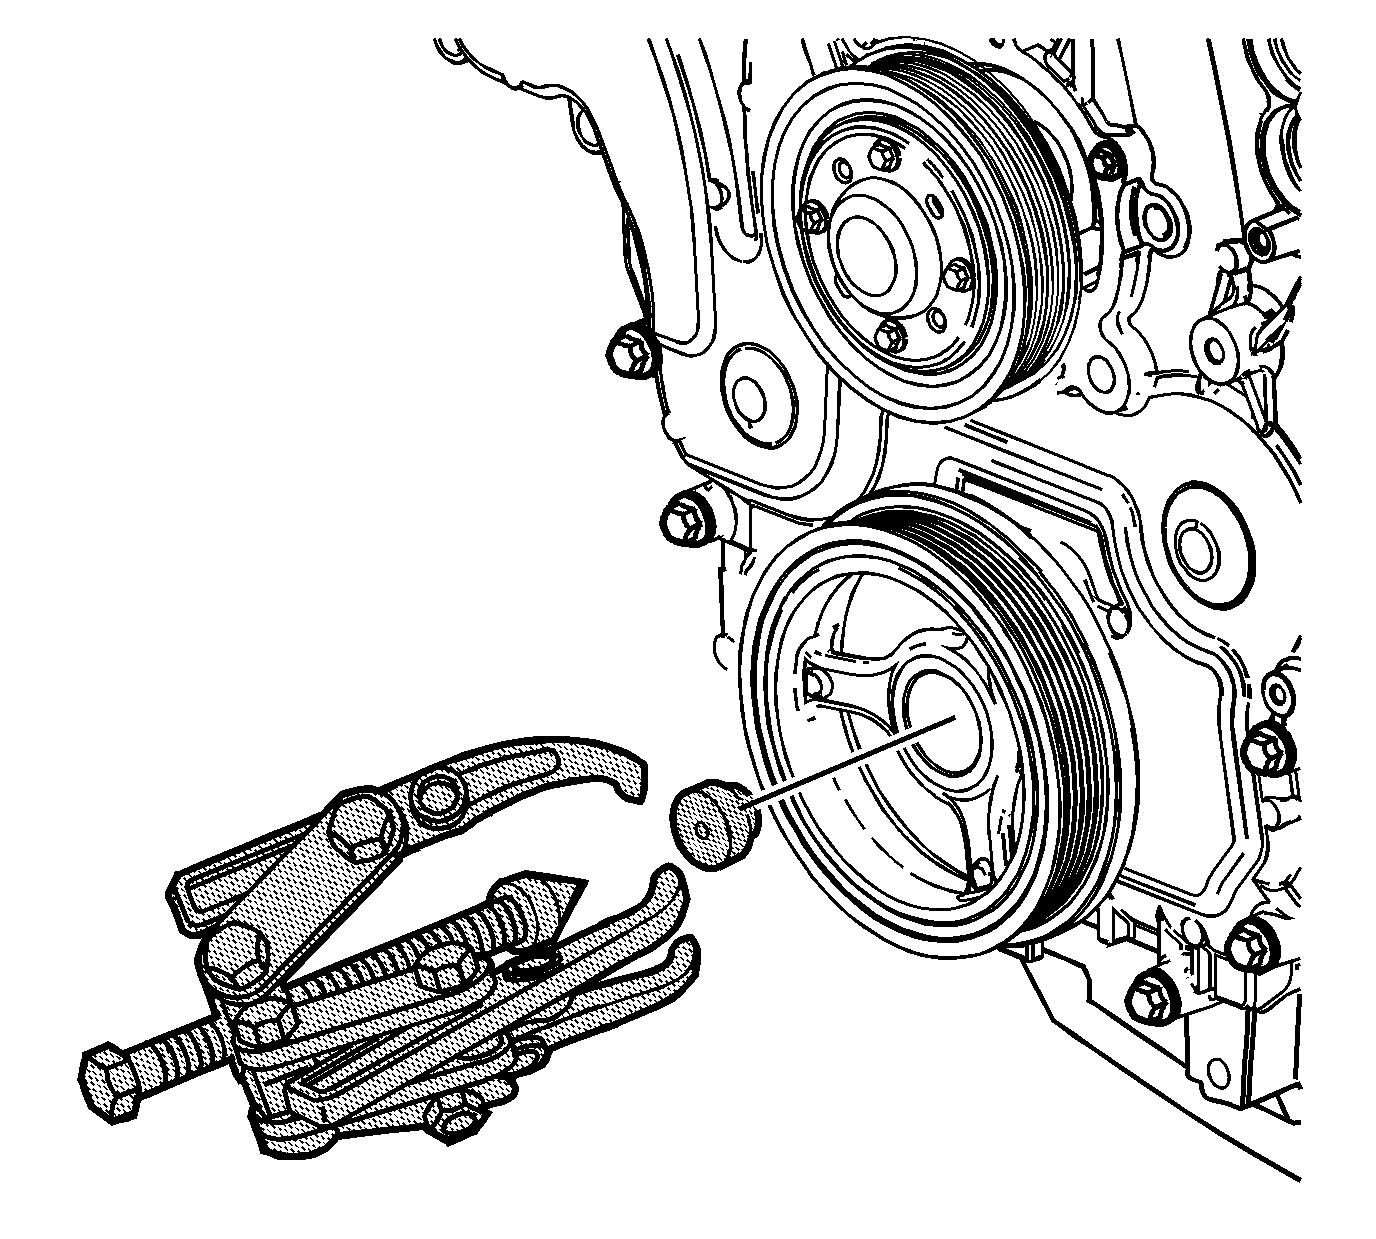
pic 5
5. Install the EN-46106 - tool through the starter mounting hole.
pic 6
6. Using engine support fixture, lower engine approximately two inches.
7. Remove the crankshaft balancer bolt. Discard the bolt.
pic 7
8. Install the J-38416-2 - button in the nose of the crankshaft.
9. Install the J-41816 - remover in order to remove the crankshaft balancer.
10. Tighten the center bolt of the J-41816 - remover in order to pull the crankshaft balancer off of the crankshaft.
11. Remove the J-41816 - remover from the crankshaft balancer.
Installation Procedure
pic 8
1. The EN-46106 - tool must be installed onto the flywheel.
2. Use the J-41998-B - installer , nut, bearing and washer to install the crankshaft balancer.
pic 9
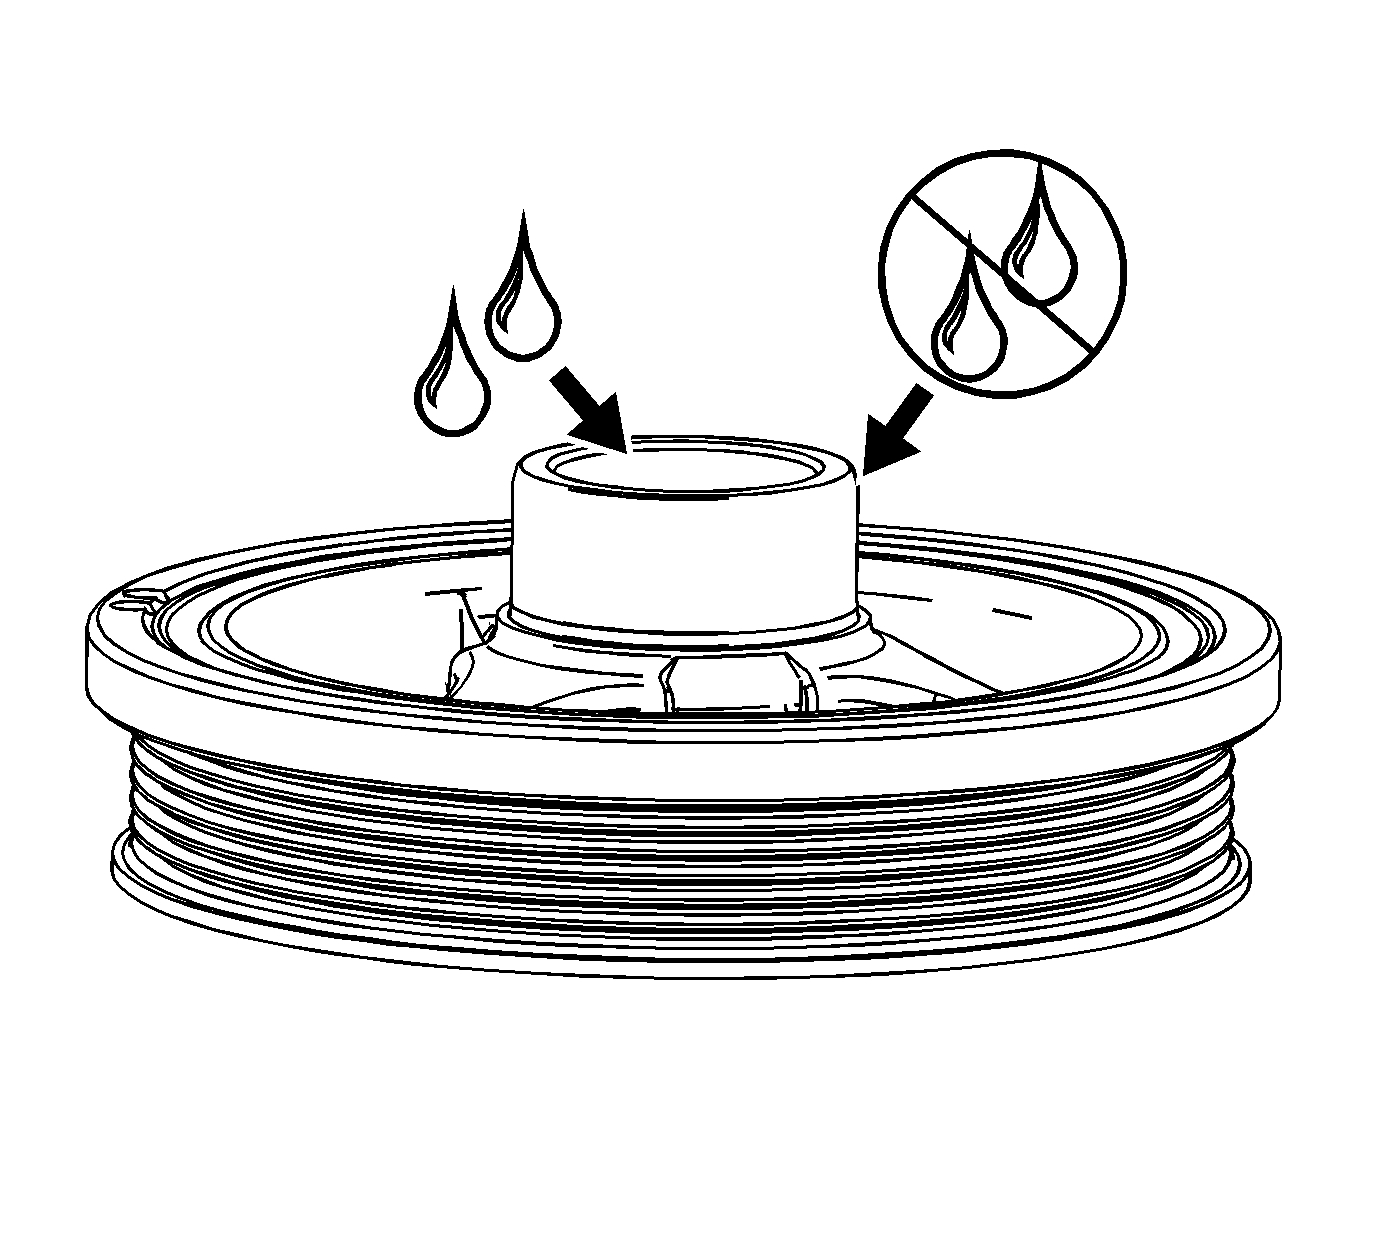
Note: Do not lubricate the crankshaft front oil seal or crankshaft balancer sealing surfaces. The crankshaft balancer is installed into a dry seal.
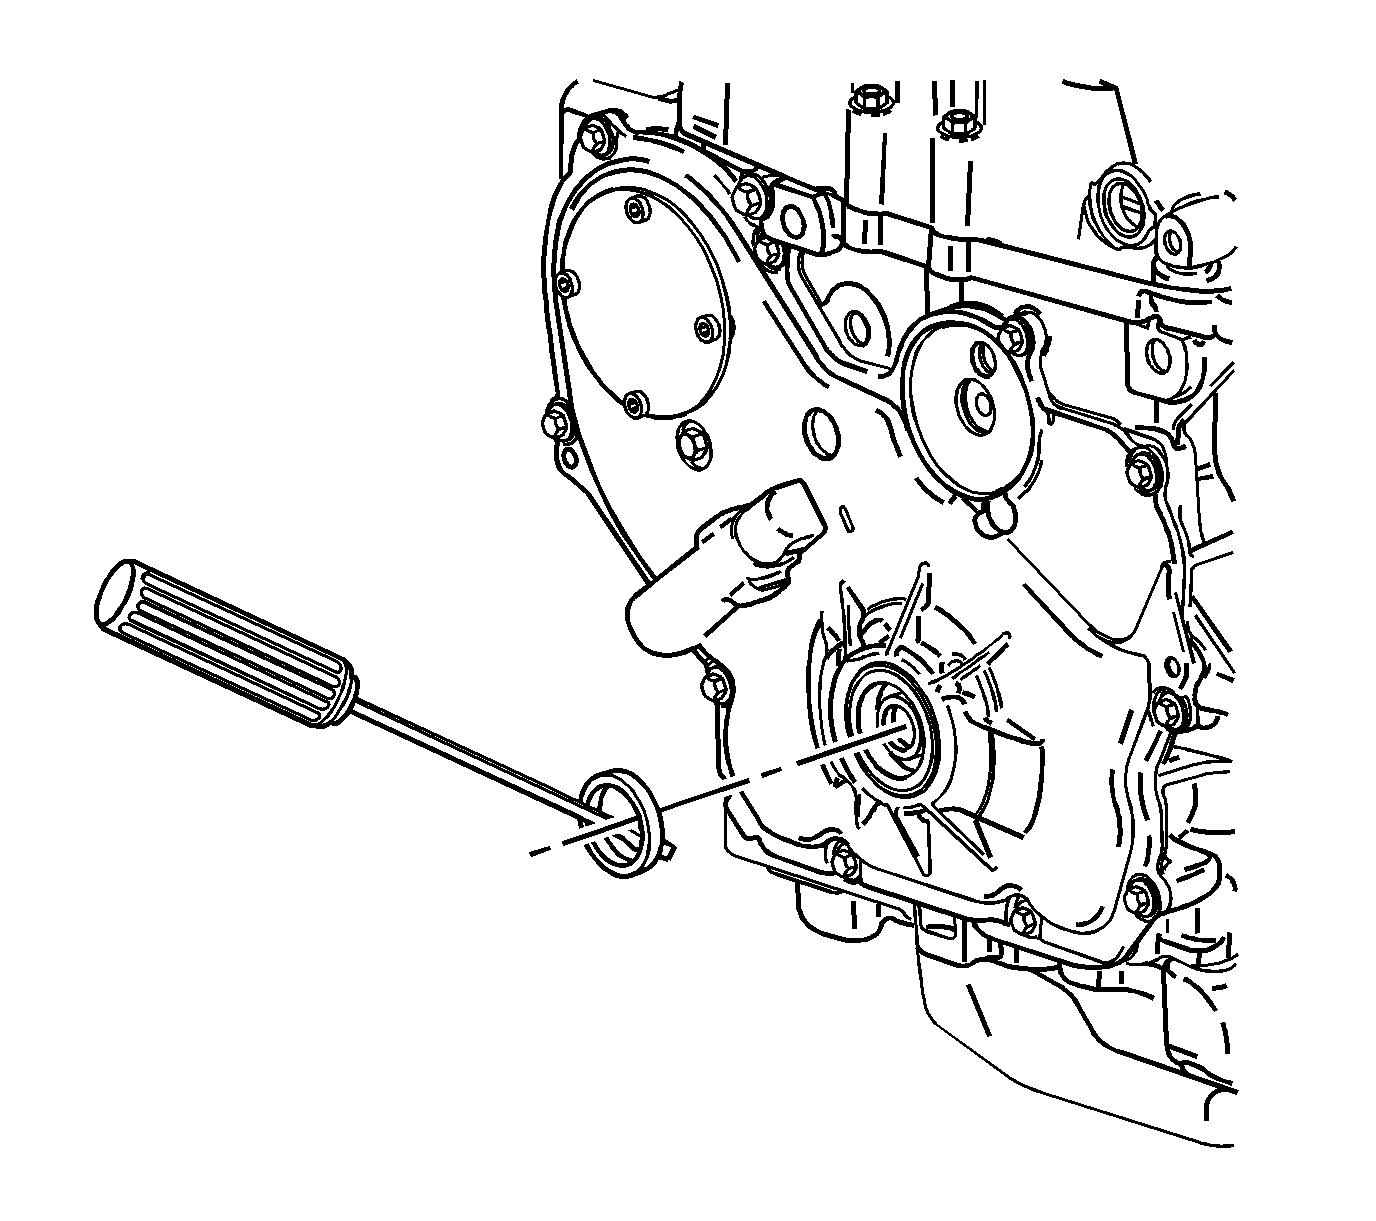
3. Apply lubricant to the inside of the crankshaft balancer hub bore.
pic 10
4. Place the crankshaft balancer in position on the crankshaft.
5. Thread the J-41998-B - installer in the crankshaft. Ensure you engage at least 10 threads of the J-41998-B - installer before pressing the crankshaft balancer in place.
6. Push the crankshaft balancer into position by tightening the nut on the J-41998-B - installer until the large washer bottoms out on the crankshaft end.
7. Remove the J-41998-B - installer.
pic 11
Note: Always install a new crankshaft balancer retaining bolt and washer.
8. Install the NEW crankshaft balancer bolt.
Caution: Refer to Fastener Caution (See: Vehicle > Vehicle Damage Warnings > Fastener Caution).
9. Tighten the crankshaft balancer bolt to 100 Nm (74 lb ft) and an additional 150 degrees using the J-45059 - meter.
pic 12
10. Remove the EN-46106 - tool.
11. Install the starter. Refer to Starter Replacement (LY7) (See: Starter Motor > Removal and Replacement)Starter Replacement (LE5/LE9) (See: Starter Motor > Removal and Replacement).
12. Using engine support fixture, raise the engine into position.
13. Install the engine mount. Refer to Engine Mount Replacement - Right Side (See: Engine Mount > Removal and Replacement > Engine Mount Replacement - Right Side).
14. Install the drive belt. Refer to Drive Belt Replacement (See: Drive Belt > Removal and Replacement).
_____________________________
Let me know if this helps or if you have other questions.
Take care,
Joe
Images (Click to enlarge)
Aug 15, 2019 at 7:43 PM