Hi,
You can try adjusting, but it usually doesn't work. Here are the directions for replacement. The attached pictures correlate with the directions.
2001 GMC Truck S15/T15 Sonoma P/U 2WD V6-4.3L VIN W
Power Steering Gear Replacement
Vehicle Steering and Suspension Steering Steering Gear Service and Repair Procedures Power Steering Gear Replacement
POWER STEERING GEAR REPLACEMENT
- Tools Required
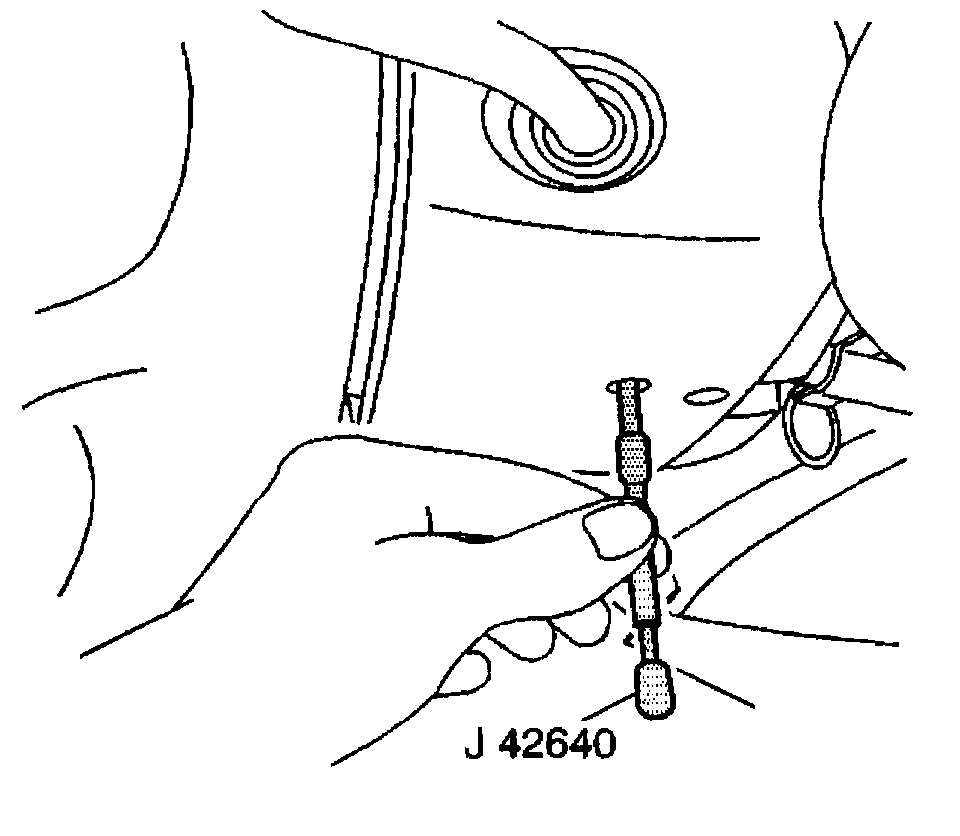
- J 42640 Steering Column Anti-Rotation Pin
Removal Procedure
Notice: Do not rotate steering shaft after steering column has been removed. Damage to SIR components may occur.
pic 1
1. Lock the steering column through the access hole in the steering column lower trim cover using the J 42640.
2. Remove the air cleaner assembly. Refer to Air Cleaner Outlet Resonator Replacement in Powertrain Management.
pic 2
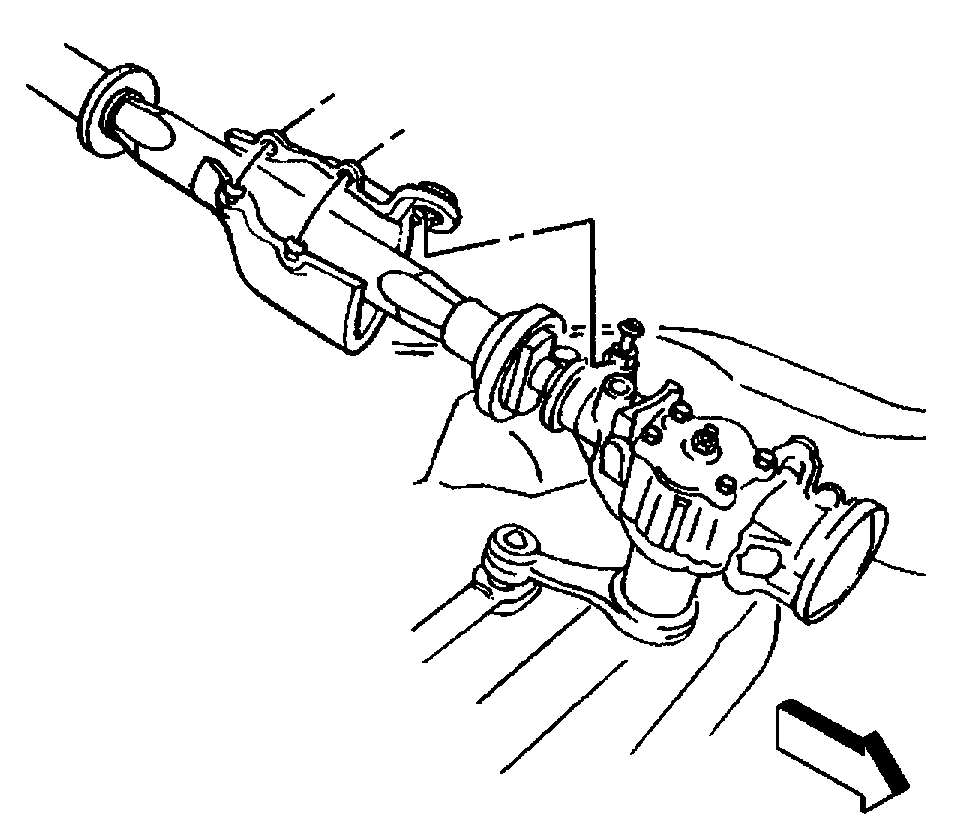
3. Remove the intermediate shaft shield from the steering gear.
pic 3
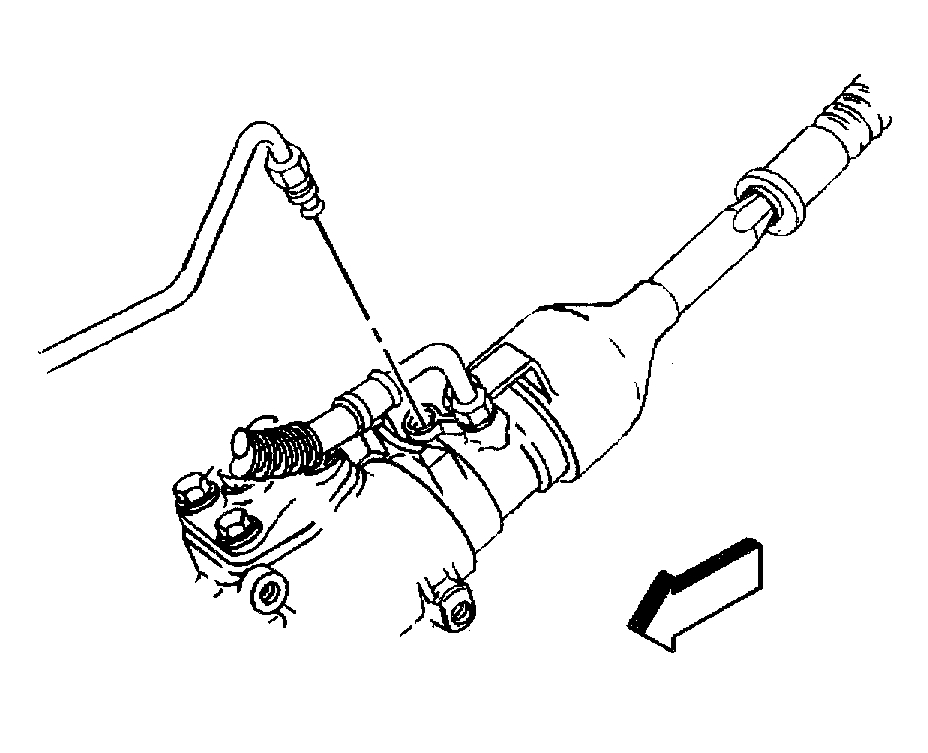
4. Place a drain pan below the steering gear.
5. Remove the pressure and the return hoses from the power steering gear.
Cap or tape the ends of the hoses and the gear fittings in order to prevent dirt from entering the system.
pic 4
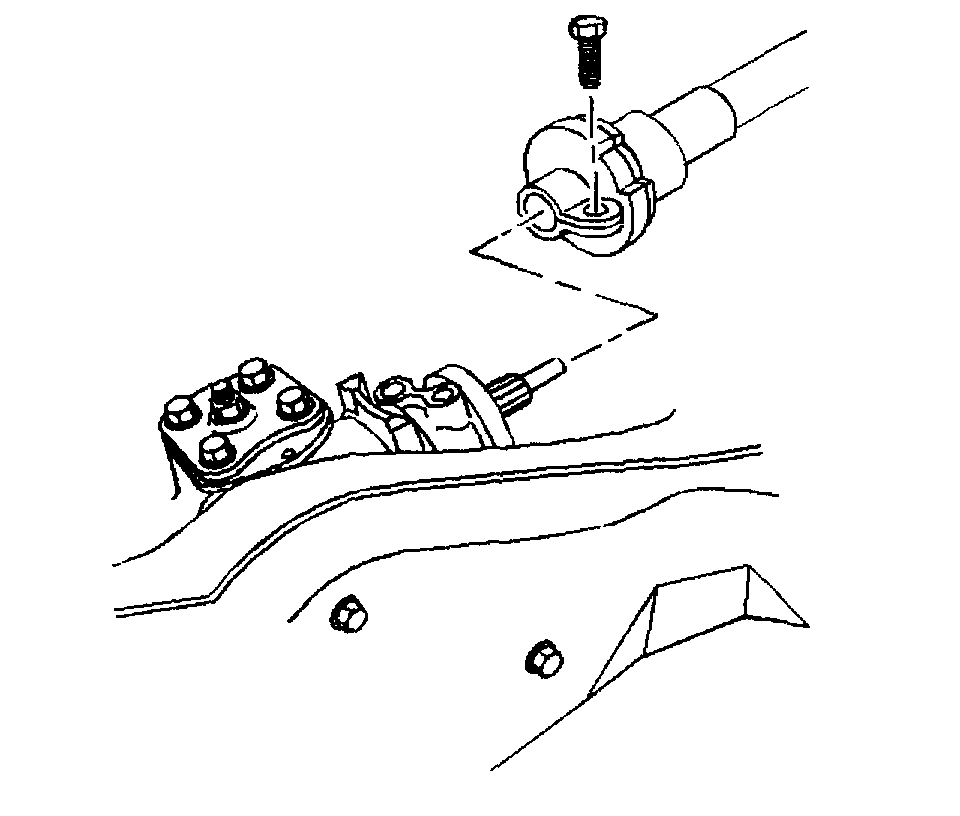
6. Remove the lower intermediate shaft coupling bolt.
7. Draw alignment marks on the lower intermediate shaft coupling and the steering shaft.
8. Remove the lower intermediate shaft coupling from the steering shaft.
9. Remove the pitman arm. Refer to Pitman Arm Replacement.
pic 5
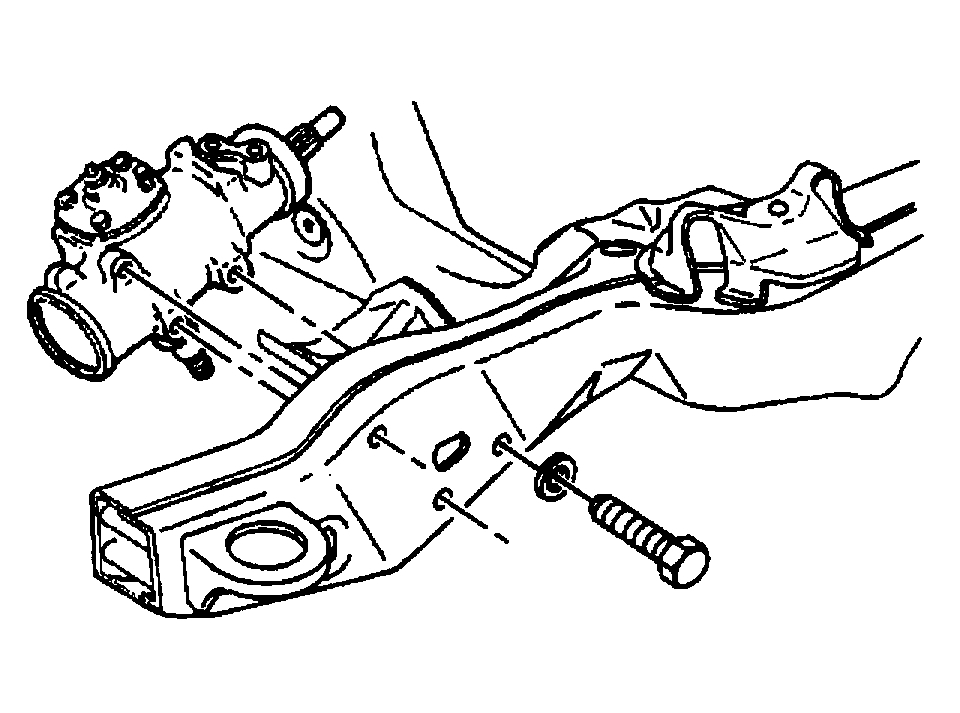
10. Remove the steering gear mounting bolts and the washers from the frame.
11. Remove the steering gear.
Installation Procedure
pic 6
1. Install the steering gear.
Notice: Refer to Fastener Notice in Service Precautions.
2. Install the power steering gear to the frame washers and the mounting bolts.
Tighten
Tighten the power steering gear to frame mounting bolts to 75 Nm (55 ft. lbs.).
3. Install the pitman arm. Refer to Pitman Arm Replacement.
pic 7
4. Install the lower intermediate shaft to the power steering gear.
Ensure that the alignment marks line up.
5. Install the lower intermediate shaft coupling bolt.
Tighten
Tighten the lower intermediate shaft coupling bolt to 35 Nm (26 ft. lbs.).
pic 8
6. Install the pressure and the return hoses to the power steering gear.
Tighten
- Tighten the pressure hose to 25 Nm (18 ft. lbs.) for the vehicle equipped with the 2.2L engines.
- Tighten the pressure hose to 30 Nm (22 ft. lbs.) for the vehicle equipped with the 4.3L engines.
- Tighten the return hose to 25 Nm (18 ft. lbs.).
pic 9
7. Install the intermediate shaft shield to the power steering gear.
8. Install the air cleaner assembly. Refer to Air Cleaner Outlet Resonator Replacement in Powertrain Management.
pic 10
9. Unlock the steering column by removing the J 42640 from the steering column lower steering column trim cover access hole.
10. Bleed the power steering system. Refer to Bleeding Power Steering System in Steering / Service and Repair.
______________________
Make sure to check all of the steering components to make sure they are tight.
Let me know if this helps.
Joe
Images (Click to enlarge)
Mar 13, 2020 at 10:33 PM