Tail lamp ground issue?

Tiny
A0302
  • MEMBER
  • 2016 FIAT 500X
  • 1.4L
  • 4 CYL
  • 2WD
  • MANUAL
  • 40,000 MILES
Hi, I seen another fiat 500x posted on your site describing a left rear bulb out issue and I am in a very close situation.
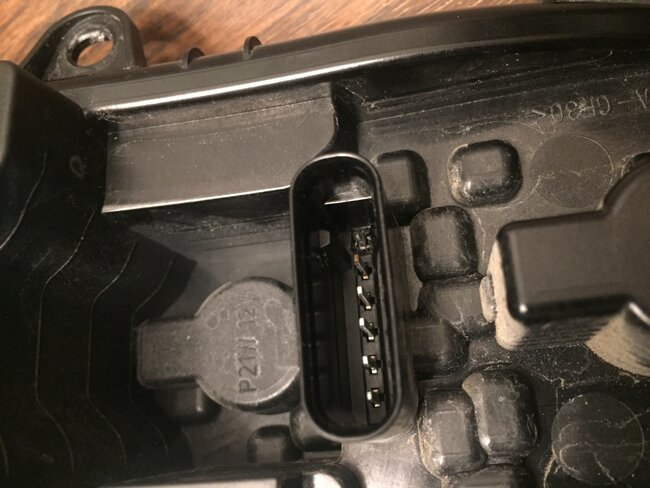
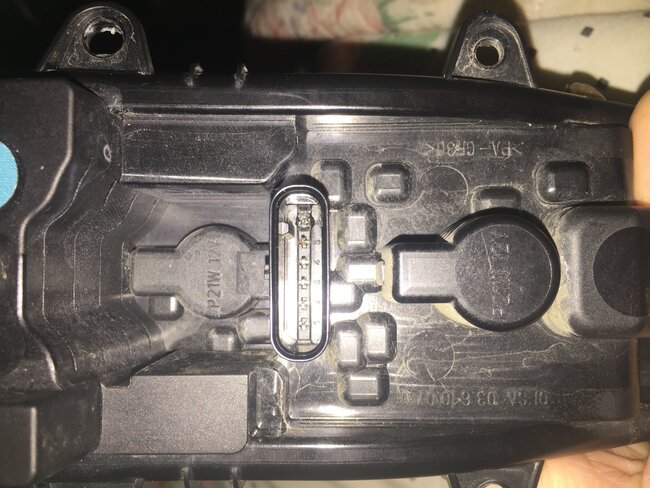
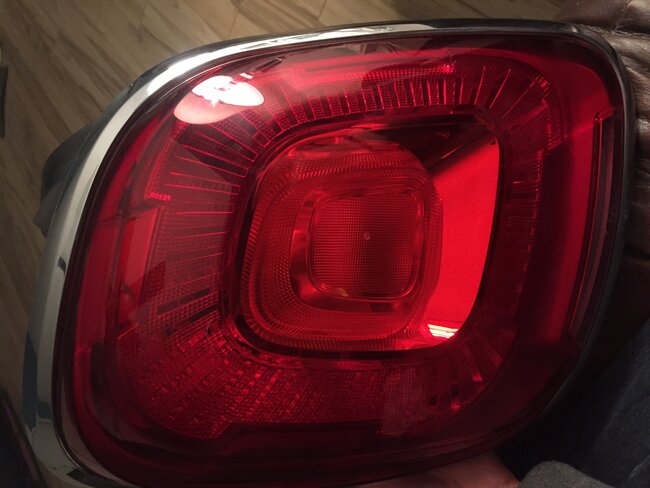
Drivers rear side taillight, back up light and turn signal all went out at same time few days ago. I changed the bulbs, and it didn’t fix the problem. I took another look at the connector to the housing unit and harness and noticed the ground pin is burned and is only half the height as other pins now. The left signal was flashing twice as fast so it led me to a ground issue which I was right. The question to you is, what could have made this happen, usually a short?
Or ground received some hot power to it? I took a light circuit tester and clamped to a good ground on car and proved the pins and they are all getting power and the proper signal to them when tested, meaning the bulb flashing on tester when each pin was probed and the appropriate signal switches on etc, I never checked fuses yet or relays to determine why the ground pin got hot. Any suggestions on what to check so it doesn’t happen again. I am purchasing a new tail lamp socket housing and a new wire connector but want to be safe this problem is fixed before proceeding. I have pictures to show the #6 pin terminal (ground).
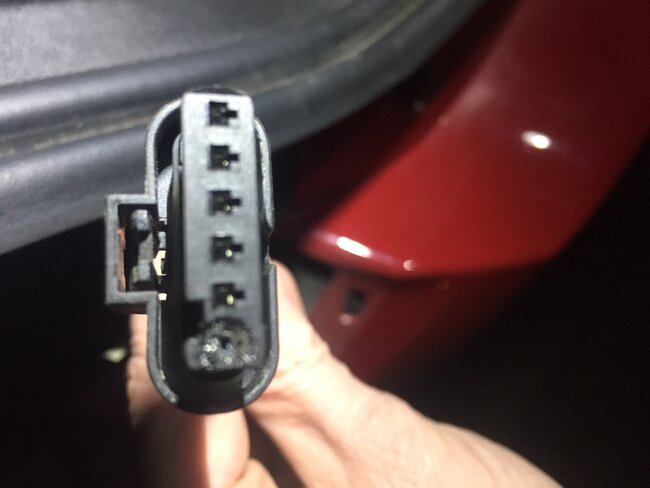
Friday, April 7th, 2023 AT 11:00 PM

4 Replies

Tiny
CARADIODOC
  • MECHANIC
  • 33,744 POSTS
This has nothing to do with the fuses, so don't waste your time there. This is caused by a less-than-perfect electrical connection that results in a little electrical resistance. Current flowing through that resistance causes heat to build up. That heat degrades the connection which leads to more resistance and more heat, until you see the results. This commonly happens to ignition switches, headlight switches, and heater fan switches on all car brands. On those switches, it is common to just cut out the two overheated terminals and the plastic connector body around those two terminals, then replace them individually with universal terminals. I can describe that a lot better when and if that day comes.

A required part of the repair for overheated switches must include replacing that switch because the pair of internal contacts have also been overheated and have developed resistance. That will lead to a repeat failure. In the case of your tail light, (thank you for the dandy photos), I would be satisfied with simply scrubbing the overheated terminal clean and shiny. That's something you can't do with sealed switches.

Check the connector on the other side to see if similar damage is occurring. My guess is it is not. This failure is not common, but we do run into it once in a while.

A way to guarantee this won't happen again that you might consider is to cut that wire off at the connector, then solder it to the terminal on the lamp housing. The plug is only there to facilitate installation on the assembly line, and if you need to replace it from damage. You can't get a more solid electrical connection than by soldering. Be sure the wire is nice and shiny copper. With overheated switches, the first four inches of those two wires will have become hardened from the heat and solder won't adhere to that. That four inches must be cut away, then new pieces of the same diameter spliced in. If that applies to this wire, do the same thing by cutting away as much as has become stiff, or if you see a dull rust-colored wire. You can shine it up with sandpaper, but that's a long, tedious process. It's far easier to just cut it back until you reach clean copper to solder to.

Let me know what works for you or what I can explain better.
Was this
answer
helpful?
Yes
No
+2
Saturday, April 8th, 2023 AT 12:06 PM
Tiny
A0302
  • MEMBER
  • 62 POSTS
Thank you for your help, very good feedback to solving this. I cleaned up the darkened pin terminal to shiny like the others. Also, I drilled through the connector that is on the 1st previous picture shown above only the ground wire as it was burned. This allowed me to run the ground wire through the connector and straight to the lamp housing and soldered it to the small terminal that was left. It was hard to do
So, I cut away the plastic a bit on the end near the ground terminal so there was room to add solder and get the soldering gun tip in it. The wiring harness clipped together to the housing still but had to seal the plastic end with a rubberized silicone to stop moisture from getting in. I canceled the new housing lamp socket unit and connector for now to see if this holds up 1st. Will check everything in few days.
I will add new pictures to show the fix.
Thanks for your expertise.
Was this
answer
helpful?
Yes
No
+1
Saturday, April 8th, 2023 AT 6:07 PM
Tiny
A0302
  • MEMBER
  • 62 POSTS
Tried to get more pictures of completed work but phone battery died and it was raining and needed to finish quickly so I put the 2 Phillips screws back into the bulb holder and where it fits in place on the back of the lens tail lamp housing. Then the torx t25
Screw heads back to the housing and to car body. Everything works as it should, now have working taillight, back up, turn signal and brake light. Before the lens housing was put back together with bulb holder I wanted to make sure the ground was good so I used a 12v light tester and put a paper clip end into the harness slots and the clamp end of the tester onto the ground wire from the plug and switched everything on and tried each of the slots to see if tester bulb was flashing and it all worked.
Thanks again for your guidance.
Was this
answer
helpful?
Yes
No
Sunday, April 9th, 2023 AT 12:55 PM
Tiny
CARADIODOC
  • MECHANIC
  • 33,744 POSTS
I knew you could do it. No need for me to ask if you know how to solder.

Very happy to hear you solved this. Please come back to see us the next time you need my wondrous wisdom. :)
Was this
answer
helpful?
Yes
No
Sunday, April 9th, 2023 AT 6:49 PM

Please login or register to post a reply.

Sponsored links