Welcome to 2CarPros.
I have to be honest. The one code is most likely causing the other. There is a large leak in the EVAP system. In my mind, that is the cause of the low purge flow.
With that in mind, yes smoke testing will find the leak, but most times you can find a large leak without doing the test.
I don't know what you live, but if you are in an area where the roads are treated with salt and other chemicals, first check to see if the filler tube (where you add gas) is rusted. You will need to look under the vehicle to locate the fuller tube. It goes from where you add gas to the tank.
Next, check for disconnected or damaged hoses at the EVAP canister. Often times they will dry rot and leak. That canister itself may have even failed. The part is under the vehicle near the fuel tank. You have to simply remove a cover to locate it as well as the hoses related to it.
Here are the directions for replacement of the canister. I'm adding this because it shows you how to access it. The pictures correlate with the directions.
_____________________________________
EVAP Canister Replacement
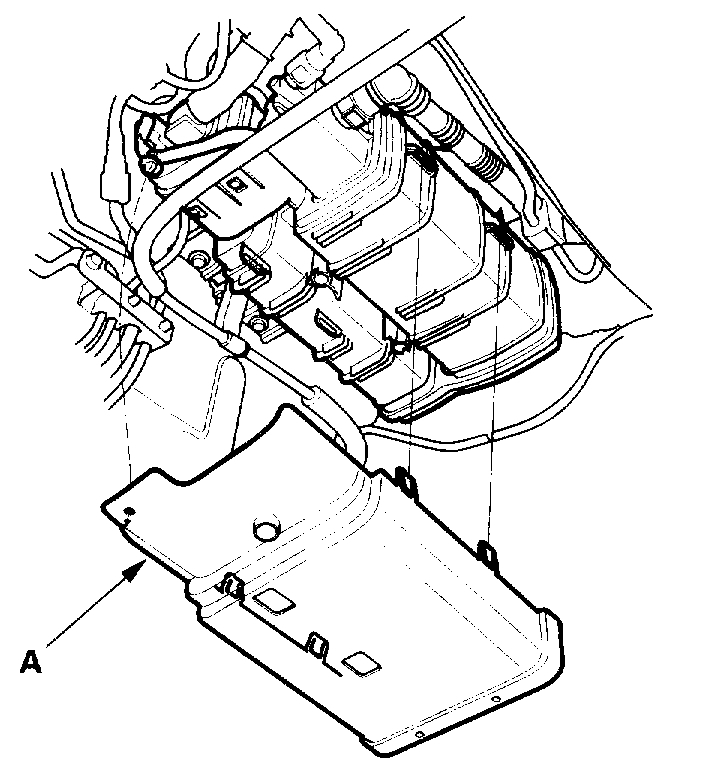
Picture 1
1. Remove the EVAP canister cover (A).
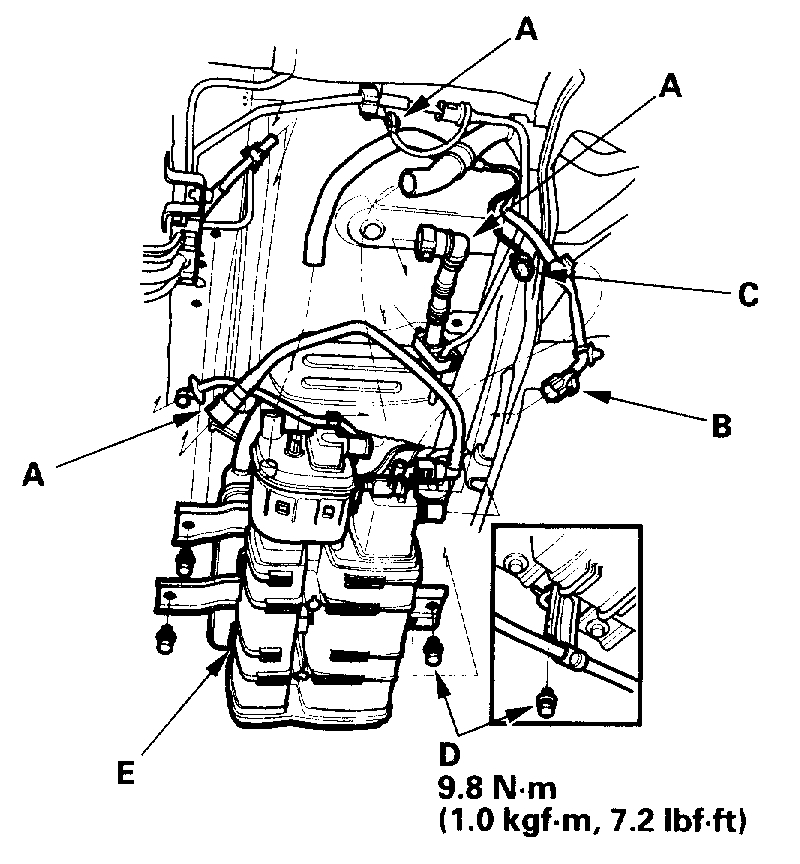
Picture 2
2. Remove the hoses (A), the FTP sensor 3P connector (B), and the EVAP canister vent shut valve 2P connector (C).
3. Remove the bolts (D)
4. Remove the EVAP canister assembly (E)
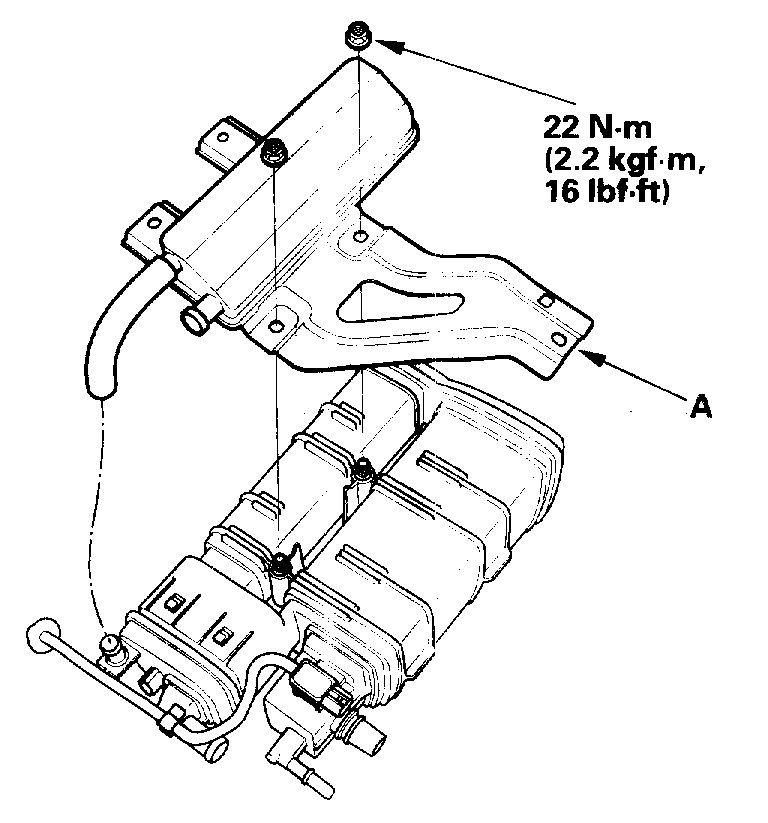
Picture 3
5. Remove the EVAP canister bracket (A).
6. Install the canister in the reverse order of removal
________________________________________
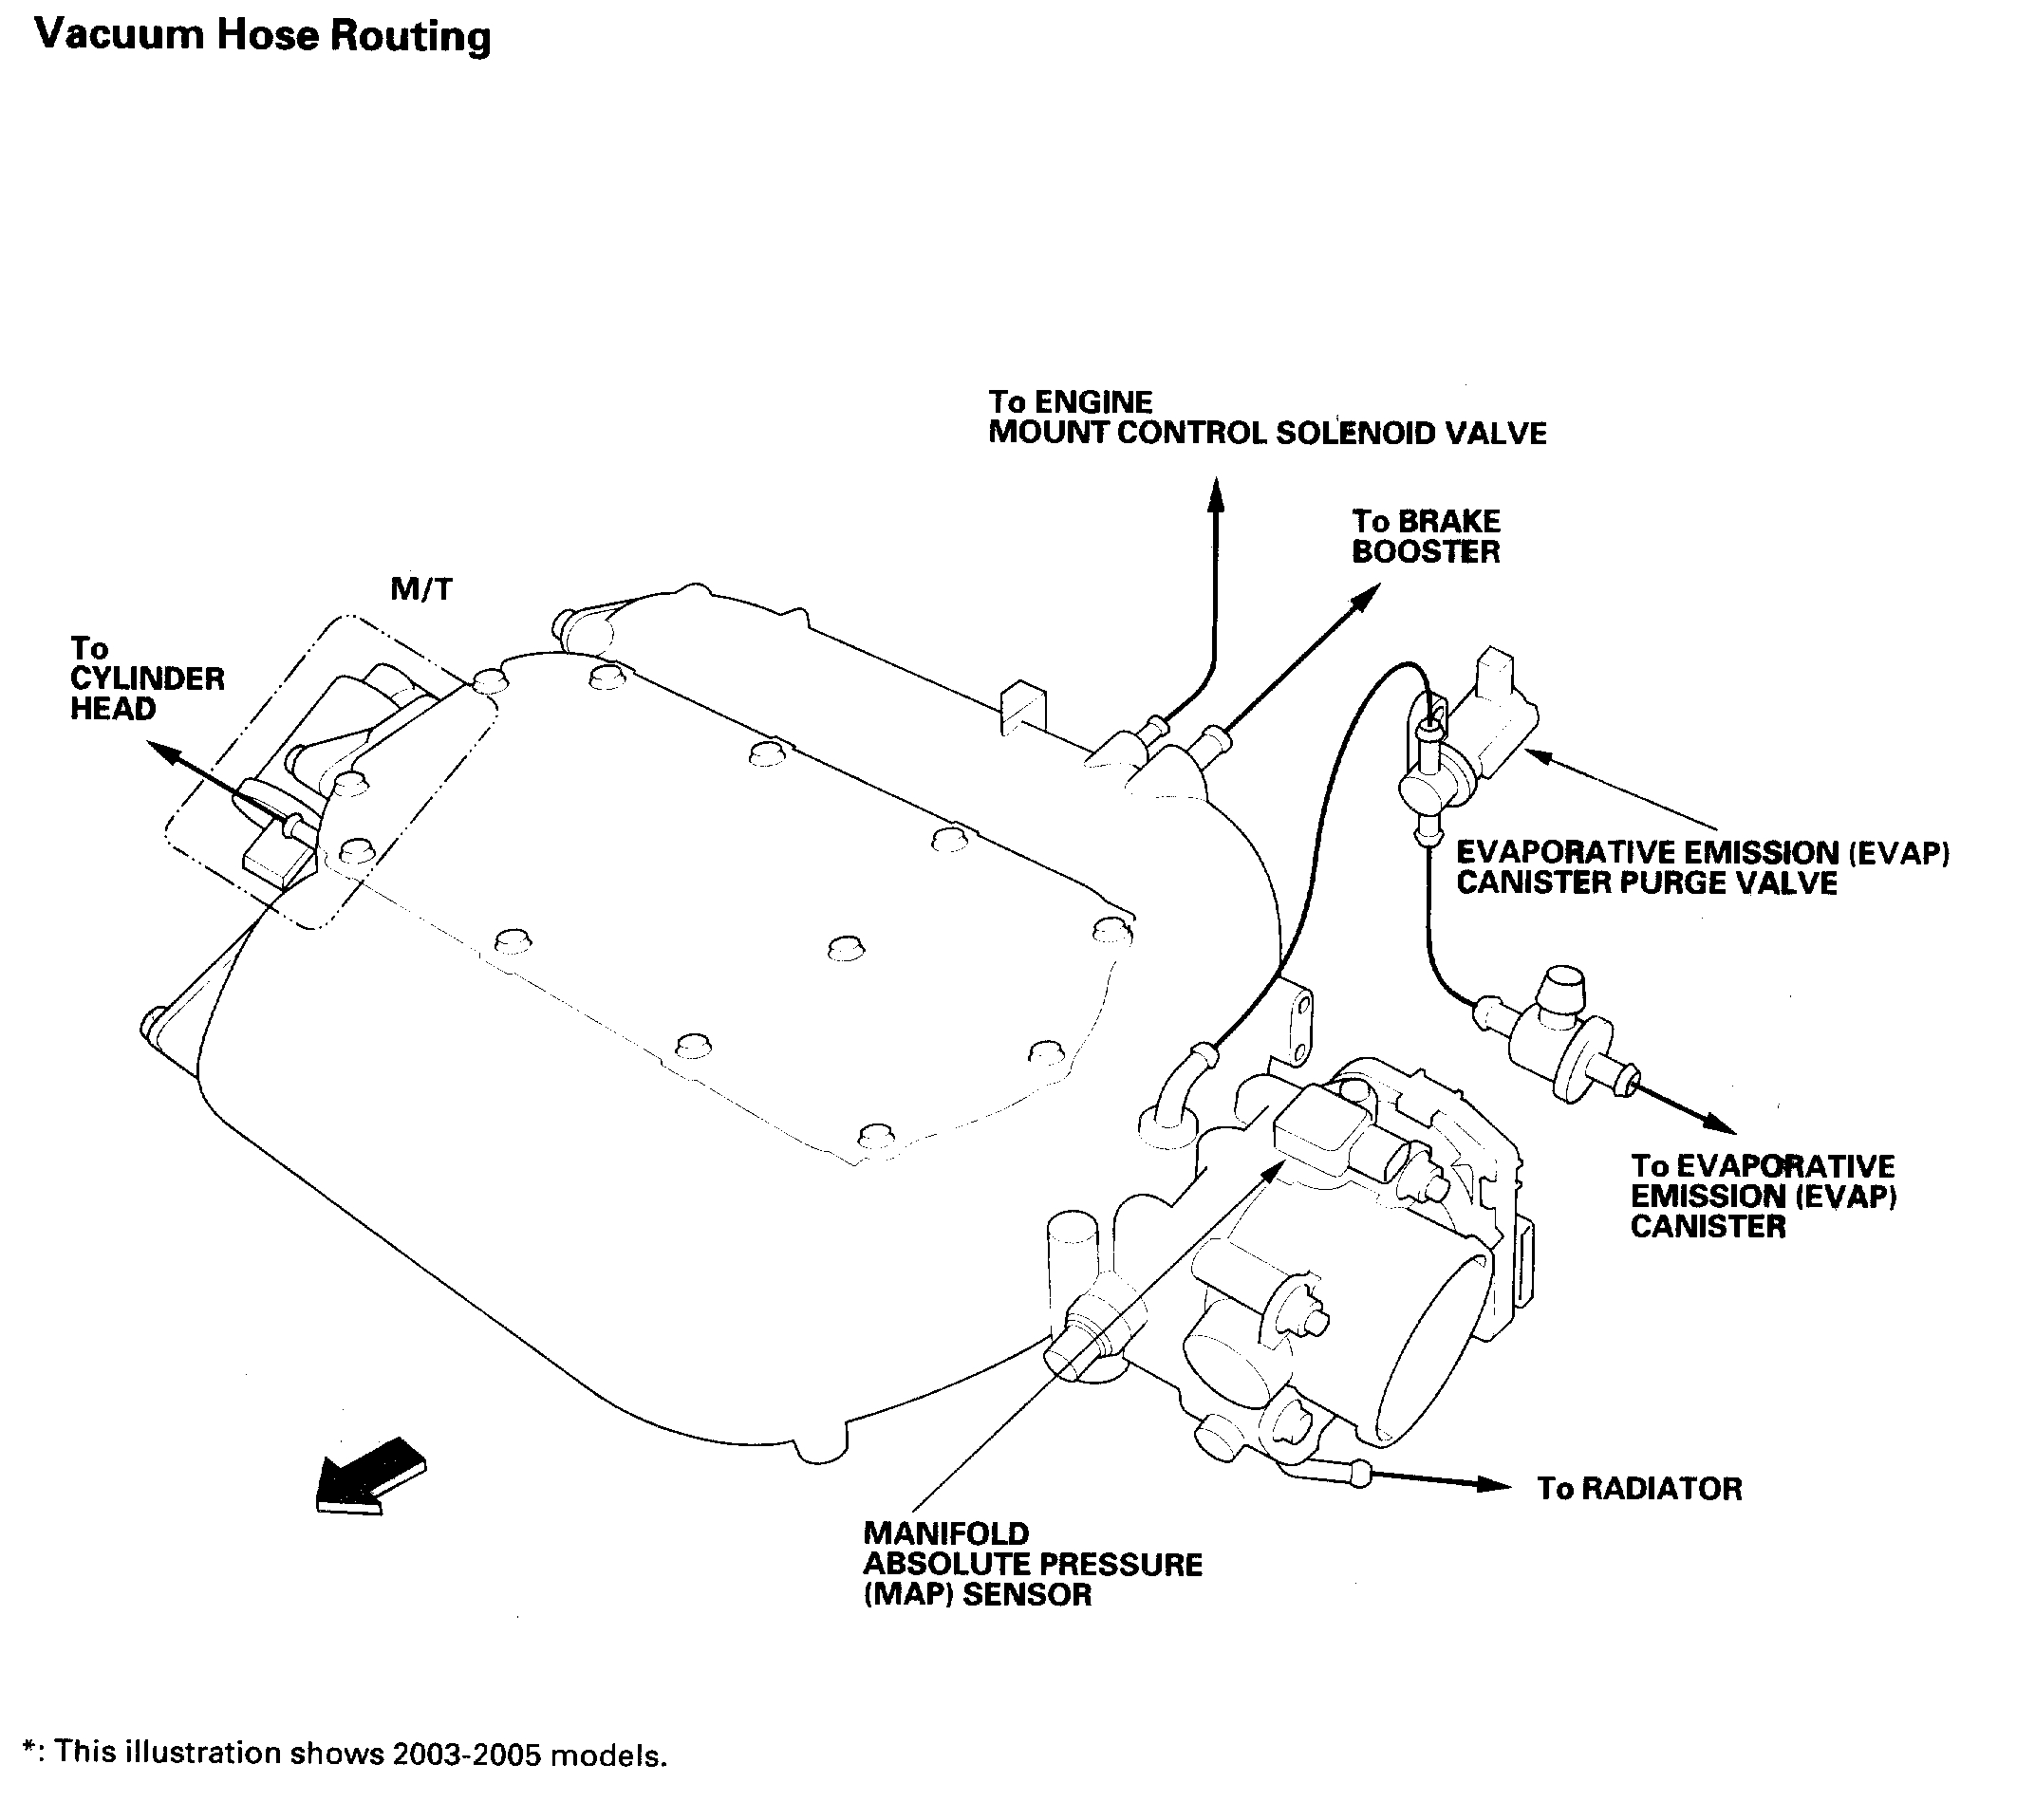
Next is the canister purge valve. It is located under the hood of the vehicle. See pic 4 for location. Check to make sure there are no disconnected or damaged hoses to it.
Here are the directions for replacing it. I'm adding them to help locate and see what is required for removal and inspection.
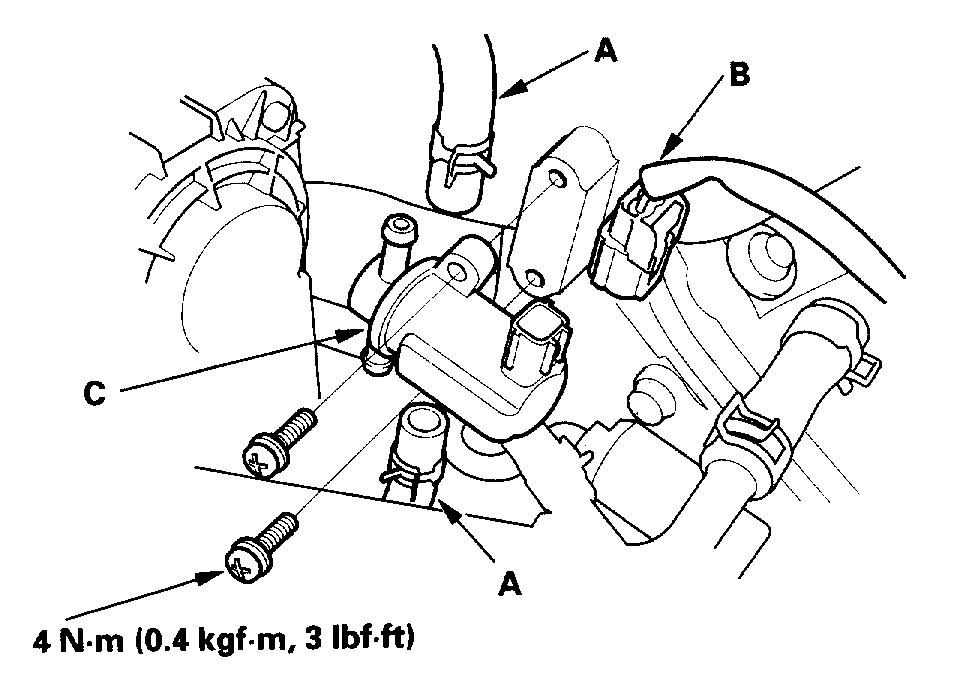
EVAP Canister Purge Valve Replacement
See Picture 5
1. Disconnect the hoses (A) and the EVAP canister purge valve 2P connector (B).
2. Remove the EVAP canister purge valve (C).
3. Install the valve in the reverse order of removal.
_______________________________________
I have a feeling that if you check these areas, you will find the problem.
Let me know if this helps or if you have other questions.
Take care,
Joe
Images (Click to enlarge)
Apr 5, 2019 at 8:06 PM