Hi and thanks for using 2CarPros.com.
That is a tough one. Honestly, because of the location of the distributor, I would remove it and drill a center hole through the broken studs and then try an easy out to remove them.
Here are directions for removal:
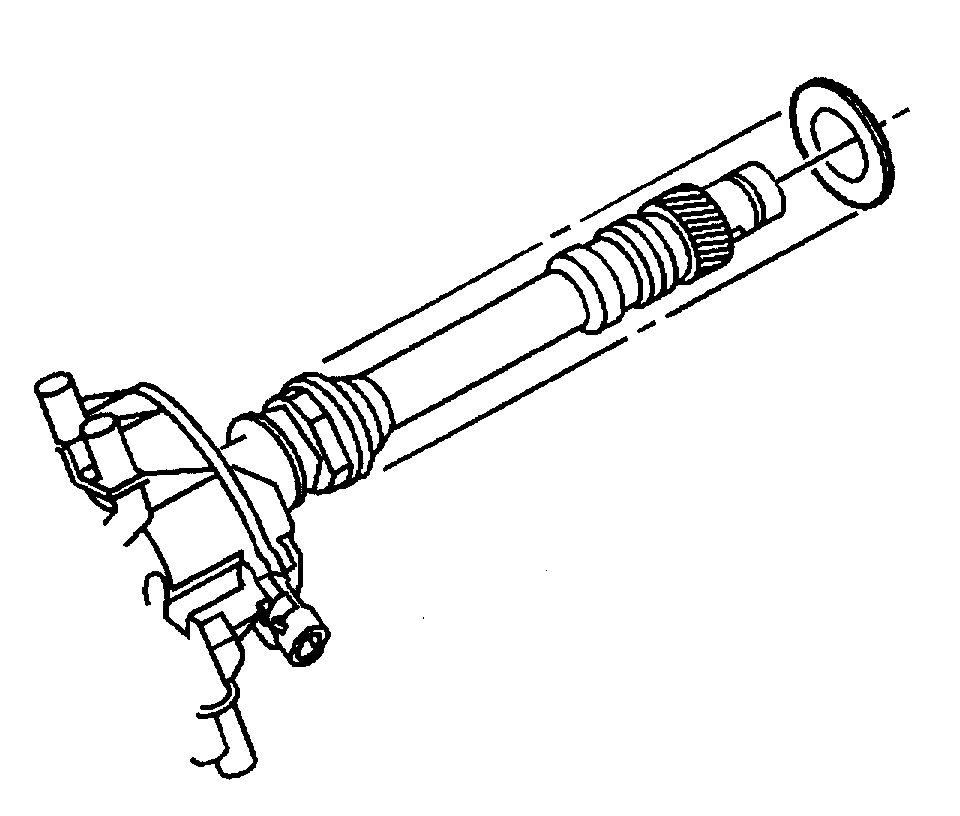
. DISTRIBUTOR REMOVAL
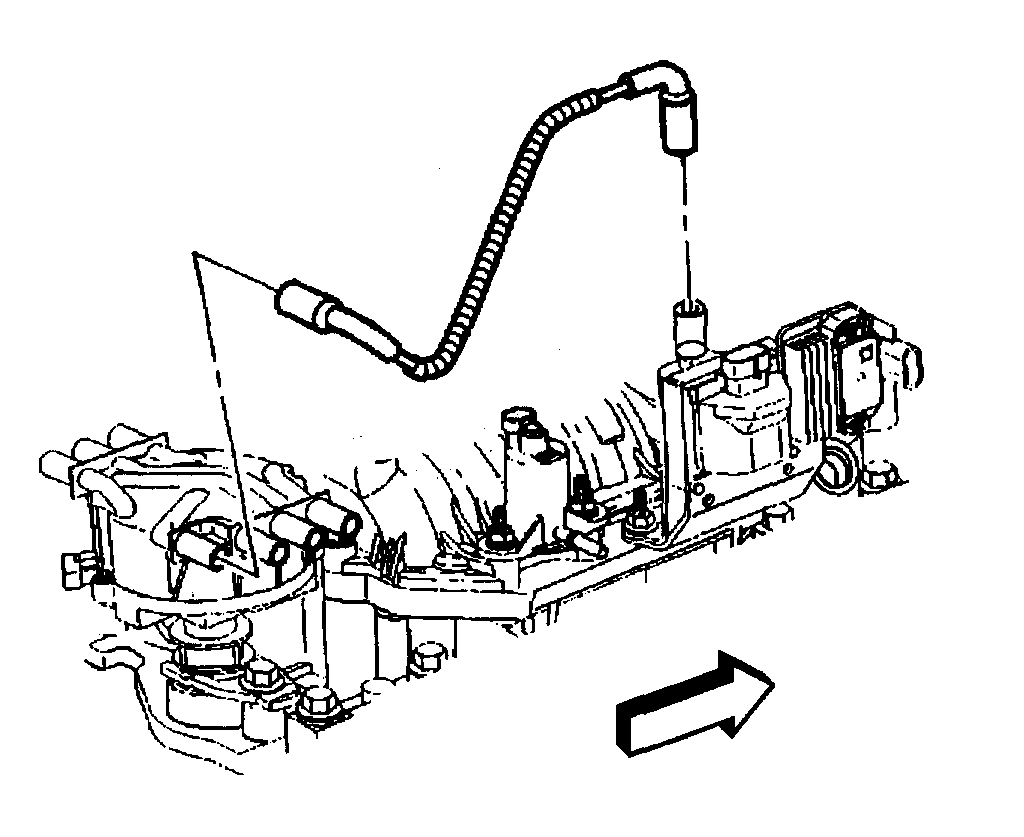
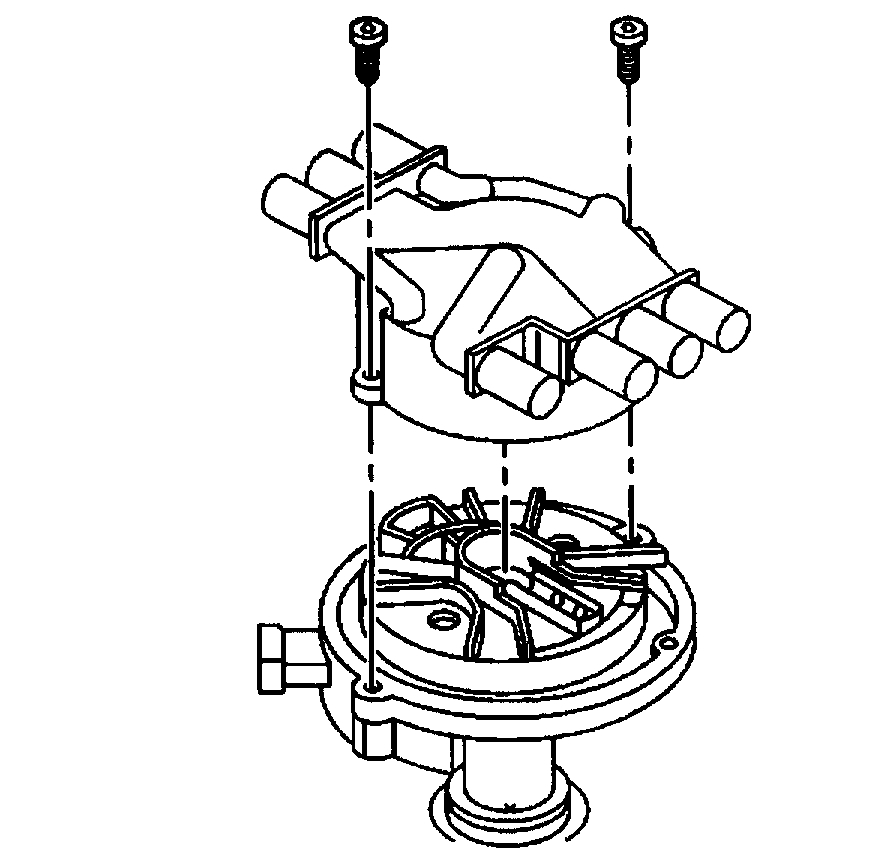
1. Remove the ignition coil wire harness from the ignition coil and distributor cap.
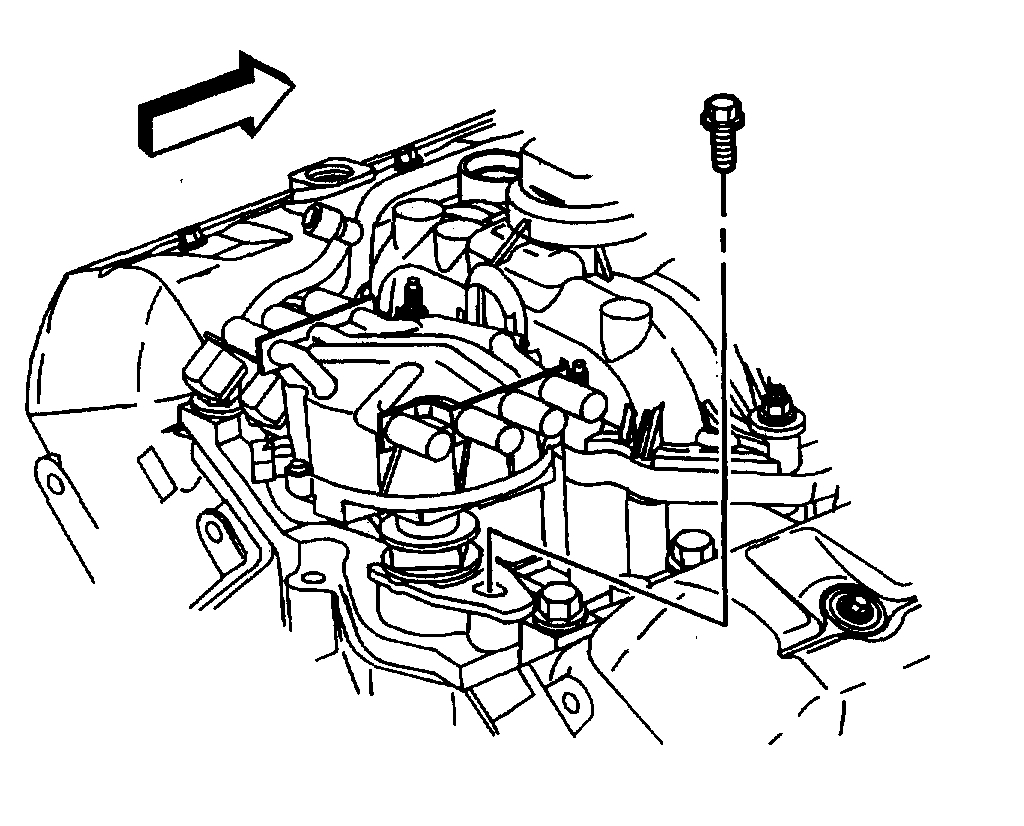
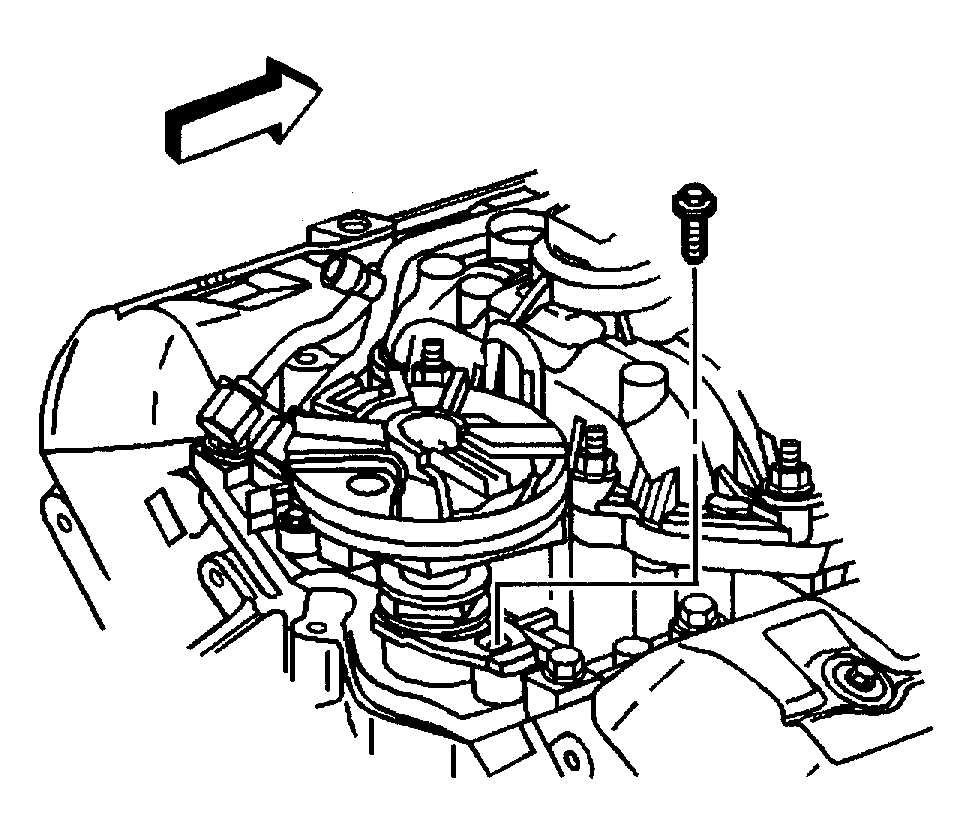
2. Remove the distributor clamp bolt.
3. Remove the distributor and the distributor clamp.
4. Remove the distributor gasket and discard.
The first 3 pictures correlate with these directions
________________________________
Here are replacement instructions:
Important: The engine front cover has 2 alignment tabs and the crankshaft balancer has 2 alignment marks (spaced 90 degrees apart) which are used for positioning number 1 piston at top dead center (TDC). With the piston on the compression stroke and at top dead center, the crankshaft balancer alignment mark (1) must align with the engine front cover tab (2) and the crankshaft balancer alignment mark (4) must align with the engine front cover tab (3).
1. Rotate the crankshaft balancer clockwise until the alignment marks on the crankshaft balancer are aligned with the tabs on the engine front cover and the number 1 piston is at top dead center of the compression stroke.
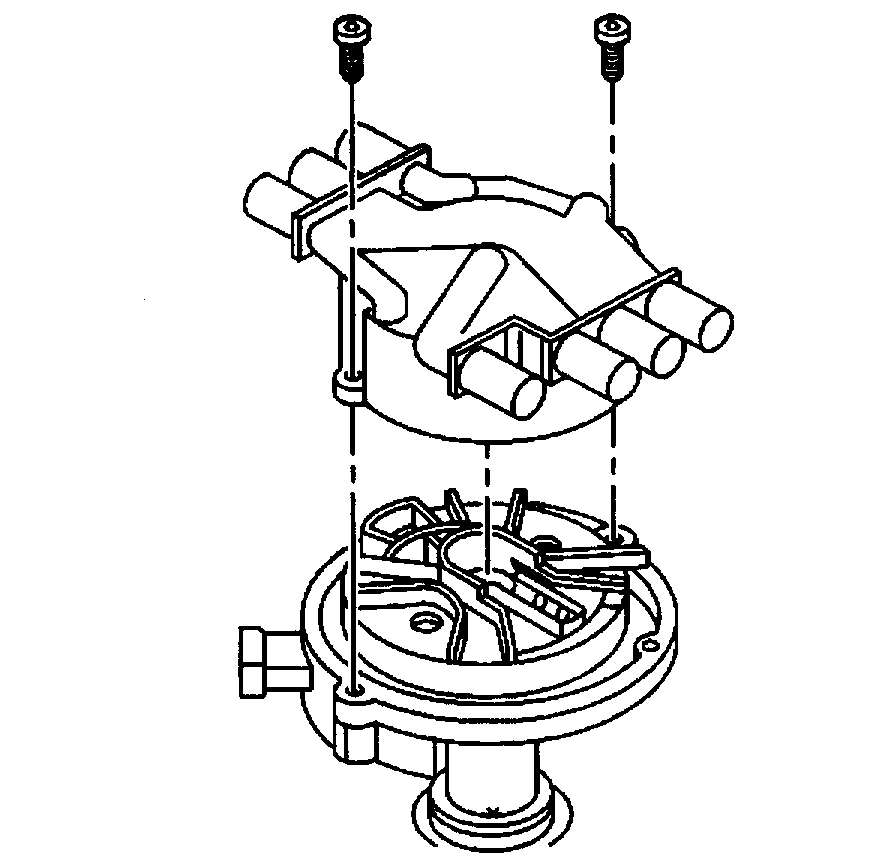
2. Remove the distributor cap bolts and discard.
3. Remove the distributor cap.
4. Install a NEW distributor gasket onto the distributor.
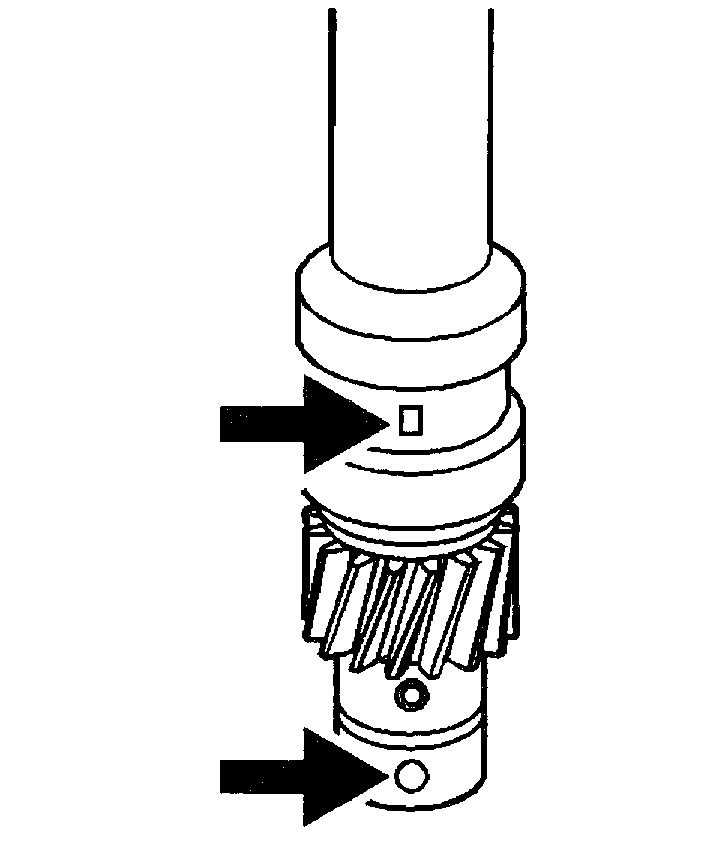
5. Align the indent hole on the driven gear with the paint mark on the distributor housing.
6. Ensure that the distributor rotor segment points to the cap hold area.
7. Align the slotted tang in the oil pump driveshaft with the distributor driveshaft.
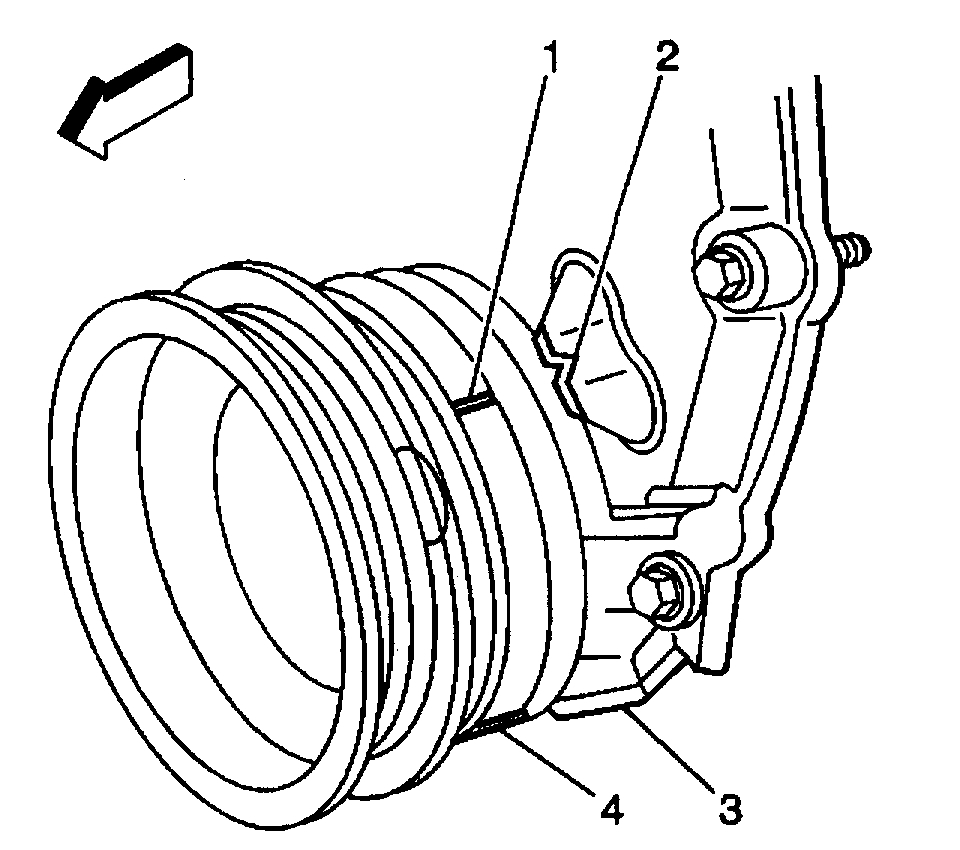
Rotate the oil pump driveshaft with a screwdriver if necessary. 8. Align the flat (1) in the
distributor housing toward the front of the engine.
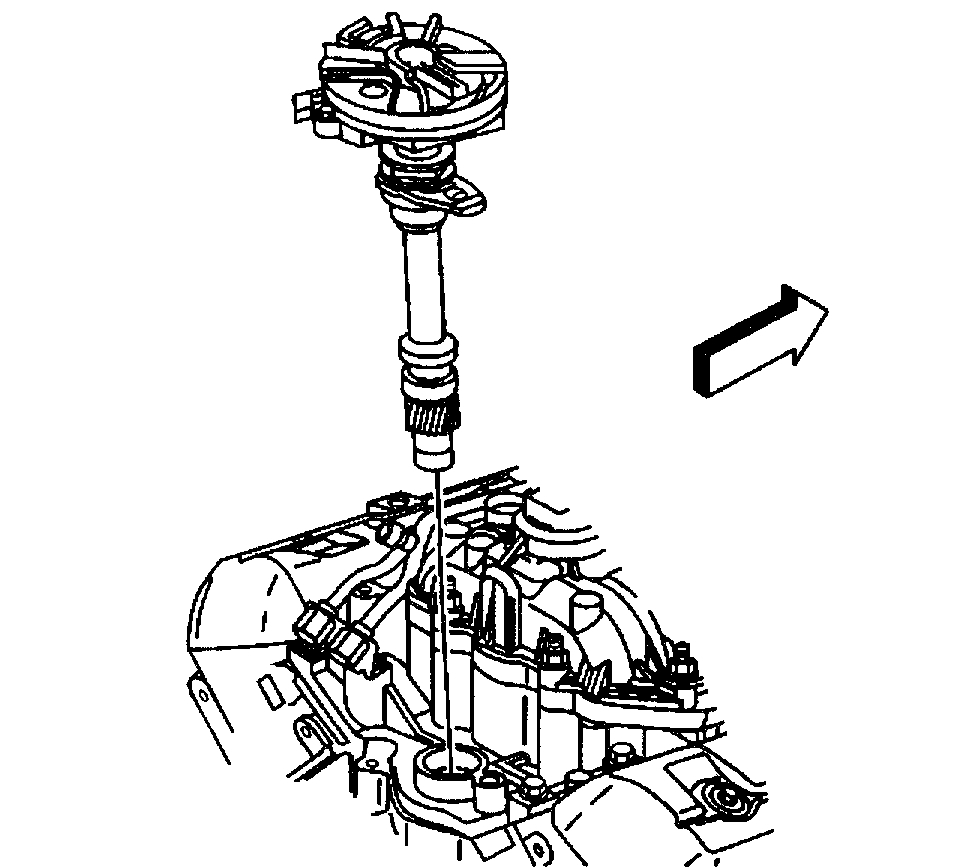
9. Install the distributor and distributor clamp.
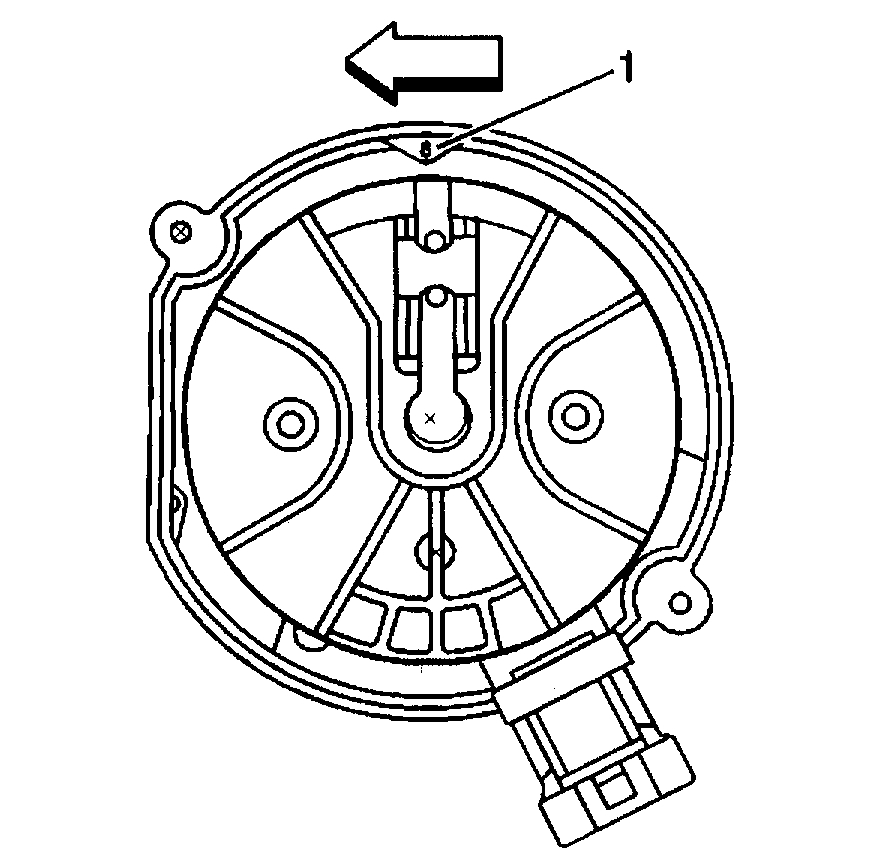
The flat in the distributor housing must point toward the front of the engine.
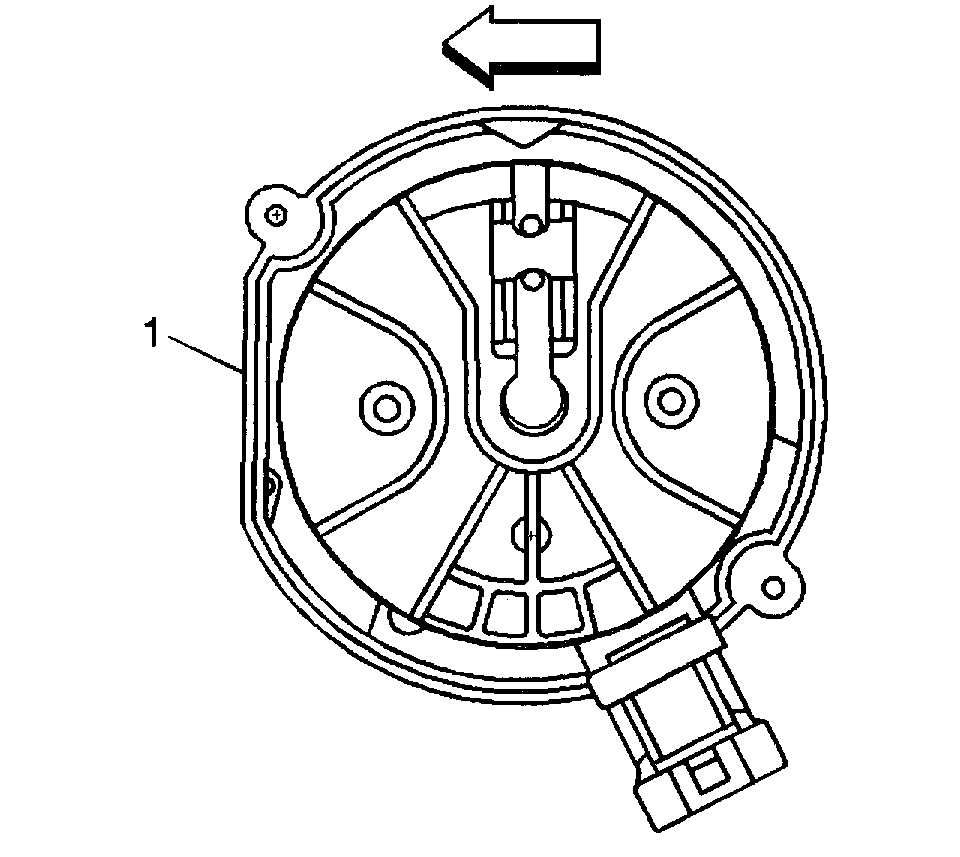
10. Once the distributor is fully seated, align the distributor rotor segment with the number 6 pointer (1) that is cast into the distributor base.
If the distributor rotor segment does not come within a few degrees of the number 6
pointer (1), the gear mesh between the distributor and camshaft may be off a tooth or
more. Repeat the procedure again in order to achieve proper alignment.
Notice: Refer to Fastener Notice in Service Precautions.
11. Install the distributor clamp bolt.
Tighten the distributor clamp bolt to 25 Nm (18 ft. lbs.).
12. Install the distributor cap and NEW distributor cap bolts.
Tighten the distributor cap bolts to 2.4 Nm (21 inch lbs.).
13. Install the ignition coil wire harness.
Starting with picture 4, the remaining pictures correlate with the install directions.
__________________________________________________
I hope this helps. Let me know if you have other questions or need additional information.
Take care,
Joe
Images (Click to enlarge)
Jul 26, 2018 at 8:59 PM