Hi,
It sounds like a problem with the mode door actuator. The mode door actuator is responsible for air flow direction. However, usually they either work or don't. The only thing I can say is to remove it and inspect the small plastic gear that drives the lever to change direction for missing teeth or damage.
__________________________
Here are the directions for replacement. You can use these to remove and replace. The attached pics correlate with the directions.
2005 Pontiac Truck Montana FWD V6-3.4L VIN E
Mode Actuator
Vehicle Heating and Air Conditioning Air Door Actuator / Motor Service and Repair Procedures Mode Actuator
MODE ACTUATOR
MODE ACTUATOR REPLACEMENT
REMOVAL PROCEDURE
1. Remove the knee bolster from the instrument panel.
2. Disconnect the mode actuator electrical connector.
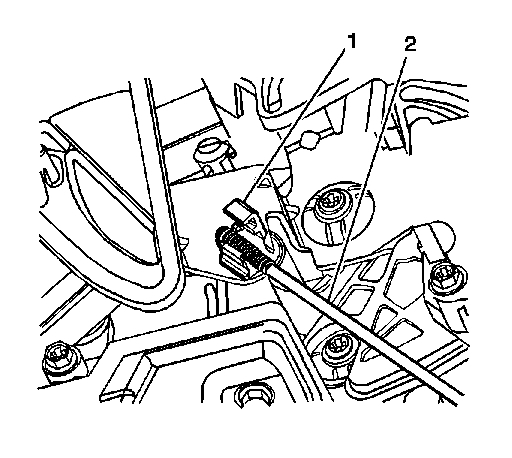
pic 1
3. Open the mode actuator push rod retainer clip (1) with a small flat bladed screwdriver.
IMPORTANT: Count the number of threads showing from the tip of the mode actuator push rod to the end of the retainer clip.
4. Disconnect the mode actuator push rod (2) from the retainer clip (1).
5. Disconnect the I/P wiring harness clip from the I/P support bracket.
IMPORTANT: Disconnect the I/P wiring harness clip from the I/P support bracket to help access the mode actuator screws.
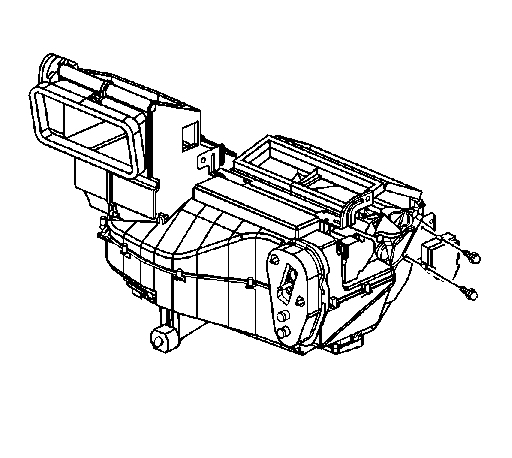
pic 2
6. Remove the mode actuator mounting screws.
7. Remove the mode door actuator.
INSTALLATION PROCEDURE
pic 3
1. Install the mode actuator.
2. Install the mode actuator mounting screws.
Tighten the screws to 1.6 N.m (14 lb in).
NOTE: Refer to Fastener Notice in Service Precautions.
3. Connect the I/P wiring harness clip to the I/P support bracket.
pic 4
4. Connect the mode actuator push rod (2) to the retainer clip (1).
IMPORTANT: Align the counted number of threads on the mode actuator push rod (2) with the tip of the retainer clip (1).
5. Close the push rod retainer clip (1).
6. Connect the mode actuator electrical connector.
7. Install the knee bolster.
_______________________
I hope this helps. Let me know if you have questions.
Take care and God Bless,
Joe
Images (Click to enlarge)
Feb 17, 2021 at 6:41 PM