Hi,
Here are the directions for installation. The attached pics correlate with the directions.
___________________________________
2003 Honda Civic L4-1.3L Hybrid
Cam Chain Installation
Vehicle Engine, Cooling and Exhaust Engine Timing Components Timing Chain Service and Repair Procedures Cam Chain Installation
CAM CHAIN INSTALLATION
Installation
NOTE: Keep the cam chain away from magnetic fields.
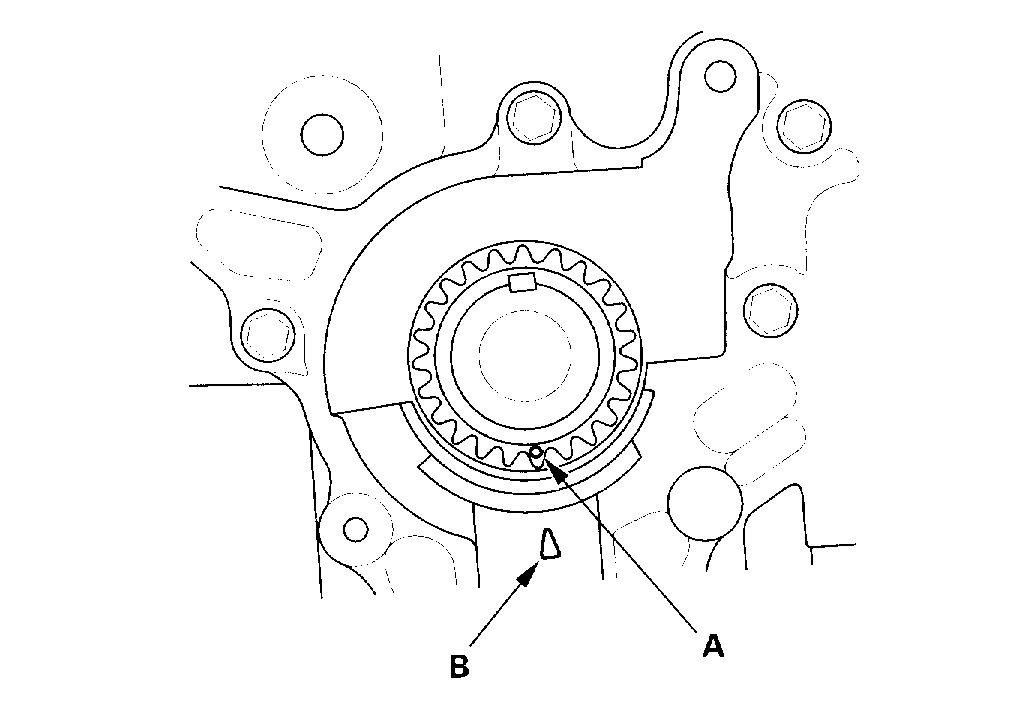
Pic 1
1. Set the crankshaft to top dead center (TDC). Align the TDC mark (A) on the crankshaft sprocket with the pointer (B) on the oil pump.
Pic 2
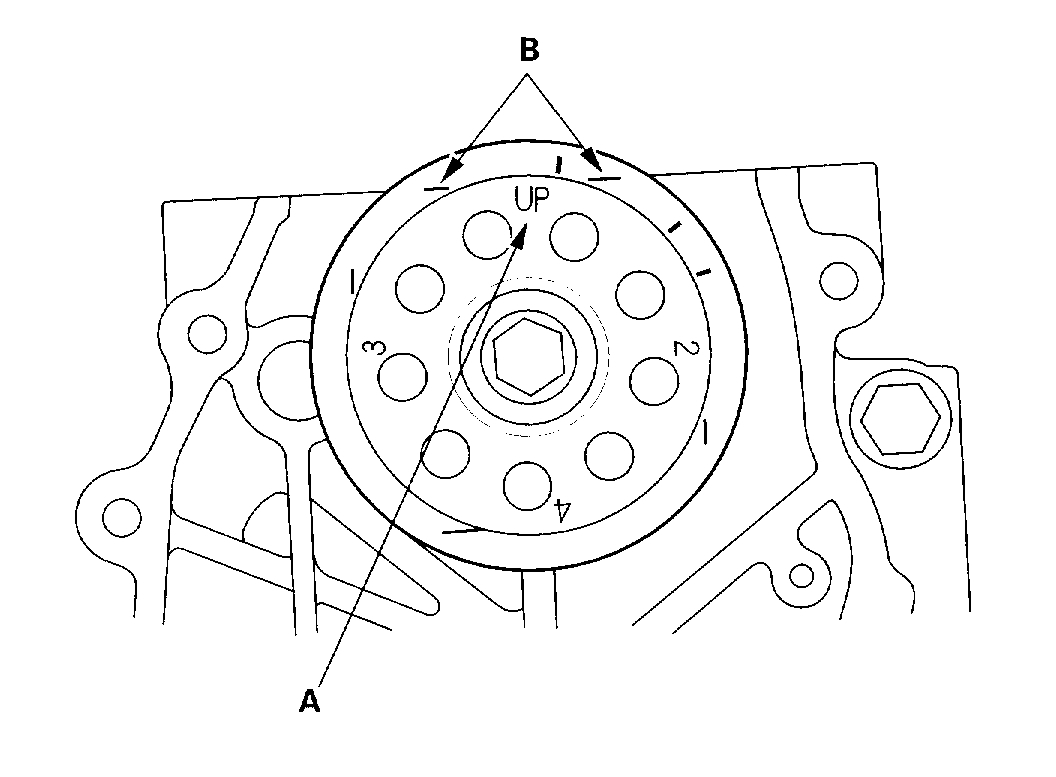
2. Set the No. 1 piston at TDC. The "UP" mark (A) on the camshaft sprocket should be at the top, and the TDC grooves (B) on the camshaft sprocket should line up with the top edge of the head.
Pic 3
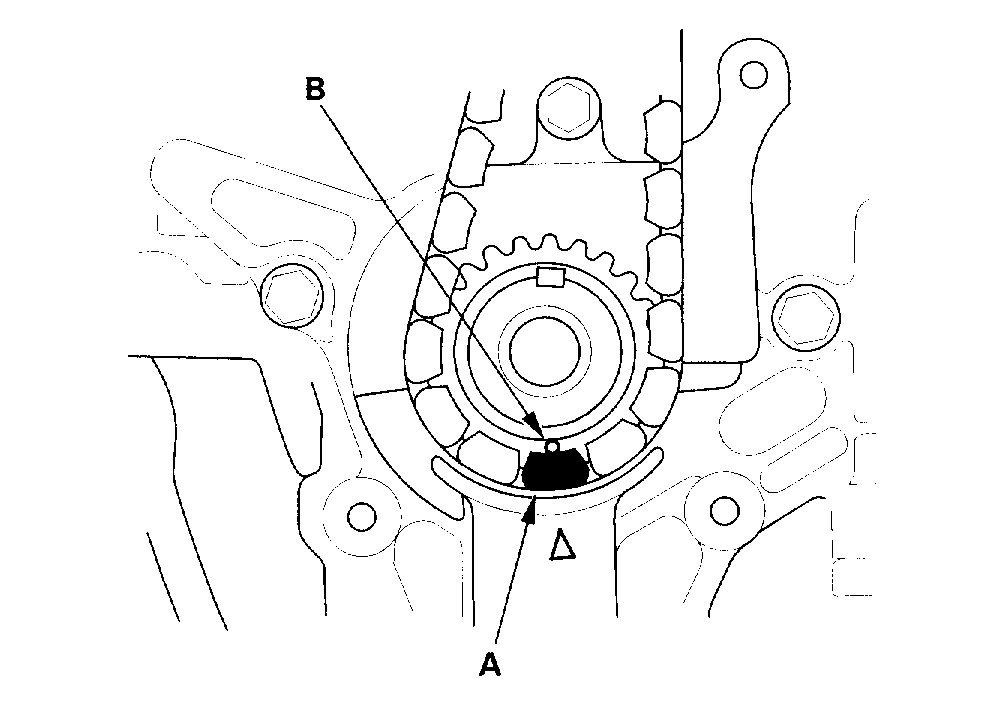
3. Install the cam chain on the crankshaft sprocket with the colored piece (A) aligned with the TDC mark (B) on the crankshaft sprocket.
Pic 4
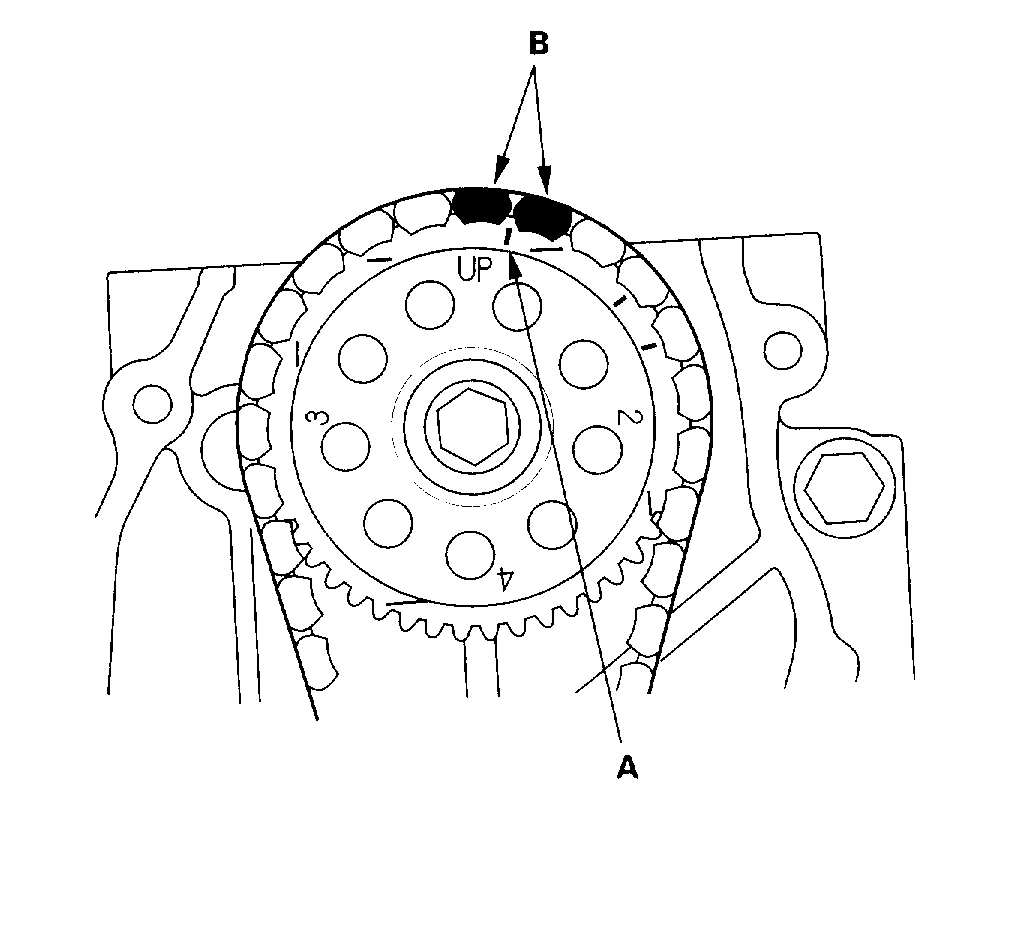
4. Install the cam chain on the camshaft sprocket with the pointer (A) aligned with the center of the two colored pieces (B).
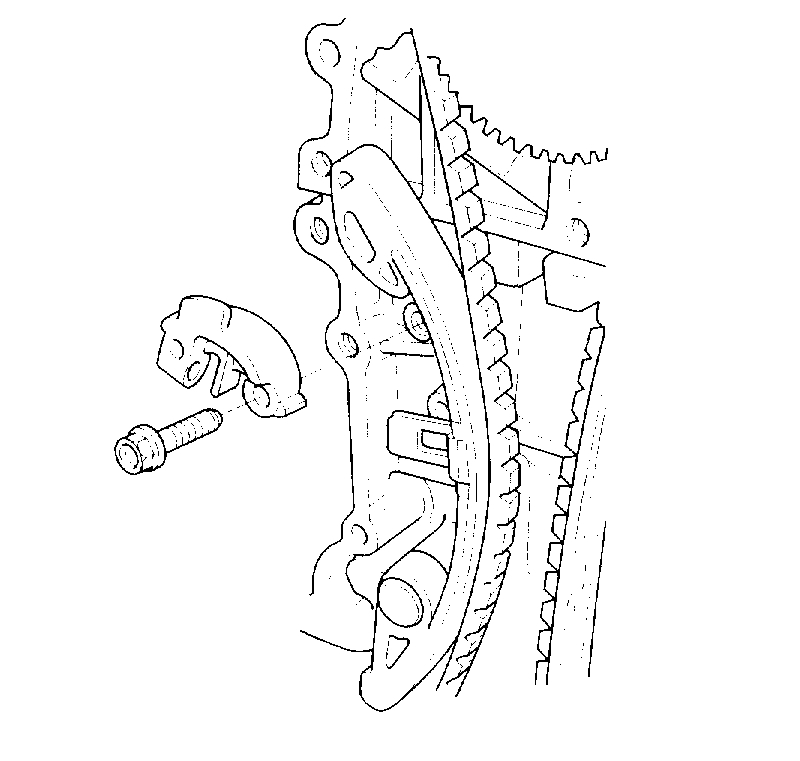
Pic 5
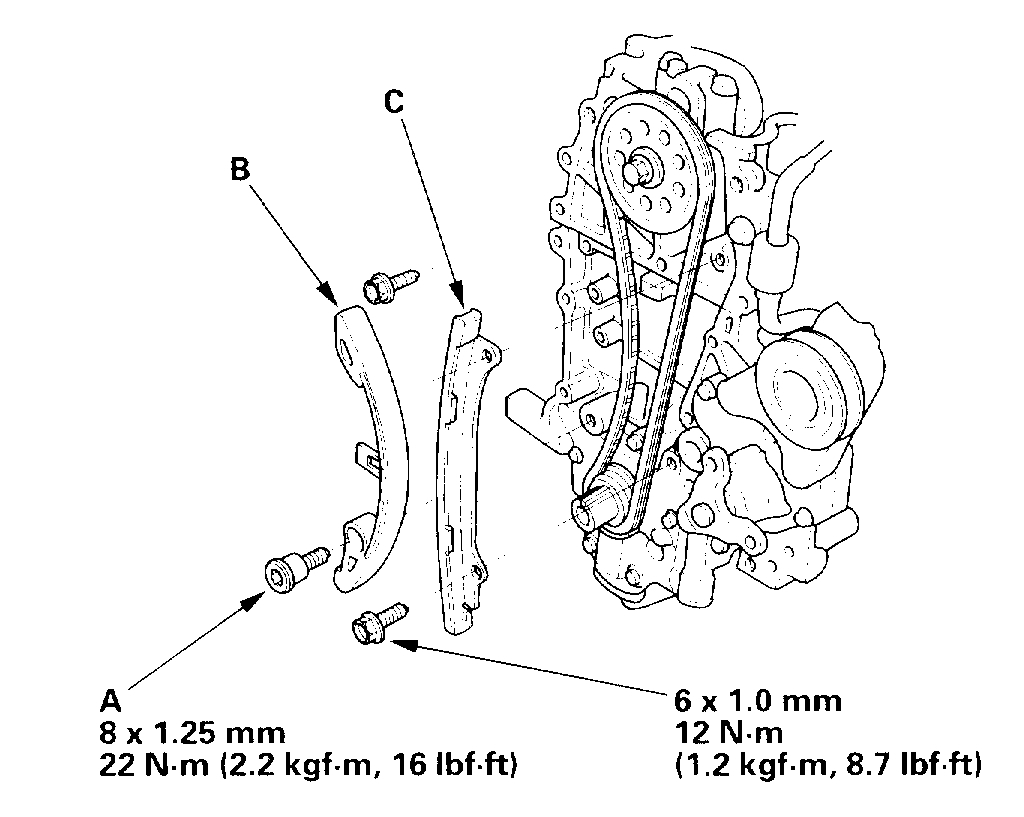
5. Apply engine oil to the threads of the cam chain tensioner rail mounting bolt (A).
6. Install the cam chain tensioner rail (B) and cam chain guide (C).
Pic 6
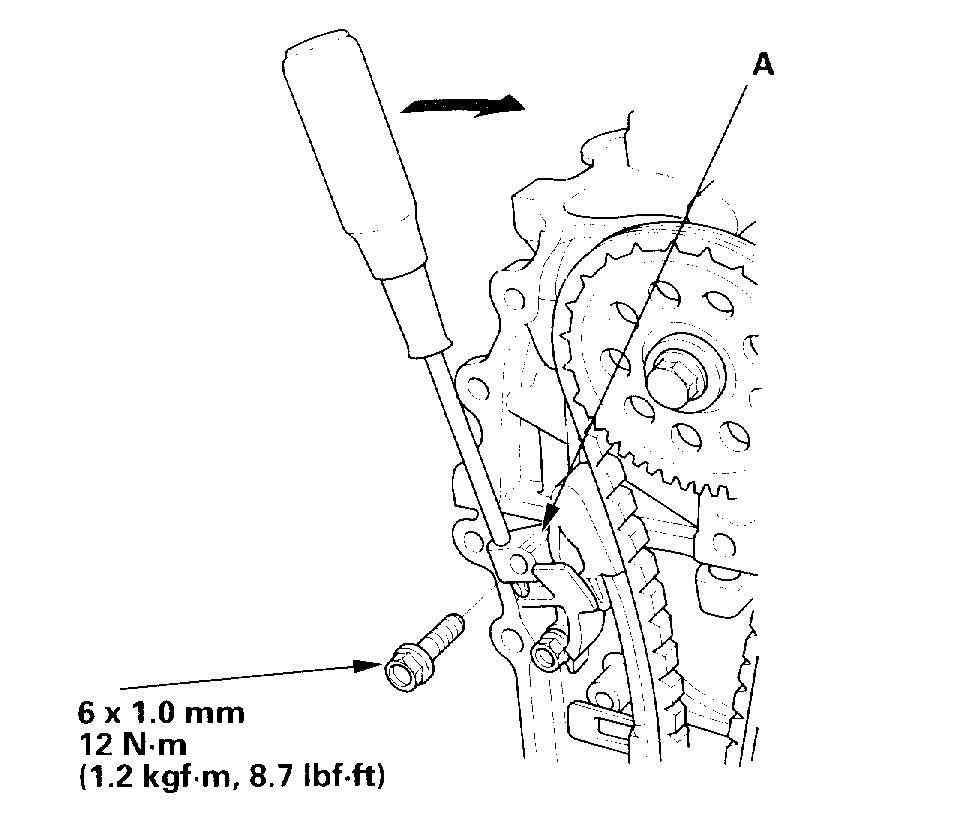
7. Install the cam chain tensioner, and tighten the bolt loosely.
Pic 7
8. Apply engine oil to the sliding surface of the cam chain tensioner (A).
9. Turn the cam chain tensioner clockwise to compress the cam chain tensioner rail. Install the remaining bolt, then tighten the bolts.
10. Check the chain case oil seal for damage. If the oil seal is damaged, replace the chain case oil seal.
11. Remove old liquid gasket from the chain case mating surfaces, bolts, and bolt holes.
12. Clean and dry the chain case mating surfaces.
Pic 8
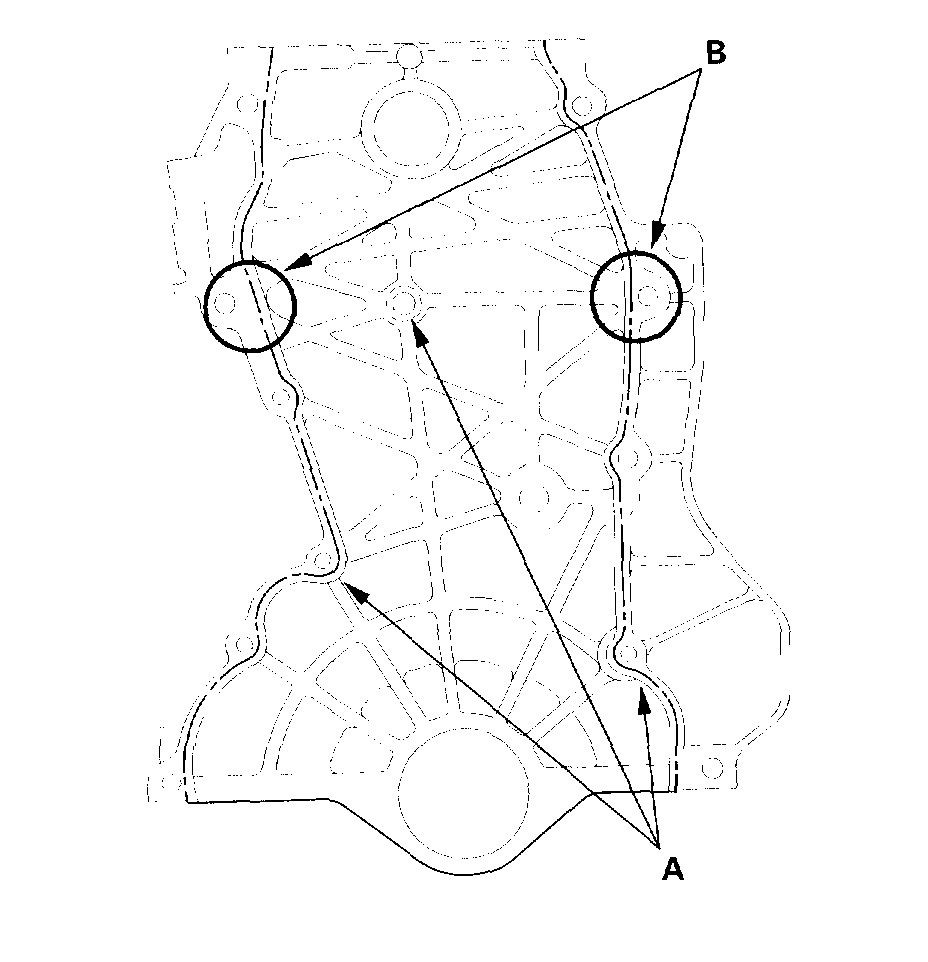
13. Apply liquid gasket, P/N 08718-0009, to the cylinder block mating surface of the chain case and the inner threads of the holes.
NOTE:
Apply a 1.5 mm wide bead of liquid gasket along the broken line (A).
Apply a 3.0 mm wide bead of liquid gasket to the cylinder block upper surface contact areas (B) on the chain case.
Do not install the parts if 5 minutes or more have elapsed since applying liquid gasket. Instead, reapply liquid gasket after removing old residue.
Pic 9
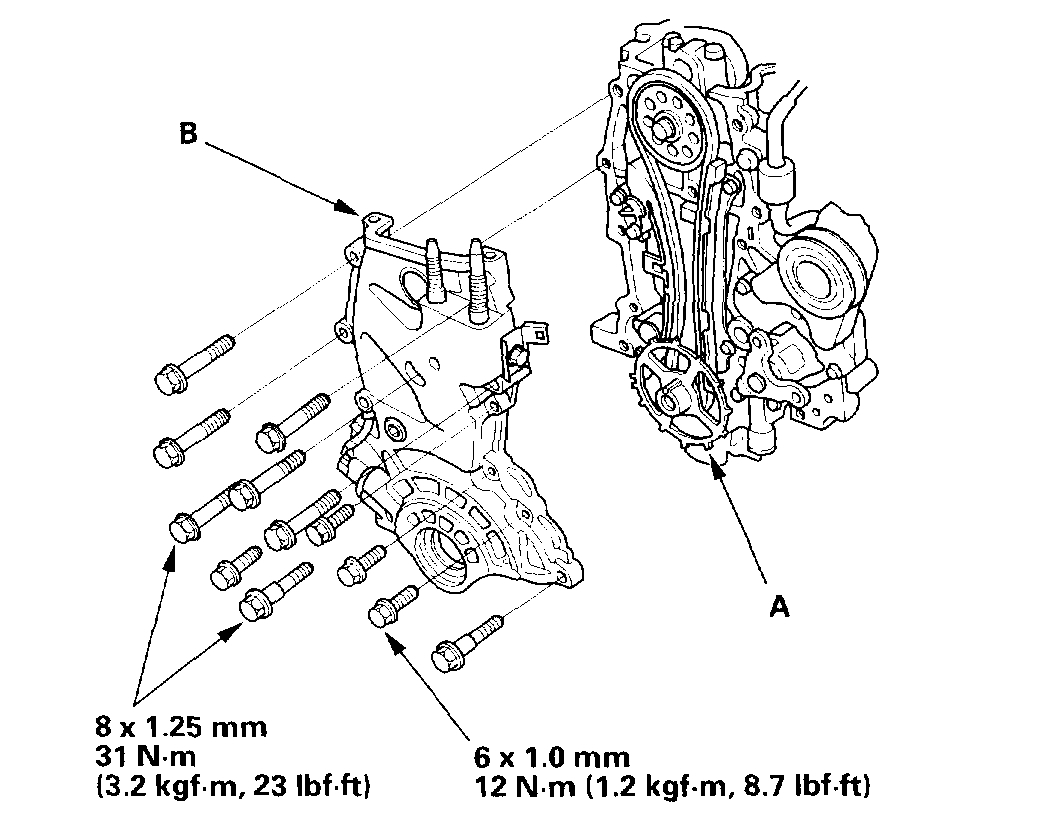
14. Install the pulse plate (A) and chain case (B).
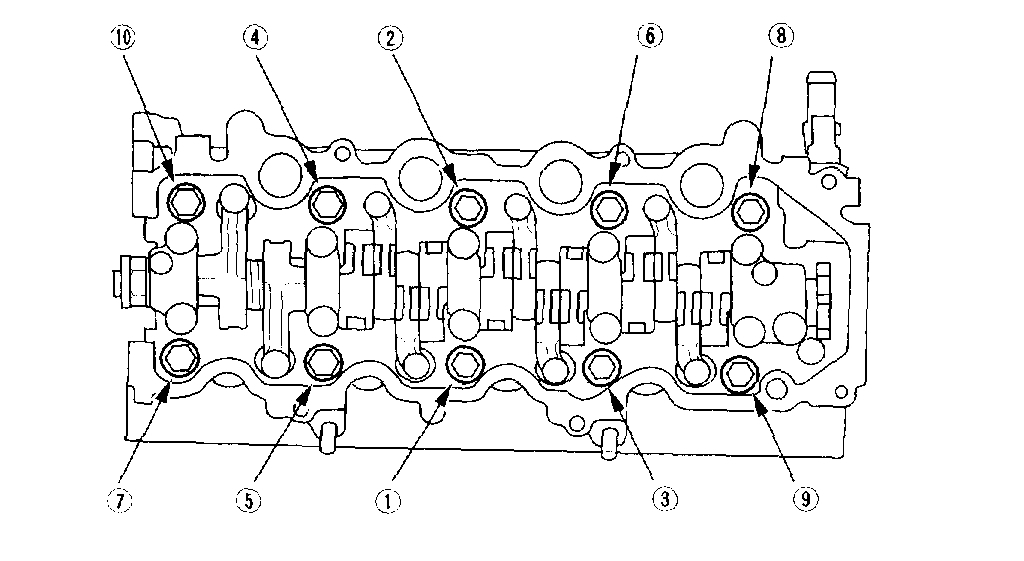
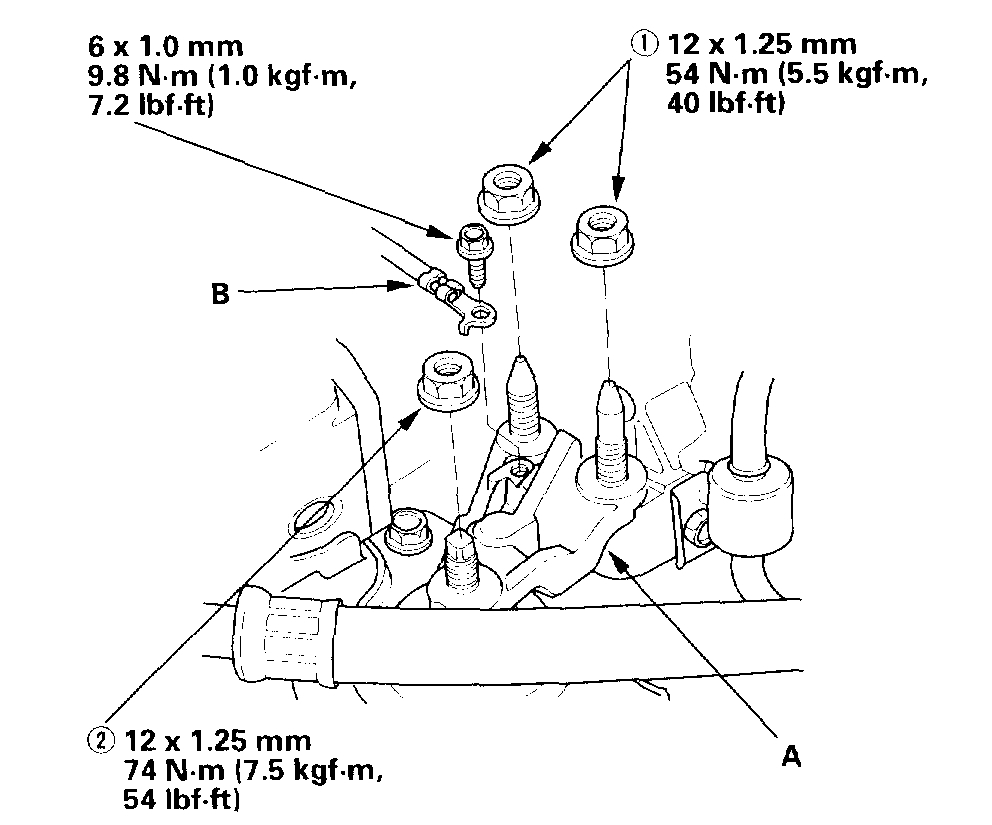
Pic 10
15. Install the upper bracket (A), then tighten the mounting nuts in the numbered sequence shown.
16. Install the ground cable (B).
17. Install the oil pan.
18. Install the crankshaft pulley.
19. Install the cylinder head cover.
20. Install the water pump pulley.
21. Install the drive belt and adjust it.
___________________________________
Let me know if this helps.
Joe
Images (Click to make bigger)
Wednesday, December 4th, 2019 AT 6:51 PM