Replacing rear brake pads and rotors really isn't too hard. You can expect to get around 30,000 miles from a set of pads, but that is based on driving habits and terrain. Changing them yourself can save you a lot. If you get lifetime parts from a parts store and do it yourself, you shouldn't have to pay for brake pad replacement again.
First, here is a link that shows in general how the process is done:
https://www.2carpros.com/articles/how-to-replace-rear-brake-pads-and-rotors
Here are the directions specific to your vehicle. The attached pics correlate with the directions.
_______________________________
2005 Chevy Truck TrailBlazer 4WD L6-4.2L VIN S
Brake Pads Replacement - Rear
Vehicle Brakes and Traction Control Disc Brake System Brake Pad Service and Repair Procedures Brake Pads Replacement - Rear
BRAKE PADS REPLACEMENT - REAR
Brake Pads Replacement - Rear
Caution: Refer to Brake Dust Caution in Service Precautions.
Removal Procedure
pic 1
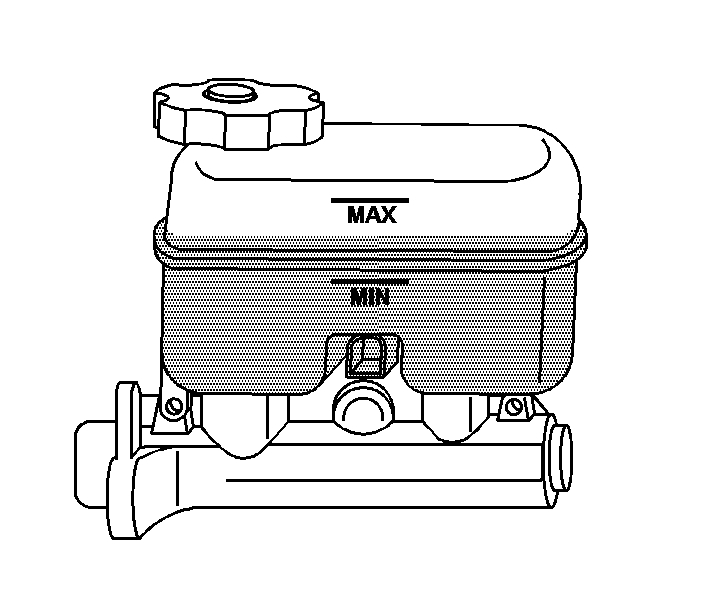
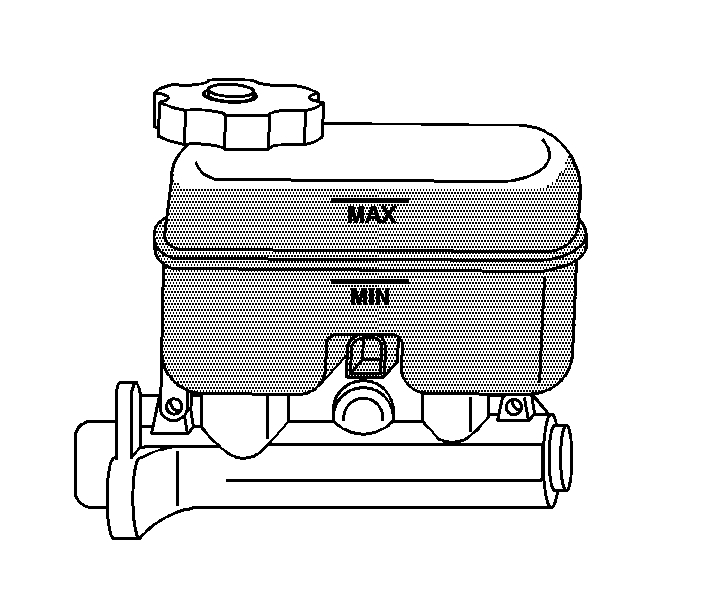
1. Inspect the brake fluid level in the brake master cylinder reservoir.
2. If the brake fluid is midway between the maximum-full point and the minimum allowable level, no brake fluid needs to be removed from the reservoir before proceeding.
pic 2
3. If the brake fluid level is higher than midway between the maximum-full point and the minimum allowable level, remove the brake fluid with appropriate tool to the midway point before proceeding.
4. Raise the vehicle. Refer to Vehicle Lifting.
5. Remove the tire and wheel assembly.
pic 3
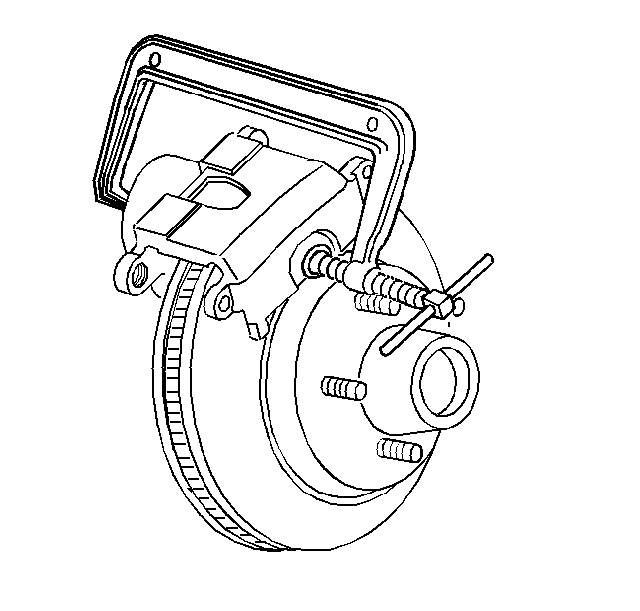
6. Compress the front brake caliper piston.
1. Install a large C-clamp over the top of the brake caliper housing and against the back of the outboard brake pad.
2. Slowly tighten the C-clamp until the piston pushes into the brake caliper enough to slide the brake caliper off the rotor.
3. Remove the C-clamp from the brake caliper.
pic 4
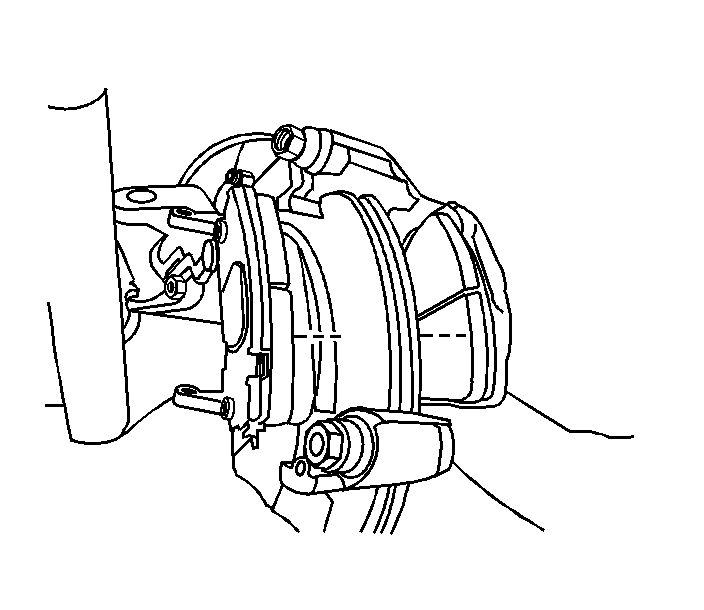
7. Remove the upper brake caliper mounting bolt.
8. Rotate the rear brake caliper downward until it stops.
pic 5
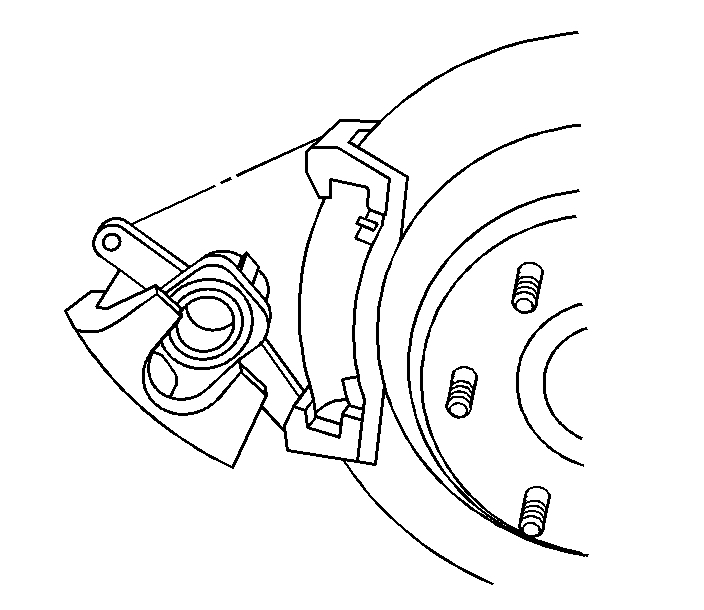
9. Remove the rear brake pads.
pic 6
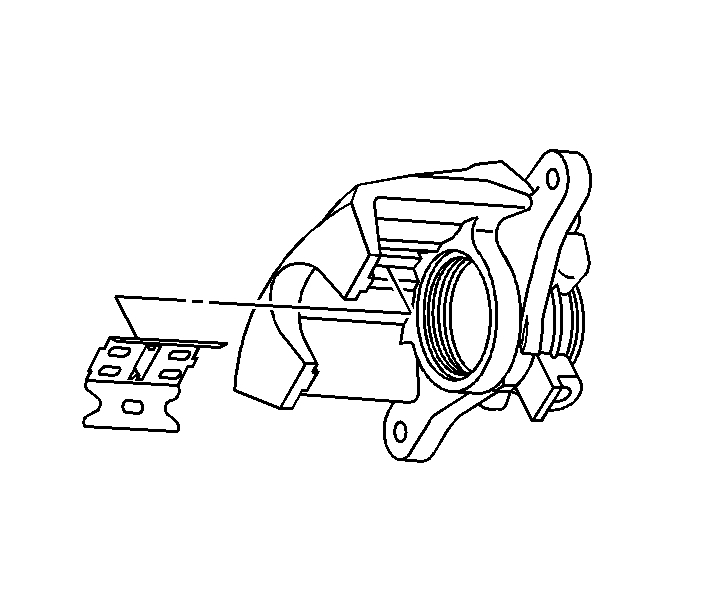
10. Remove the brake pad retaining clips from the brake caliper mounting bracket.
pic 7
11. Remove the retaining clip from the brake caliper.
12. Clean the brake caliper mounting bracket with denatured alcohol.
13. Using non-lubricated, filtered air, dry the brake caliper mounting bracket.
Installation Procedure
pic 8
1. Important: When installing new brake pads, DO NOT reuse the old retaining clips for the brake pad. Use only NEW brake pad retaining clips.
Install the brake pad retaining clips on the brake caliper mounting bracket.
pic 9
2. Install the brake pads to the brake caliper mounting bracket.
pic 10
3. Important: Ensure that the retaining clip for the brake pads is properly seated in the brake caliper.
Install the retaining clip from the brake caliper.
pic 11
4. Rotate the rear brake caliper upward until the brake caliper assembly is in the proper position.
pic 12
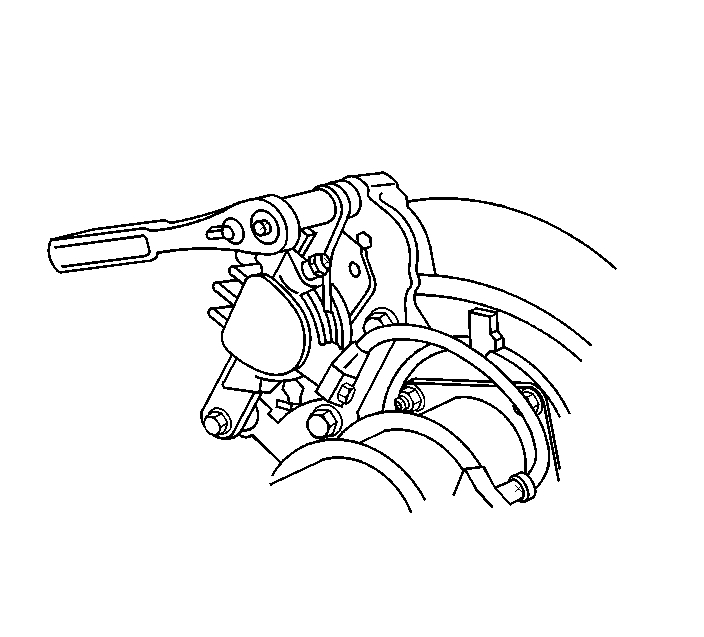
5. Notice: Refer to Fastener Notice in Service Precautions.
Install the upper brake caliper mounting bolt.
Tighten the brake caliper bolt to 31 Nm (23 ft. lbs.).
6. Install the tire and wheel assembly.
7. Lower the vehicle. Refer to Vehicle Lifting.
8. Fill the brake master cylinder reservoir (if needed).
9. Caution: Refer to Firm Brake Pedal Caution in Service Precautions.
Pump the brake pedal slowly and firmly in order to seat the brake pads.
10. Burnish the new brake pads.
_______________________________
Rear Rotor Replacement
2005 Chevy Truck TrailBlazer 4WD L6-4.2L VIN S
Brake Rotor Replacement - Rear
Vehicle Brakes and Traction Control Disc Brake System Brake Rotor/Disc Service and Repair Procedures Brake Rotor Replacement - Rear
BRAKE ROTOR REPLACEMENT - REAR
Brake Rotor Replacement - Rear
^ Tools Required
- J 2619-01 Slide Hammer
- J 42450-A Wheel Hub Resurfacing Kit
- J 21177-A Drum to Brake Shoe Clearance Gage
- J-46277 Rotor Removal Tool
Removal Procedure
Caution: Refer to Brake Dust Caution in Service Precautions.
1. Inspect the brake fluid level in the brake master cylinder reservoir.
2. If the brake fluid is midway between the maximum-full point and the minimum allowable level, no brake fluid needs to be removed from the reservoir before proceeding.
3. If the brake fluid level is higher than midway between the maximum-full point and the minimum allowable level, using an appropriate tool, remove the brake fluid to the midway point before proceeding.
4. Raise the vehicle. Refer to Vehicle Lifting.
5. Remove the tire and wheel assembly.
pic 13
6. Compress the rear brake caliper piston.
1. Install a large C-clamp over the top of the brake caliper housing and against the back of the outboard brake pad.
2. Slowly tighten the C-clamp until the piston pushes into the brake caliper enough to slide the brake caliper off the rotor.
3. Remove the C-clamp from the brake caliper.
pic 14
7. Remove the rear brake caliper mounting bracket.
pic 15
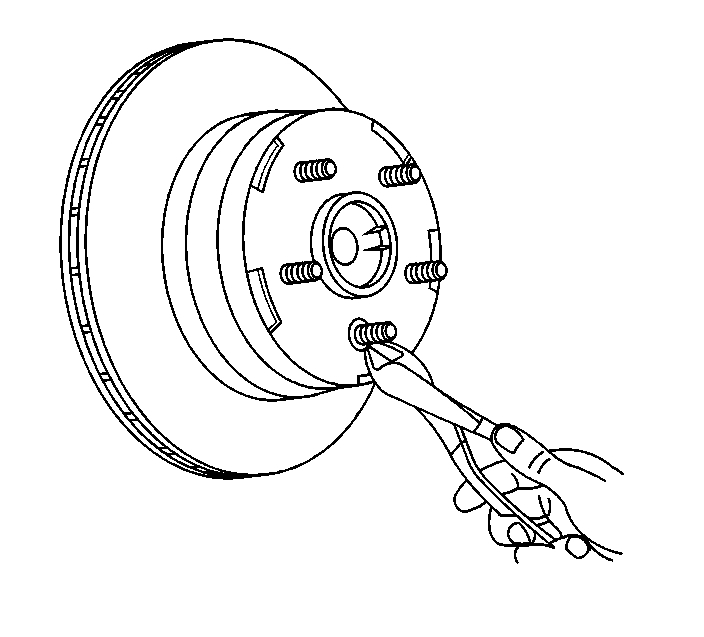
8. Remove the brake rotor retaining clips, if equipped.
pic 16
9. If the brake rotor is stuck, perform the following:
1. Assemble J-46277 to J 2619-01.
2. Insert J-46277 between the rotor friction surfaces in the vent section of the rotor. DO NOT place the J-46277 on the rotor friction surface.
3. Using the J-46277 and J 2619-01 , release the rotor from the hub assembly.
pic 17
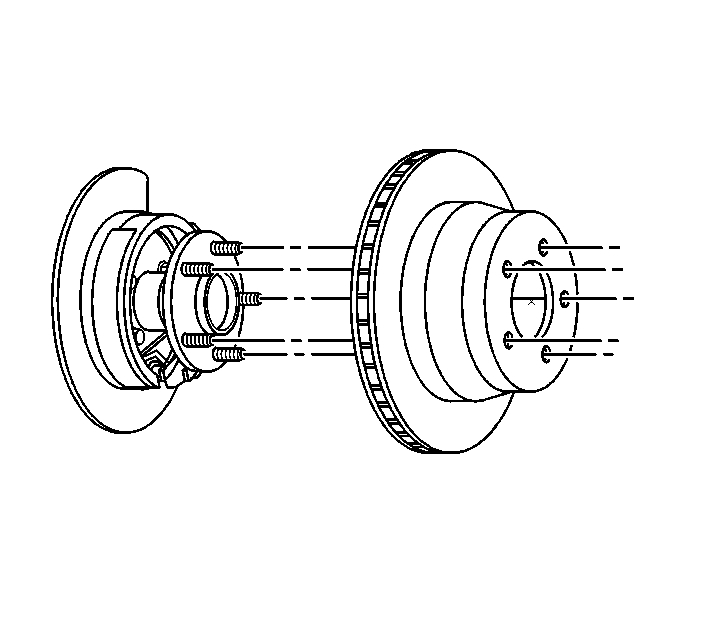
10. Notice: Whenever the rotor has been separated from the axle flange, clean any rust or foreign material from the mating surface of the axle flange and brake rotor. Failure to do this may result in increased lateral runout of the rotor and brake pulsation.
Important: If the brake rotor is not going to be replaced but just removed from the front hub to be refinished, mark the brake rotor left or right and the relationship of the brake rotor and a wheel stud. In doing so, it will reduce the possibility of vibration in the brake system.
Remove the brake rotor.
pic 18
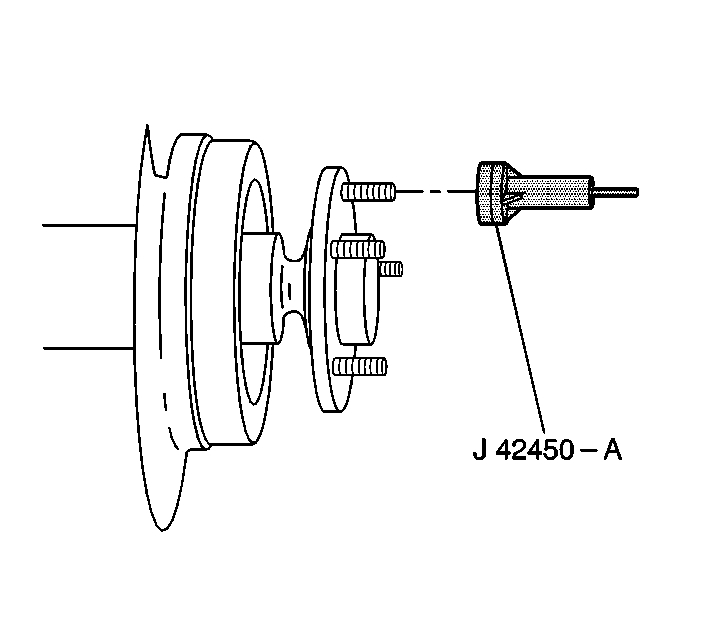
11. Using the J 42450-A , clean the brake rotor to the rear axle flange contact area.
12. Refinish the rotor, if necessary.
13. Inspect the park brake components. If any of the following conditions are found, replace the affected parts.
^ Bent or broken hold down spring
^ Broken, cracked, or worn brake shoe lining
^ Bent or damaged brake shoe
^ Worn, bent, or damaged backing plate
Installation Procedure
1. Clean the park brake shoes using denatured alcohol.
2. Dry the park shoes using non-lubricated, filtered air.
3. Lubricate the contact area between the park brake shoe and the backing plate with high temperature silicone brake lubricant.
4. Important: It maybe necessary to readjust the park brake shoes to allow the brake rotor to be reinstalled.
Adjust the park brake.
pic 19
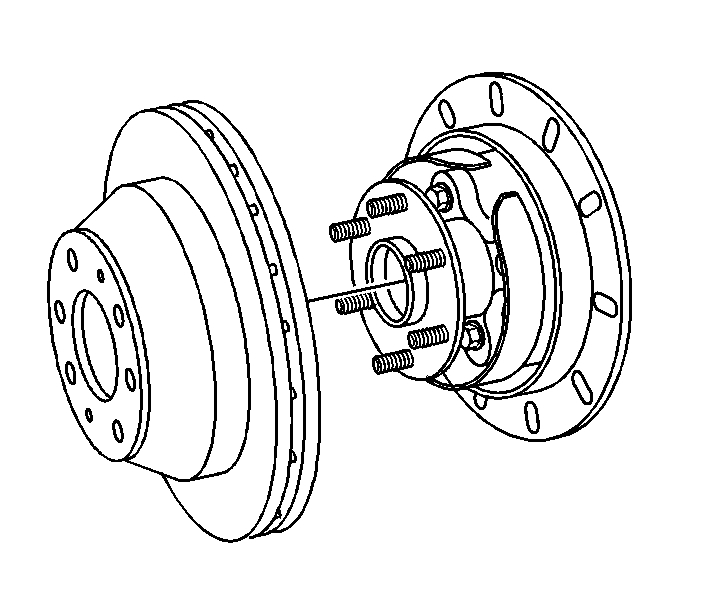
5. Important: Ensure that the rotor to axle flange relationships marks are aligned, if the brake rotor has been refinished, after the brake rotor is installed.
Install the brake rotor by slowly turning the rotor while pushing the rotor on the axle flange.
pic 20
6. Install the rear brake caliper mounting bracket.
7. Install the tire and wheel assembly.
8. Lower the vehicle. Refer to Vehicle Lifting.
9. Refill the brake master cylinder reservoir, if needed.
10. Caution: Do not move the vehicle until a firm brake pedal is obtained. Failure to obtain a firm pedal before moving vehicle may result in personal injury.
Pump the brake pedal slowly and firmly in order to seat the brake pads.
11. Burnish replaced or refinished rotors.
____________________________________________
I hope this helps. Let me know if you have other questions.
Take care and God Bless,
Joe
Images (Click to enlarge)
Feb 19, 2021 at 8:02 PM