1. Remove the door trim panel and inner panel water deflector.
2. Raise the window to half-up position and hold in place by inserting a rubber wedge door stops at the front and rear of the window between window and inner panel.
3. Remove the rear guide channel and inner panel cam channel.
4. Punch out the center pins of the regulator rivets; then drill out the rivets using a 1 / 4 in. (6mm) bit.
5. Move the regulator rearward and disconnect wire harness from the motor (if equipped). Disengage the roller on the regulator lift arm from glass sash channel.
6. Remove the regulator through the rear access hole.
If electric motor removal from the regulator is required, the sector gear must be locked in position. The regulator lift arm is under tension from the counterbalance spring and could cause personal injury if the sector gear is not locked in position.
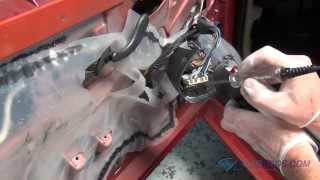
7. Drill a hole through the regulator sector gear and backplate and install a bolt and nut to lock the sector gear in position.
8. Using a 3 / 16 in. (5mm) bit, drill out the motor attaching rivets and remove the motor from the regulator.
To install:
9. To install the motor to the regulator. Use a rivet tool, J-29022 or equivalent, and install 3 / 16 in. (5mm) rivets or 3 / 16 in. (5mm) nuts and bolts. Remove the bolt and nut used to secure the sector gear in position.
10. Place the regulator through the rear access hole into the door inner panel. If the electric regulator is being installed, engage the wire connector to motor prior to installing the regulator to the inner panel.
11. Locate the lift arm roller into the glass sash channel.
12. Using rivet tool J-29022 or equivalent, rivet the regulator to the inner panel of the door using 1 / 4 in. (6mm) 1 / 2 in. (13mm) aluminum peel type rivets (part No. 9436175 or equivalent). If the rivet tool is not available, use the following nut and bolt method:
A. Install U-clips on the regulator at the attaching locations. Be sure to install the clips with clinch nuts on the outboard side of the regulator.
B. Locate the regulator in the door inner panel. If the electric regulator is being installed, connect the wire connector to the regulator motor.
C. Locate the lift arm roller in the glass sash channel.
D. Align the regulator with clinch nuts to holes in the inner panel.
E. Attach the regulator (and motor) to the door inner panel with 1 / 4 -20 x 1 / 2 in. Screws (part No. 9419723 or equivalent) into 1 / 4 in. (6mm) nuts with integral washers. Tighten the screw to 90-125 inch lbs. (10-14 Nm) torque.
13. Install the inner panel cam channel and rear guide channel.
14. Remove the rubber wedge door stops at the front and rear of the window between window and inner panel.
15. Install the inner panel water deflector and the door trim panel.
Wednesday, March 31st, 2010 AT 7:37 PM