Hi,
If you followed those steps and have no flow, it does sound like the pump is the issue. I don't know if you need them, but I am adding the directions for chain/pump replacement. They are extensive. The attached pics correlate with the directions.
_________________________________
2008 Lincoln Truck MKX V6-3.5L
Removal and Replacement
Vehicle Engine, Cooling and Exhaust Engine Water Pump Service and Repair Removal and Replacement
REMOVAL AND REPLACEMENT
COOLANT PUMP
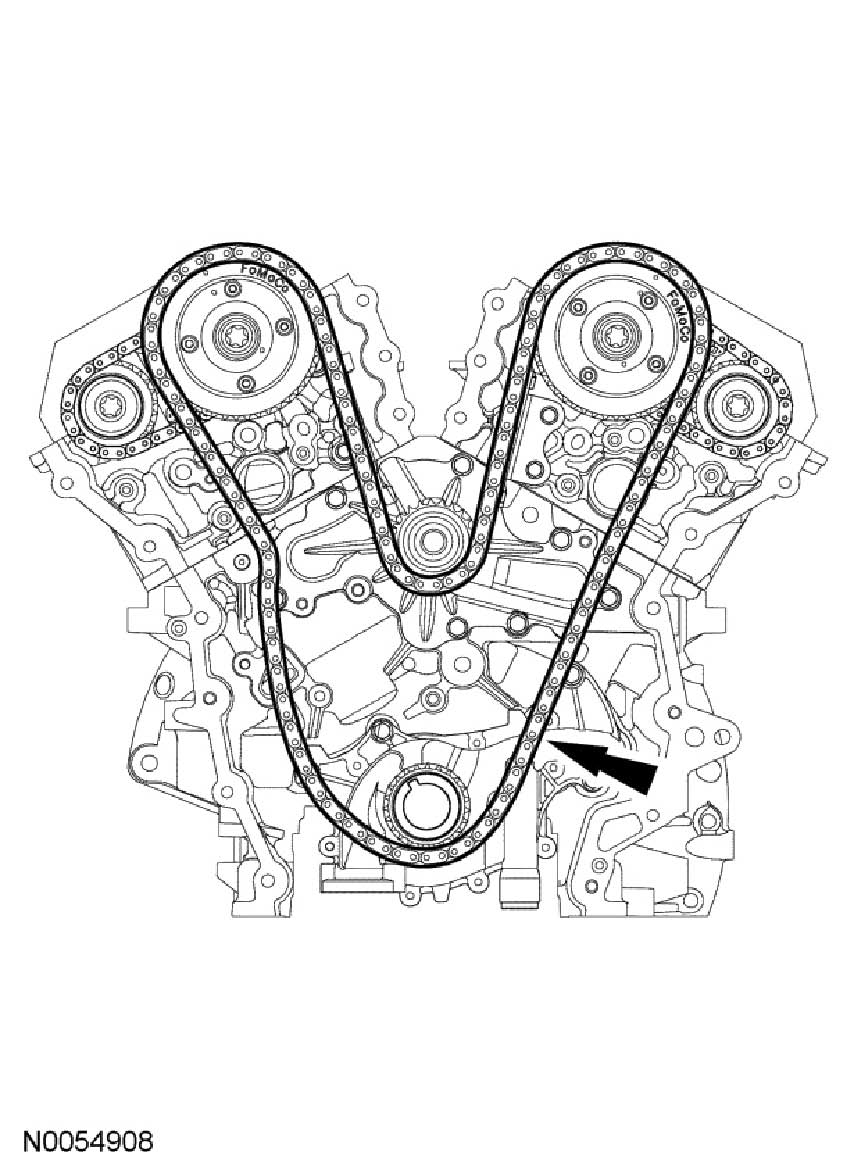
pic 1
pic 2
Removal
NOTICE: During engine repair procedures, cleanliness is extremely important. Any foreign material, including any material created while cleaning gasket surfaces, that enters the oil passages, coolant passages or the oil pan can cause engine failure.
1. With the vehicle in NEUTRAL, position it on a hoist.
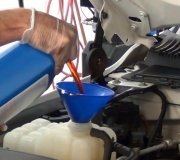
2. Drain the cooling system.
3. Remove the engine front cover.
4. Remove and discard the engine oil filter.
Pic 3
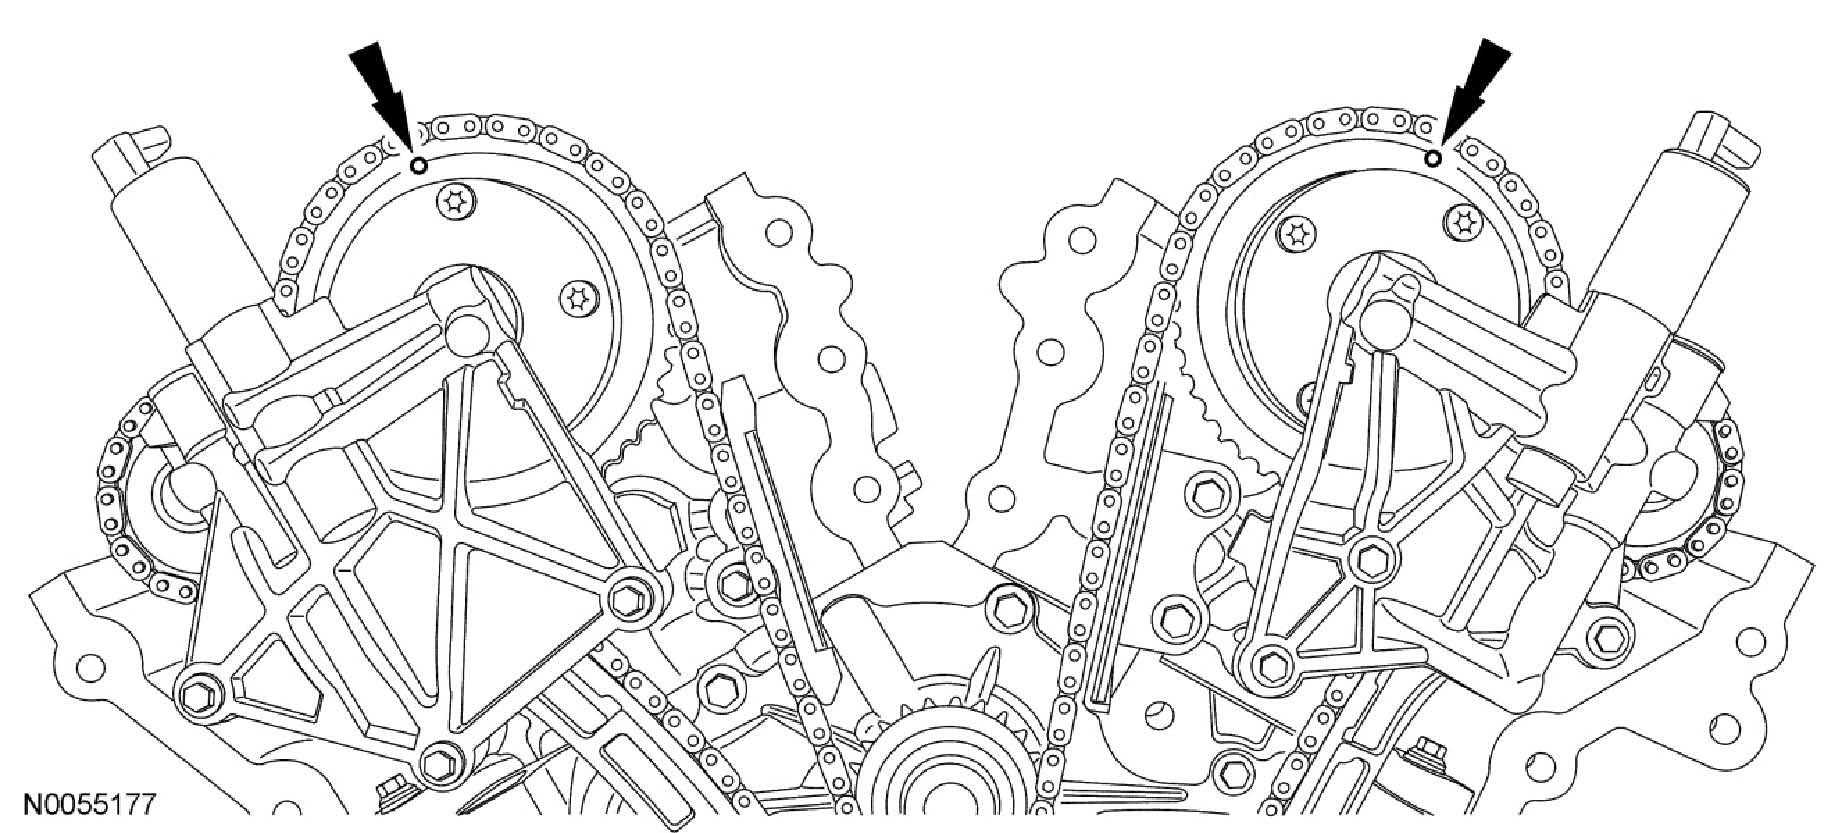
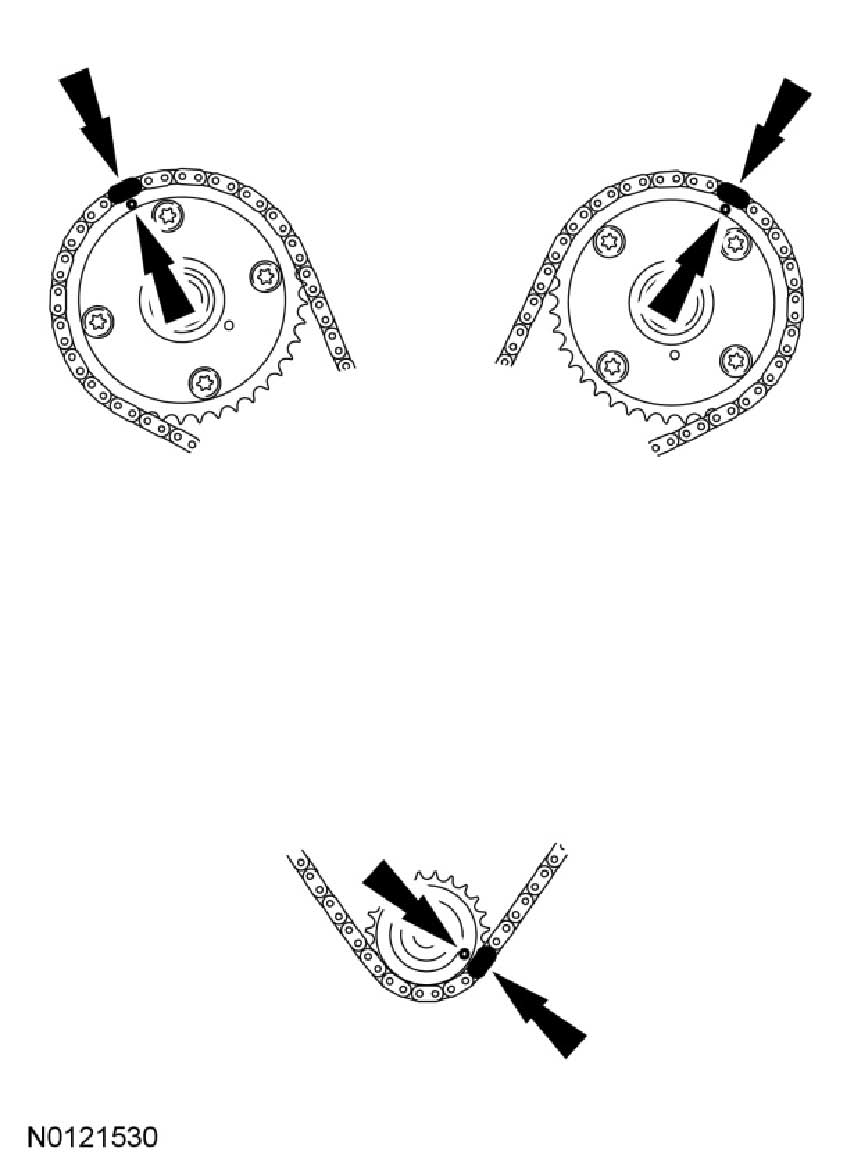
5. Rotate the crankshaft clockwise and align the timing marks on the Variable Camshaft Timing (VCT) assemblies as shown.
Pic 4
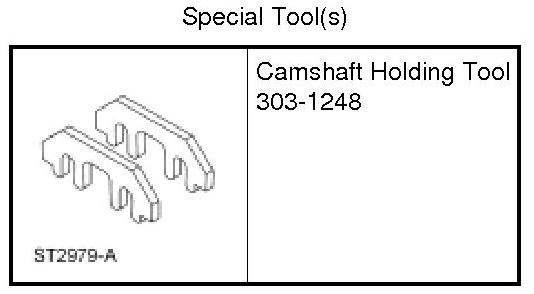
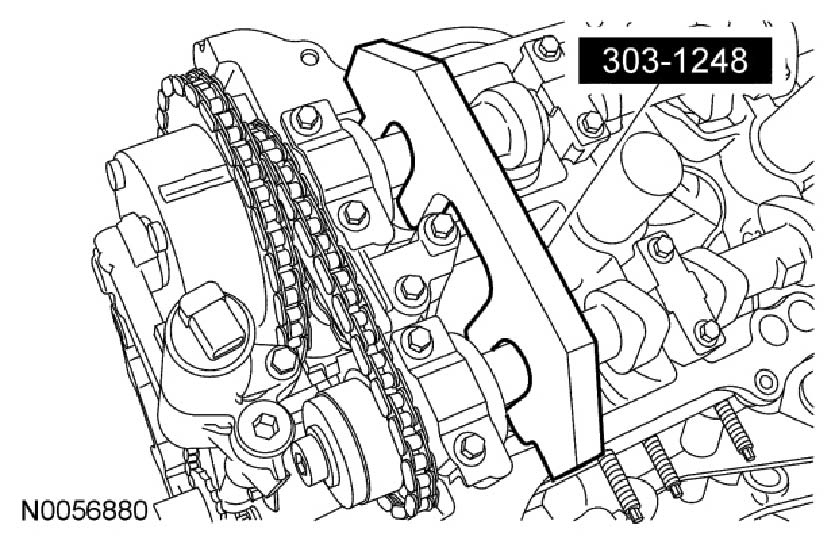
6. NOTE: The Camshaft Holding Tool will hold the camshafts in the Top Dead Center (TDC) position.
Install the Camshaft Holding Tool onto the flats of the LH camshafts.
Pic 5
7. NOTE: The Camshaft Holding Tool will hold the camshafts in the TDC position.
Install the Camshaft Holding Tool onto the flats of the RH camshafts.
Pic 6
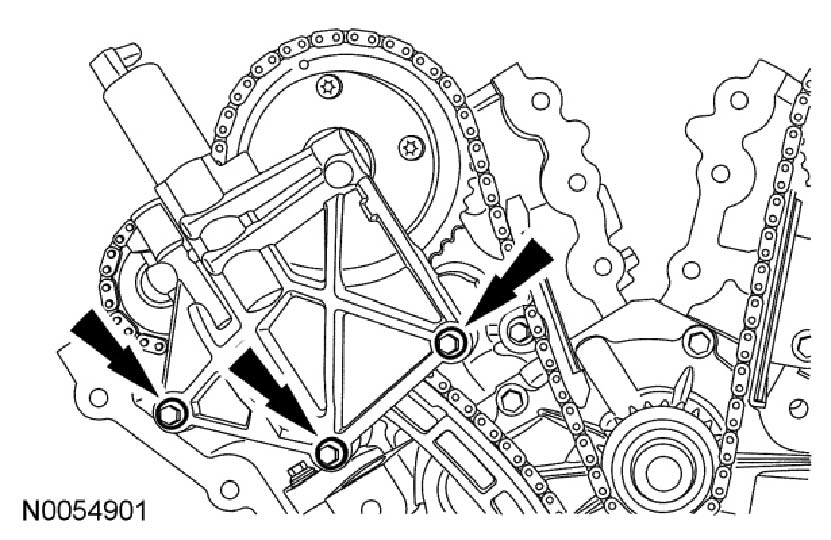
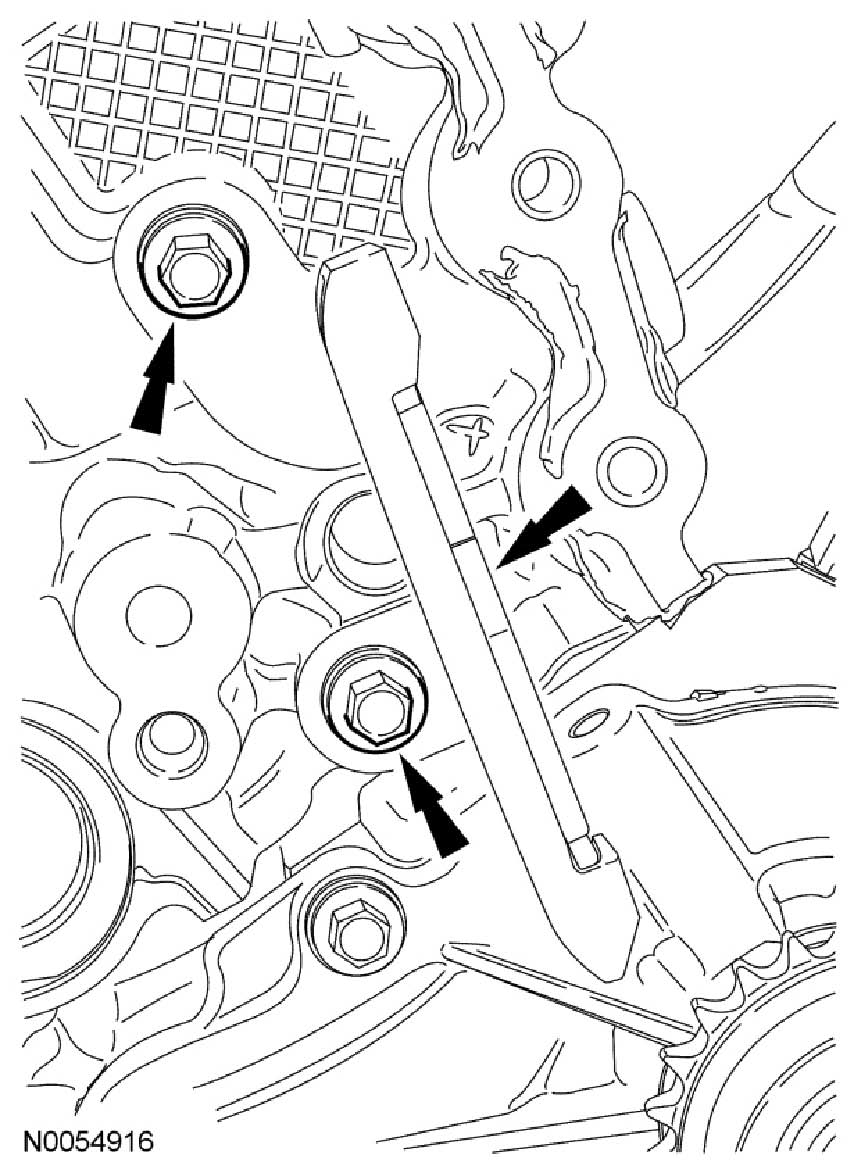
8. Remove the 3 bolts and the RH VCT housing.
Pic 7
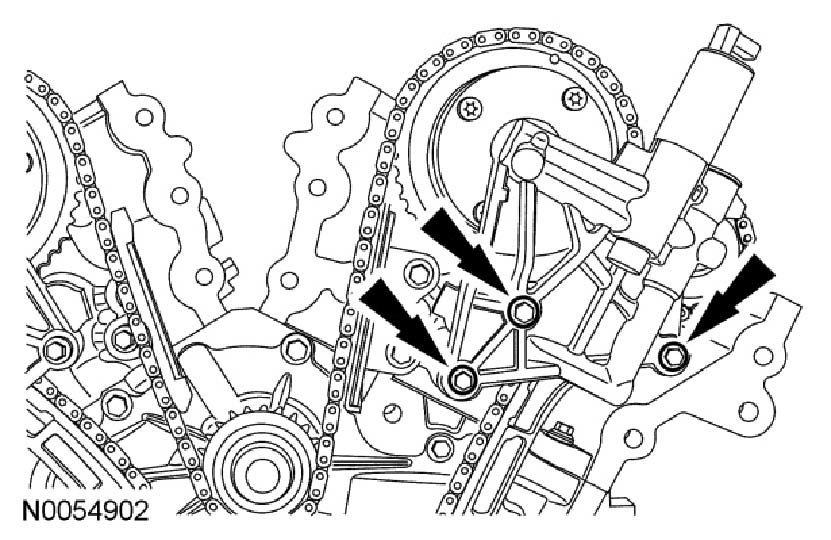
9. Remove the 3 bolts and the LH VCT housing.
NOTE: The following 3 steps are for primary timing chains when the colored links are not visible.
Pic 8
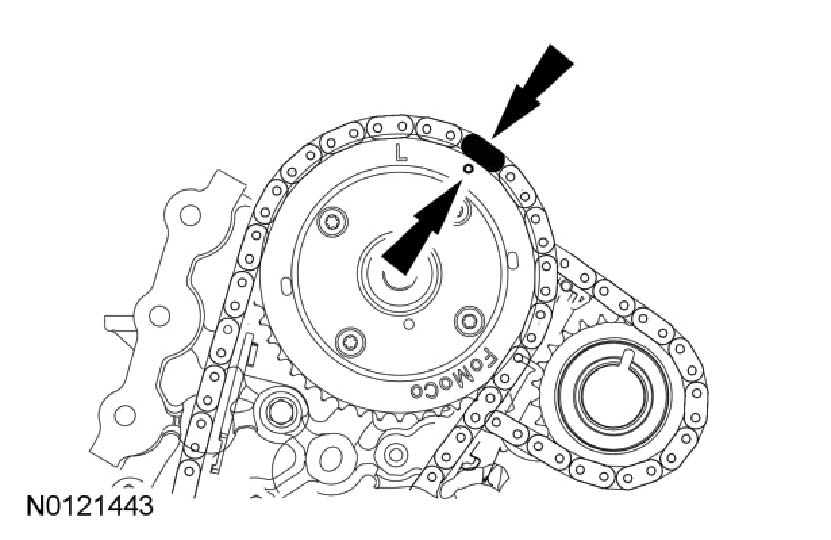
10. Mark the timing chain link that aligns with the timing mark on the RH intake VCT assembly as shown.
Pic 9
11. Mark the timing chain link that aligns with the timing mark on the LH intake VCT assembly as shown.
Pic 10
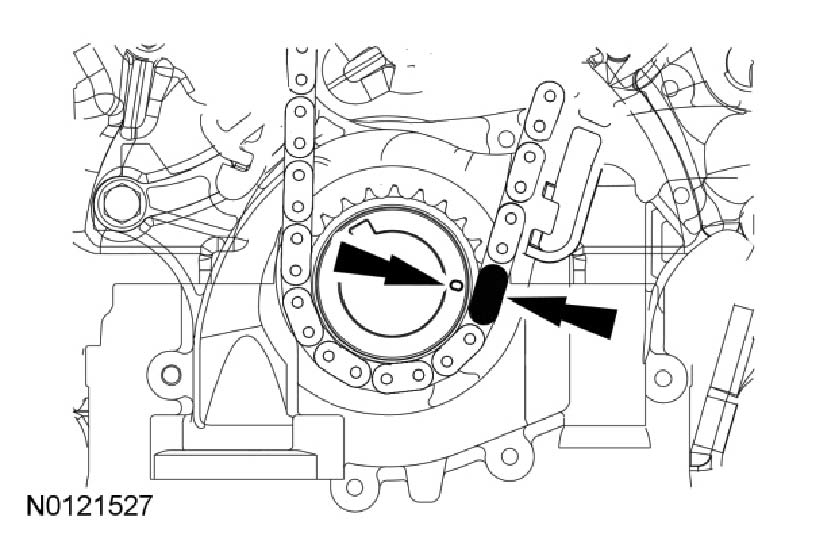
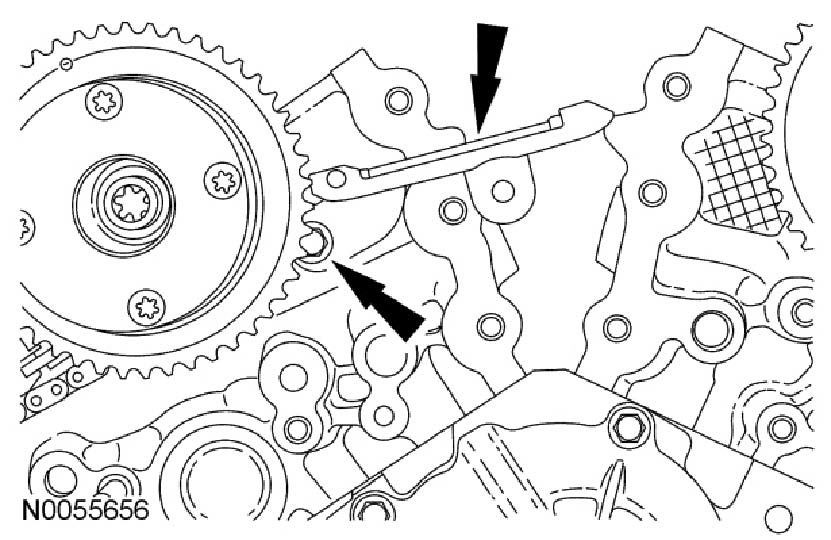
12. Mark the timing chain link that aligns with the timing mark on the crankshaft sprocket as shown.
Pic 11
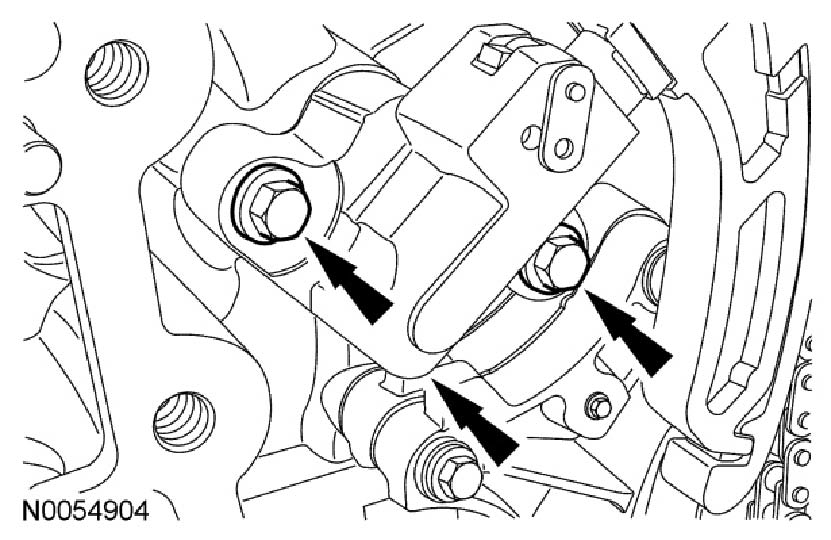
13. Remove the 2 bolts and the primary timing chain tensioner.
Pic 12
14. Remove the primary timing chain tensioner arm.
Pic 13
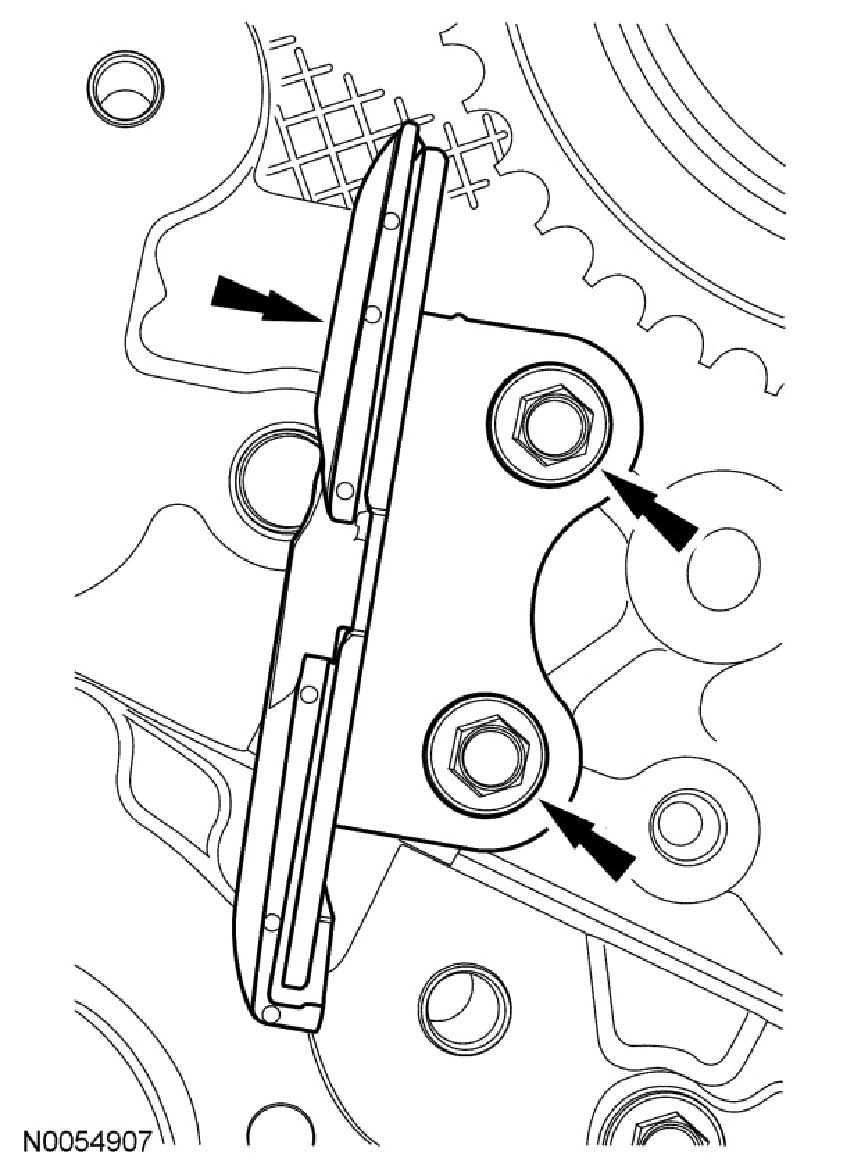
15. Remove the 2 bolts and the lower LH primary timing chain guide.
Pic 14
16. Remove the primary timing chain.
Pic 15
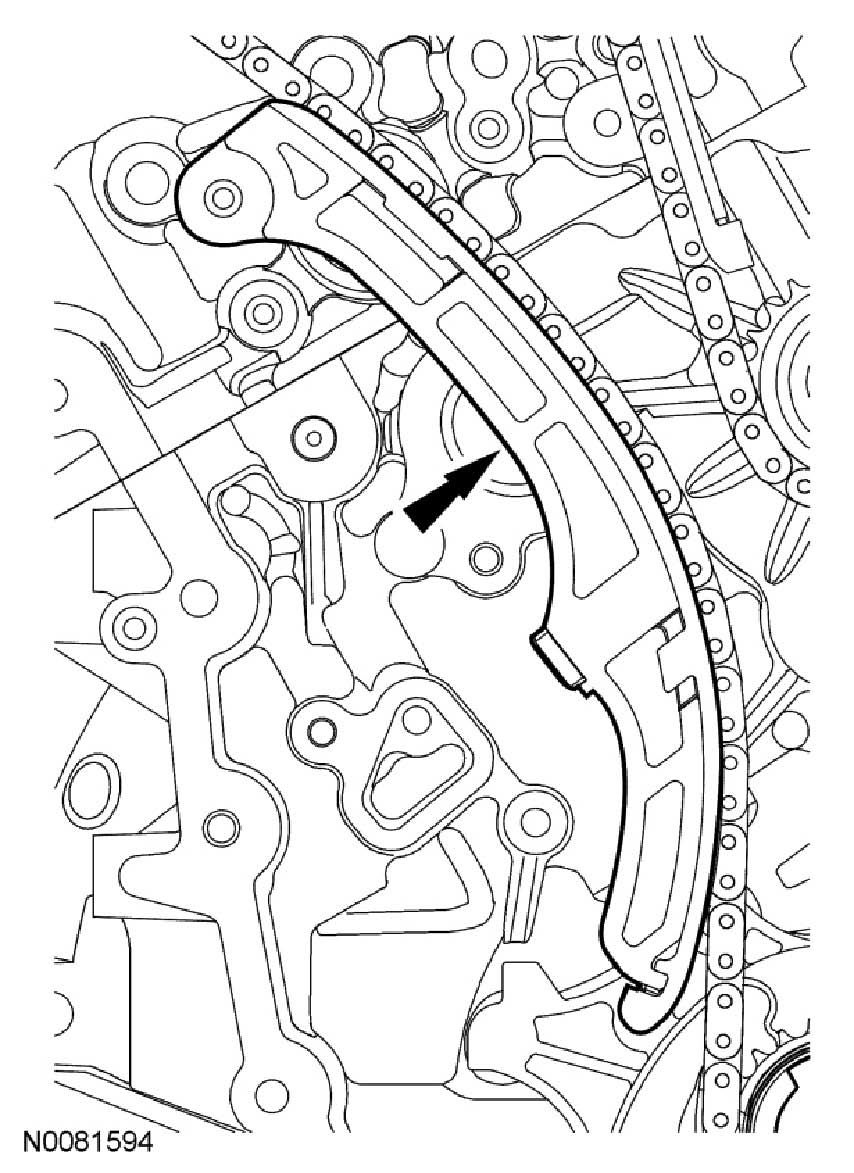
17. Remove the 2 bolts and the upper LH primary timing chain guide.
Pic 16
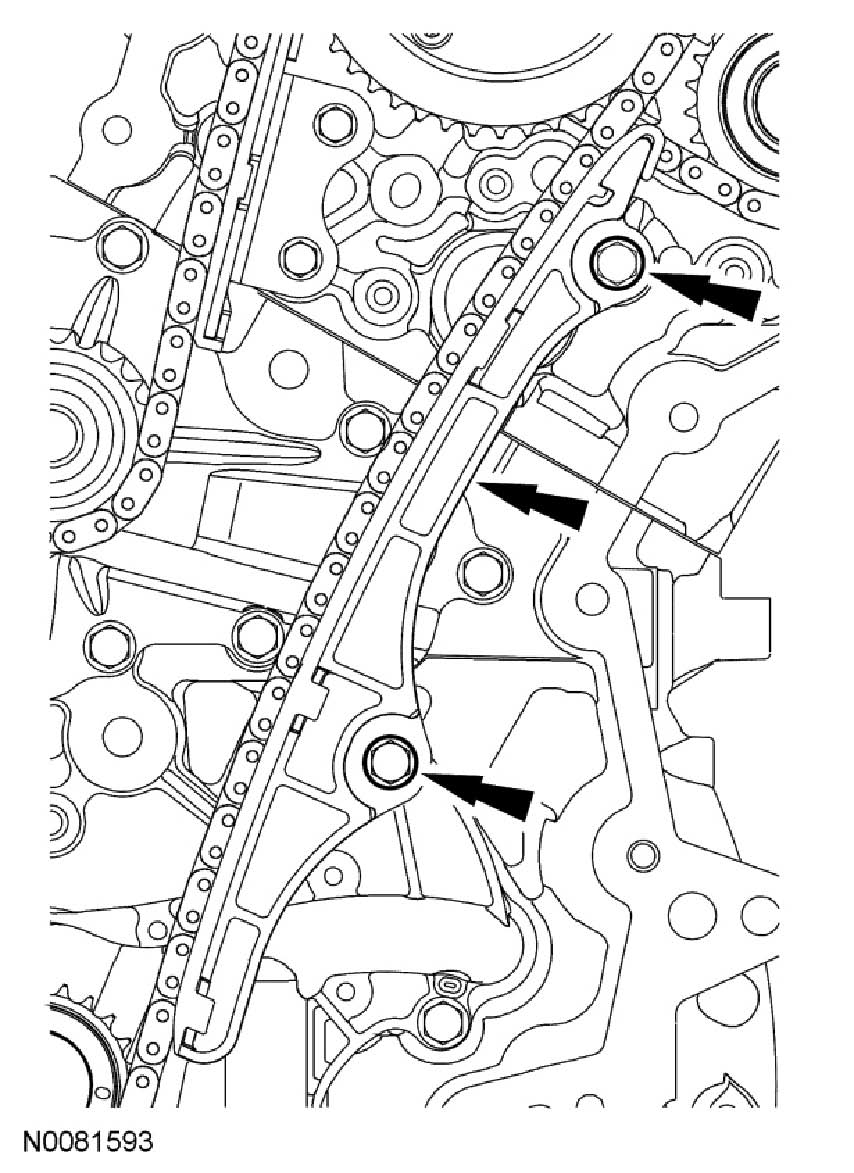
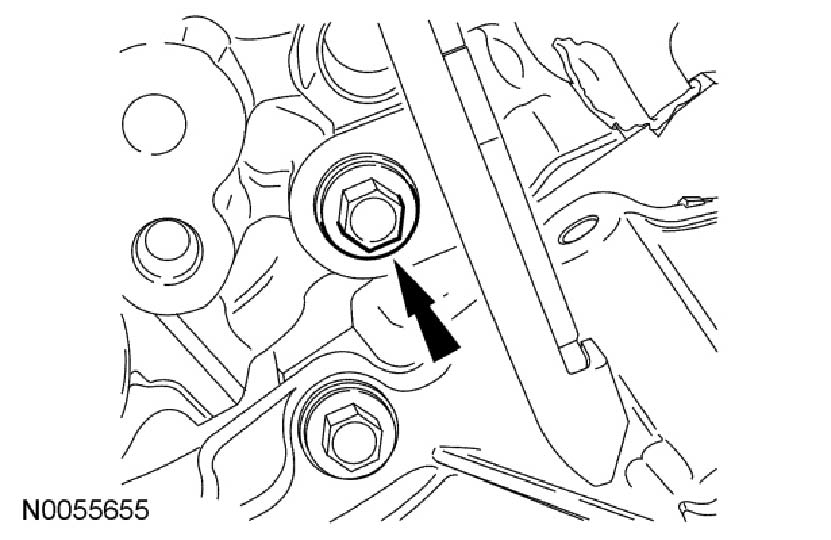
18. Remove the RH primary timing chain guide lower bolt.
Pic 17
19. NOTE: The RH primary timing chain guide must be repositioned to allow the coolant pump to be removed.
Loosen the RH primary timing chain guide upper bolt.
- Rotate the guide and tighten the bolt.
20. Place clean lint-free shop towels in the oil pan opening to prevent coolant from entering the oil pan during coolant pump removal.
Pic 18
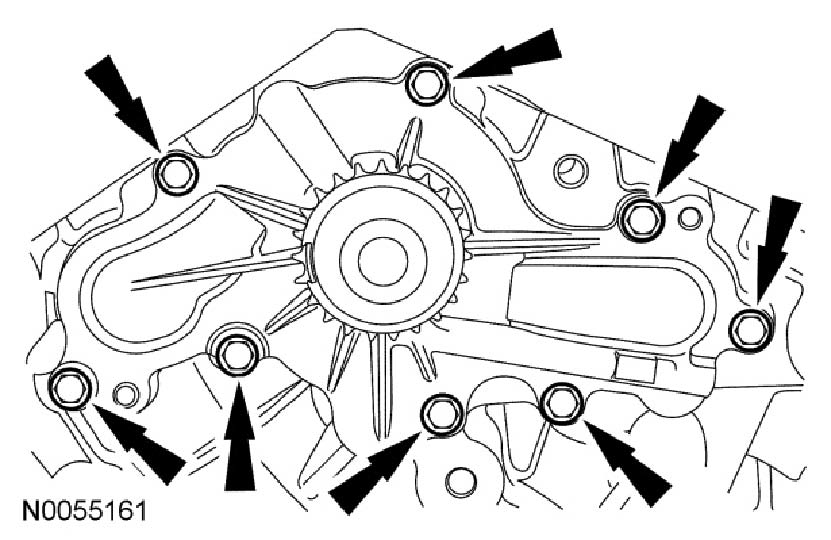
21. Remove the 8 bolts and the coolant pump.
Installation
pic 19
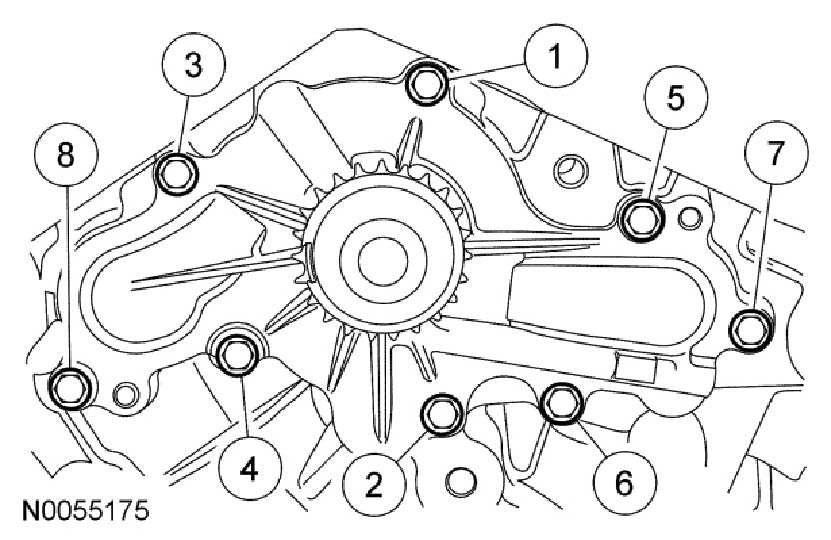
1. NOTE: Clean and inspect all sealing surfaces.
Install the coolant pump and the 8 bolts.
- Tighten in the sequence shown to 10 Nm (89 lb-in).
2. Remove all of the shop towels from the oil pan opening.
3. NOTICE:Any coolant that has accumulated in the oil pan must be drained from the pan and any residual coolant cleaned from the front of the engine and oil pan. Failure to remove all traces of the coolant can result in oil contamination and severe engine damage.
Remove the oil pan drain plug and allow any accumulated coolant to drain.
- Remove any residual coolant from the front of the engine and the oil pan using regulated compressed air and clean lint-free shop towels.
- Install the oil pan drain plug and tighten to 27 Nm (20 lb-ft).
Pic 20
4. Loosen the RH primary timing chain guide upper bolt.
- Position the RH primary timing chain guide and install the lower bolt.
- Tighten the 2 bolts to 10 Nm (89 lb-in).
Pic 21
5. Install the primary timing chain with the colored links aligned with the timing marks on the VCT assemblies and the crankshaft sprocket.
Pic 22
6. Install the upper LH primary timing chain guide and the 2 bolts.
- Tighten to 10 Nm (89 lb-in).
Pic 23
7. Install the lower LH primary timing chain guide and the 2 bolts.
- Tighten to 10 Nm (89 lb-in).
Pic 24
8. Install the primary timing chain tensioner arm.
Pic 25
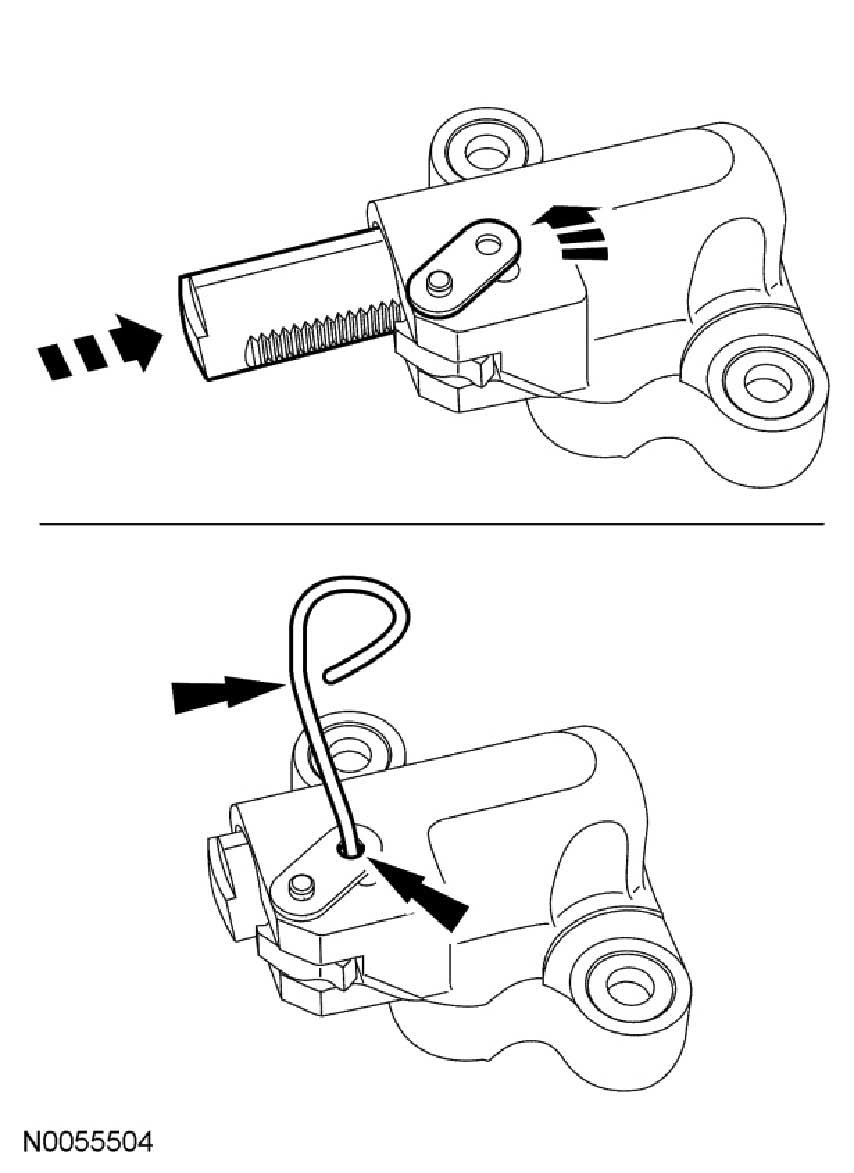
9. Reset the primary timing chain tensioner.
- Rotate the lever counterclockwise.
- Using a soft-jawed vise, compress the plunger.
- Align the hole in the lever with the hole in the tensioner housing.
- Install a suitable lock pin.
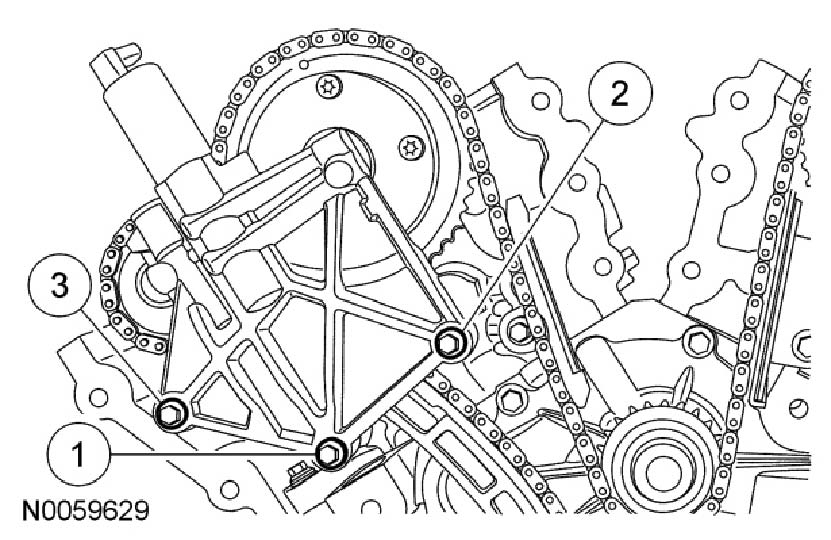
Pic 26
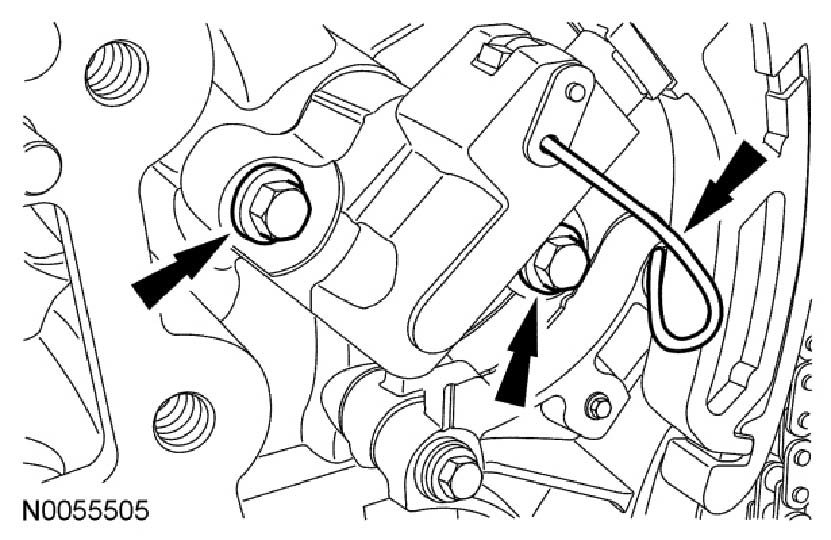
10. NOTE: It may be necessary to rotate the crankshaft slightly to remove slack from the timing chain and install the tensioner.
Install the primary tensioner and the 2 bolts.
- Tighten to 10 Nm (89 lb-in).
- Remove the lock pin.
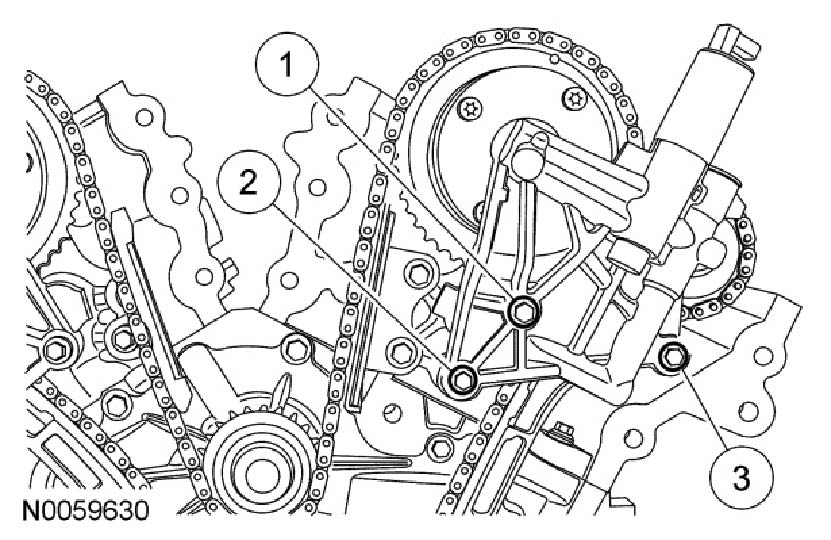
Pic 27
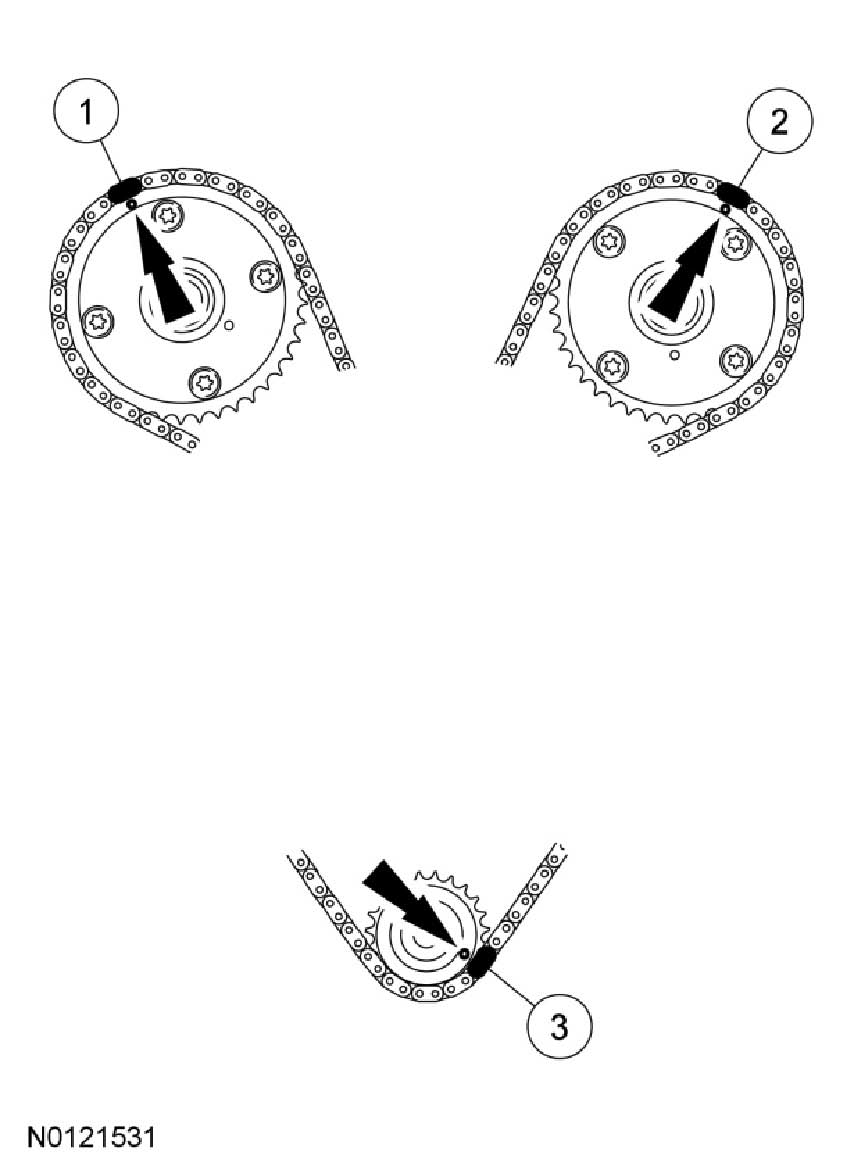
11. As a post-check, verify correct alignment of all timing marks.
- There are 38 links in between the RH intake VCT assembly colored link (1) and the LH intake VCT assembly colored link (2).
- There are 27 links in between LH intake VCT assembly colored link (2) and the crankshaft sprocket link (3).
Pic 28
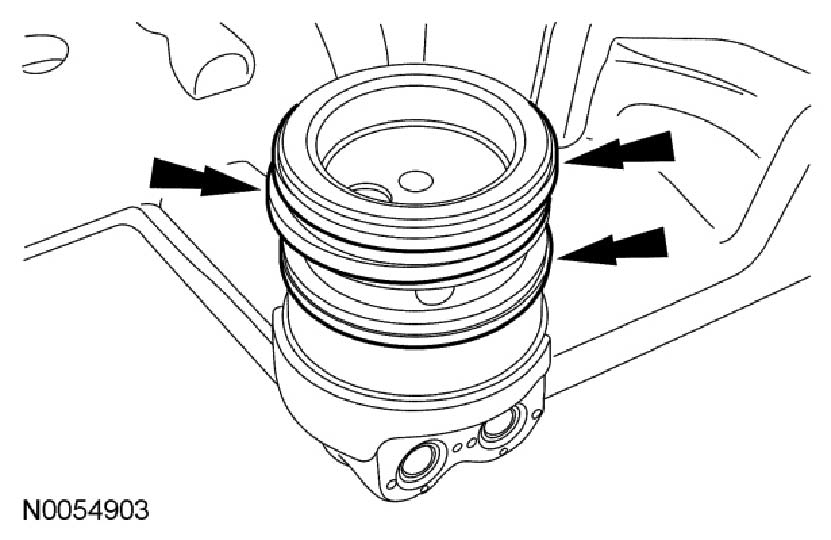
12. Inspect the VCT housing seal for damage and replace as necessary.
Pic 29
13. NOTICE: Make sure the dowels on the Variable Camshaft Timing (VCT) housing are fully engaged in the cylinder head prior to tightening the bolts. Failure to follow this process will result in severe engine damage.
Install the LH VCT housing and the 3 bolts.
- Tighten in the sequence shown to 10 Nm (89 lb-in).
Pic 30
14. NOTICE: Make sure the dowels on the Variable Camshaft Timing (VCT) housing are fully engaged in the cylinder head prior to tightening the bolts. Failure to follow this process will result in severe engine damage.
Install the RH VCT housing and the 3 bolts.
- Tighten in the sequence shown to 10 Nm (89 lb-in).
15. NOTE: Lubricate the engine oil filter gasket with clean engine oil prior to installing the oil filter.
Install a new engine oil filter.
- Tighten to 5 Nm (44 lb-in) and then rotate an additional 180 degrees.
16. Install the engine front cover.
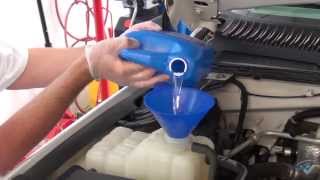
17. Fill and bleed the cooling system.
______________________________________
I hope this helps. Let me know if you need anything.
Take care and God Bless,
Joe
Images (Click to make bigger)
Monday, February 15th, 2021 AT 5:09 PM