You can't do this without a factory scan tool
Remove/Install
DANGER:
* Risk of death. Death may result if vehicle slips or topples from the lifting platform.
* Align vehicle between the columns of the lifting platform and position the four support plates at the lifting platform support points specified by the vehicle manufacturer.
* Risk of injury, body parts may become jammed or crushed. Risk of injury, skin and eyes may be injured due to brake fluid spraying out at high pressure when working on the SBC brake system
* Deactivate SBC brake system using STAR DIAGNOSIS.
* Risk of poisoning from swallowing brake fluid. Risk of injury from brake fluid coming into contact with skin and eyes.
* Pour brake fluid only into suitable and appropriately marked containers. Wear protective clothing and eye protection when handling brake fluid.
1 Deactivate SBC brake system using STAR DIAGNOSIS.
CAUTION: See notes on repairs to brake system
2 Lower fluid level in expansion reservoir for brake fluid to "Min" mark
CAUTION:
* To prevent the brake fluid reservoir overflowing when pushing back the floating caliper piston.
* See notes on handling brake fluid
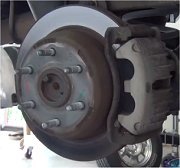
3 Remove rear wheels.
4 Disconnect right rear brake pad contact sensor (S10/4) from electrical feed line
5 Lever out clip (31h)
6 Unscrew guide bolt (31c)
NOTE:
* Pull off protective caps (31k) to do this.
- Installation: Install new guide bolts.
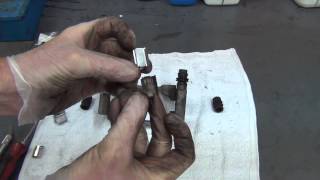
7 Remove floating caliper (31) together with inner brake pad (31g)
CAUTION: Unhook floating caliper (31) to remove load from brake hose. Otherwise the brake hose can be damaged.
NOTE: Leave brake hose connected.
8 Remove brake pads (31g)
NOTE:
* Brake pads (31g) must be disposed of as special waste. Please ask local authorities if it is permitted to dispose of these parts as household-like industrial refuse.
* Only the brake pads (31g) approved by Mercedes-Benz may be installed as a set.
- Installation: Insert inner brake pad (31g) with riveted spring into piston, push outer brake pad into (31g) brake carrier support (31n) and install floating caliper (31)
Measuring
9 Measure lining thickness of brake pads (31g) and check condition of brake disks
Inspect
10 Check floating caliper (31) for leaks and check dust seal (31m) for damage.
* If the floating caliper (31) is leaking or the dust seal (31m) is damaged then replace rear axle brake caliper
11 Pull right rear brake pad contact sensor (S10/4) out of pad backplate of brake pad (31g)
NOTE: Installation: Defective contact sensors should be replaced.
CAUTION: See note on installing contact sensors for brake lining wear indicator
12 Press back piston using resetting device (01)
* If the piston is difficult to move then replace rear axle brake caliper
Cleaning
13 Clean contact surfaces of brake pads (31g) at floating brake caliper (31) and brake caliper support (31n)
NOTE:
* Do not use sharp-edged or pointed objects to clean contact surfaces.
- Installation: Install brake pad (31g) without grease.
14 Install in the reverse order
15 Activate SBC brake system using STAR DIAGNOSIS.
16 Use STAR DIAGNOSIS to move brake pads toward brake disks
17 Inspect fluid level in expansion reservoir, adjust to correct level if necessary
Sunday, November 21st, 2010 AT 3:46 PM