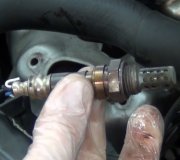
First lets clarify the designations. You listed two O2 sensors. Bank 1 is the driver's side. Bank 2 is the passenger side. "Upstream" is before the catalytic converters, and "downstream" is right after the converters.
You're getting a code for the driver's side running too rich, and based on the message, you're replacing the messenger. The sensor is working if it's reporting a problem. The way to approach this is to use a scanner that displays live data, and view the left sensor to see what it's reading. It should be bouncing around between 0.2 and 0.8 volts a couple of times per second, and that correlates with switching between "rich" and "lean" a couple of times per second. O2 sensors do not detect fuel, only oxygen, so they do not really detect a rich condition. They fail to detect those lean pulses. Disconnect one injector at a time from the driver's side of the engine to see if the O2 sensor goes lean. If one does not cause that, it may be leaking fuel into the engine. If it is, you won't get a misfire when you unplug that one.
Before you spend any more money on the left side, address the stripped threads on the right side. A leak there can result in the right side reading too lean. Between the pulses of exhaust gas flow, the momentum creates little pulses of vacuum that can draw in outside air. The oxygen in that air gets detected as a lean condition, and the Engine Computer responds by commanding more fuel. No matter how much fuel it adds, there will always be that extra oxygen there.
To fix stripped threads, get a Heli-Coil kit from any auto parts store. It will have the correct size drill bit to drill the hole larger, and the correct size tap to make new threads. You use the special plastic tool to wind the spring-metal insert into the hole. Use a small punch or screwdriver to break the little tab off the end, and there's your new threads. Use a heat-resistant liquid Lock Tite product on the outside of the insert, (before you install it), to keep it in place the next time the sensor is removed.
You might also have luck with JB Weld. That is an epoxy that gets hard as metal, but I don't know how it holds up to that kind of heat. Put some high-temperature anti-seize compound on the threads of the sensor, (if it didn't come with any already), and use a wire brush to clean the hole in the manifold. Coat the hole with the glue and work it into the remaining threads, then run the sensor in. Let it sit overnight. The anti-seize compound will allow the sensor to be removed next time.
Tuesday, March 5th, 2013 AT 1:19 AM


