TIMING BELT
Removal (AEG, AVH, AZG, BEV & BDC Engine Codes)
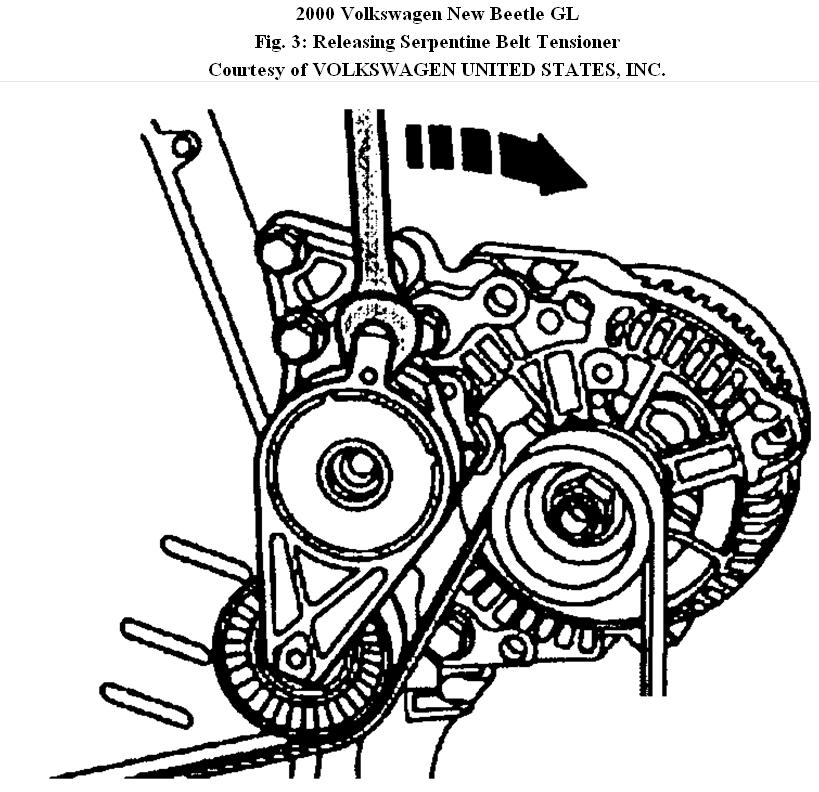
1. Remove right hand insulation tray from engine compartment. Remove engine cover. Rotate serpentine belt tensioner clockwise to relieve belt tension. Remove serpentine belt. See Fig. 3. Lock in place using Mandrel (T10060) or a drift.
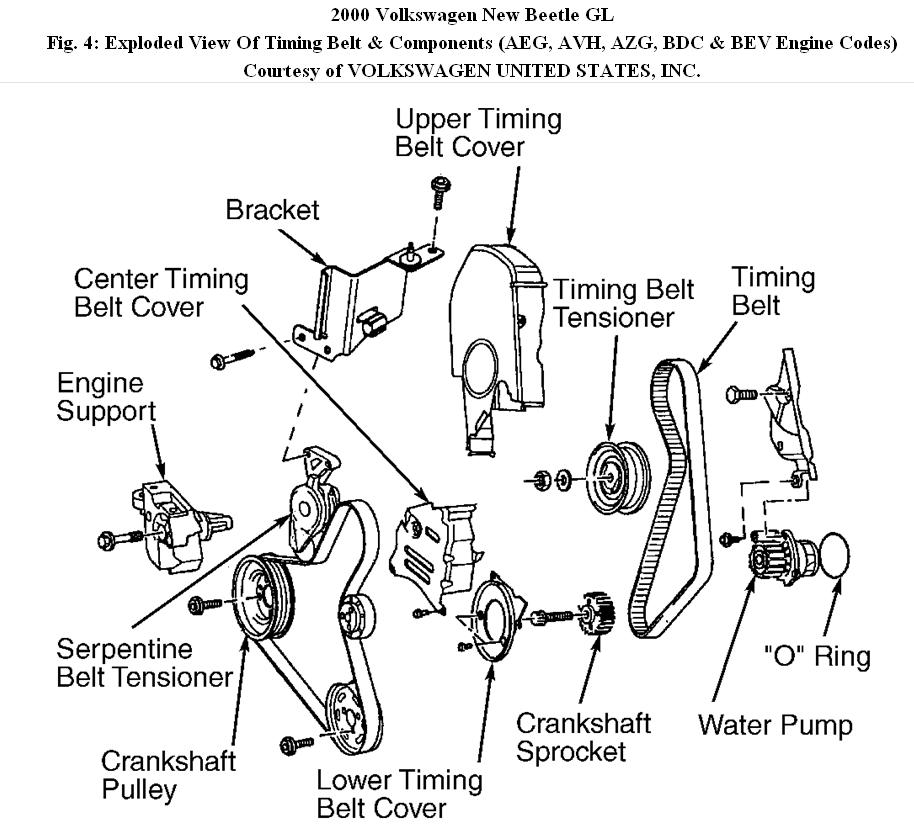
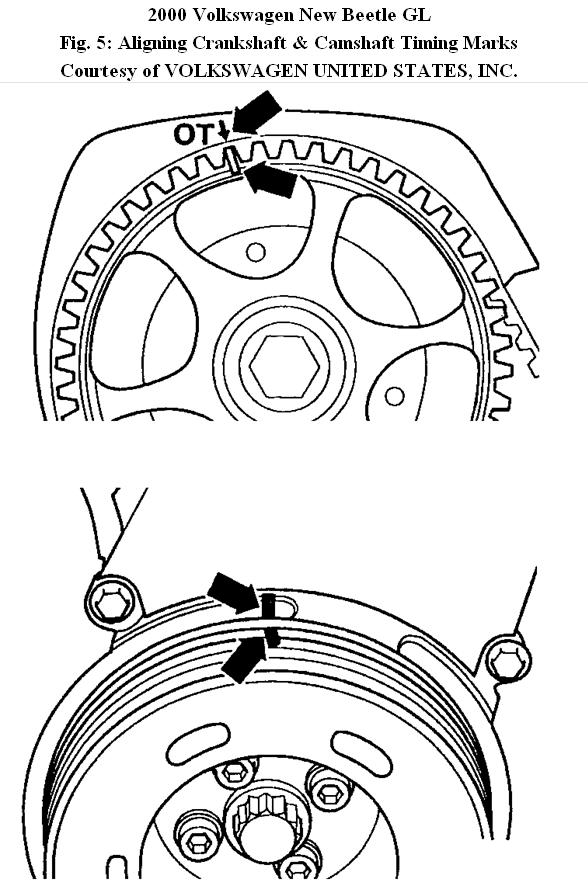
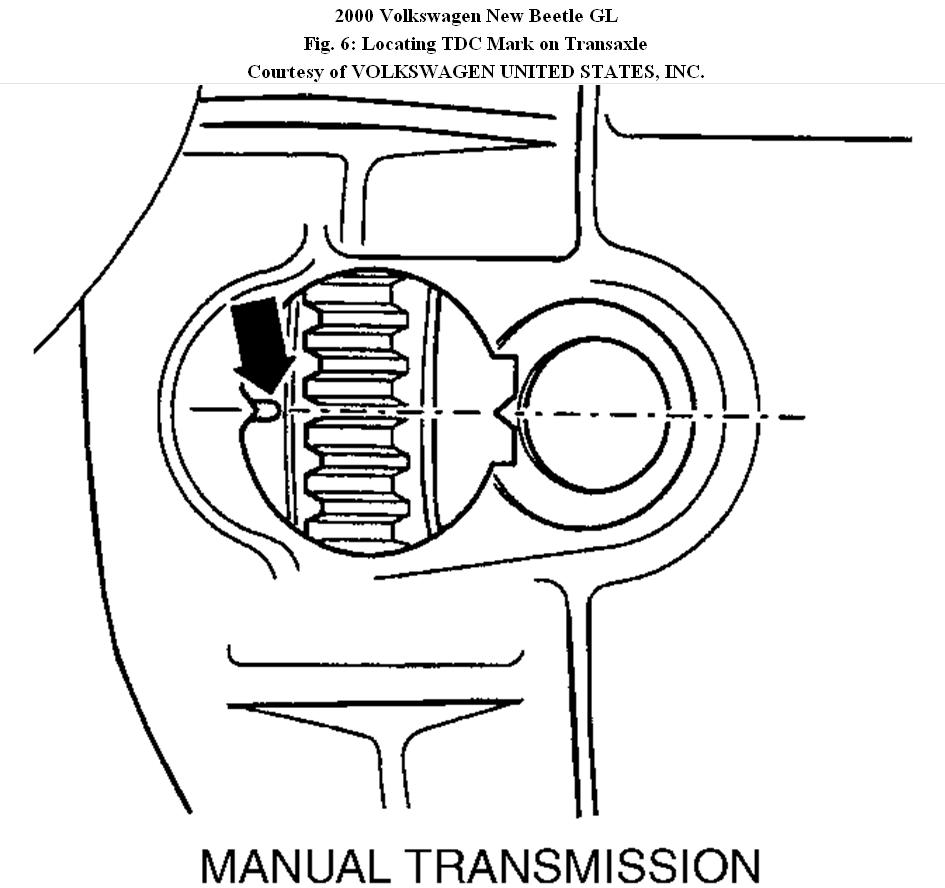
2. Remove serpentine belt tensioner assembly. See Fig. 4. Turn crankshaft to TDC position. See Fig. 5. Align TDC marks visible in bellhousing access hole. See Fig. 6. Remove upper timing belt cover. Ensure camshaft sprocket timing mark aligns with mark on rear cover.
See Fig. 5.
3. Support engine from above or below with floor jack to take engine weight off of mounts. Remove coolant reservoir and set aside. On Golf and Jetta, remove power steering reservoir (hoses attached), and set aside. On New Beetle, pull off EVAP hoses at EVAP canister and throttle valve housing.
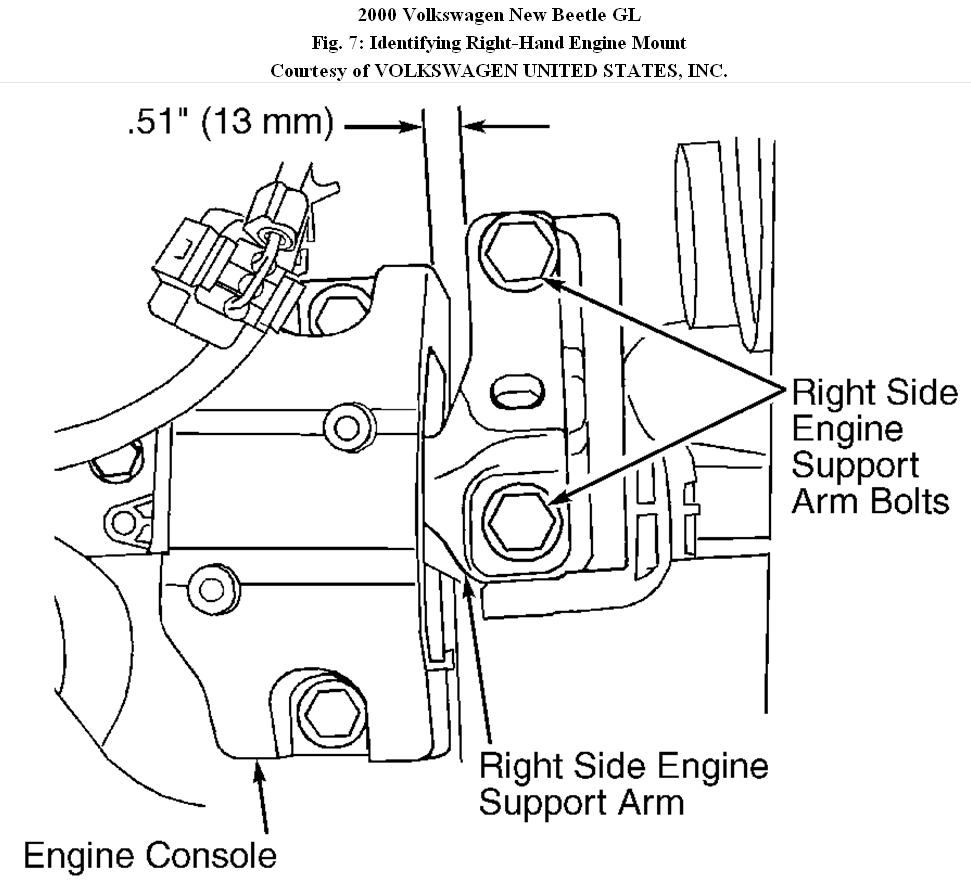
4. On all models, remove engine mount from timing belt end of engine. See Fig. 7. Remove crankshaft pulley from crankshaft sprocket. It is NOT necessary to remove center bolt (center bolt is torque-to-yield type that must be replaced if removed).
5. Remove timing belt covers. Remove engine support from front of engine. See Fig. 4.
CAUTION:To prevent valves from contacting piston, DO NOT rotate
camshaft or crankshaft with timing belt removed.
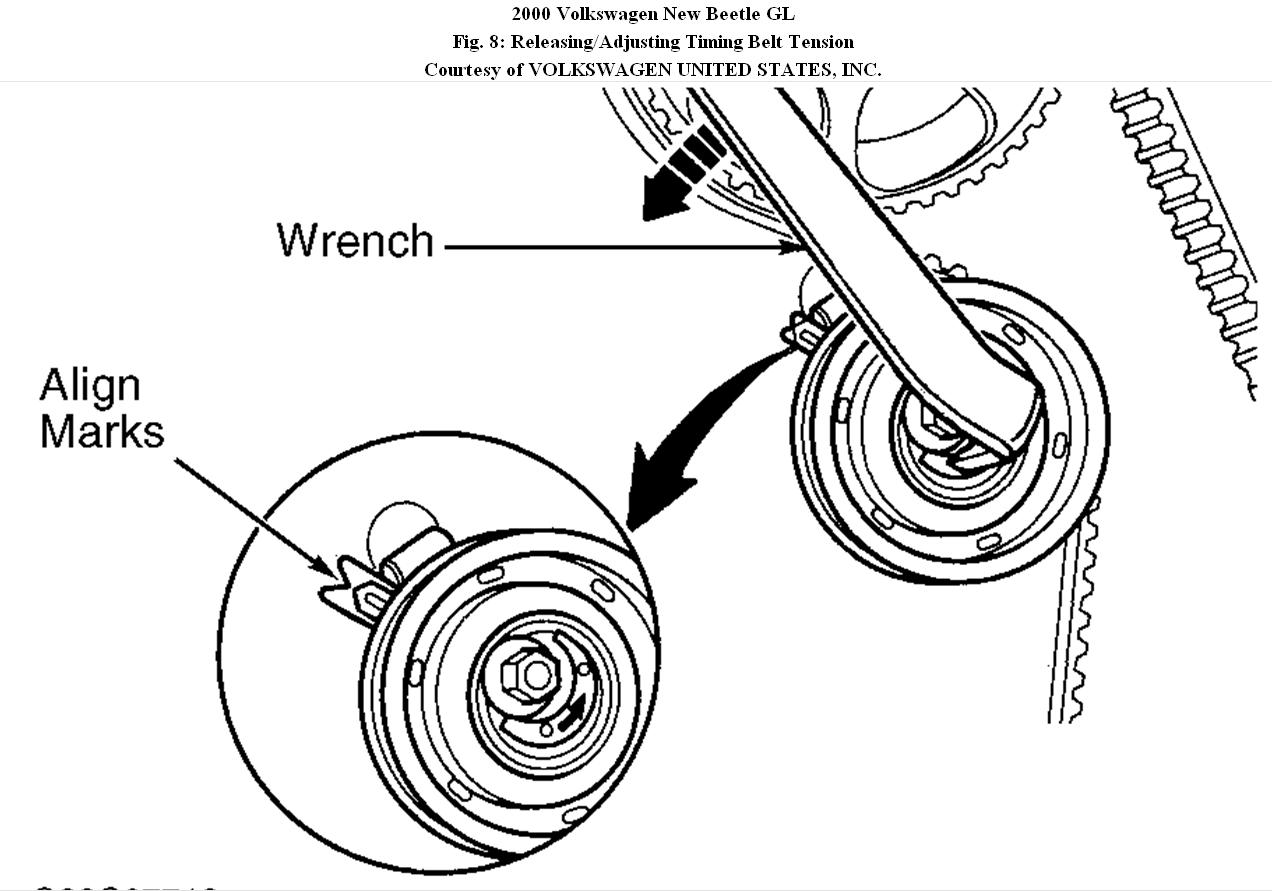
6. If reusing old belt, mark belt with arrow to indicate original direction of rotation. Loosen timing belt tensioner nut and rotate timing belt tensioner away from belt to remove timing belt. See Fig. 8.
7.
Installation (AEG, AVH, AZG, BDC & BEV Engine Codes)
1. Ensure crankshaft and camshaft timing marks are still aligned. See
Fig. 5 and Fig. 6.
2. Install timing belt around crankshaft and water pump sprockets. Install engine support on front of engine block. Tighten mounting bolts to specification.
3. Install timing belt lower and center covers. Install crankshaft pulley and tighten bolts to specification. Install engine mount-to-body and engine support. Remove floor jack or engine support bar from engine.
4. Install timing belt on camshaft sprocket and timing belt tensioner. Make sure there is no slack in timing belt.
5. To tension timing belt, engine must be at most warm to the touch. Rotate tensioner pulley counterclockwise until tensioner arrow is aligned with cut-out on cylinder head. See Fig. 8.
6. Tighten tensioner pulley center nut to specification. Rotate crankshaft 2 revolutions in normal direction of rotation, and recheck check belt tension. Adjust tension as necessary. Recheck all timing marks again.
7. Install upper timing belt cover. Install serpentine belt tensioner and serpentine belt. To complete installation, reverse removal procedure. Tighten all fasteners to specification.
Images (Click to make bigger)
Thursday, January 20th, 2011 AT 2:18 PM