Hi and thanks for using 2CarPros. Com.
I am not sure what step 13 is in the directions you have. Step 13 in my directions deals with driveshaft removal. Here are the directions from Alldata. I have also attached a picture of the special tools required. All pictures correlate with these directions. I hope this helps.
_______________________________________
Transfer Case (46.10.01)
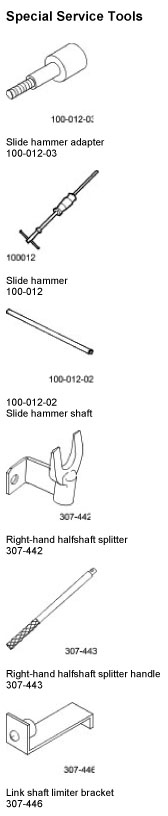
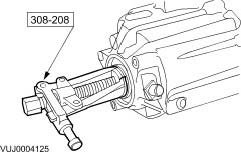
Special Service Tools (see pic 1)
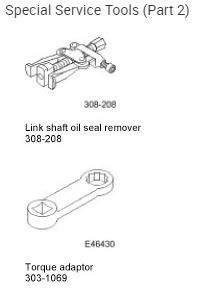
Special Service Tools (See pic 2)
Removal
All vehicles
1. Position the front wheels in a straight ahead position and centralize the steering wheel.
Lock in position and remove the ignition key.
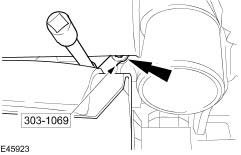
2. Detach the steering column.
Remove and discard the steering column lower retaining bolt.
3. Loosen the shock absorber and spring assembly securing nuts.
4. Remove the right-hand front wheel and tire.
5. Remove the fender splash shield access panel.
6. Remove the front pipe.
7. Remove the muffler inlet pipe.
Vehicles with automatic transmission
8. Remove the selector lever cable shield.
9. Detach the selector lever cable bracket.
10. Disconnect the selector lever cable.
11. Drain the transmission fluid.
Vehicles with manual transmission
12. Drain the transmission fluid.
All vehicles
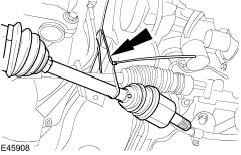
13. A) Mark the position of the driveshaft in relation to the drive pinion flange.
B) Remove the driveshaft from the transfer case.
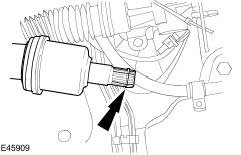
C) Using suitable tie straps, secure the outer casing of the driveshart universal joint.
D) Using suitable tie straps, secure the driveshaft to the subframe.
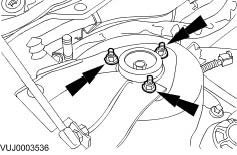
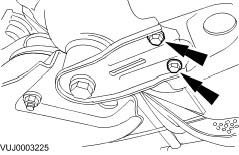
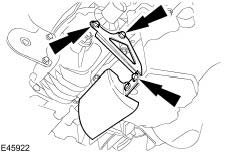
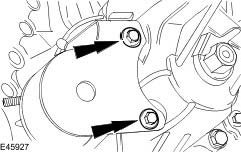
14. NOTE: Left-hand shown, right-hand similar.
Remove the front subframe reinforcement plate retaining bolts.
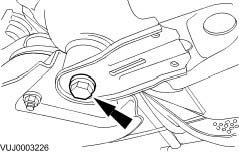
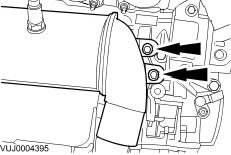
15. Remove the right-hand front subframe rear mount retaining bolt.
16. Loosen the left-hand front subframe rear mount retaining bolt.
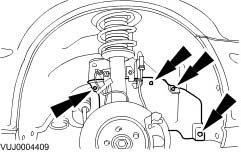
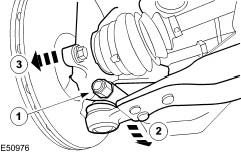
17. CAUTION: Make sure the constant velocity (CV) joint boot is protected. Failure to follow this instruction may result in damage to the CV joint boot.
Detach the lower arm from the wheel knuckle.
1. Remove the lower arm ball joint retaining nut and bolt.
2. Reposition the lower arm.
3. Reposition the wheel knuckle.
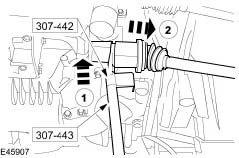
18. CAUTION: To prevent damage to the transfer box internal seal, make sure that the link shaft is not retracted further than 200 mm (7.87 inches) from the transfer case.
CAUTION: Make sure the halfshaft CV joints do not over articulate. Failure to follow this instruction may result in damage to the CV joints.
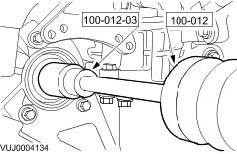
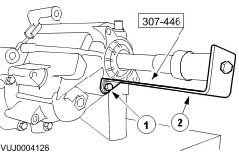
Using the special tools, detach the halfshaft.
1. Align the special tools to the halfshaft.
2. Detach the halfshaft.
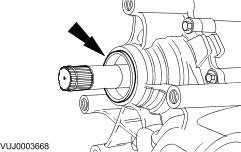
Remove and discard the halfshaft seal.
19. CAUTION: Make sure the halfshaft constant velocity (CV) joints do not over articulate. Failure to follow this instruction may result in damage to the CV joints.
Support the halfshaft.
20. Remove and discard the halfshaft snap ring.
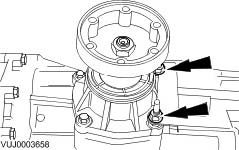
21. Remove the transfer case support bracket.
22. Remove the catalytic converter mount bracket retaining bolts.
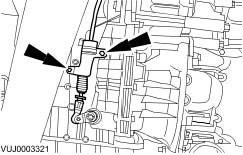
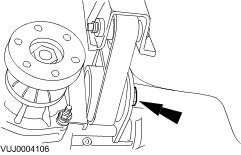
23. Detach the engine roll restrictor.
Remove the engine roll restrictor retaining bolt.
24. Remove the engine roll restrictor.
Remove the engine roll restrictor retaining bolt.
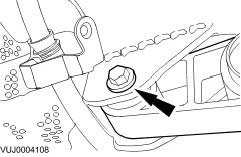
25. Remove the catalytic converter mount bracket to transfer case retaining bolt.
26. Remove the catalytic converter mount bracket retaining bolt.
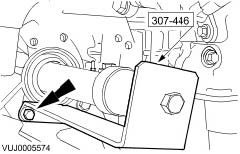
27. Using the special tool, loosen the catalytic converter mount bracket, top left-hand retaining bolt.
28. Remove the catalytic converter mount bracket.
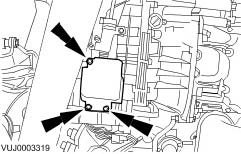
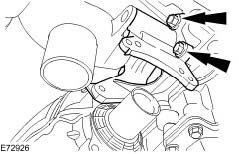
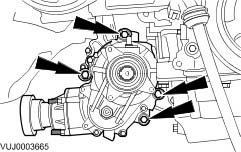
29. Remove the engine anti-roll restrictor bracket retaining bolts.
30. Remove the engine anti-roll restrictor bracket retaining nuts.
31. Remove the engine anti-roll restrictor bracket.
32. CAUTION: To prevent damage to the transfer box internal seal, make sure that the link shaft is not retracted further than 200 mm (7.87 inches) from the transfer case.
Using the special tools, detach the transfer case link shaft from the transfer case.
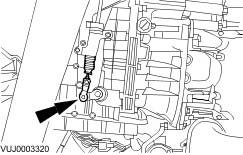
33. CAUTION: To prevent damage to the transfer box internal seal, make sure that the link shaft is not retracted further than 200 mm (7.87 inches) from the transfer case.
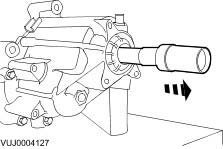
Using the special tool, retract the transfer case link shaft.
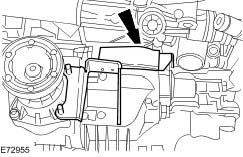
34. CAUTION: Make sure there is no loss of fluid from the transfer case. Failure to follow this instruction may result in damage to the transfer case.
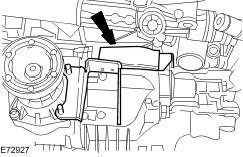
With the aid of an assistant remove the transfer case.
35. CAUTION: Make sure there is no loss of fluid from the transfer case. Failure to follow this instruction may result in damage to the transfer case.
Remove the special tool.
1. Remove the retaining bolt.
2. Remove the special tool.
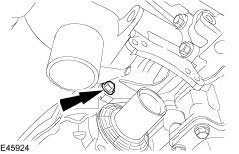
36. CAUTION: Make sure there is no loss of fluid from the transfer case. Failure to follow this instruction may result in damage to the transfer case.
Remove and discard O-ring seal.
37. CAUTION: Make sure there is no loss of fluid from the transfer case. Failure to follow this instruction may result in damage to the transfer case.
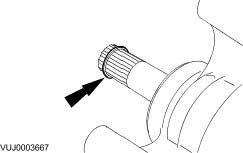
Remove and discard the link shaft snap ring.
38. CAUTION: Make sure there is no loss of fluid from the transfer case. Failure to follow this instruction may result in damage to the transfer case.
Remove the link shaft from the transfer case.
39. CAUTION: Make sure there is no loss of fluid from the transfer case. Failure to follow this instruction may result in damage to the transfer case.
Using the special tool, remove the link shaft seal.
_______________________________________________
Let me know if this helps.
Take care,
Joe
Images (Click to make bigger)
SPONSORED LINKS
Saturday, August 25th, 2018 AT 9:09 PM