Removal
Disconnect the negative battery cable.
Disconnect the Manifold Air Temperature (MAT) sensor connector.
Disconnect the air cleaner outlet hose from the throttle body.
Disconnect the breather tube from the camshaft cover.
Fig. 31: Identifying Breather Tube To Camshaft Cover (2 Of 2)
Courtesy of SUZUKI OF AMERICA CORP.
Remove the air cleaner housing bolts.
Remove the air cleaner housing.
Remove the right front wheel. Refer to WHEEL REMOVAL AND INSTALLATION.
Remove the right front wheel well splash shield.
Fig. 32: Identifying Air Cleaner Housing And Bolts
Courtesy of SUZUKI OF AMERICA CORP.
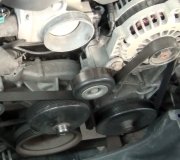
Remove the serpentine accessory drive belt. Refer to SERPENTINE ACCESSORY DRIVE BELT REMOVAL AND INSTALLATION.
Remove the crankshaft pulley bolts.
Remove the crankshaft pulley.
Remove the right engine mount bracket. Refer to Engine Mount Removal and Installation.
Fig. 33: Identifying Crankshaft Pulley And Bolts
Courtesy of SUZUKI OF AMERICA CORP.
Remove the front timing belt cover bolts.
Remove the front timing belt cover.
Fig. 34: Identifying Front Timing Belt Cover
Courtesy of SUZUKI OF AMERICA CORP.
Using the crankshaft gear bolt, rotate the crankshaft clockwise until the timing mark on the crankshaft gear is aligned with the notch at the bottom of the rear timing belt cover.
Fig. 35: Identifying Crankshaft Gear With Notch At Bottom Of Rear Timing Belt Cover
Courtesy of SUZUKI OF AMERICA CORP.
Align the camshaft gears with the notch on the camshaft cover.
Fig. 36: Identifying Camshaft Gears With Notch On Camshaft Cover
Courtesy of SUZUKI OF AMERICA CORP.
Remove the timing belt.
Loosen the automatic tensioner bolt. Turn the hex-key tab to relieve belt tension.
Fig. 37: Identifying Automatic Tensioner Bolt
Courtesy of SUZUKI OF AMERICA CORP.
Installation
Align the timing mark on the crankshaft gear with the notch on the bottom of the rear timing belt cover.
Fig. 38: Identifying Timing Mark On Crankshaft Gear With Notch On Bottom Of Rear Timing Belt Cover
Courtesy of SUZUKI OF AMERICA CORP.
Align the timing marks on the camshaft gears, using the intake gear mark for the intake gear and the exhaust gear mark for the exhaust gear.
Fig. 39: Identifying Timing Marks On Camshaft Gears
Courtesy of SUZUKI OF AMERICA CORP.
Install the timing belt.
Fig. 40: Identifying Timing Belt
Courtesy of SUZUKI OF AMERICA CORP.
Turn the hex-key tab in a clockwise direction to tension the belt. Turn until the pointer aligns with the notch.
Install the automatic tensioner bolt.
Tighten:
Tighten the automatic tensioner bolt to 25 N.M (18 lb-ft).
Rotate the crankshaft two full turns clockwise using the crankshaft pulley bolt.
Recheck the automatic tensioner pointer.
Fig. 41: Identifying Automatic Tensioner Pointer
Courtesy of SUZUKI OF AMERICA CORP.
Install the front timing belt cover.
Install the front timing belt cover bolts.
Tighten:
Tighten the front timing belt cover bolts to 6 N.M (53 lb-in).
Install the right engine mount bracket. Refer to
Fig. 42: Identifying Front Timing Belt Cover
Courtesy of SUZUKI OF AMERICA CORP.
Install the crankshaft pulley.
Install the crankshaft pulley bolts.
Tighten:
Tighten the crankshaft pulley bolts to 20 N.M (15 lb-ft).
Install the serpentine accessory drive belt. Refer to SERPENTINE ACCESSORY DRIVE BELT REMOVAL AND INSTALLATION.
Install the right front wheel well splash shield.
Install the right front wheel. Refer to WHEEL REMOVAL AND INSTALLATION.
Install the air cleaner housing.
Install the air cleaner housing bolts.
Tighten:
Tighten the air cleaner housing bolts to 10 N.M (89 lb-in).
Fig. 43: Identifying Engine Mount Bracket
Courtesy of SUZUKI OF AMERICA CORP.
Connect the air cleaner outlet hose to the throttle body.
Connect the breather tube to the camshaft cover.
Connect the MAT sensor connector.
Connect the negative battery cable.
SPONSORED LINKS
Friday, April 30th, 2010 AT 5:36 AM