Hi,
Usually when you see smoke from the defroster, it is related to the heater core. I realize there isn't any evidence of coolant in the vehicle, but the leak could be very small.
Coolant usually has a sweet smell to it. If that is the case, I suspect the core needs replaced. Here is a link that shows in general how to do it:
https://www.2carpros.com/articles/replace-heater-core
Now, before I actually would replace it, I would recommend pressure testing the system. Although you may not see a leak, you may hear a leak. Here is a link that explains how to pressure the cooling system:
https://www.2carpros.com/articles/radiator-pressure-test
You will need a pressure tester, but most parts stores will lend them to you.
If you determine it is the heater core, here are directions specific to your vehicle for replacement. Just a note, the plenum chamber needs removed. I will start with those directions first. The attached pictures correlate with the directions.
_______________________________________
2000 Mercury Grand Marquis V8-4.6L VIN W
Removal and Installation
Vehicle Heating and Air Conditioning Housing Assembly HVAC Service and Repair Procedures Removal and Installation
REMOVAL AND INSTALLATION
REMOVAL
1. Remove the rear seat airflow duct. For additional information, refer to Air Duct. See: Air Duct > Procedures
2. Remove the instrument panel. For additional information, refer to: Dashboard/Instrument Panel. See: Dashboard / Instrument Panel > Service and Repair
3. Drain the coolant from the radiator so the coolant level is below the heater core. For additional information, refer to Cooling System. See: Cooling System > Procedures
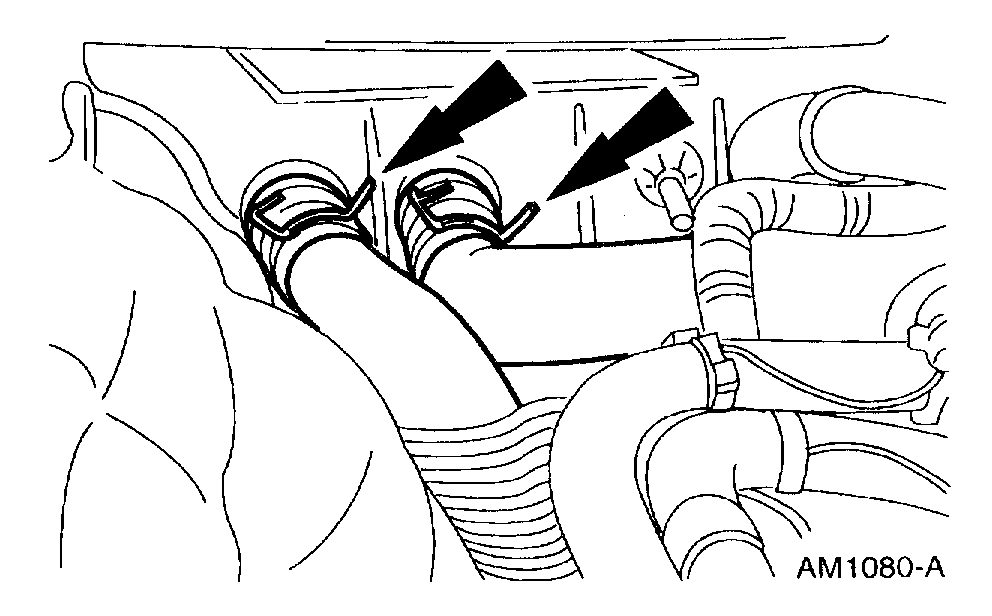
pic 1
4. Disconnect the heater water hoses.
pic 2
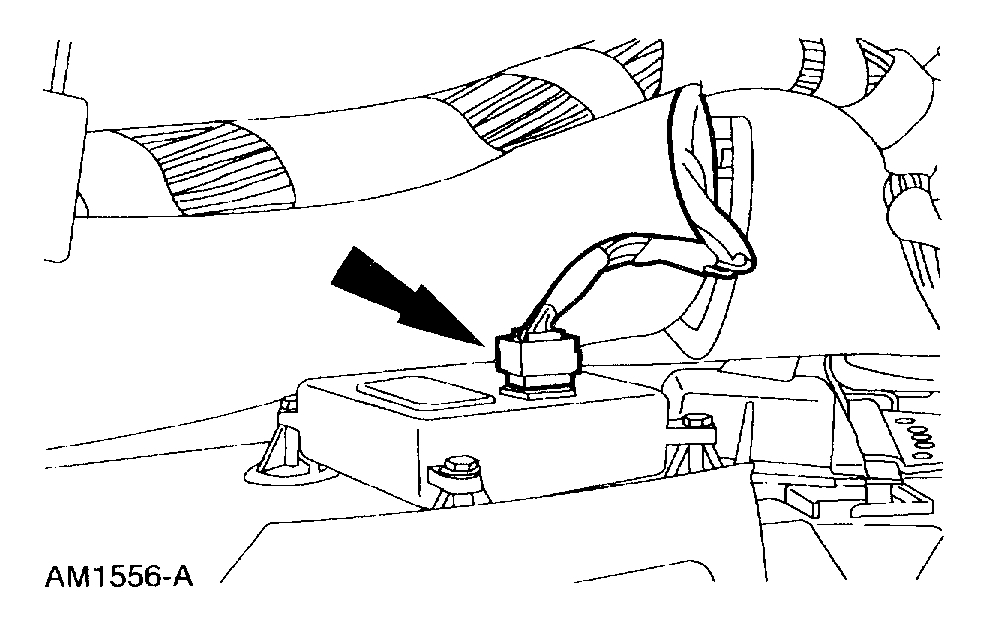
5. Inside the vehicle, remove the nut.
pic 3
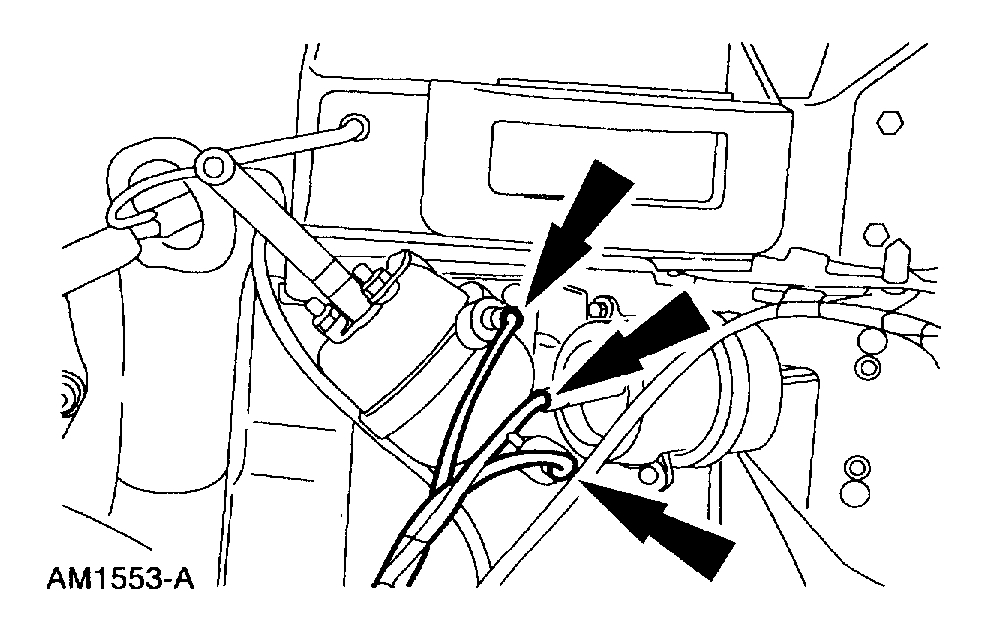
6. Disconnect the vacuum hoses.
NOTE: Mark the locations of the vacuum hoses.
pic 4
7. Disconnect the vacuum hose.
pic 5
8. Remove the pin-type retainers and remove the vacuum harness.
pic 6
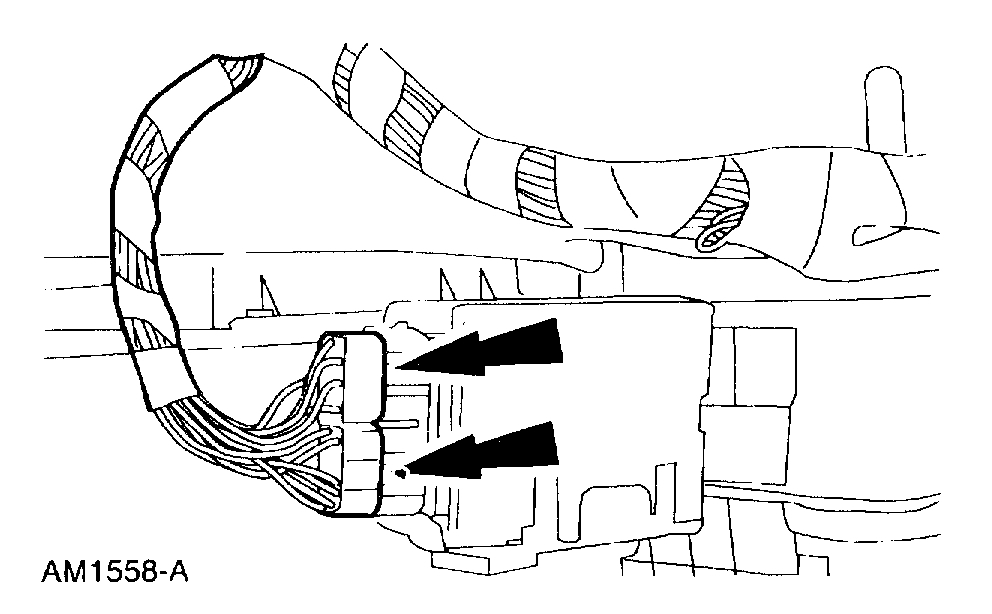
9. Disconnect the connector.
pic 7
1O. Remove the nuts.
pic 8
11. Disconnect the connectors.
pic 9
12. Remove the in-car temperature sensor hose (if equipped).
pic 10
13. Remove the plenum chamber.
INSTALLATION
1. Position the plenum chamber on the dash panel
pic 11
2. Install the nuts.
pic 12
3. Install the nut.
pic 13
4. Install the in-car temperature sensor hose (if equipped).
pic 14
5. Install the connector.
pic 15
6. Install the vacuum harness.
pic 16
7. Connect the vacuum hose.
pic 17
8. Connect the vacuum hoses.
pic 18
9. Install the heater water hoses.
- Lubricate the coolant hoses with Ford Rubber Suspension Insulator Lube E25Y-19553-A or equivalent meeting Ford specification ESF-M99B112-A.
10. Refill the cooling system. For additional information, refer to Cooling System. See: Cooling System > Procedures
11. Install the heater outlet floor duct. For additional information, refer to Heater Outlet Floor-Duct.
12. Install the instrument panel. For additional information, refer to: Dashboard/Instrument Panel. See: Dashboard / Instrument Panel > Service and Repair
_____________________________________________________
2000 Mercury Grand Marquis V8-4.6L VIN W
Heater Core
Vehicle Heating and Air Conditioning Heater Core Service and Repair Procedures Heater Core
HEATER CORE
REMOVAL
NOTE: If a heater core leak is suspected, the heater core must be leak tested before it is removed from the vehicle.
1. Remove the plenum chamber.
pic 19
2. Remove the screws and the heater core cover.
pic 20
3. Carefully cut the seal above the heater core inlet and outlet tubes and remove the heater core.
INSTALLATION
1. To install, reverse the removal procedure.
________________________________________
Let me know if this helps or if you have other questions.
Take care,
Joe
Images (Click to make bigger)
Friday, April 3rd, 2020 AT 8:45 PM