Welcome to 2CarPros.
Here are the directions specific to your vehicle. Please note that it is extremely important to reinstall the distributor in the manner explained in the directions. The distributor rotor positioning when installed will determine ignition timing. If it is wrong, it won't run, run poorly, backfire, and so on.
The two attached pictures correlate with the directions. If you need help, let me know.
____________________
2000 Chrysler Cirrus V6-2.5L VIN H
Procedures
Vehicle Powertrain Management Ignition System Distributor Service and Repair Procedures
PROCEDURES
REMOVAL
1. Remove bolt holding air inlet resonator to intake manifold.
2. Loosen clamps holding air cleaner cover to air cleaner housing.
3. Remove PCV make-up air hose from air inlet tube.
4. Loosen hose clamp at throttle body.
5. Remove air inlet tube, resonator and air cleaner cover.
6. Remove EGR tube.
7. Remove spark plug cables from distributor cap.
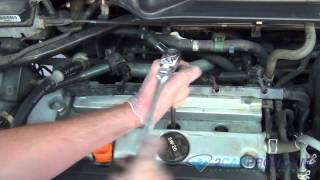
Distributor Cap Screws
pic 1
8. Loosen distributor cap holddown screws and remove cap.
9. Mark the rotor position and remove rotor. The mark indicates where to position the rotor when reinstalling the distributor.
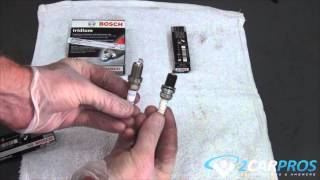
Distributor Electrical Connectors-Viewed From Rear Of Distributor
Pic 2
10. Remove 2 harness connectors from distributor.
11. Remove 2 sets of distributor holddown nuts and washers from studs.
12. Remove bolt and spark plug cable mounting bracket from top of distributor housing.
13. Remove bolt and transmission dipstick tube.
14. Carefully remove distributor from engine.
INSTALLATION
1. Install rotor on shaft.
2. Position distributor in engine. Make certain that O-ring is properly seated on distributor. If O-ring is cracked or nicked replace with a new one.
3. Carefully engage distributor drive with slotted end of camshaft. When the distributor is installed properly, the rotor will be in line with previously scribe line on air intake plenum. If engine was cranked while distributor was removed, establish proper relationship between the distributor shaft and Number 1 piston position as follows:
a. Rotate the crankshaft until number one piston is at top of compression stroke.
B. Rotate rotor to number one rotor terminal.
C. Lower distributor into opening, engaging distributor drive with drive on camshaft. With distributor fully seated on engine, rotor should be under the number 1 terminal.
4. Install distributor holddown washers and nuts. Tighten nuts to 13 Nm (9 ft. Lbs.).
5. Install spark plug cable bracket.
6. Install 2 harness connectors to distributor.
7. Install distributor cap.
8. Install spark plug cables onto distributor cap. The cap is numbered as well as the cables. Ensure sure all high tension wires are firmly in the cap towers.
9. Install transmission dipstick tube.
10. Install EGR tube to intake manifold. Tighten bolts to 11 Nm (95 in. Lbs.) Torque.
11. Install air inlet tube, resonator and air cleaner cover.
12. Tighten hose clamp at throttle body.
13. Install PCV make-up air hose from air inlet tube.
14. Tighten clamps holding air cleaner cover to air cleaner housing.
15. Install bolt holding air inlet resonator to intake manifold.
___________________________________________
Let me know how it goes or if you have questions.
Take care,
Joe
Images (Click to make bigger)
SPONSORED LINKS
Wednesday, July 31st, 2019 AT 6:53 AM