Hi,
Front brakes aren't too hard to replace. You can expect rear brakes to last approximately 25,000 miles, but that is based on driver habits and terrain.
First, here is a link that you may find helpful. It explains how, in general, the job is done. You can use it as a guide.
https://www.2carpros.com/articles/how-to-replace-front-brake-pads-and-rotors-fwd
Here are the directions specific to your vehicle. The attached pics correlate with the directions.
____________________________________________________
2005 Land Rover LR3 (LA) V6-4.0L
Front Disc Brake Pads
Vehicle Brakes and Traction Control Disc Brake System Brake Pad Service and Repair Removal and Replacement Front Disc Brake Pads
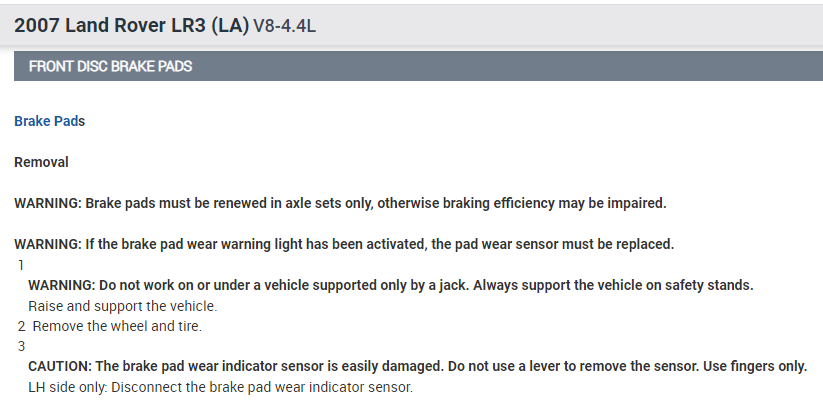
FRONT DISC BRAKE PADS
Brake Pads
Removal
WARNING: Brake pads must be renewed in axle sets only, otherwise braking efficiency may be impaired.
WARNING: If the brake pad wear warning light has been activated, the pad wear sensor must be replaced.
1
WARNING: Do not work on or under a vehicle supported only by a jack. Always support the vehicle on safety stands.
Raise and support the vehicle.
2 Remove the wheel and tire.
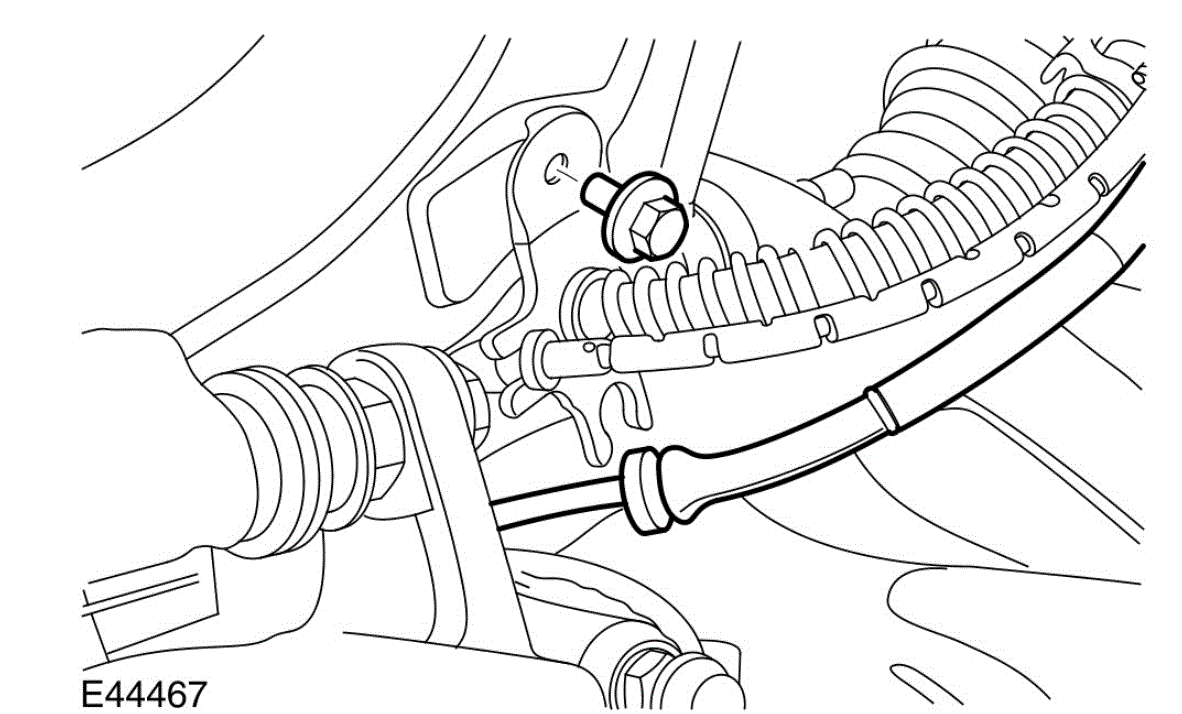
3
CAUTION: The brake pad wear indicator sensor is easily damaged. Do not use a lever to remove the sensor. Use fingers only.
LH side only: Disconnect the brake pad wear indicator sensor.
pic 1
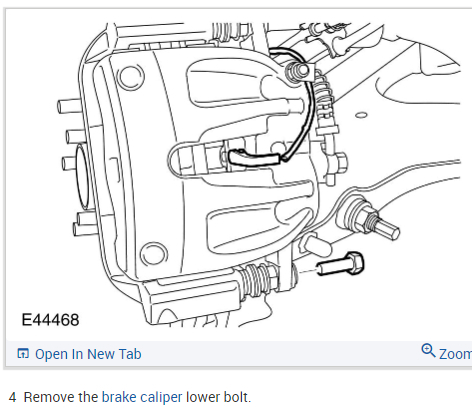
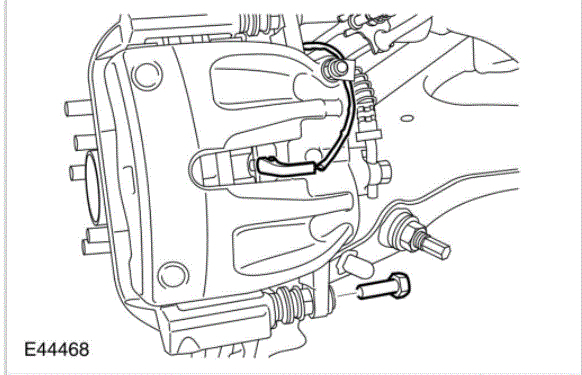
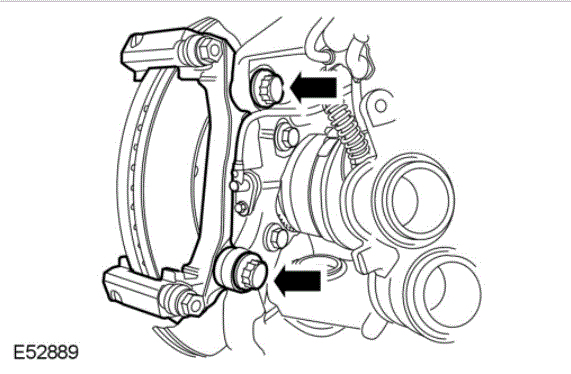
4 Remove the brake caliper lower bolt.
pic 2
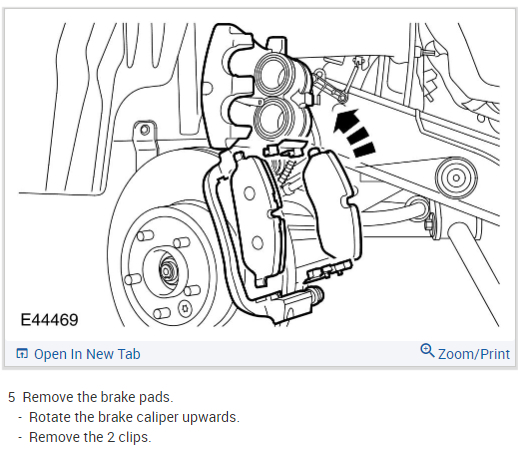
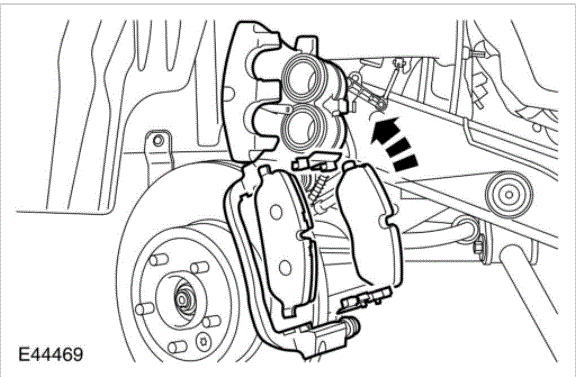
5 Remove the brake pads.
- Rotate the brake caliper upwards.
- Remove the 2 clips.
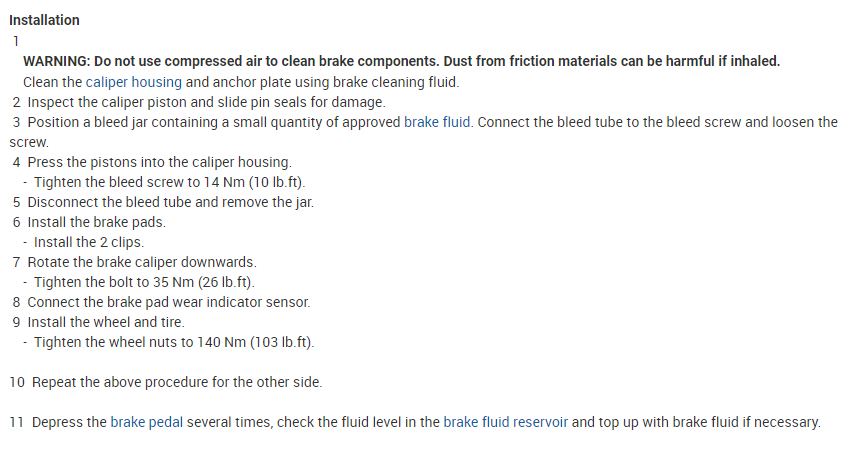
Installation
1
WARNING: Do not use compressed air to clean brake components. Dust from friction materials can be harmful if inhaled.
Clean the caliper housing and anchor plate using brake cleaning fluid.
2 Inspect the caliper piston and slide pin seals for damage.
3 Position a bleed jar containing a small quantity of approved brake fluid. Connect the bleed tube to the bleed screw and loosen the screw.
4 Press the pistons into the caliper housing.
- Tighten the bleed screw to 14 Nm (10 lb.ft).
5 Disconnect the bleed tube and remove the jar.
6 Install the brake pads.
- Install the 2 clips.
7 Rotate the brake caliper downwards.
- Tighten the bolt to 35 Nm (26 lb.ft).
8 Connect the brake pad wear indicator sensor.
9 Install the wheel and tire.
- Tighten the wheel nuts to 140 Nm (103 lb.ft).
10 Repeat the above procedure for the other side.
11 Depress the brake pedal several times, check the fluid level in the brake fluid reservoir and top up with brake fluid if necessary.
____________________________________________
Rotor Replacement
2005 Land Rover LR3 (LA) V6-4.0L
Front Disc Brake Disc
Vehicle Brakes and Traction Control Disc Brake System Brake Rotor/Disc Service and Repair Removal and Replacement Front Disc Brake Disc
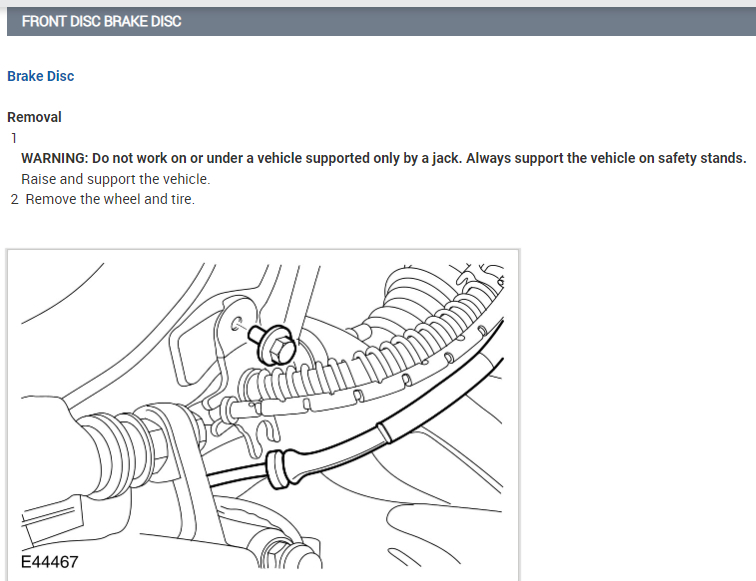
FRONT DISC BRAKE DISC
Brake Disc
Removal
1
WARNING: Do not work on or under a vehicle supported only by a jack. Always support the vehicle on safety stands.
Raise and support the vehicle.
2 Remove the wheel and tire.
pic 3
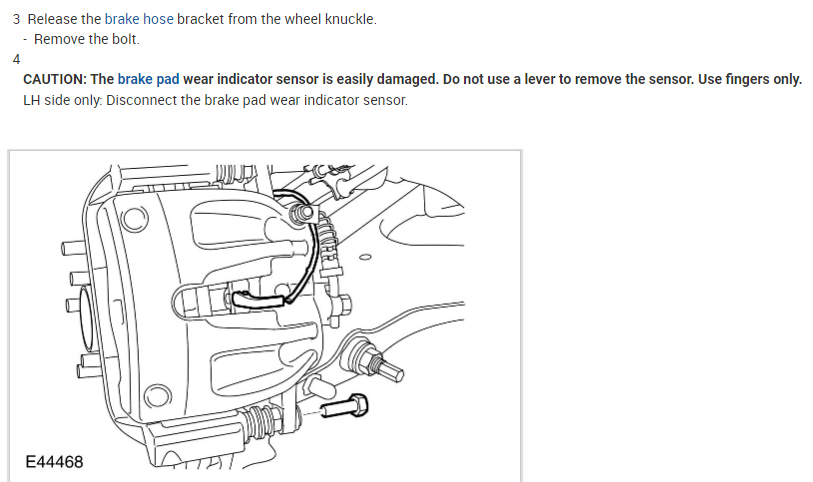
3 Release the brake hose bracket from the wheel knuckle.
- Remove the bolt.
4
CAUTION: The brake pad wear indicator sensor is easily damaged. Do not use a lever to remove the sensor. Use fingers only.
LH side only: Disconnect the brake pad wear indicator sensor.
pic 4
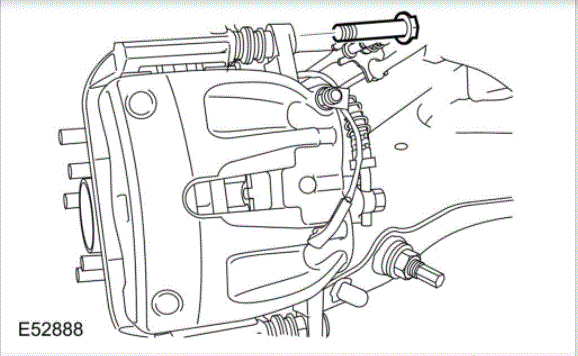
5 Remove the brake caliper lower bolt.
pic 5
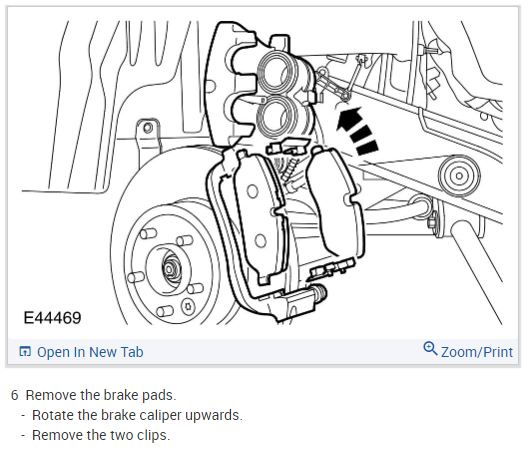
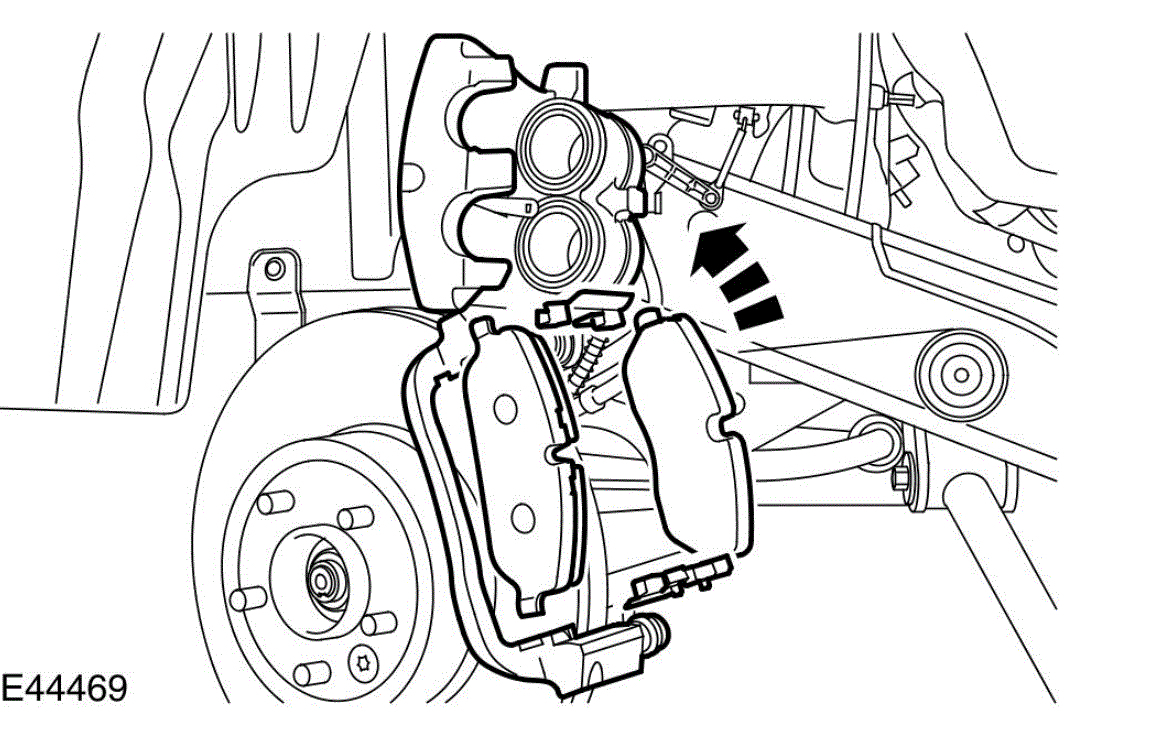
6 Remove the brake pads.
- Rotate the brake caliper upwards.
- Remove the two clips.
pic 6
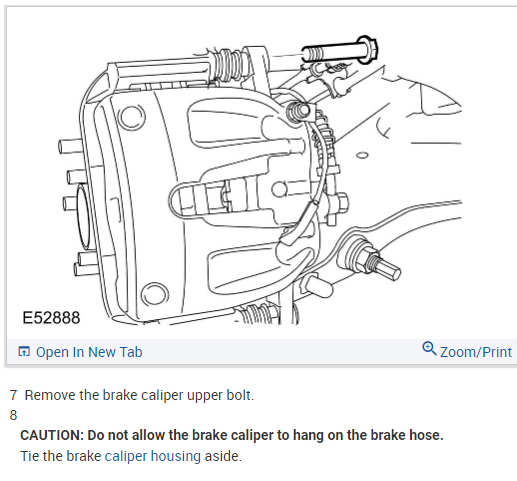
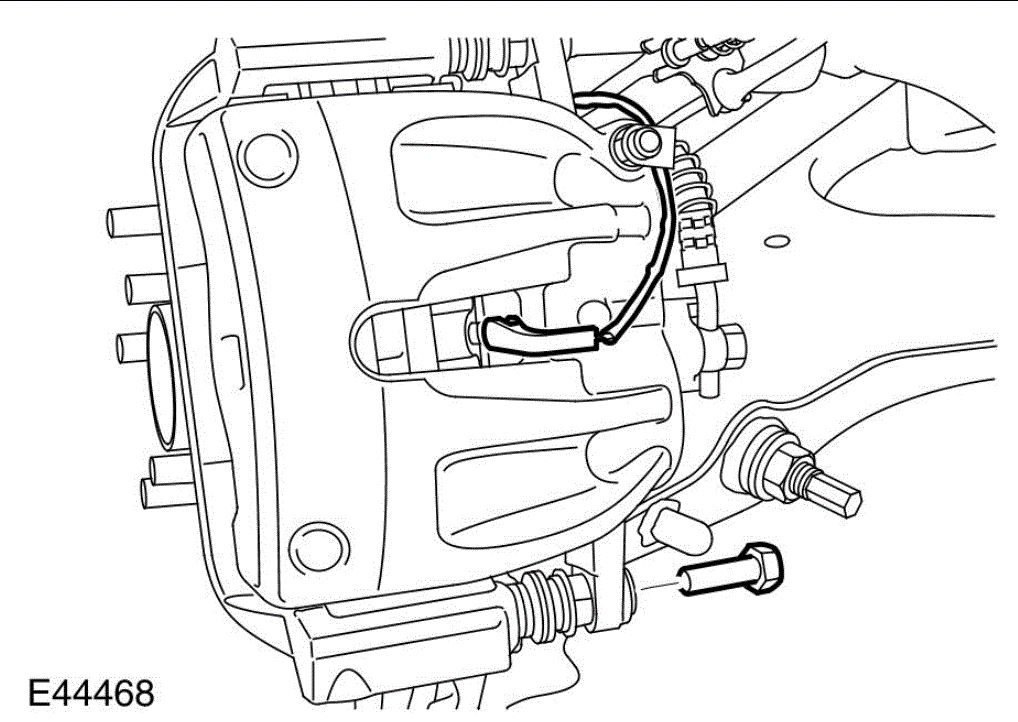
7 Remove the brake caliper upper bolt.
8
CAUTION: Do not allow the brake caliper to hang on the brake hose.
Tie the brake caliper housing aside.
pic 7
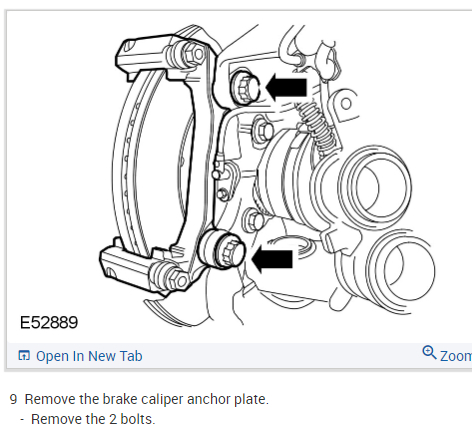
9 Remove the brake caliper anchor plate.
- Remove the 2 bolts.
pic 8
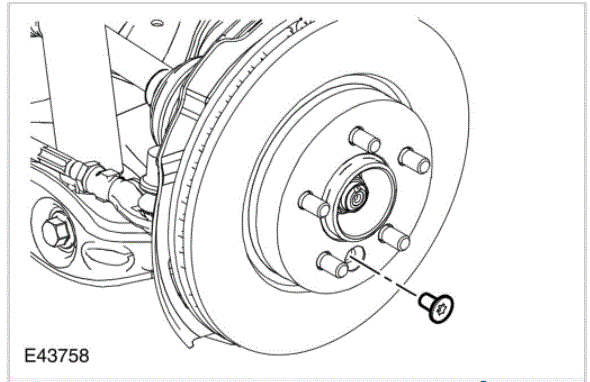
10 Remove the brake disc.
- Remove the Torx screw.
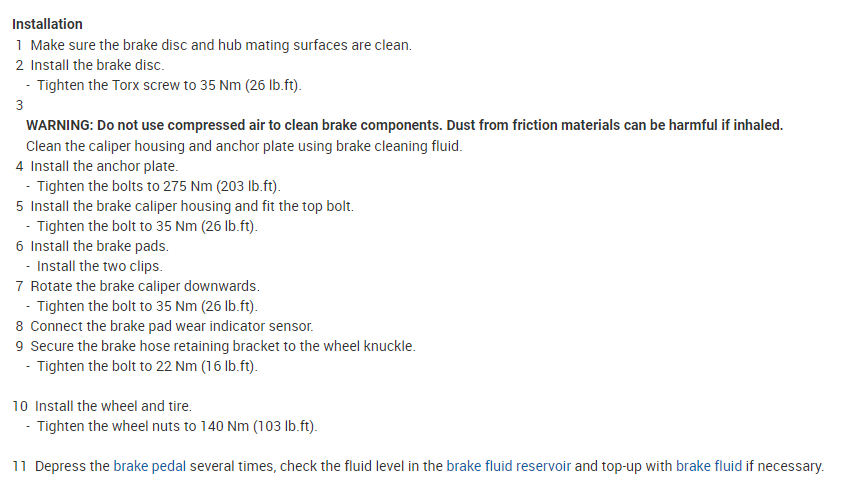
Installation
1 Make sure the brake disc and hub mating surfaces are clean.
2 Install the brake disc.
- Tighten the Torx screw to 35 Nm (26 lb.ft).
3
WARNING: Do not use compressed air to clean brake components. Dust from friction materials can be harmful if inhaled.
Clean the caliper housing and anchor plate using brake cleaning fluid.
4 Install the anchor plate.
- Tighten the bolts to 275 Nm (203 lb.ft).
5 Install the brake caliper housing and fit the top bolt.
- Tighten the bolt to 35 Nm (26 lb.ft).
6 Install the brake pads.
- Install the two clips.
7 Rotate the brake caliper downwards.
- Tighten the bolt to 35 Nm (26 lb.ft).
8 Connect the brake pad wear indicator sensor.
9 Secure the brake hose retaining bracket to the wheel knuckle.
- Tighten the bolt to 22 Nm (16 lb.ft).
10 Install the wheel and tire.
- Tighten the wheel nuts to 140 Nm (103 lb.ft).
11 Depress the brake pedal several times, check the fluid level in the brake fluid reservoir and top-up with brake fluid if necessary.
___________________________
I hope this helps. Let me know if you have other questions.
Take care and God Bless,
Joe
Images (Click to enlarge)
Feb 24, 2021 at 12:16 PM
(Merged)