Disconnect the battery cable, remove the carburetor air cleaner and partially drain the coolant system.
Remove the heater hoses from the heater core.
From under the hood, remove A/C hose support bracket from the cowl (one screw).
Remove the insulation tape from the expansion valve and sensing bulb. Then remove the cover plate and seal from the evaporator housing at the expansion valve (two screws).
Remove the glove box liner and remove the A/C duct by pulling from the instrument panel register and releasing the clip at the plenum.
Disconnect the right cowl fresh air inlet vacuum hose from the fresh air door vacuum motor.
Remove the evaporator rear housing from under the instrument panel. Then, remove the fresh air inlet tube from the evaporator rear housing ( 4 nuts and 1 bolt) and install one upper nut to retain evaporator housing-to-dash after rear housing is removed.
Disconnect wires from the de-icing switch and pull capillary tube out of evaporator core. Remove the de-icing switch mounting plate (four screws).
Remove two screws retaining plenum-to-dash (above transmission tunnel) and two screws to evaporator case and remove the plenum.
Install a piece of protective tape on A-pillar inner cowl panel, at lower right corner of instrument panel.
Then, remove the lower right instrument panel-to-A-pillar bolt and lower the center instrument panel brace, bolt and nut.
Position the instrument panel rearward and install the A-pillar bolt to hold the panel in the rearward position.
Remove four evaporator retaining screws.
Position the evaporator away from the case and secure it rearward and upward. Remove evaporator sealing grommet.
Remove heater core (3 screws retaining 2 plates).
Remove A/C-heat door (snaps off).
Remove A/C-heat door arm support (2 screws) and pivot arm retainer (1 screw).
Remove blower motor (2 screws) and remove blower wheel.
INSTALLATION:
Install transfer blower wheel to blower motor and panel assembly.
Install door arm pivot retainer (1 screw) and door arm support (2 screws).
Install A/C/heat door (snaps on).
Install heater core.
Remove the retainer that held the evaporator away from the case, install evaporator and tube sealing grommet.
Install the plenum (4 screws).
Install the de-icing switch mounting plate, install de-icing switch capillary tube back into evaporator core and position blower wire grommet.
Connect blower and de-icing switch wires.
Remove upper evaporator case retaining nut and install the evaporator outlet (4 nuts and 1 bolt). Then, position the air inlet bellows.
Connect the right cowl fresh air inlet vacuum hose to the fresh air door vacuum motor.
Reposition the instrument panel, install the retaining bolts and remove the protective tape at the A-pillar inner cowl panel, lower right corner of instrument panel.
Install the right A/C duct assembly and install the glove box liner.
Install seal and cover plate to the evaporator case at the expansion valve.
Install insulation tape over the expansion valve and sensing bulb.
Install the A/C hose support bracket-to-cowl.
Connect heater hoses to the heater core assembly.
Fill cooling system, install the carburetor air cleaner and connect the battery cable to the battery.
Check blower motor operation.
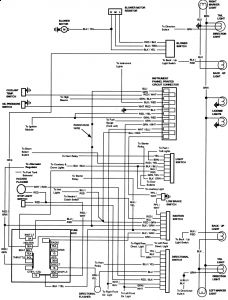
Post your email and I can send this diagram to you in a larger form..

SPONSORED LINKS
Thursday, December 3rd, 2009 AT 9:43 PM


