MANUAL BLEEDING
NOTE:DO NOT allow reservoir to run dry during bleeding operation.
Master Cylinder Bleeding (Bench)
Support brake master cylinder body in a vise, and fill both fluid brake master cylinder reservoirs with brake fluid. Install plugs in front and rear brake outlet ports. Bleed front brake system first. Loosen plug in front brake outlet port and depress primary piston slowly to force air out of master cylinder.
Tighten plug while piston is depressed or air will enter brake master cylinder. Repeat procedure until no air bubbles are present. Repeat bleeding procedure for rear brake outlet port with front brake outlet plugged. Tighten plugs and try to depress piston. Piston will not depress if all air is out of master cylinder.
Master Cylinder Bleeding (On-Vehicle)
Using a line wrench, remove front brake tube and master cylinder outlet rear tube from master cylinder. Install short brake tubes in master cylinder and position them so they curve into master cylinder reservoir, and ends of tubes are submerged in brake fluid.
Fill master cylinder reservoir with clean brake fluid. Have an assistant pump brakes until clear, bubble-free fluid flows from both brake tubes. Remove short brake tubes and reinstall front brake tube and master cylinder inlet rear tube on master cylinder. Bleed each brake tube at master cylinder by having and assistant pump brake pedal 10 times and then hold firm pressure on brake pedal.
Loosen rearmost brake tube fittings until a stream of brake fluid comes out. Have an assistant maintain pressure on brake pedal until brake tube fitting is tightened again. Repeat procedure until clear, bubble-free fluid comes out from around tube fitting. Refill master cylinder reservoir as necessary. Repeat this bleeding operation at front brake tube fittings.
Gravity Bleeding
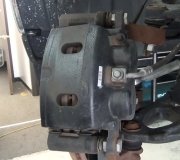
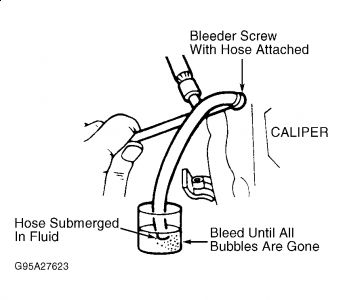
Fill brake master cylinder with new brake fluid. Loosen both wheel cylinder bleeder screws and leave them open until clear brake fluid flows. Check master cylinder reservoir fluid level often and do not let it run dry. Tighten wheel cylinder bleeder screws. One at a time, loosen caliper bleeder screws. Leave bleeder screws open until clear fluid flows. Check fluid level often. Tighten caliper bleeder screws.
Manual Bleeding
Clean master cylinder cap and surrounding area. Remove cap. All models are equipped with dual-type master cylinder. Bleed primary and secondary systems separately. Loosen primary or secondary master cylinder hydraulic line fitting.
Wrap a cloth around brakelines to absorb escaping brake fluid. Slowly push brake pedal down to force out air. With pedal fully depressed, tighten fittings to prevent air from being sucked into master cylinder when pedal is released. Release pedal.
Repeat procedure until air is completely purged from master cylinder. When all air has escaped, tighten fittings with pedal down. Release pedal, and depress again. If pedal is not firm, repeat bleeding procedure.
Repeat procedure at bleeder fitting on rear anti-lock brake electrohydraulic RABS valve, each wheel cylinder and caliper
BLEEDING SEQUENCE
Before bleeding system, remove all vacuum from power unit by depressing brake pedal several times. Bleed master cylinder first, followed in sequence by rear wheel cylinders, anti-lock system components (if equipped) and calipers
All (Except Models With ABS)RR, LR, RF, LF
ABS ModelsRR, LR, (1), RF, LF
Bleed hydraulic control unit

SPONSORED LINKS
Wednesday, April 14th, 2021 AT 10:35 AM