Welcome to 2CarPros.
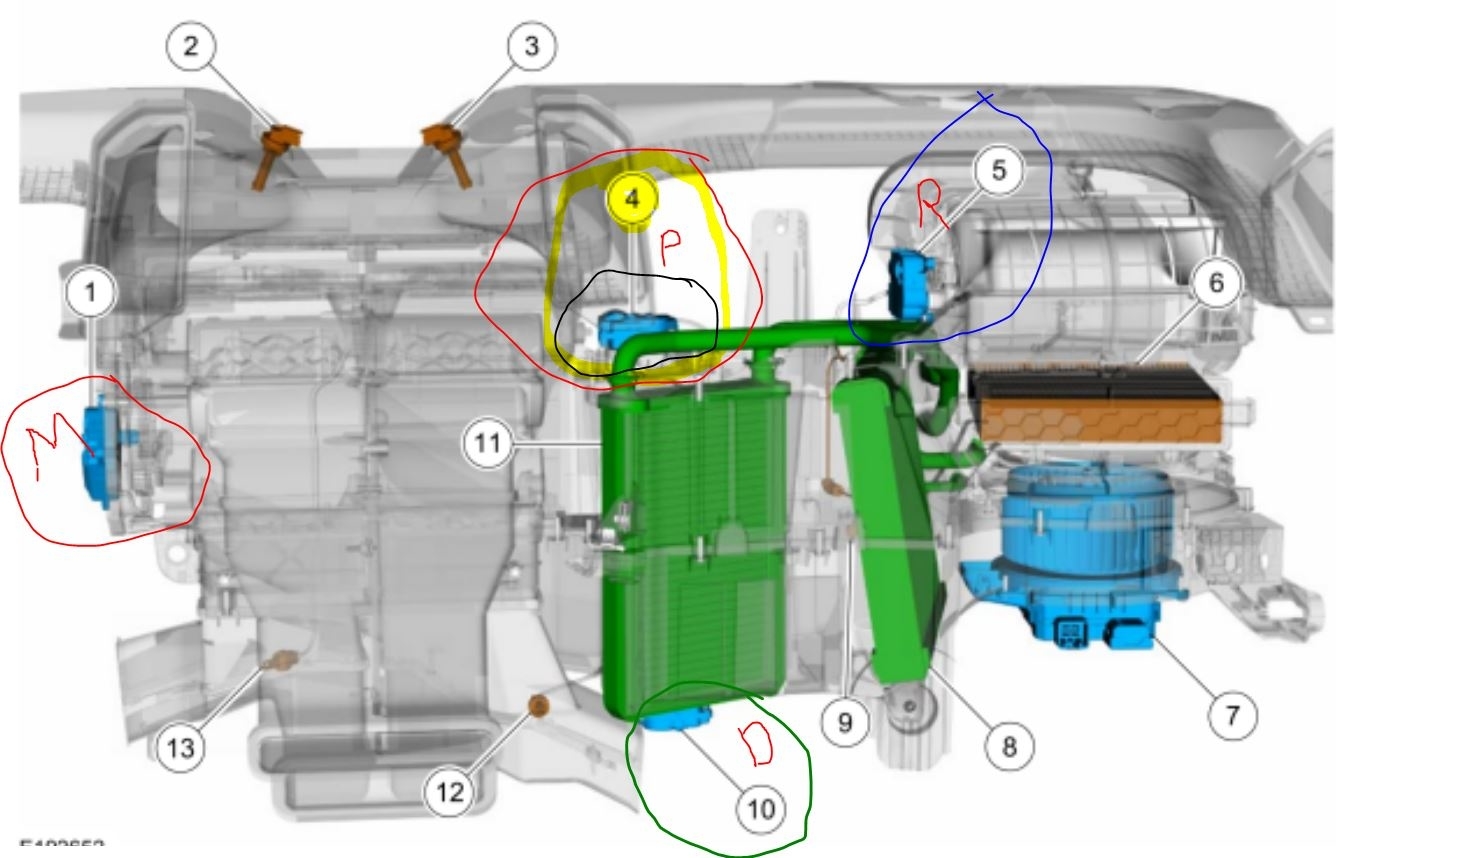
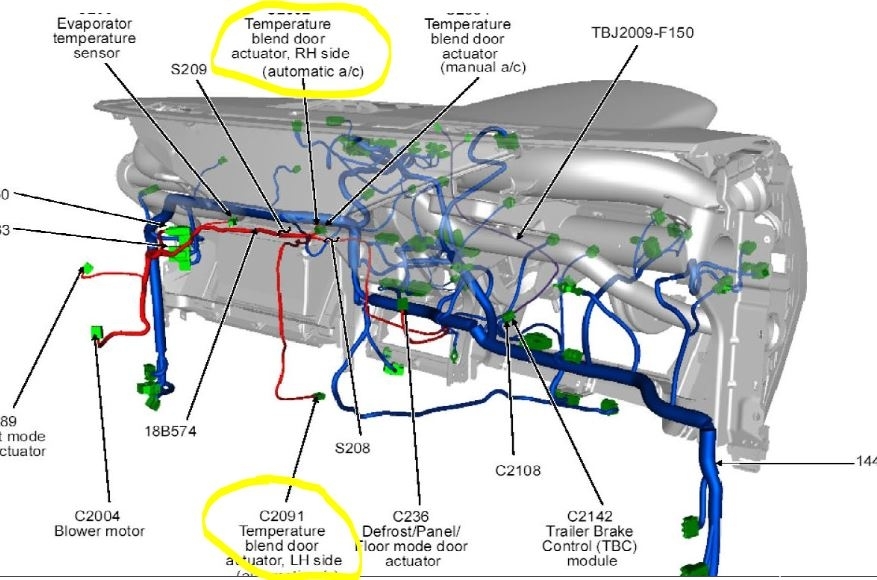
It is possible they caused it, but unlikely. Under the dash in the HVAC system is what is called a blend air door. The door's position is actuated by an electrical motor. If it is disconnected, you will only get heat or AC based on the position of the door.
Now the reason I said unlikely is because the blower motor's location in regards to the blend air door, but the connection is located behind the glove box, the same area where they would have worked on the blower motor. Maybe it was left disconnected or accidentally disconnected. That is where I would check.
Now the location is different if you have dual climate control. However, based on your description, I believe you have standard control. If I am wrong, let me know.
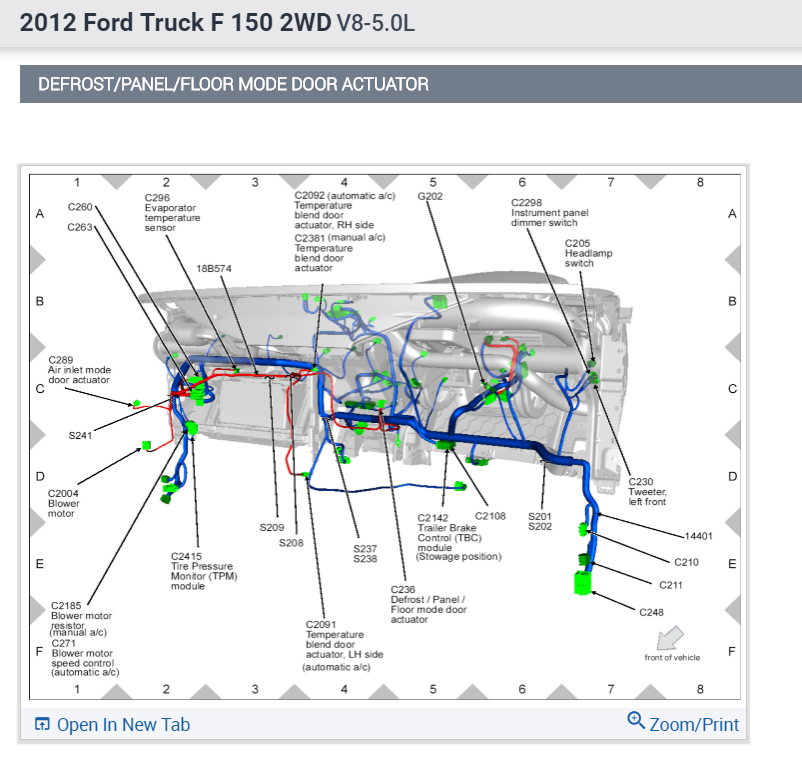
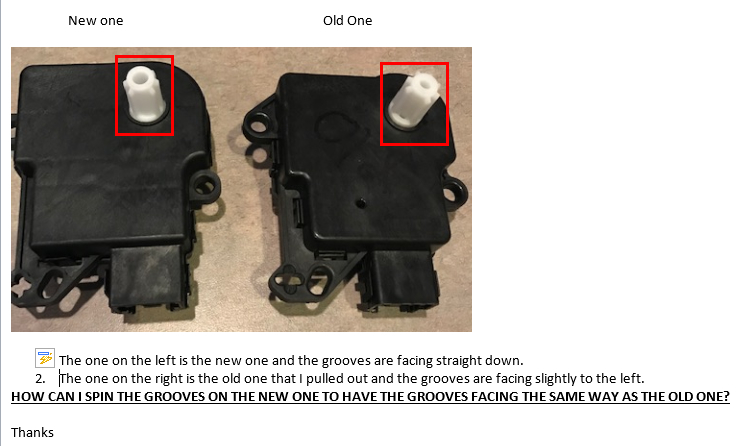
Here are the directions for replacement of the blend air door actuator. I will provide everything so you can locate the wiring and see if anything is disconnected. The attached pictures correlate with the directions. If everything is connected, I need you to pay attention to the directions starting with number 7. That is how the actuator is calibrated. If it was disconnected and the steps weren't followed, that can cause this problem as well.
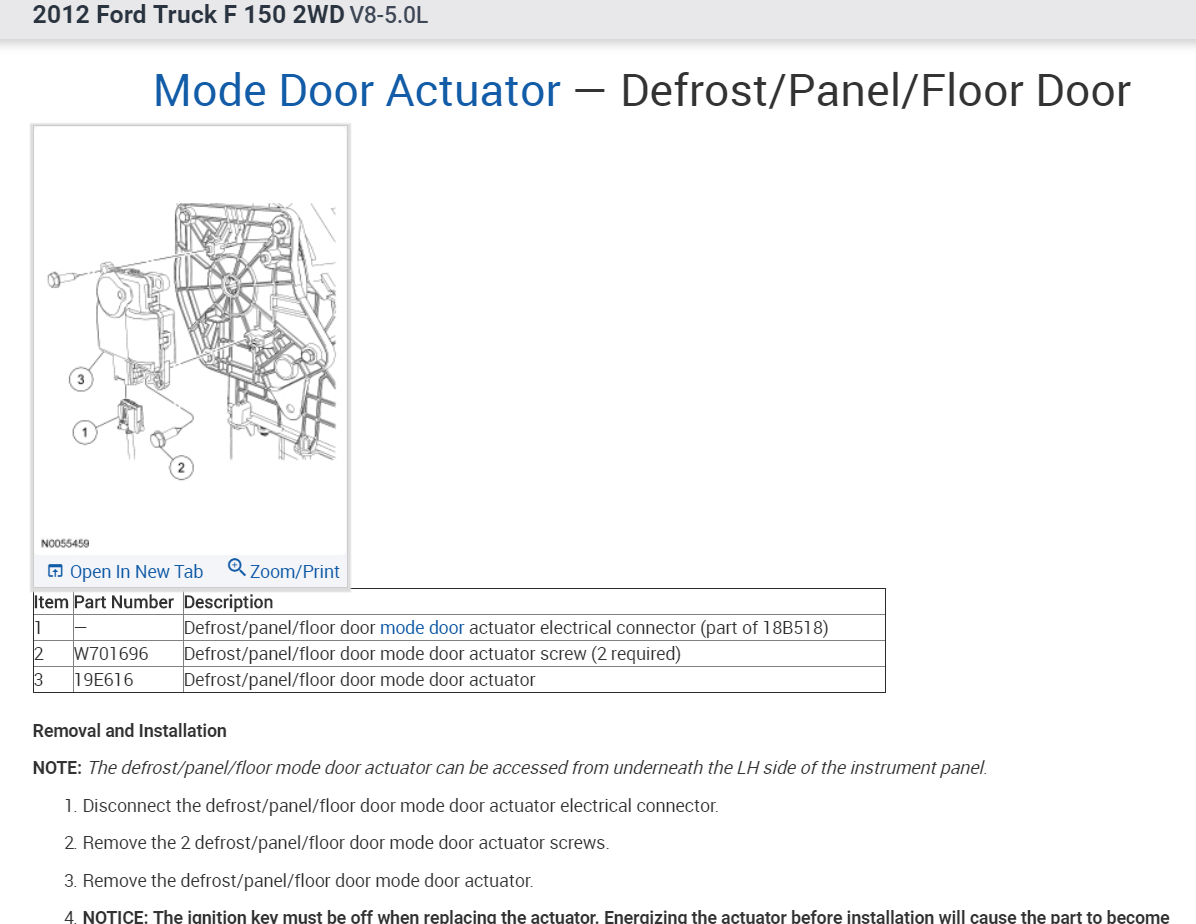
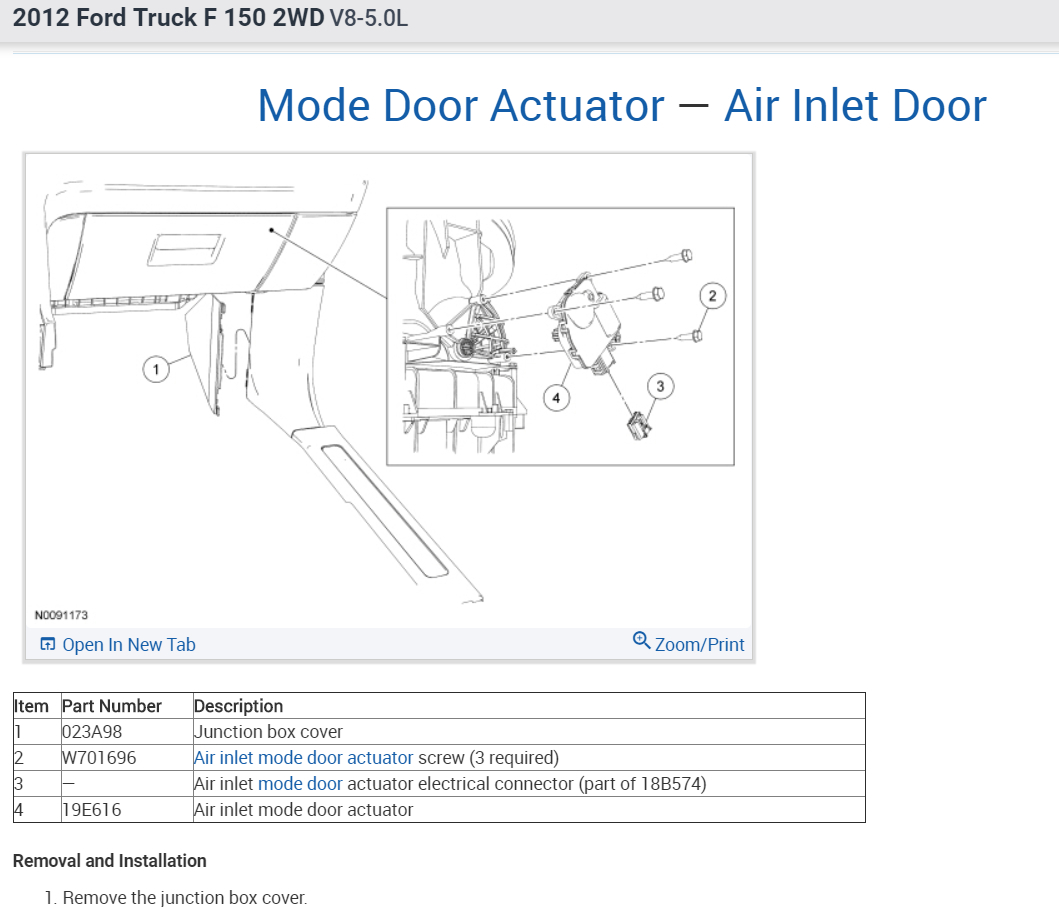
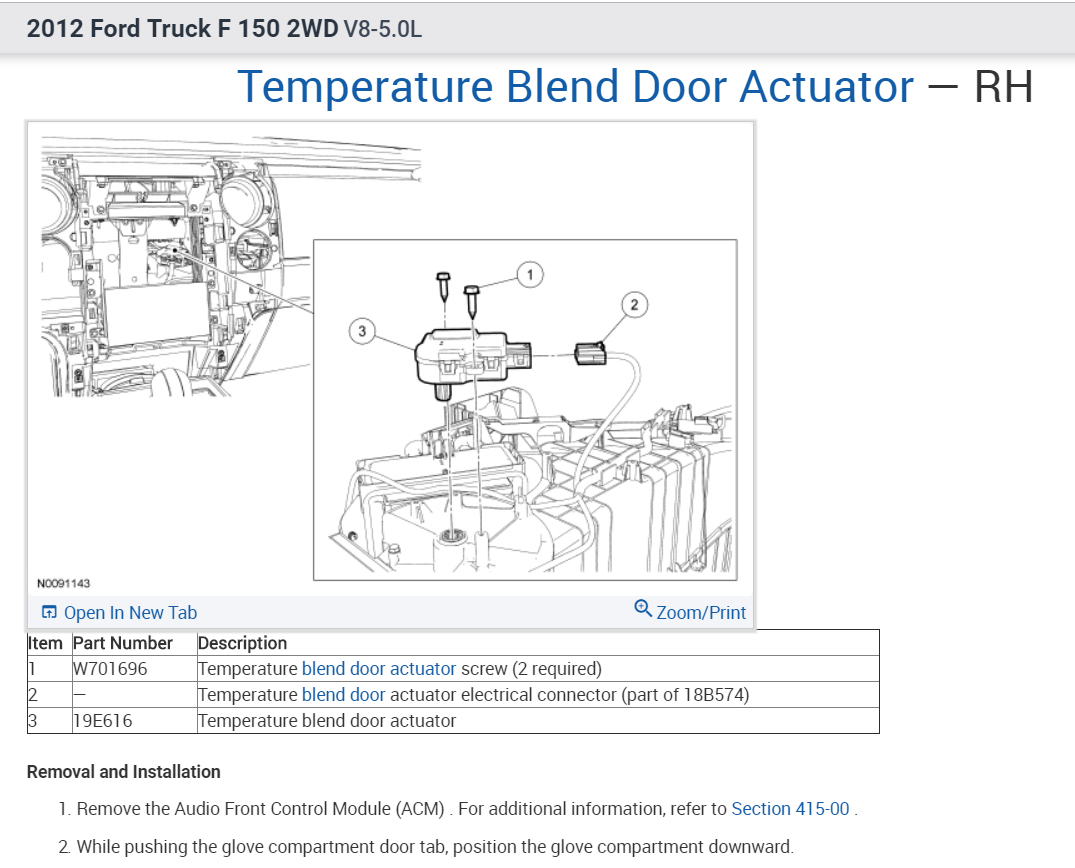
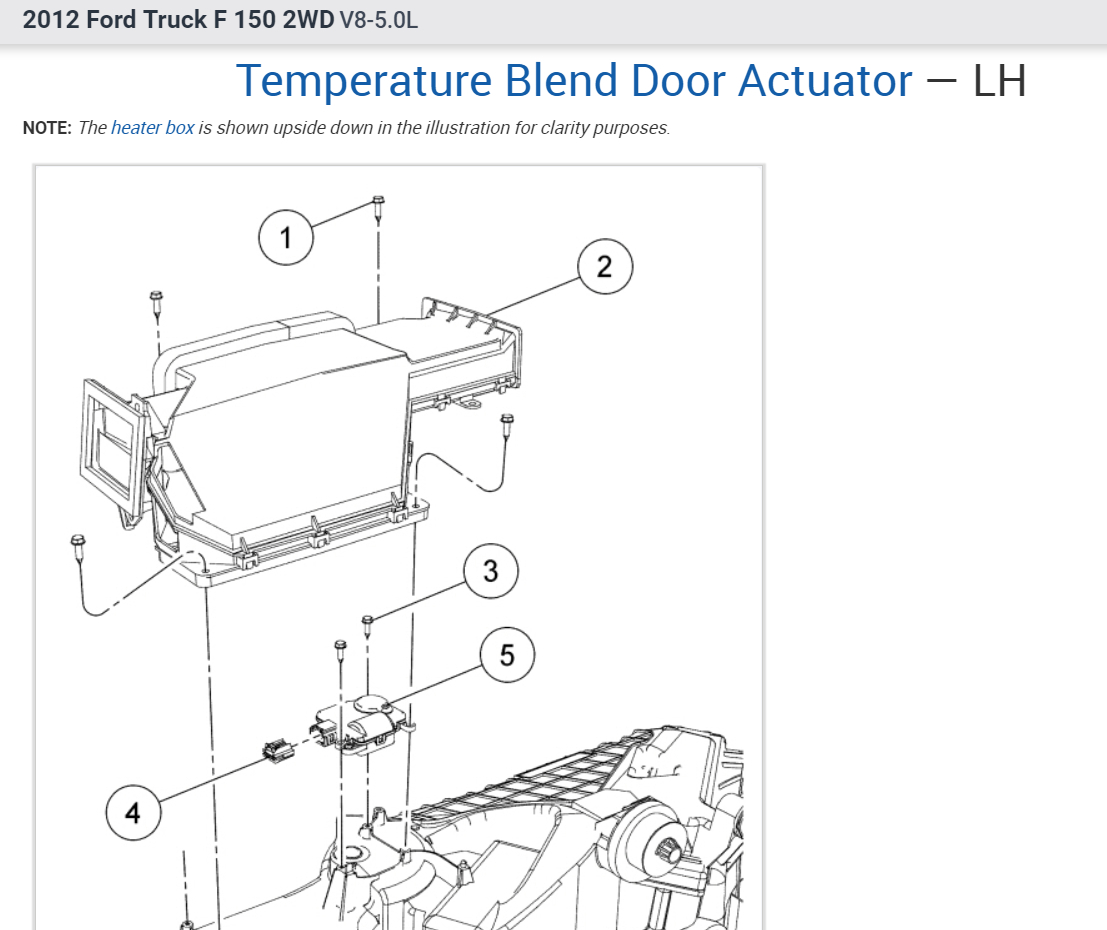
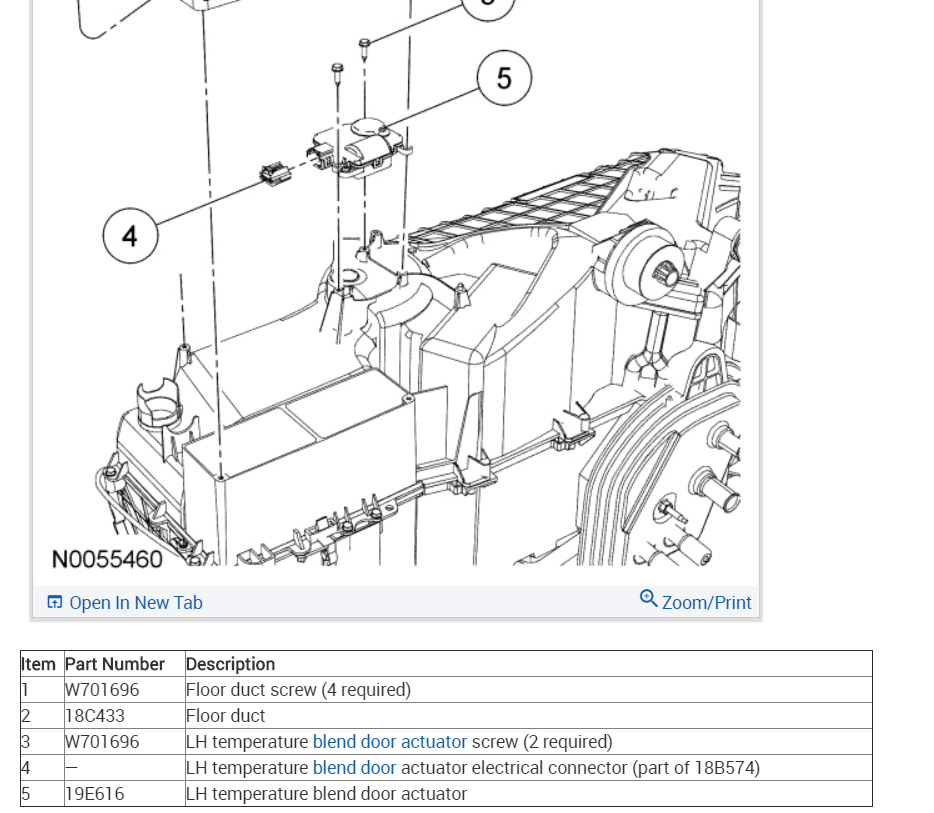
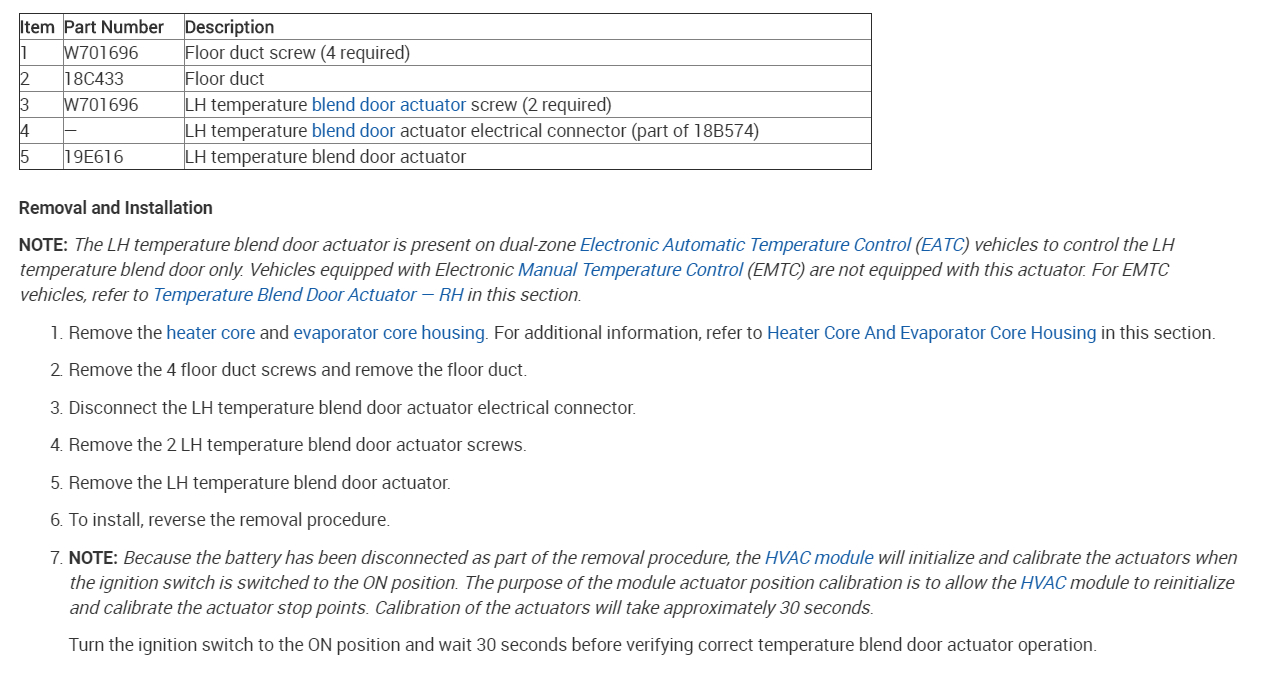
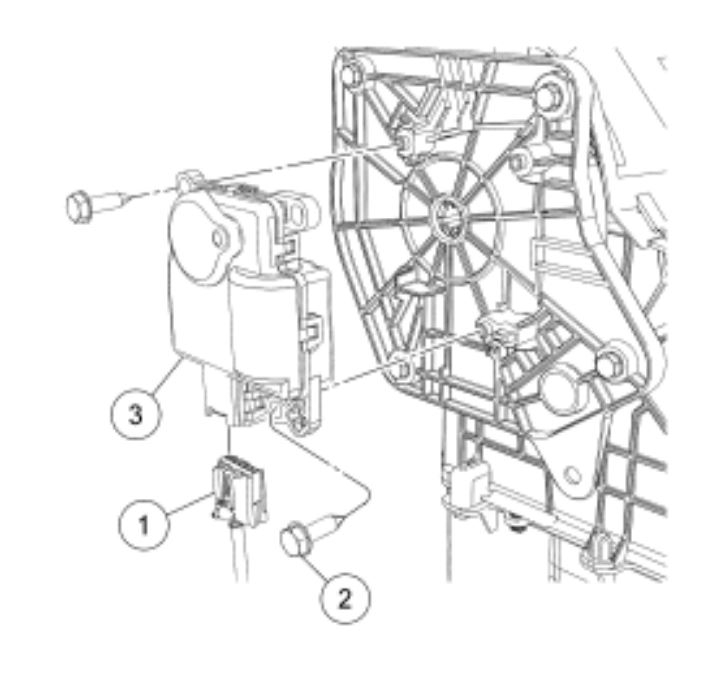
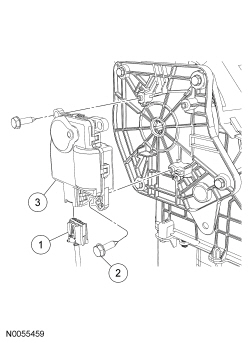
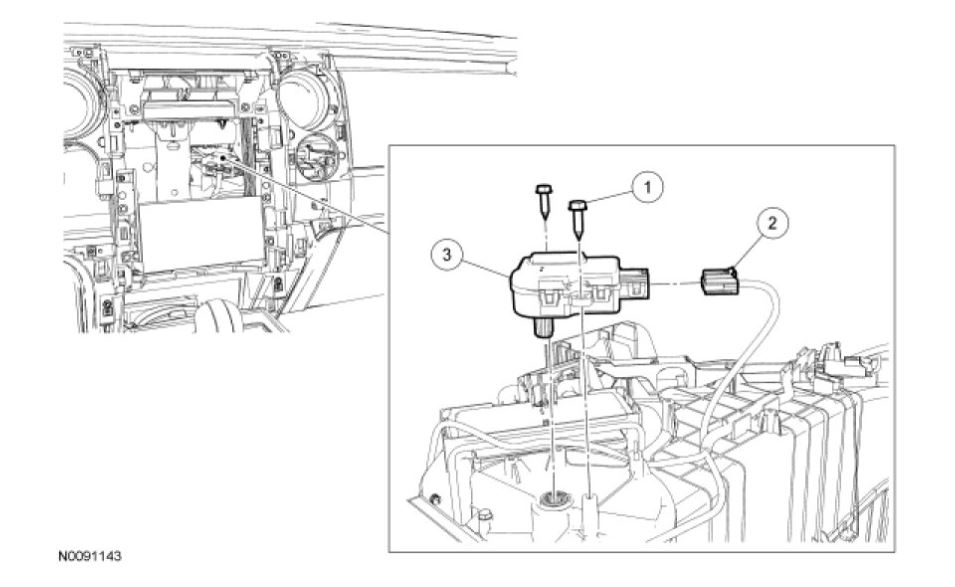
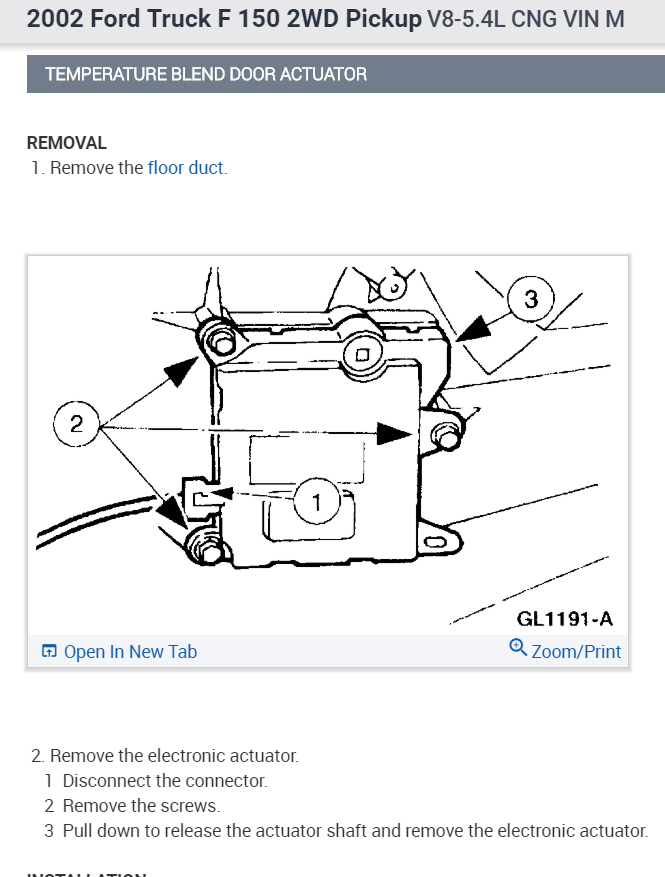
Temperature Blend Door Actuator - RH
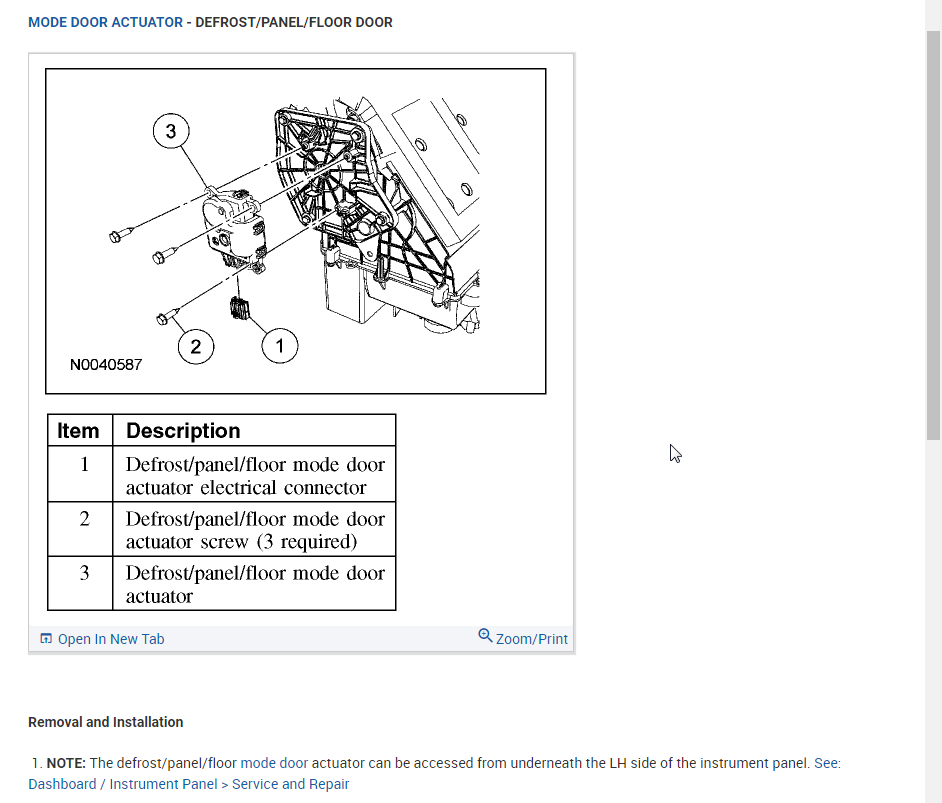
Removal and Installation
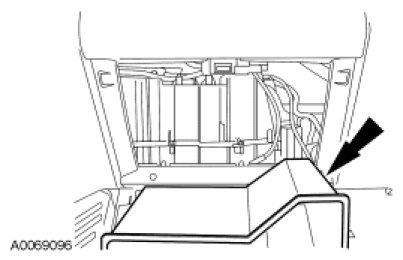
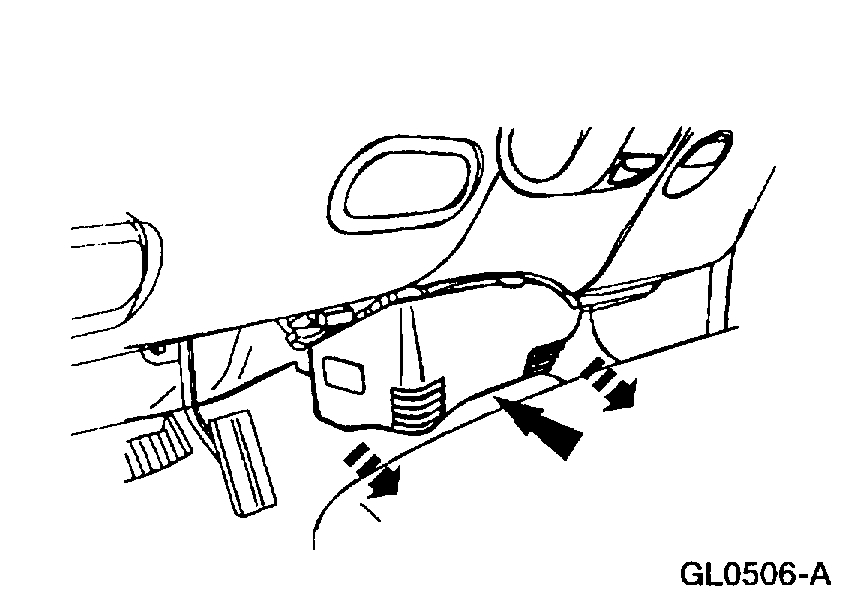
1. Remove the Audio Control Module (ACM). For additional information, refer to Accessories and Optional Equipment.
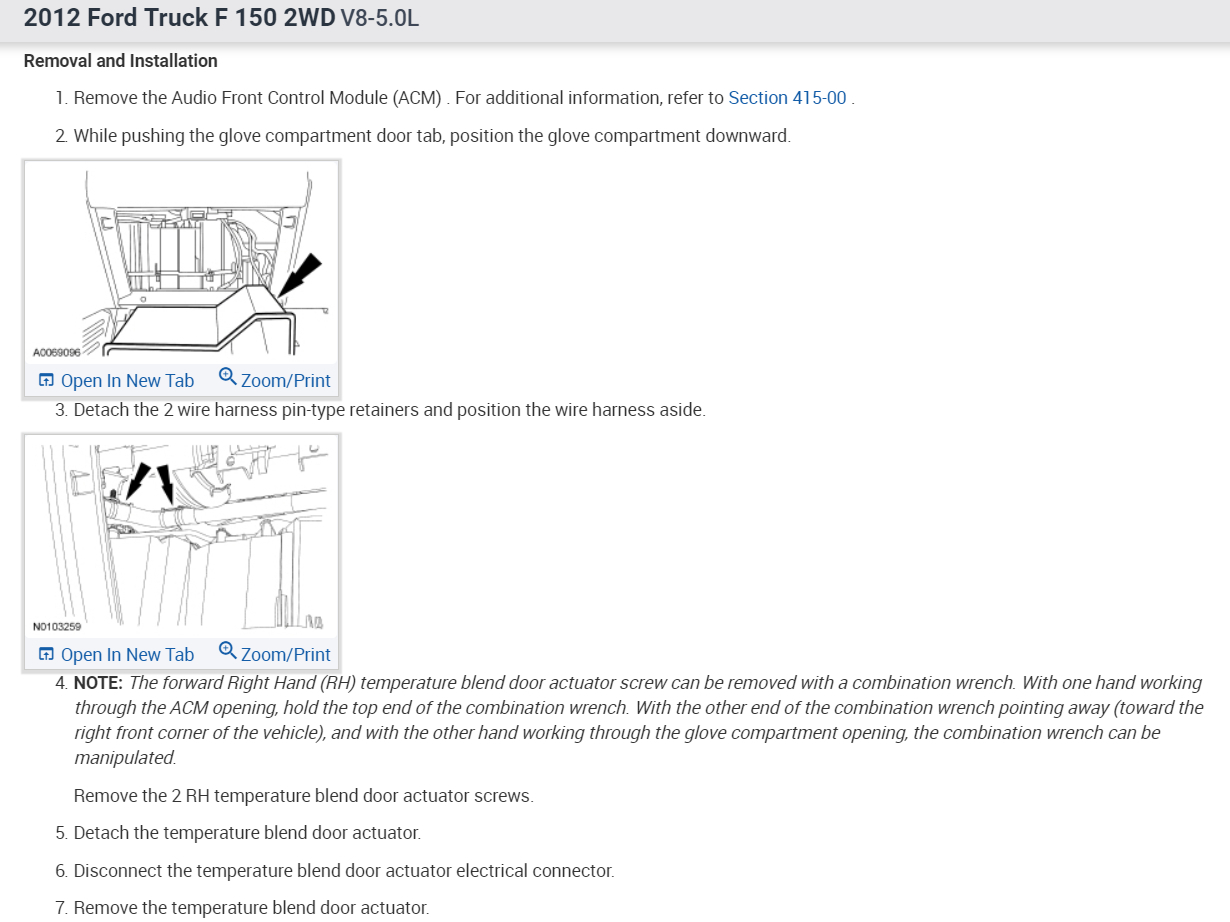
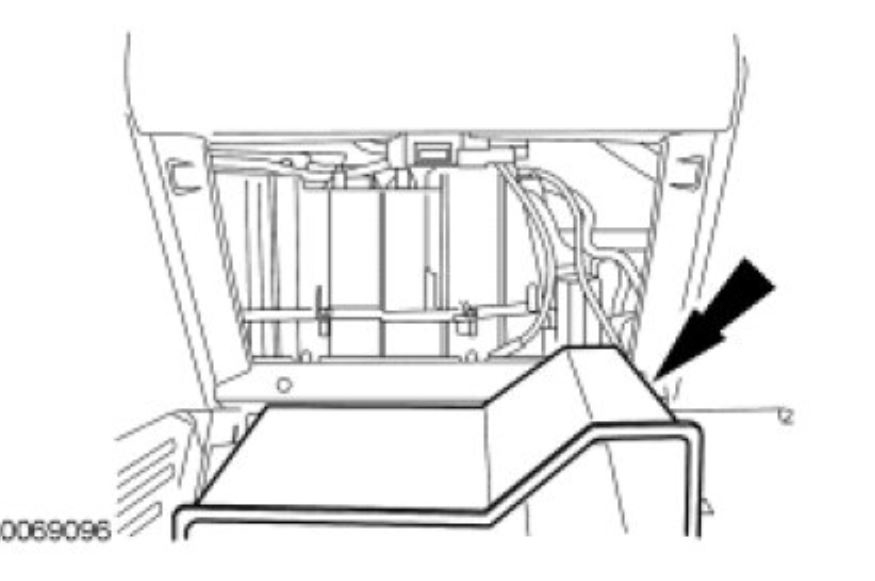
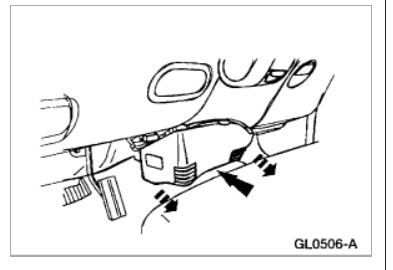
2. While pushing the glove compartment door tab, position the glove compartment downward.
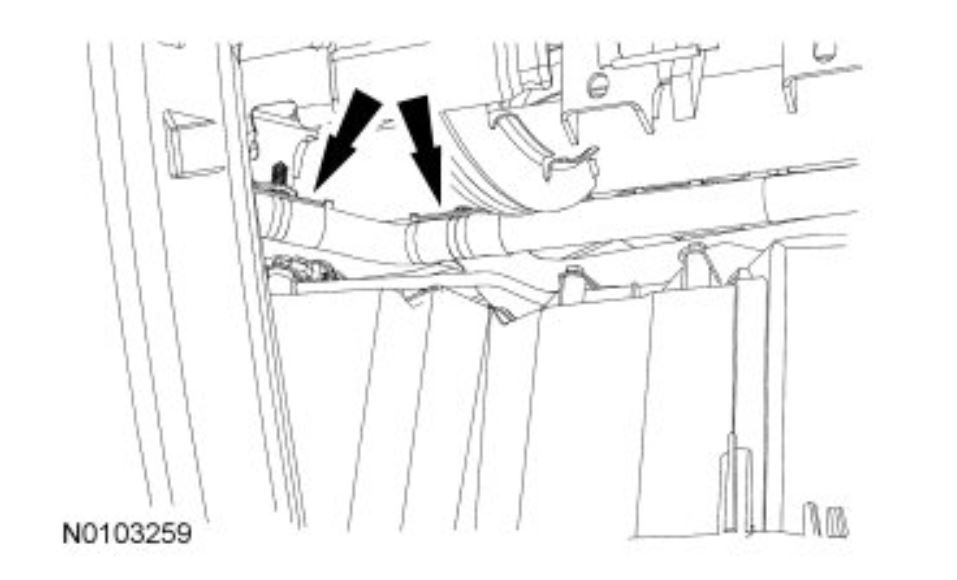
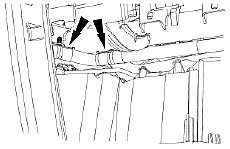
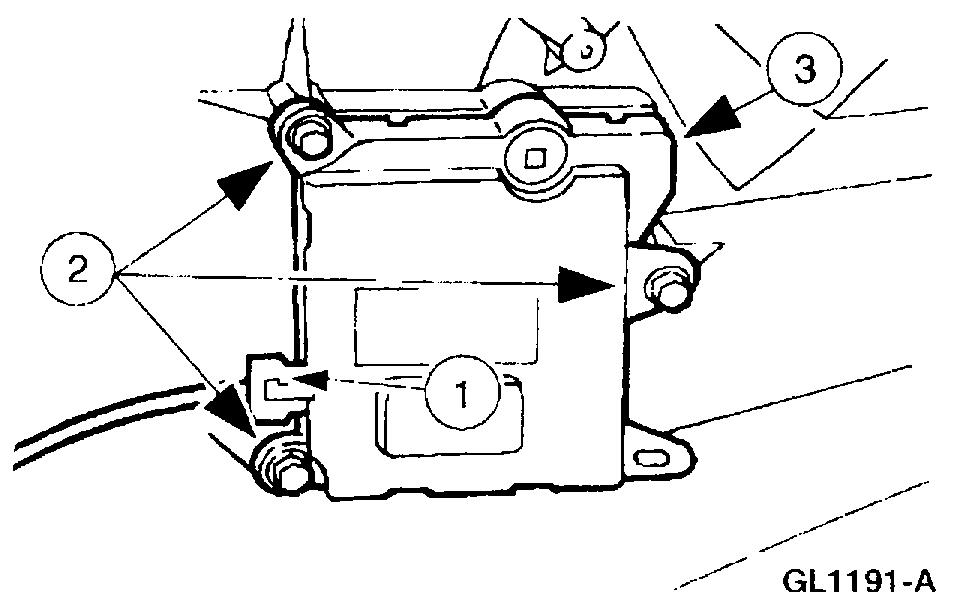
3. Detach the 2 wire harness pin-type retainers and position the wire harness aside.
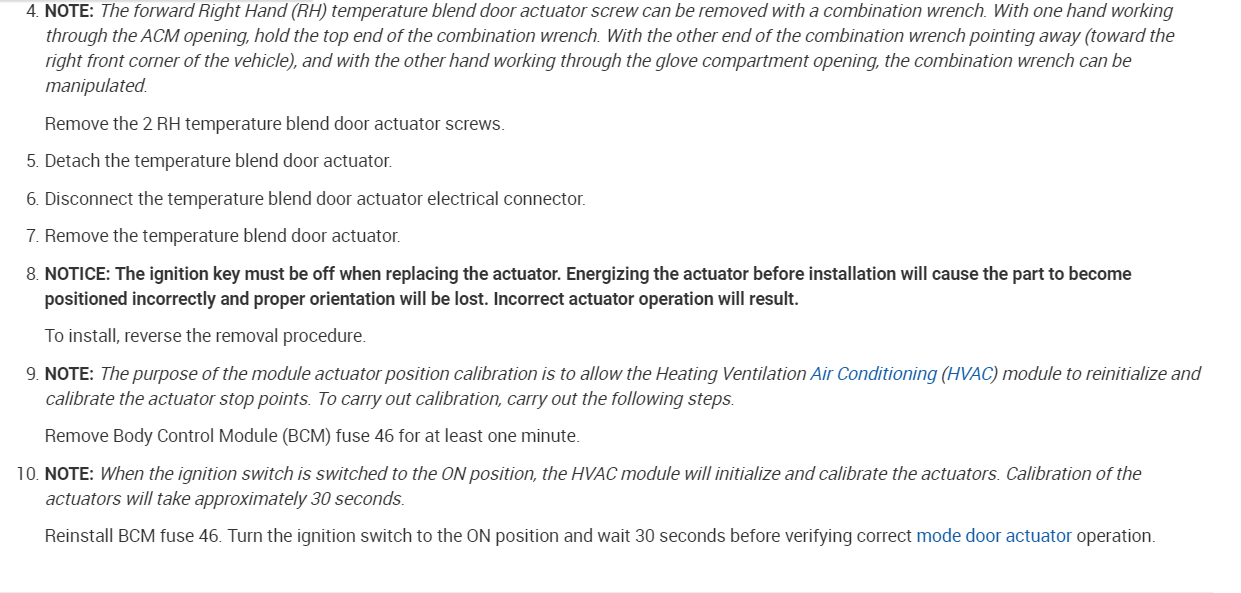
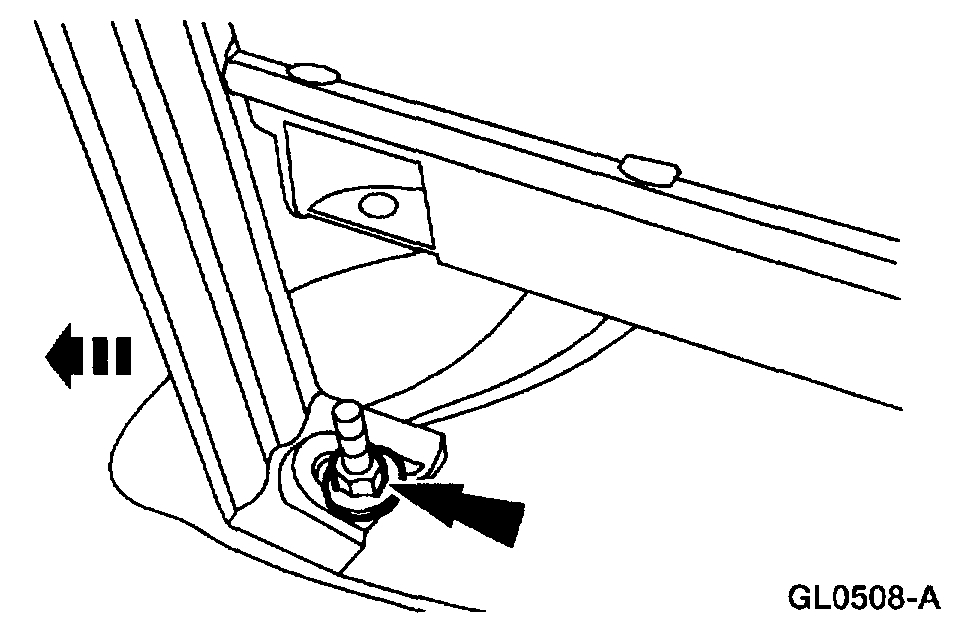
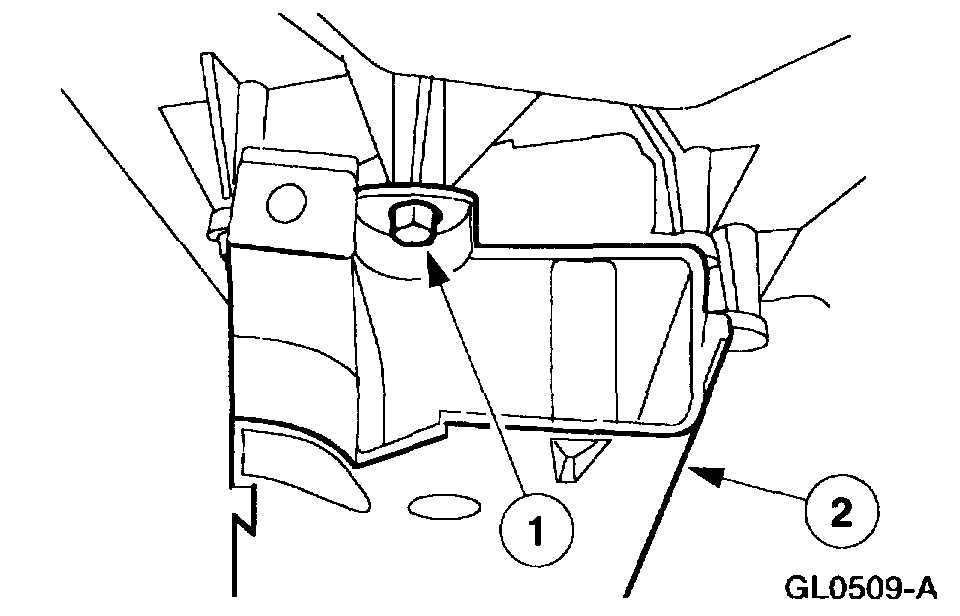
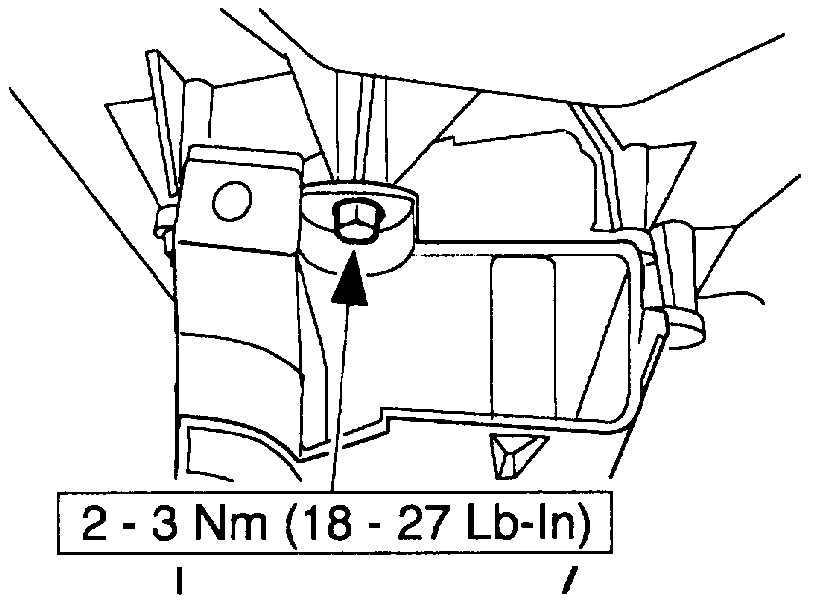
4. NOTE: The forward RH temperature blend door actuator screw can be removed with a combination wrench. With one hand working through the ACM opening hold the top end of the combination wrench. With the other end of the combination wrench pointing away (toward the right front corner of the vehicle) and with the other hand working through the glove compartment opening. the combination wrench can be manipulated.
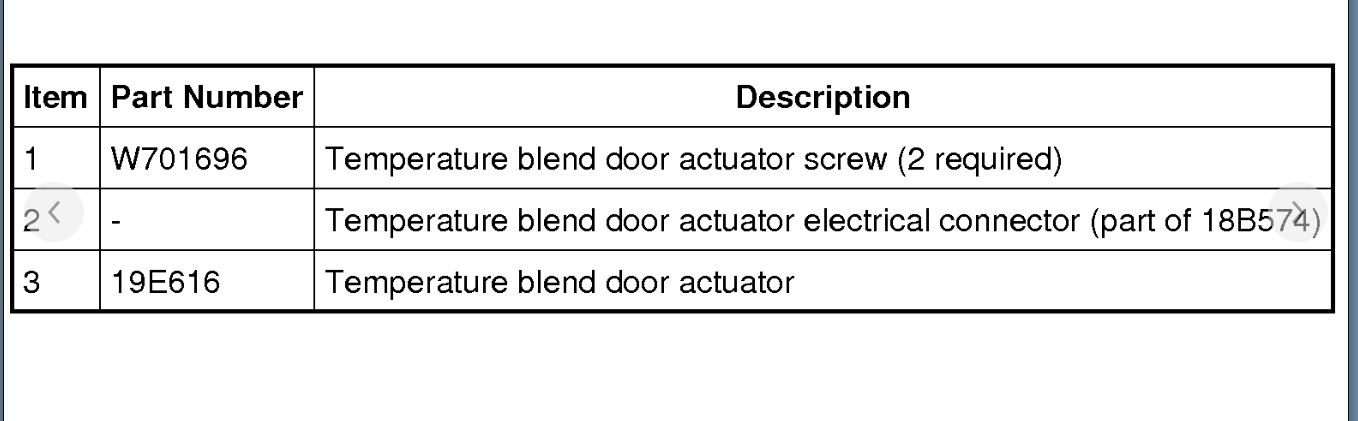
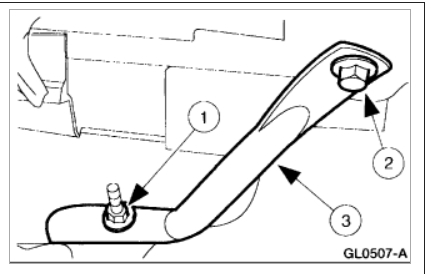
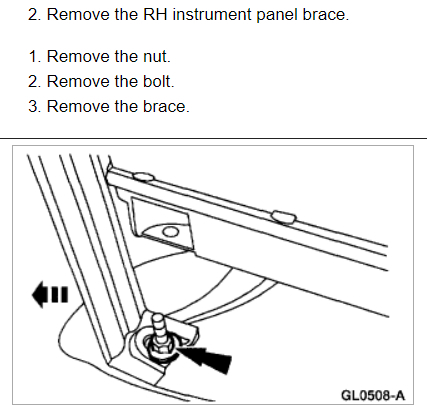
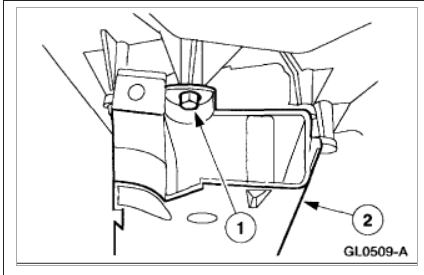
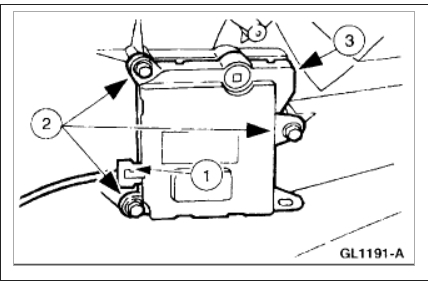
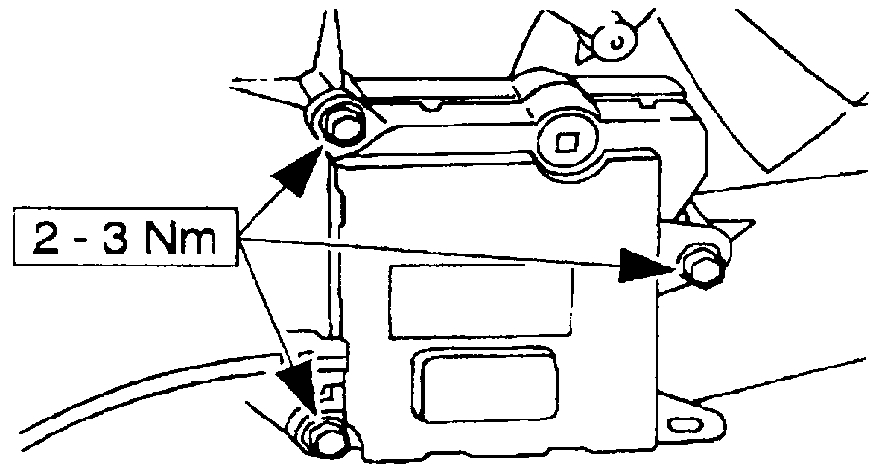
3. Remove the 2 RH temperature blend door actuator screws.
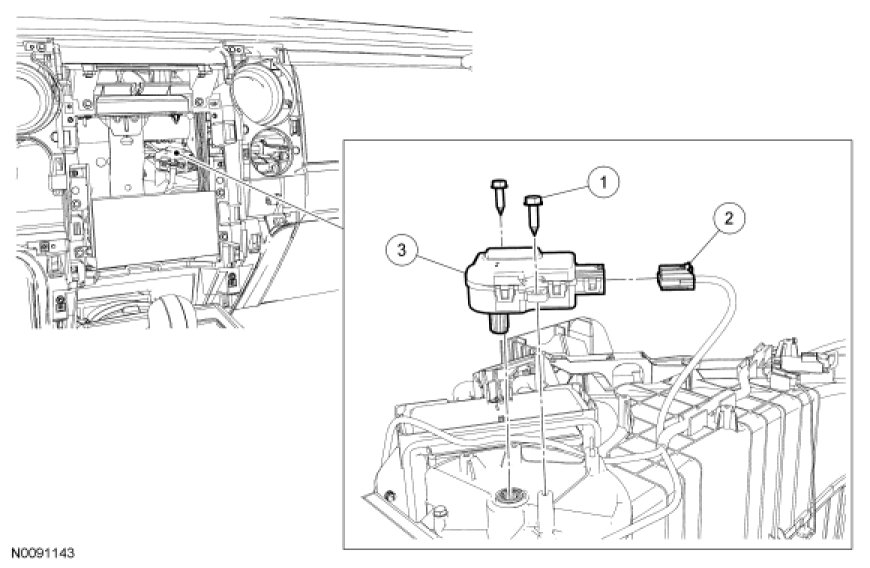
4. Detach the temperature blend door actuator.
5. Disconnect the temperature blend door actuator electrical connector.
6. Remove the temperature blend door actuator.
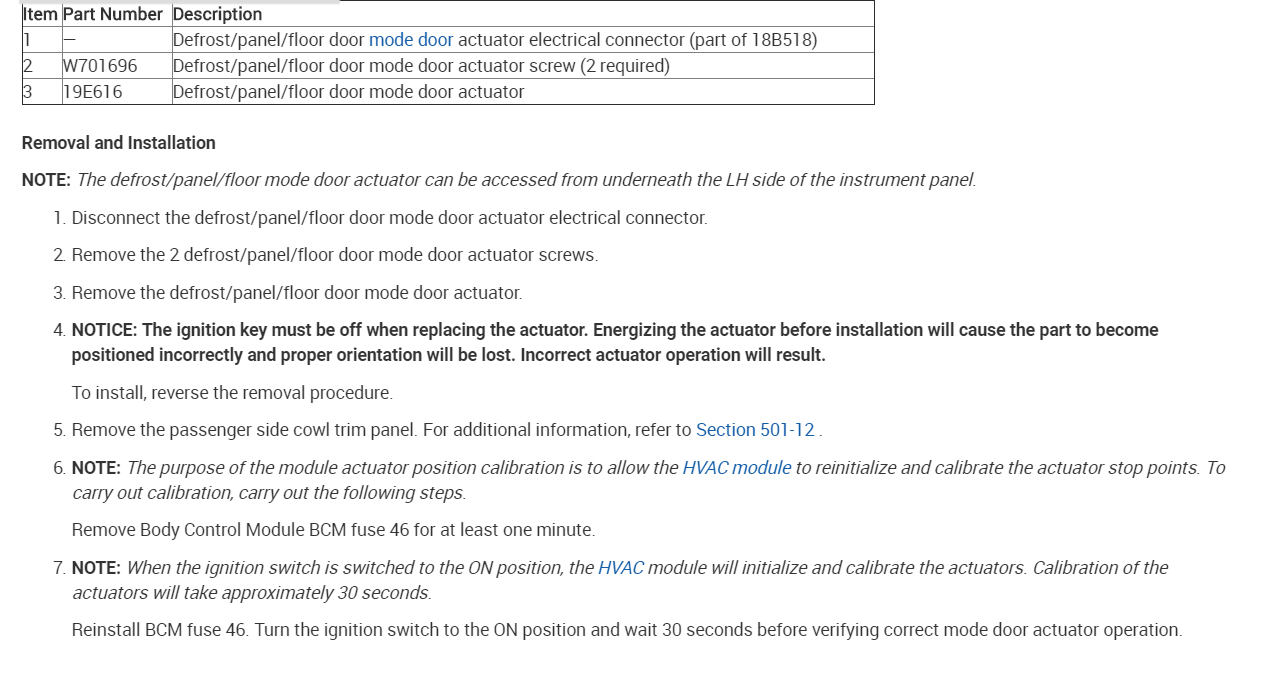
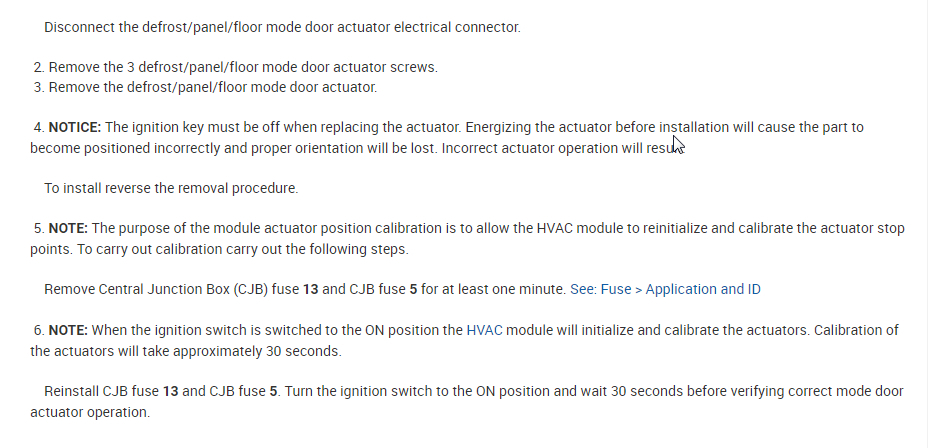
7. NOTICE: The ignition key must be off when replacing the actuator. Energizing the actuator before installation will cause the part to become positioned incorrectly and proper orientation will be lost. Incorrect actuator operation will result.
To install, reverse the removal procedure.
8. NOTE: The purpose of the module actuator position calibration is to allow the HVAC module to reinitialize and calibrate the actuator stop points. To carry out calibration, carry out the following steps.
Remove Smart Junction Box (SJB) fuse 15 for at least one minute. See: Fuse > Application and ID
9. NOTE: When the ignition switch is switched to the ON position, the HVAC module will initialize and calibrate the actuators. Calibration of the actuators will take approximately 30 seconds.
Reinstall SJB fuse 15. Turn the ignition switch to the ON position and wait 30 seconds before verifying correct mode door actuator operation.
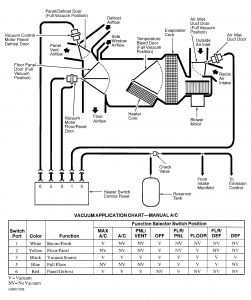
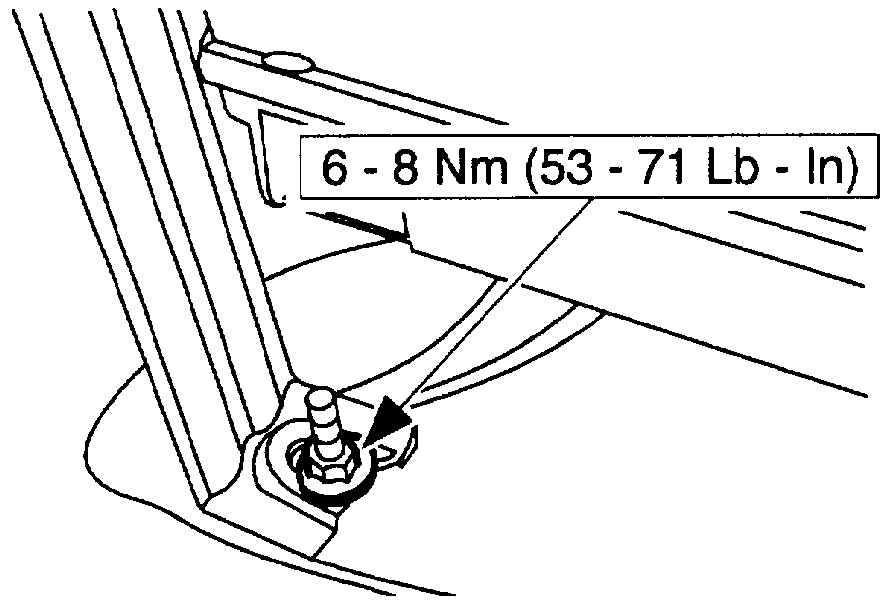
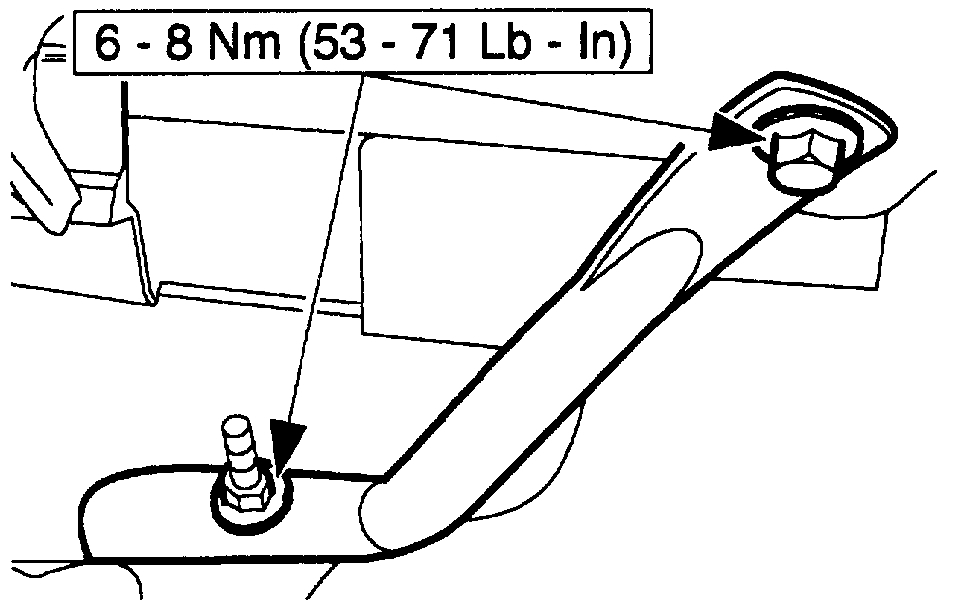
Check out the diagrams (Below). Please let us know what you find.
Images (Click to enlarge)
Apr 15, 2021 at 12:33 PM
(Merged)