Hey FRERICKSON,
Yes this mount is rubber, here is how you replace it.
Raise vehicle approximately 30.5 cm (12 inch) on hoist
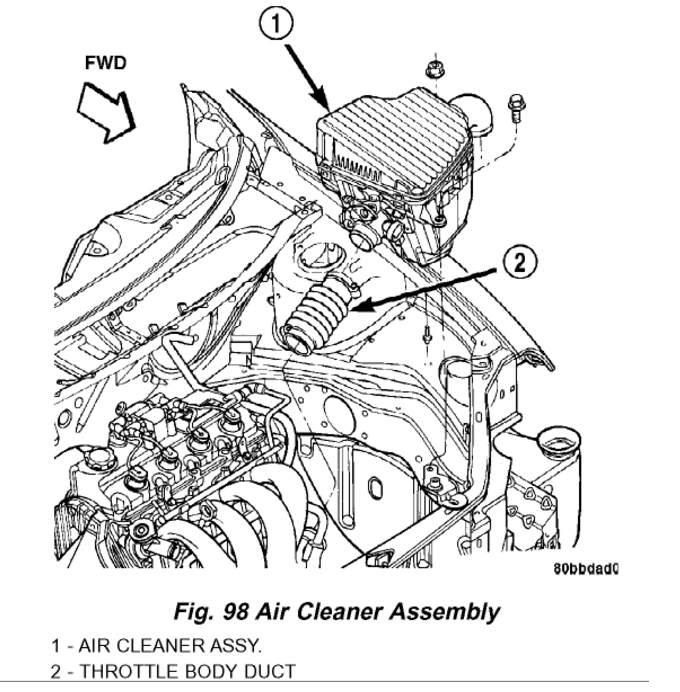
Remove air cleaner assembly (Fig. 98).
Remove battery and tray.
Support transaxle with a suitable jack.
Remove left front wheel.
Remove left splash shield.
Remove through bolt access plug at left side outer frame rail.
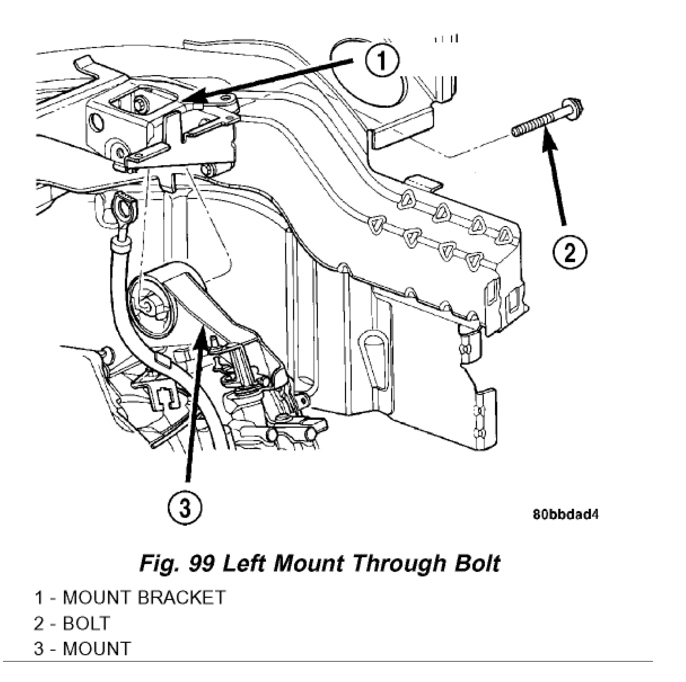
Remove mount through bolt (Fig. 99).
Disconnect transaxle shift cable from left mount and transaxle linkage.
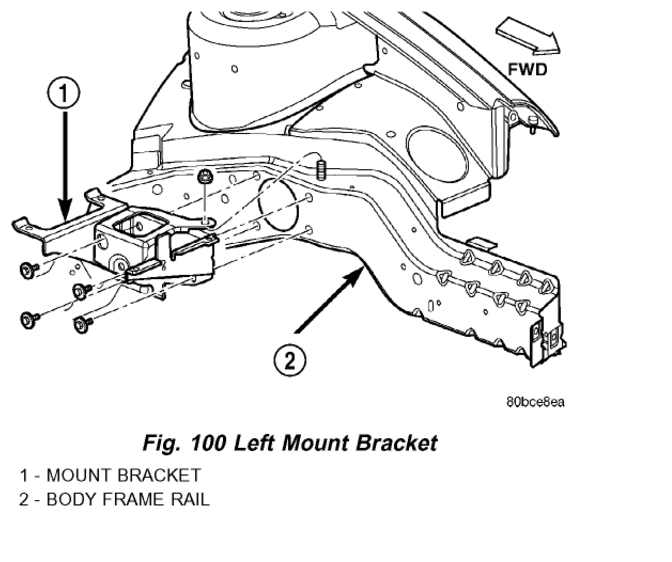
Remove left mount bracket to body frame rail fasteners (Fig. 100).
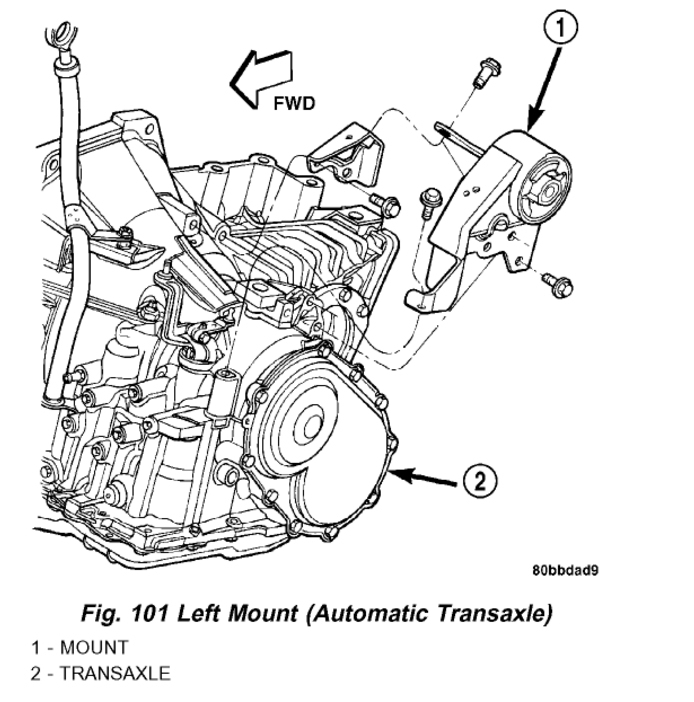
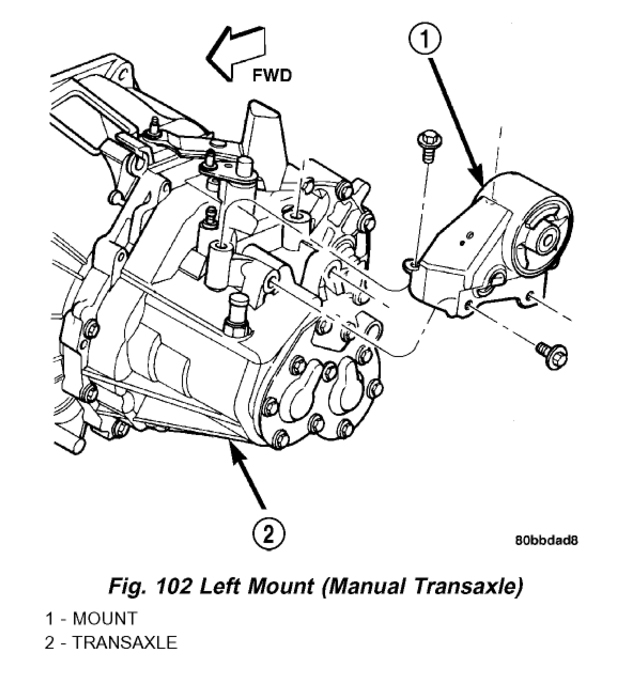
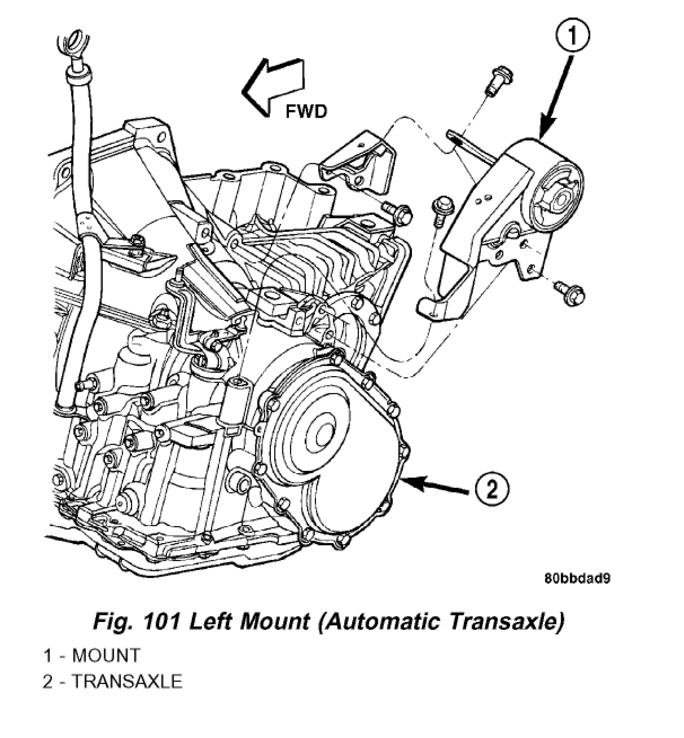
Remove mount attaching bolts (Fig. 101) or (Fig. 102).
Remove mount.
INSTALLATION
Install mount and attaching bolts (Fig. 101)or (Fig. 102). Tighten bolts to 68 Nm (50 ft. Lbs.).
Install engine mount bracket to body frame rail and tighten fasteners to 28 Nm (250 in. Lbs.) (Fig. 100).
Position engine/transaxle for installation of through bolt. Install and tighten through bolt to 118 Nm (87 ft. Lbs.) (Fig. 99).
Remove jack from under transaxle.
Install through bolt access plug at left side outer frame rail.
Install left splash shield and wheel.
Connect transaxle shift cable to engine mount and transaxle linkage.
Install battery tray and battery.
Install air cleaner assembly (Fig. 98).
Lower vehicle.
Please let us know happens so it will help others.
Best, Ken
Images (Click to make bigger)
SPONSORED LINKS
Tuesday, December 13th, 2016 AT 4:19 PM