Engine mounts are made of durable rubber which cushions the engine vibration from the vehicle frame. These mounts hold the engine in the car and are bolted to the engine block and then to the frame of the car. There will be two or three engine mounts and one or two transmission mounts per vehicle.
What Goes Wrong?
Over time engine mounts lose their firm but pliable properties and will wear causing abnormal noises especially when shifting from reverse to forward drive gears. When an engine mount fails it can cause a heavy clunk when accelerating which indicates the engine is moving around in the engine compartment. Other times the engine vibration may become more pronounced due to the mount collapsing. This will transfer engine vibrations to the frame. In front wheel drive vehicles a broken mount can cause the axle to fail or pop out of the transmission causing the vehicle to stop moving. Oil contamination, hard shifting (manual transmission), excessive high idle and age can cause premature engine mount failure. Inspect engine mounts by use a flashlight and check for deterioration or separation of the mounts rubber and metal plates.
How Much Does It Cost?
The cost of replacing an engine mount will vary depending on location and the manufacture of the mount. Some mounts are simple vulcanized rubber and metal plates while other mounts are liquid filled which are more expensive. In general the price of the parts will run between $12.00 and $65.00 (US) on Amazon or the local parts store. When taking your car in the have the job done at a local garage or dealer you can expect to pay between $150.00 and $240.00 for parts and labor.
There is a video of this job being done at the bottom of this guide.
Let's Get Started
You will need to jack the car up off of the ground and support it with jack stands. You should wear protective eyewear and gloves as well.
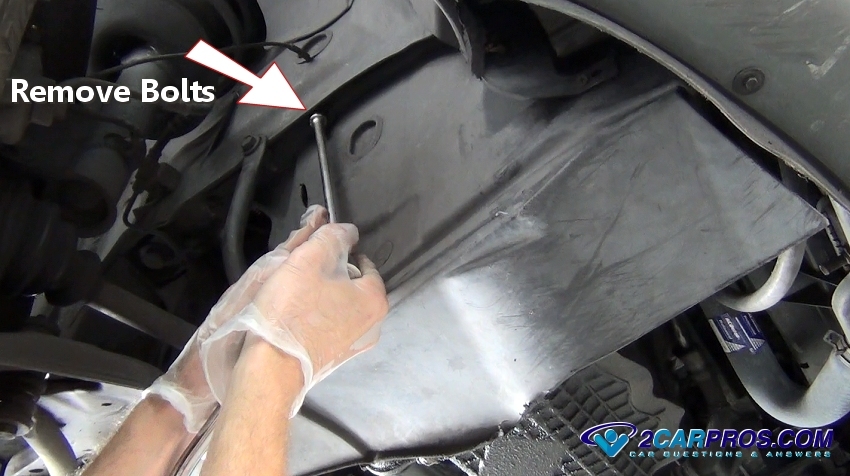
1. Remove Plastic Covers
To clear access to the engine mounts locate and remove the lower cover bolts and the plastic engine covers. Put the bolts in a container so they don't get lost during the job.
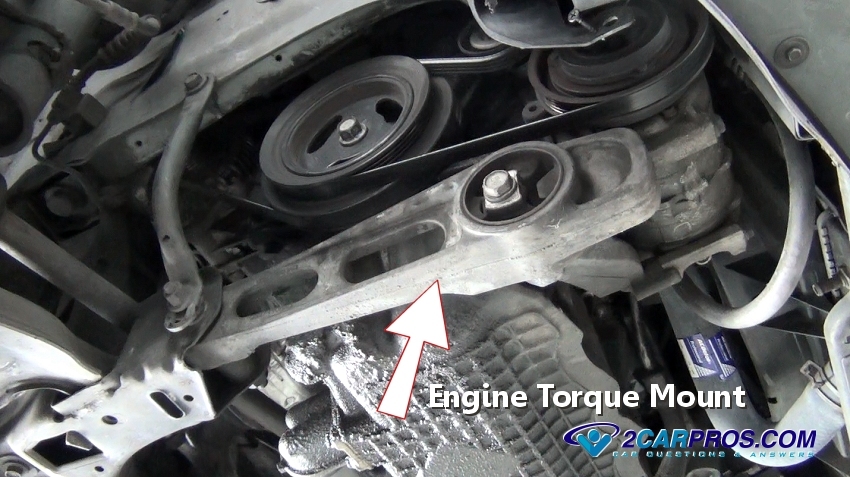
2. Identify Failed Engine Mount
Using a flashlight identify the engine mount to be replaced. In the image below we show a torque style of engine mount which have a high failure rate due to excessive engine movement under load. You can see the right side bushing is worn allowing the engine to have excessive lateral movement.
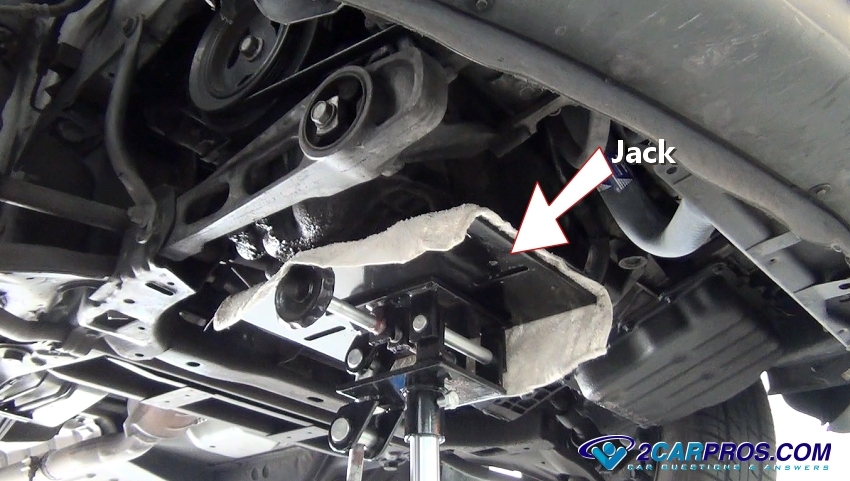
3. Remove the Engine Mount
A jack maybe needed while removing the engine mount to help support the engine by taking the weight off of the mount.
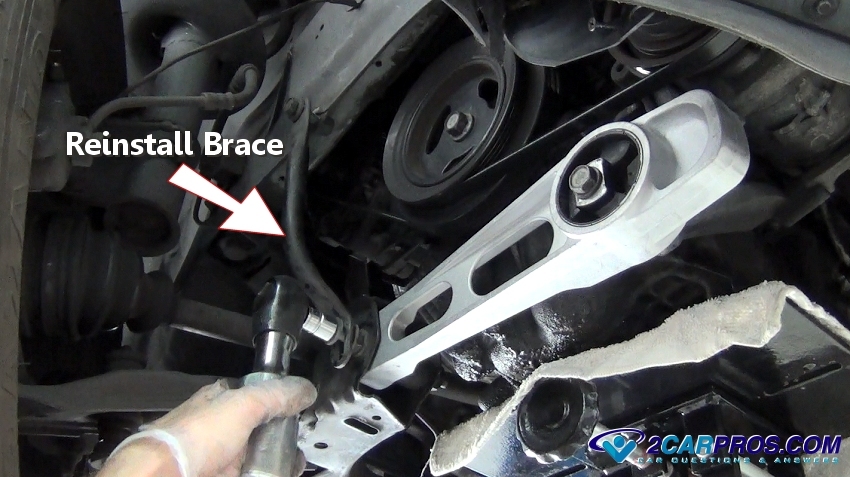
Occasionally a bracket or brace will need to be removed to help clear access to the mount.
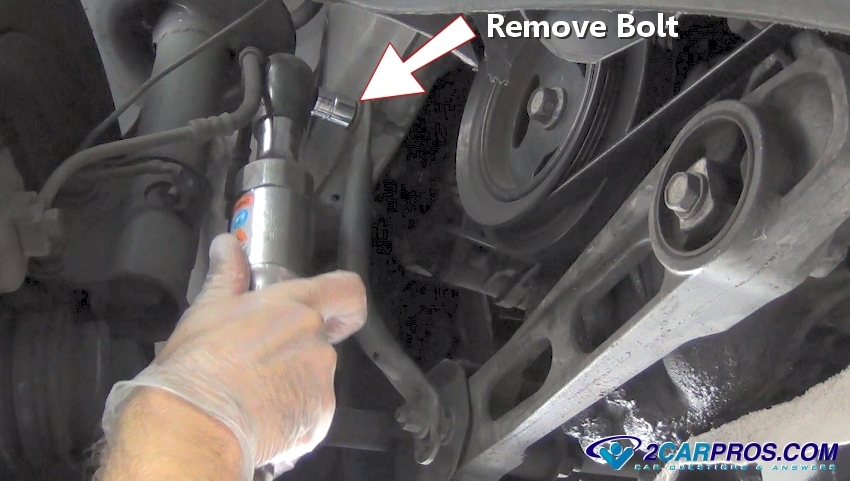
Remove the brace nut at the opposite end to remove the brace.
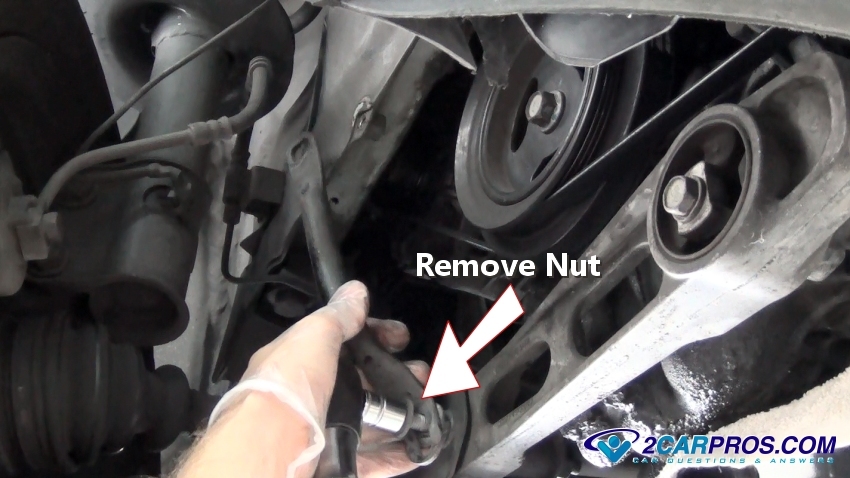
Once all obstructions have been cleared use a 15mmm or 16mm socket or wrench to remove the frame to mount bolt.

Finally remove the main mount bolt to the engine mount keep your hand on the mount as it will become loose.
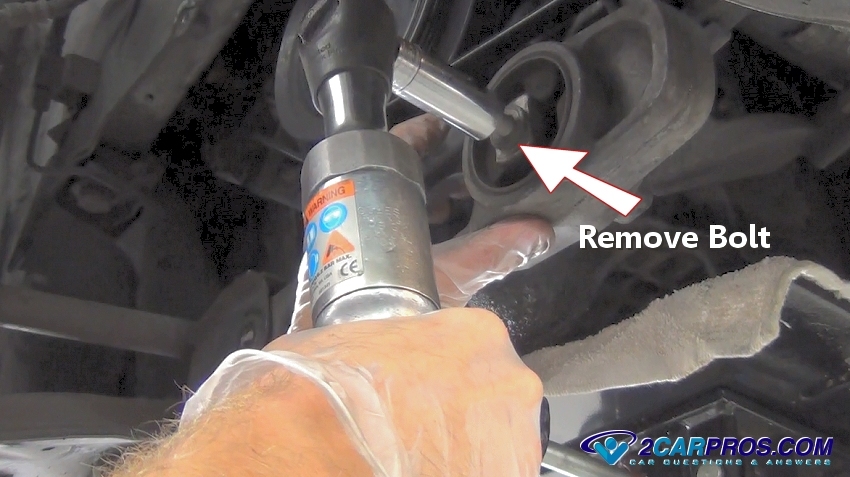
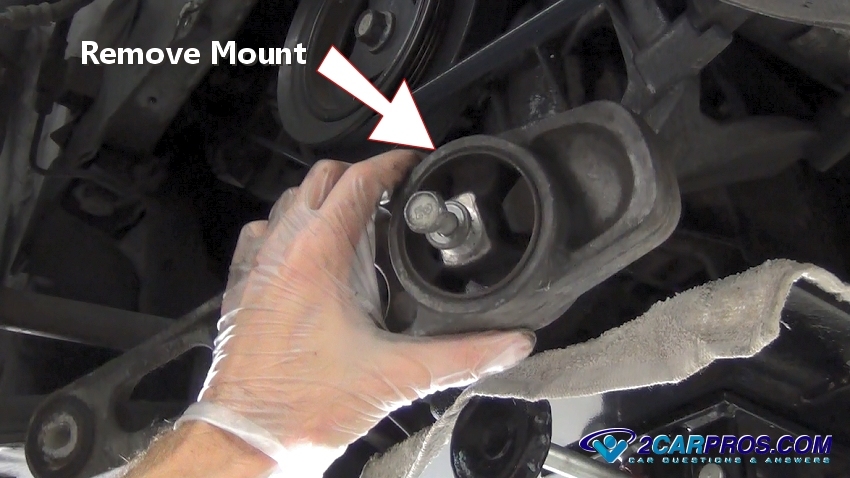
After all mounting bolts have been removed grasp the mount and pull it from the engine and frame brackets.
Watch the Video!
Please watch this video of the job being done, then continue down the guide to glean additional helpful information.
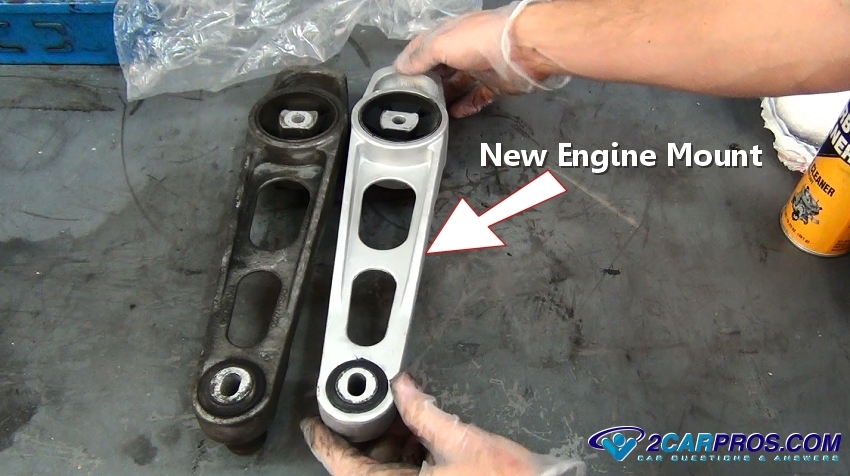
4. Match the New Engine Mount
Match the old mount to the new unit, they should match perfectly. Some mounts have been redesigned from the factory and may have a slightly different appearance which is normal.
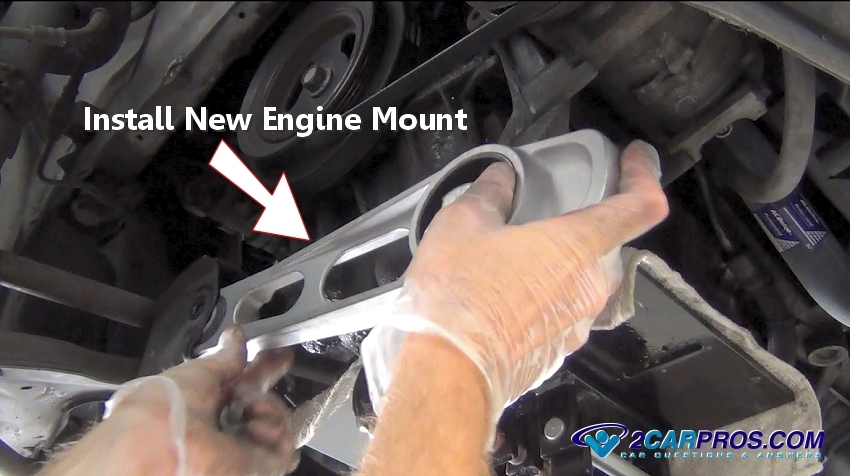
5. Install New Engine Mount
Grasp the new engine mount and insert it into the frame mount.
Insert the frame to mount bolt by hand which will hold the engine mount in place.
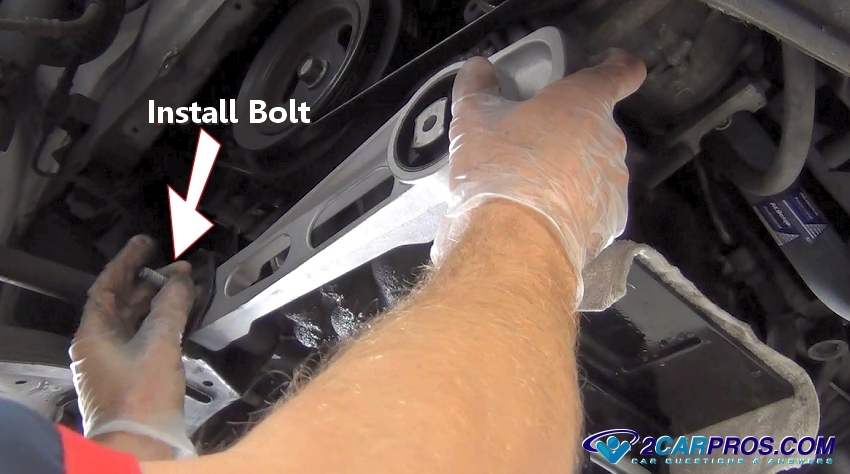
Hand thread the engine mounting bolt. The engine may need to be jostled slightly to align the threads.
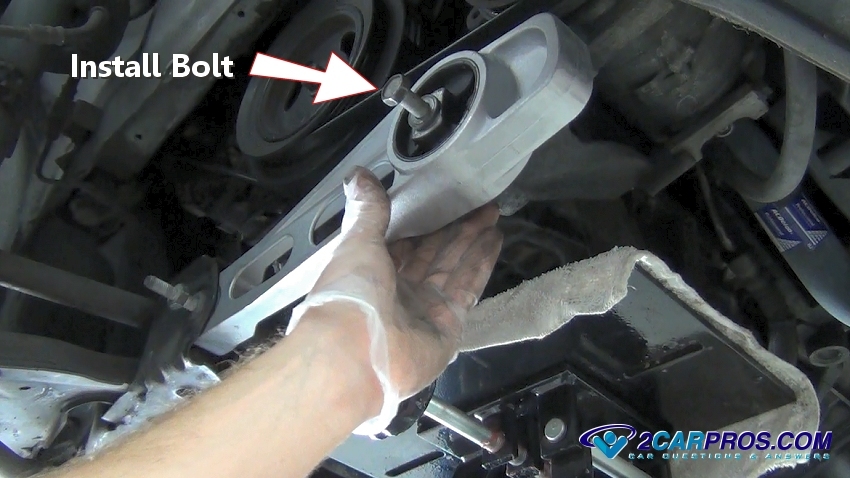
Using a ratchet or wrench tighten both the mounting bolt and nut to manufacturers recommended tightness which is usually between 45 and 55 foot pounds of torque.

Reinstall any brackets or braces that were removed while replacing the mount.
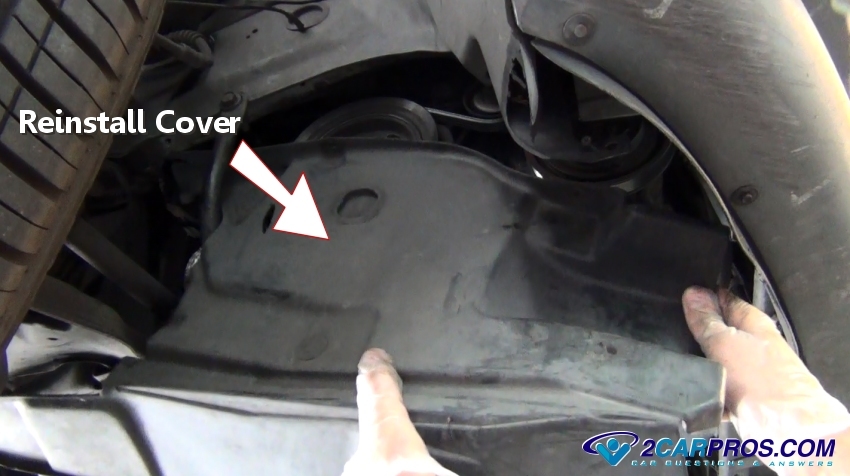
6. Reinstall Plastic Cover
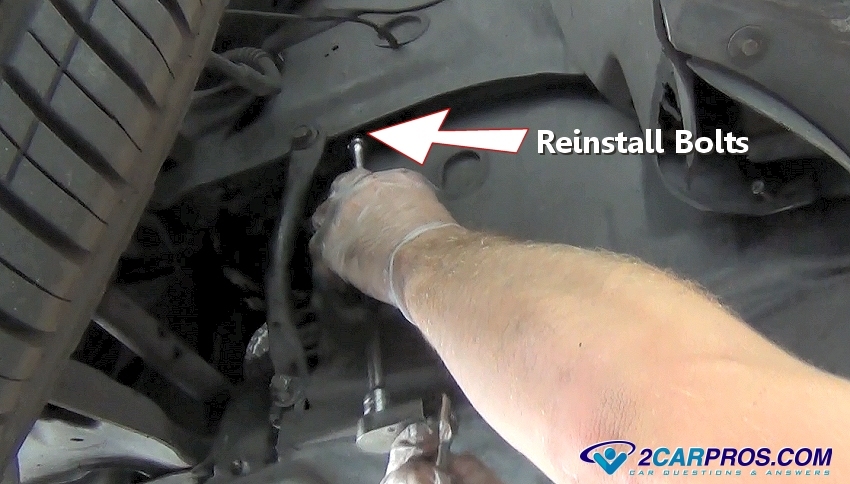
Check to see that all the mounting bolts and nuts are tight and reposition the plastic cover.
Reinstall cover bolts and tighten. Then lower the car off of the jack stands and you rare all set. When starting and driving the vehicle listen for any strange noises which could be a sign of a problem and will need to be checked out.
Got Any Questions?
If you have any engine mount questions, please visit our forum. If you need car repair advice, please ask our community of mechanics is happy to help you and it is always 100% free.
We hope you enjoyed this guide and video. We are creating a full set of car repair guides. Please subscribe to our 2CarPros YouTube channel and check back often for new videos which are uploaded almost every day.
Article published 2023-11-30