What I would suggest is to remove the intake. If the bolt is stripped, an air leak can be causing the misfire. By chance, is the bolt that is loose near cylinder 3?
________________________________
Here are the directions for the upper intake. The attached pics correlate with the directions.
2001 Mazda Truck Tribute LX 4WD V6-3.0L DOHC
Upper Intake Manifold
Vehicle Engine, Cooling and Exhaust Engine Intake Manifold Service and Repair Procedures Upper Intake Manifold
UPPER INTAKE MANIFOLD
Removal
pic 1
1. Remove the air cleaner outlet tube.
1. Remove the vacuum hose.
2. Loosen the clamps.
3. Remove the air cleaner outlet tube.
Pic 2
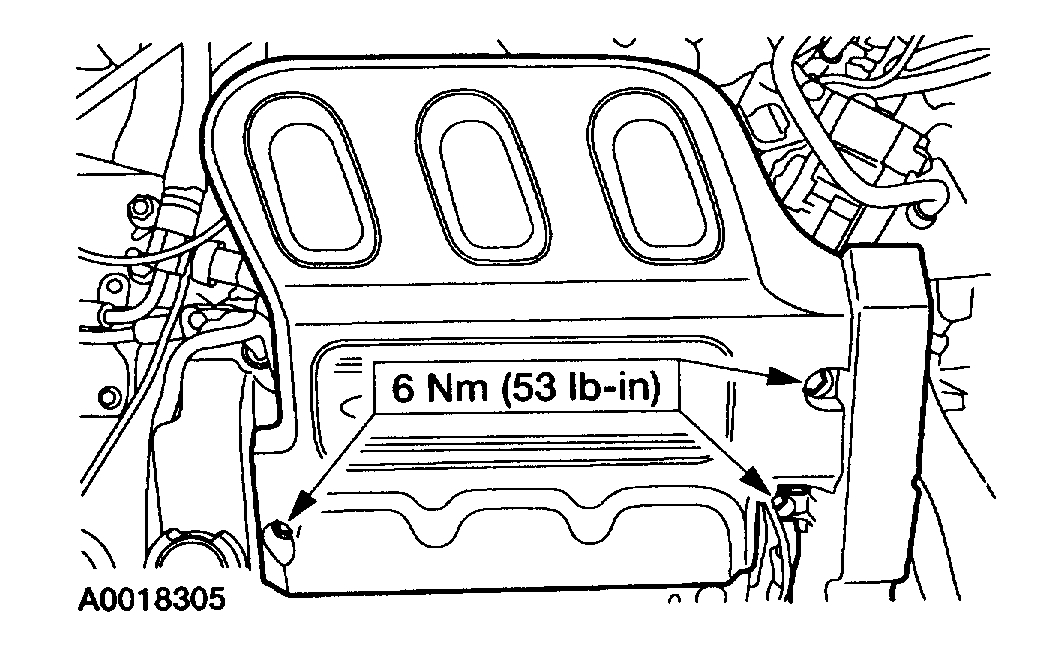
2. Remove the three nuts and the engine appearance cover.
Pic 3
3. Disconnect the cables.
1. Disconnect the throttle cable.
2. If equipped, disconnect the cruise control cable.
3. Remove the throttle cable bracket bolts.
Pic 4
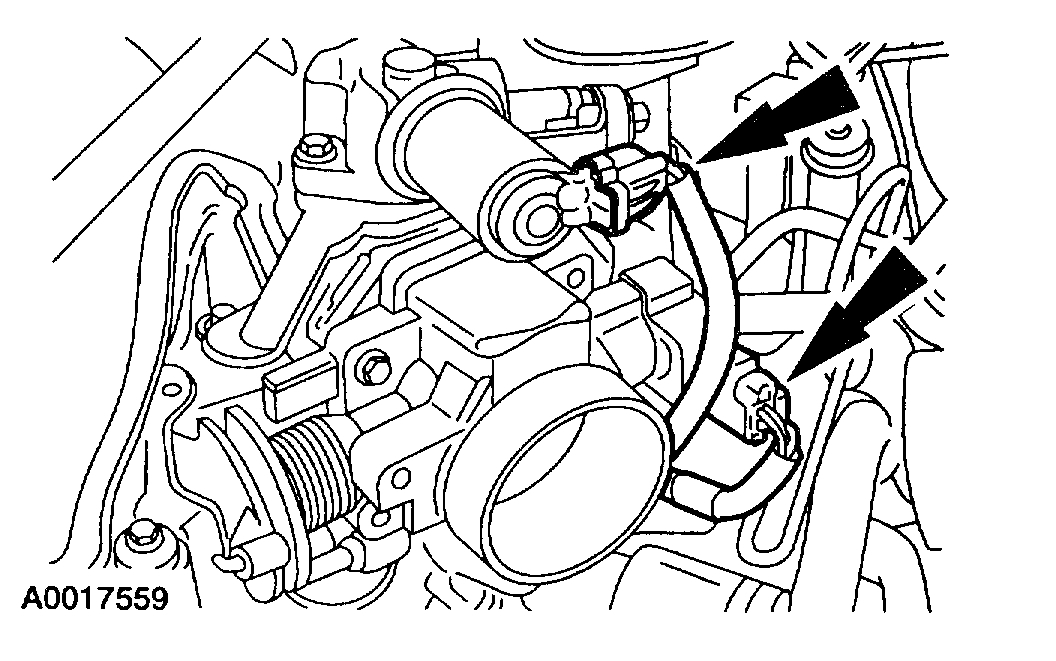
4. Disconnect the throttle position (TP) sensor and idle air control (IAC) electrical connectors.
Pic 5
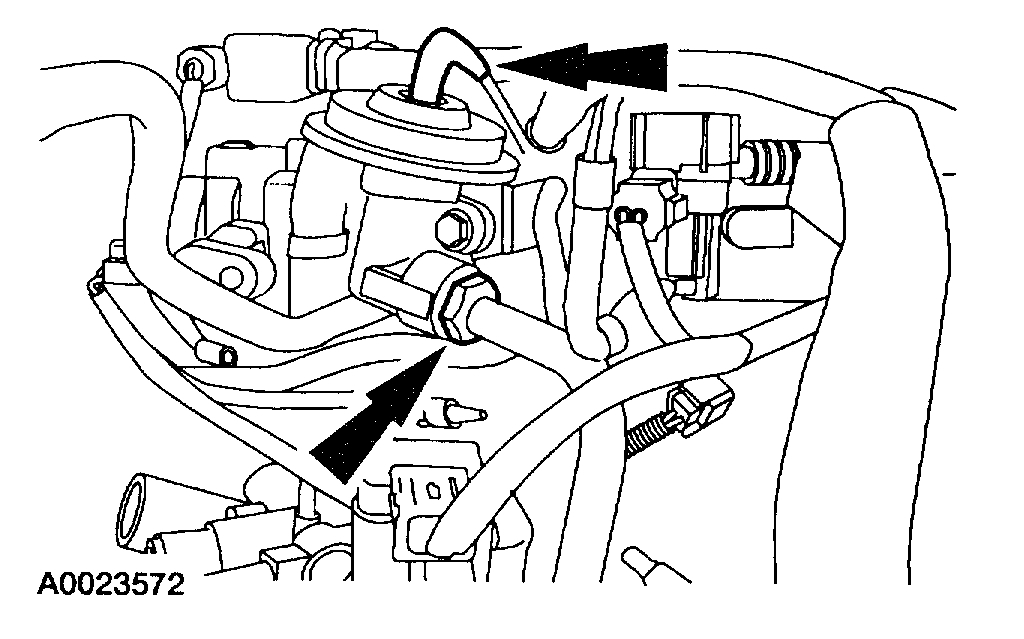
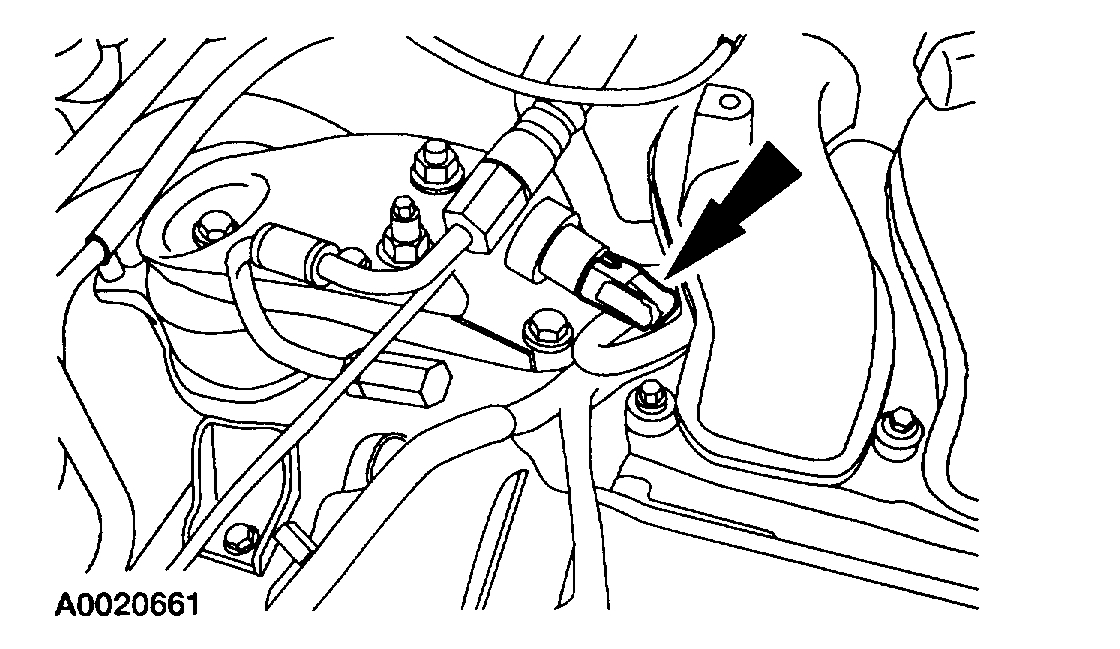
5. Disconnect the exhaust gas recirculation (EGR) valve vacuum hose and EGR tube nut.
Pic 6
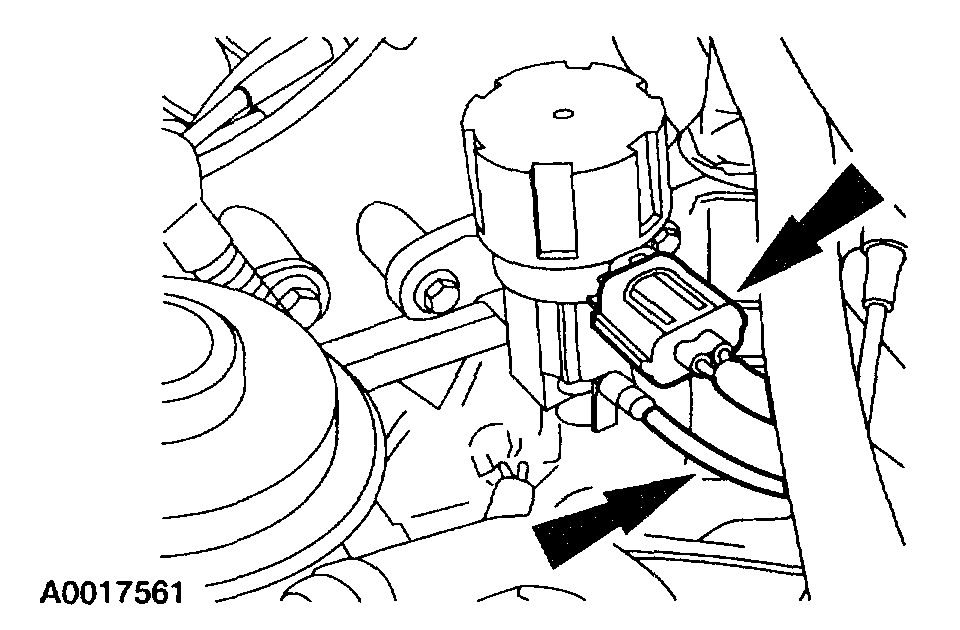
6. Disconnect the EGR vacuum regulator valve electrical connector and vacuum hose.
Pic 7
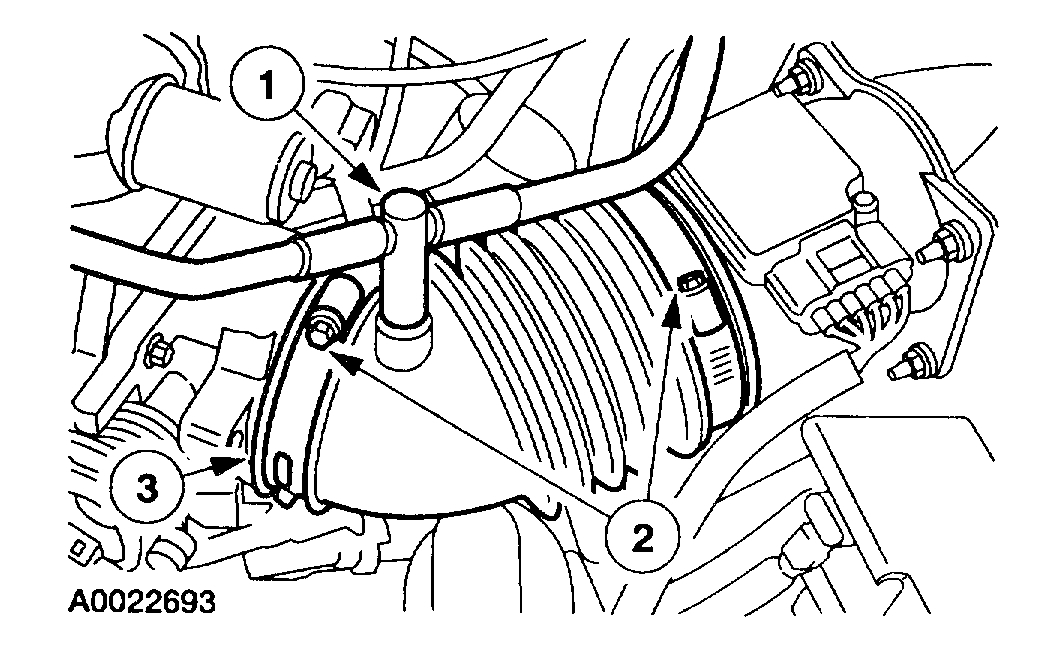
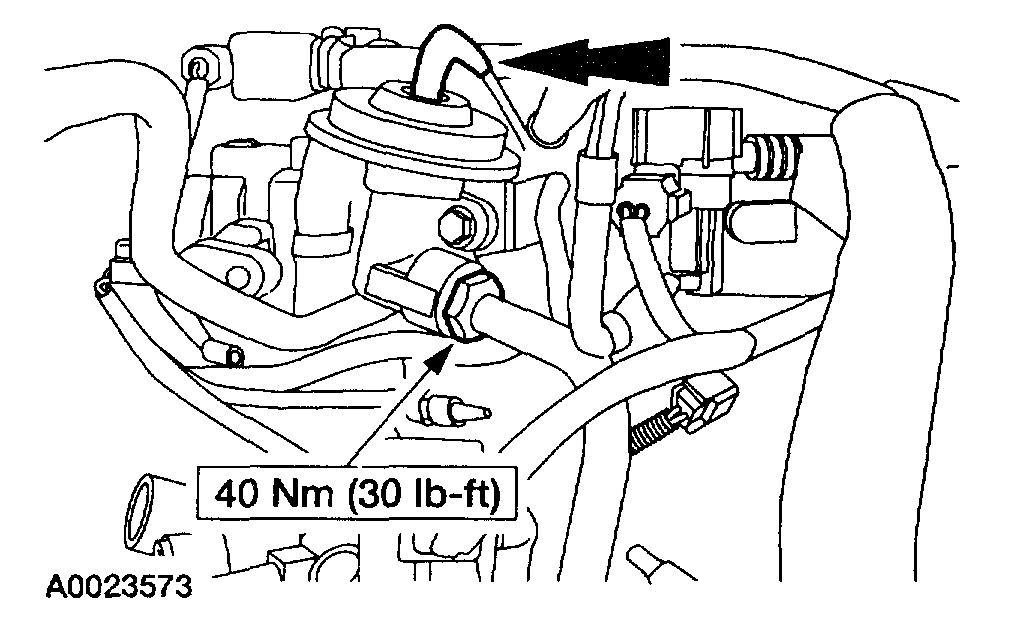
7. Disconnect the three vacuum hoses on the back of the intake manifold.
1. Connect the chassis vacuum hose.
2. Connect the engine vacuum hose.
3. Connect the positive crankcase ventilation (PCV) hose.
Pic 8
8. Disconnect the vapor management valve (VMV) vacuum hose.
Pic 9
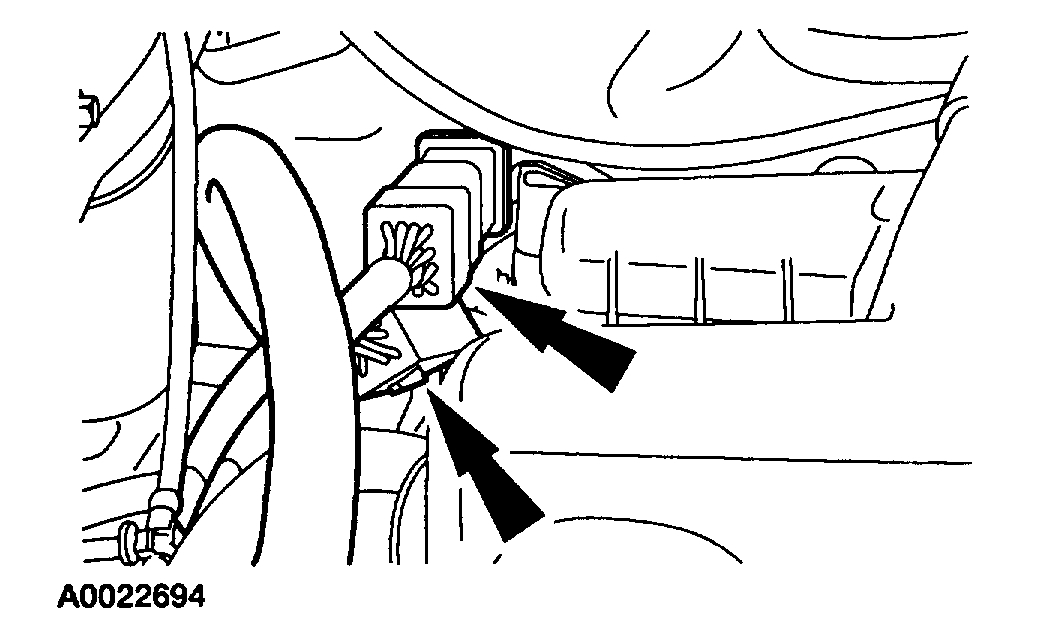
9. Disconnect the two electrical connectors attached to the left side of the upper intake manifold.
Pic 10
10. Disconnect the power steering pressure (PSP) sensor electrical connector.
Pic 11
11. Remove the eight bolts and the upper intake manifold.
1. Remove and inspect the gaskets. Discard if damaged.
2. Clean all sealing surfaces.
Installation
1. Position the gaskets in the upper intake manifold.
Pic 12
2. Position the upper intake manifold and tighten the bolts in the sequence shown.
Pic 13
3. Connect the PSP electrical connector.
Pic 14
4. Install the two electrical connectors on the left side of the intake manifold.
Pic 15
5. Install the vapor management valve (VMV) vacuum hose.
Pic 16
6. Connect the three vacuum hoses on the back of the upper intake manifold.
1. Connect the chassis vacuum hose.
2. Connect the engine vacuum hose.
3. Connect the PCV hose.
Pic 17
7. Connect the E.G.R. Vacuum regulator electrical connector.
Pic 18
8. Install the EGR valve vacuum hose and EGR tube nut.
Pic 19
9. Connect the TP sensor and IAC electrical connectors.
Pic 20
10. Connect the throttle cables.
1. Install the throttle cable bracket bolts.
2. Connect the throttle cable.
3. If equipped, connect the cruise control cable.
Pic 21
11. Install the air cleaner outlet tube.
1. Position the air cleaner outlet tube.
2. Install the hoses.
3. Install the clamps.
Pic 22
12. Install the splash shield.
_______________________________________________________
Lower intake:
2001 Mazda Truck Tribute LX 4WD V6-3.0L DOHC
Lower Intake Manifold
Vehicle Engine, Cooling and Exhaust Engine Intake Manifold Service and Repair Procedures Lower Intake Manifold
LOWER INTAKE MANIFOLD
Removal
1. Disconnect the fuel line spring lock coupling.
Pic 23
2. Remove the upper intake manifold.
Pic 24
3. Disconnect the fuel rail.
1. Disconnect the six fuel injector electrical connectors (1).
2. Disconnect the fuel pressure damper vacuum line (2).
4. Remove the bolts and the lower intake manifold.
Pic 25
5. Remove the fuel rail.
1. Remove the bolts (1).
2. Carefully separate the lower intake manifold from the fuel rail (2).
6. Remove the six fuel injectors from the lower intake manifold.
7. Remove and discard the gaskets if damaged.
Installation
1. Install the gaskets in the lower intake manifold.
CAUTION: Never use silicone grease. It will clog the fuel injectors.
NOTE: Inspect the fuel injector O-ring seals and install O-ring seals if necessary.
2. Lubricate the O-ring seals lightly with SAE 5W-20 Motor Oil and install the fuel injectors into the lower intake manifold.
Pic 26
3. Install the fuel rail.
1. Position the fuel rail (1).
2. Install the four bolts (2).
Pic 27
4. Install the lower intake manifold assembly and tighten the bolts in the sequence shown.
Pic 28
5. Connect the fuel rail.
1. Connect the six fuel injectors (1).
2. Connect the fuel pressure damper vacuum line (2).
6. Install the upper intake manifold.
7. Connect the fuel line spring lock coupling.
___________________________
Have you been able to secure the coil?
Let me know.
Joe
Images (Click to make bigger)
SPONSORED LINKS
Monday, September 14th, 2020 AT 7:32 PM