Welcome to 2CarPros.
Most times, it is related to a bushing. However, the Canadian version of this vehicle has a technical service bulletin (TSB) regarding abnormal noise from the rear. I'm not sure if you are located in Canada, so I will provide the TSB. The attached pictures correlate with this bulletin.
Note: If you are not in Canada, the last picture I will attach is an exploded view of the rear suspension. You will see where all the bushings are located in the pic. You may want to try spraying them with a rubber friendly lubricant to see if the sound changes or goes away.
___________________________
Here is the TSB:
SUBJECT
REAR HUB BEARING AND DUST COVER INSTALLATION (REVISED)
This bulletin supersedes TSB 09-50-013-1 to provide updated warranty information for increased labour time. See warranty information for further details. Please discard the previous bulletin.
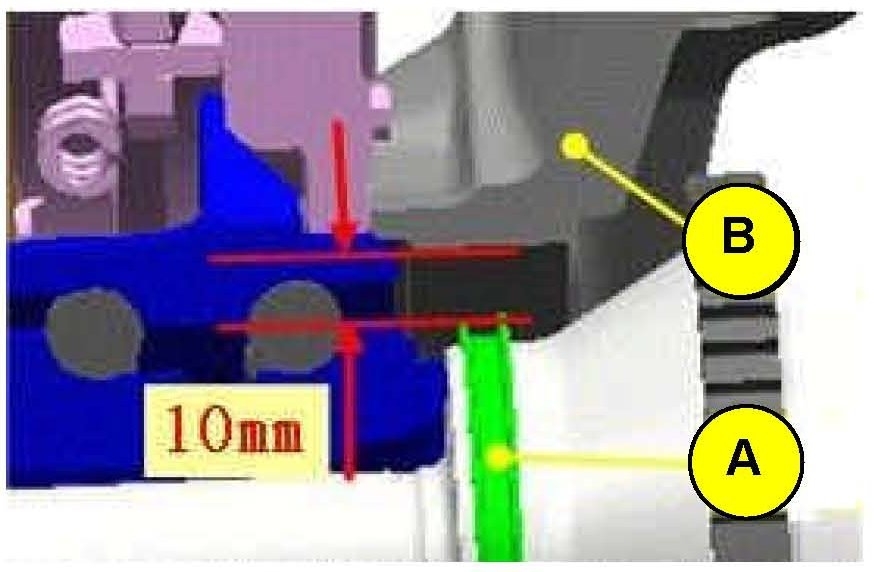
Pic 1
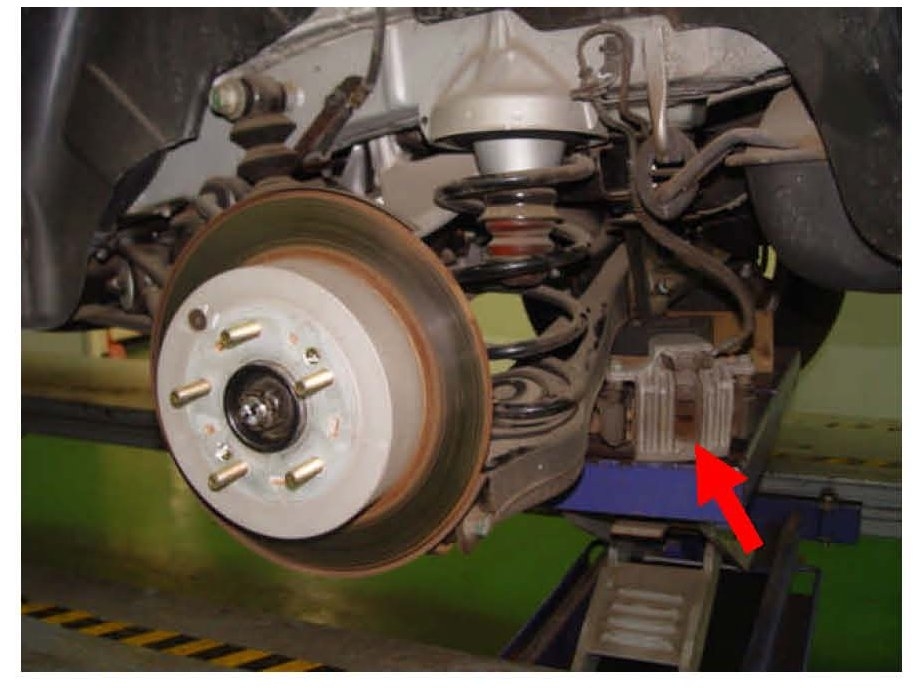
Some Santa Fe vehicles equipped with the 4WD system may exhibit an abnormal noise originating from the rear hub. This may be caused by a damaged rear hub bearing due to debris entering through the 10mm gap between the dust cover (A) and the carrier (B) on Santa Fe vehicles.
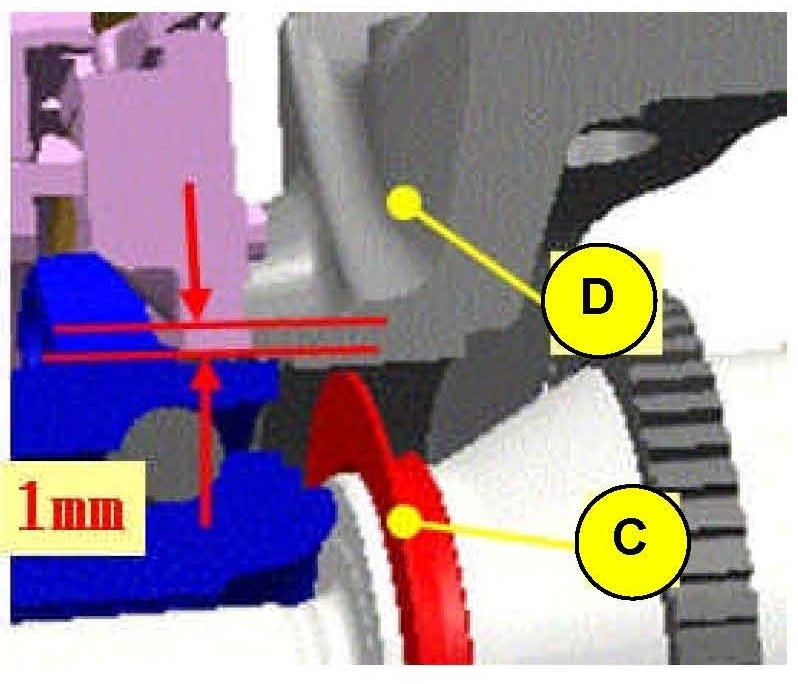
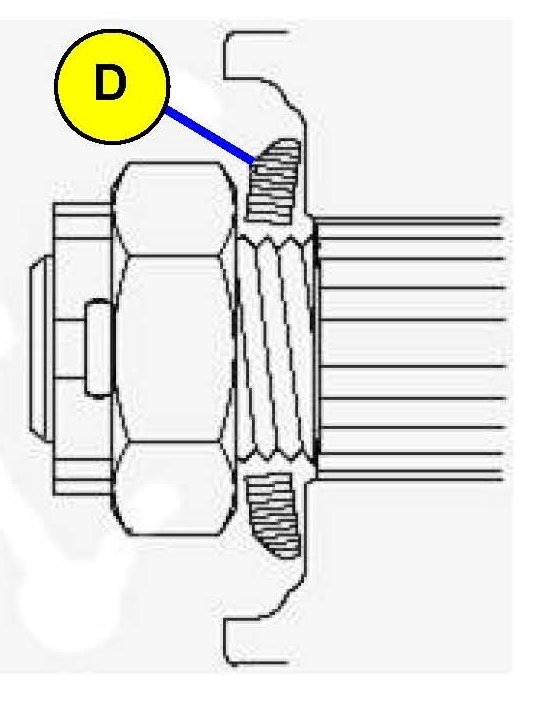
Pic 2
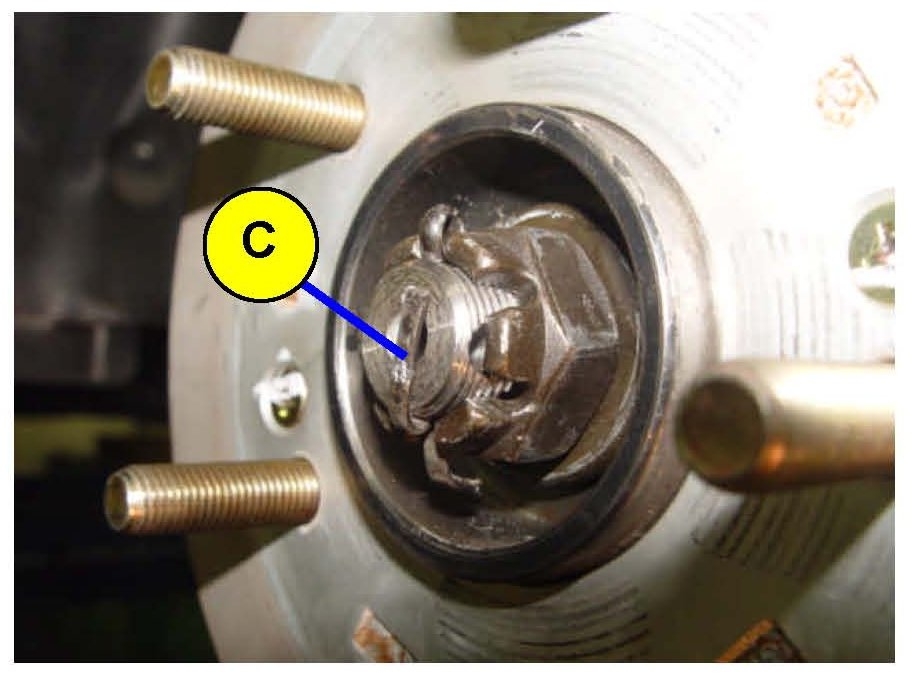
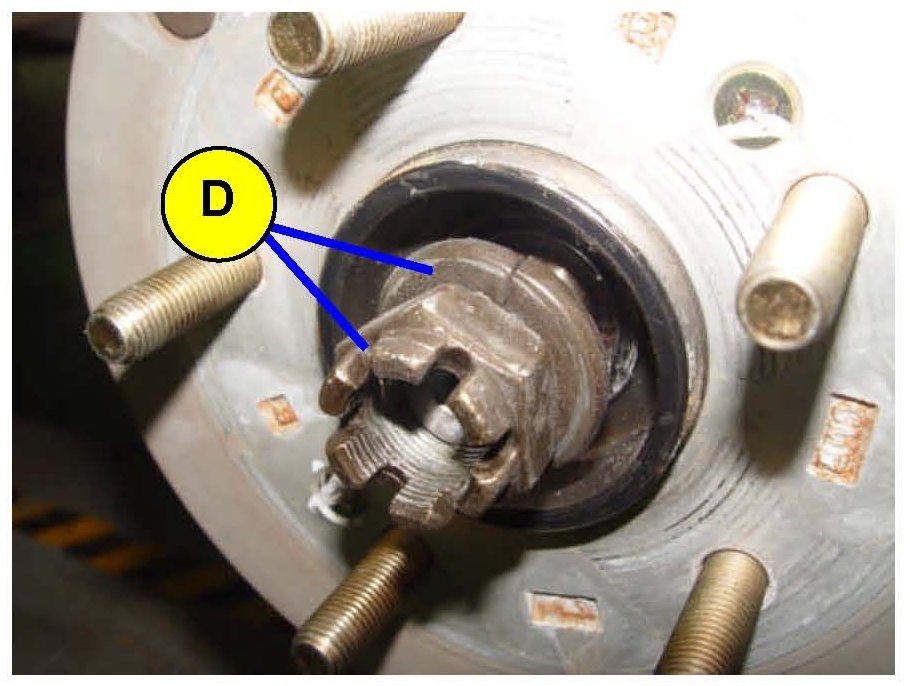
This bulletin provides the procedure for replacing the rear hub bearing and installing an improved dust cover to prevent damage caused by debris. The new dust cover reduces the gap between the dust cover (C) and the carrier (D) to 1mm.
AFFECTED VEHICLES
Some 2007 2009 Santa Fe (CM) vehicles produced from Job # 1 to April 8, 2009.
Pic 3
PARTS INFORMATION
NOTE:
Each kit includes the components required to perform the procedure on ONE side of the vehicle; dealers must order two kits to complete the procedure on both sides.
SERVICE PROCEDURE:
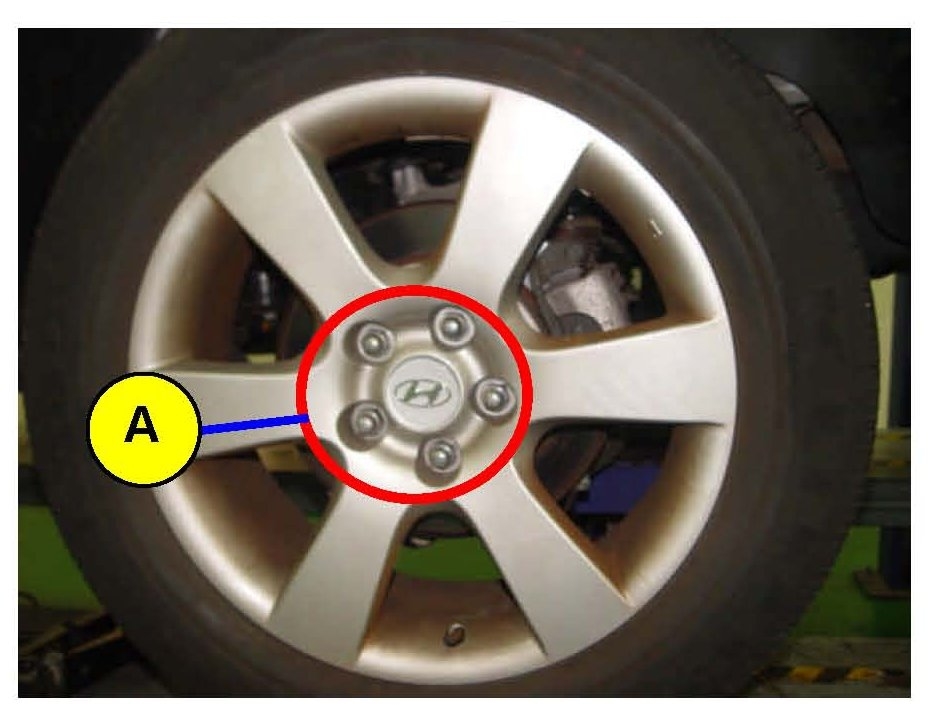
pic 4
1. Release the parking brake.
2. Remove the left rear wheel from the vehicle by removing the wheel lug nuts (A).
Tightening torque: 9 11 kgf.M(88.3 107.8 N.M, 65.1 79.5 lbf-ft)
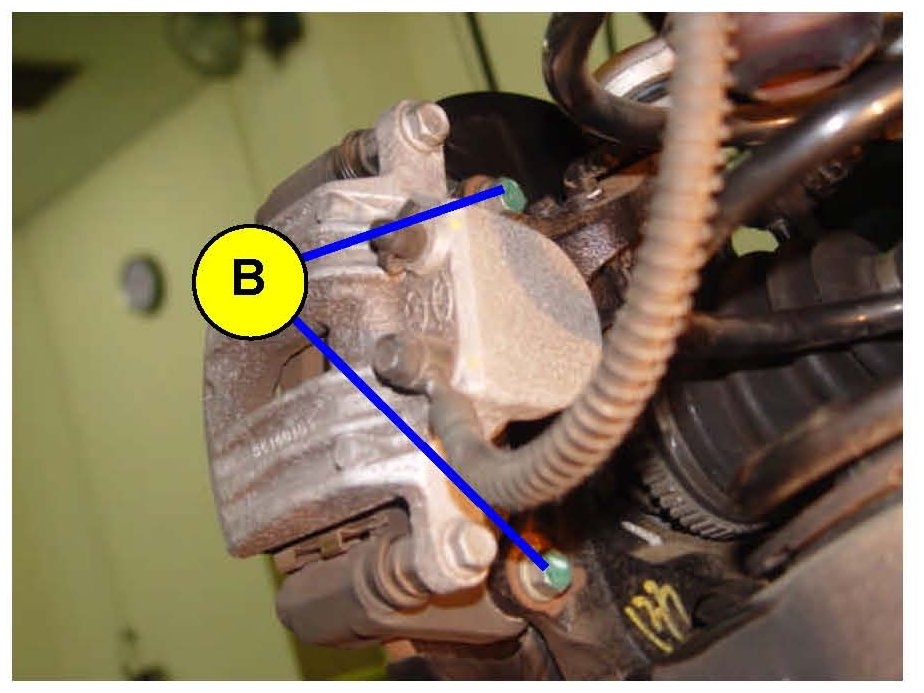
pic 5
3. Remove the mounting bolts (B) to remove the caliper assembly.
Tightening torque: 6.5 7.5 kgf-m(63.8 73.5 N.M, 47.0 54.2 lbf-ft)
pic 6
4. Place the caliper assembly in a position which will not pull on the brake hose.
Pic 7
5. Remove the split pin (C) from the castle nut.
Pic 8
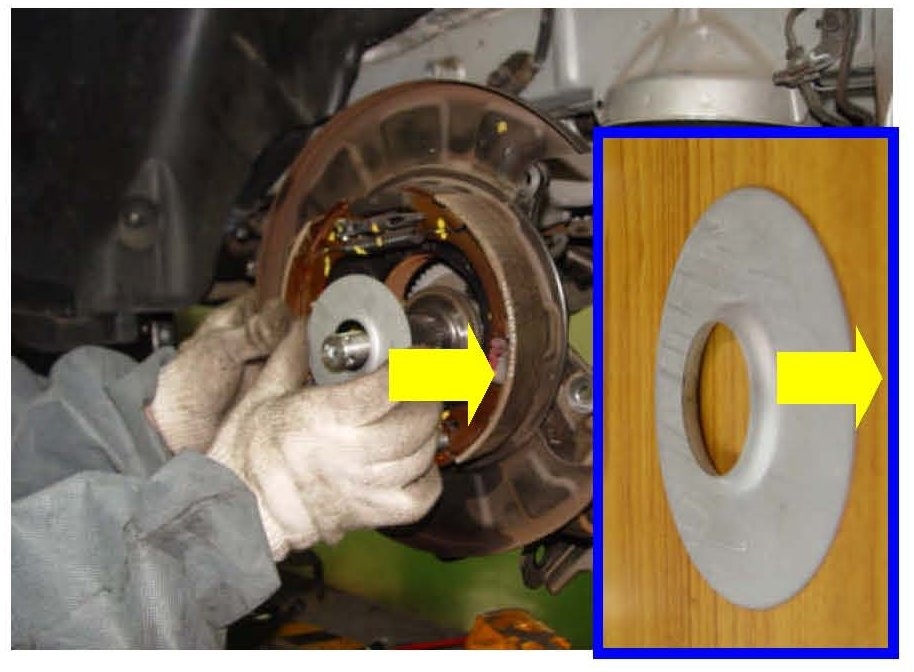
6. Unfasten and remove the castle nut and washer (D).
Tightening torque: 20 26 kgf.M(196.2 254.9 N.M, 144.7 188.0 lbf-ft)
pic 9
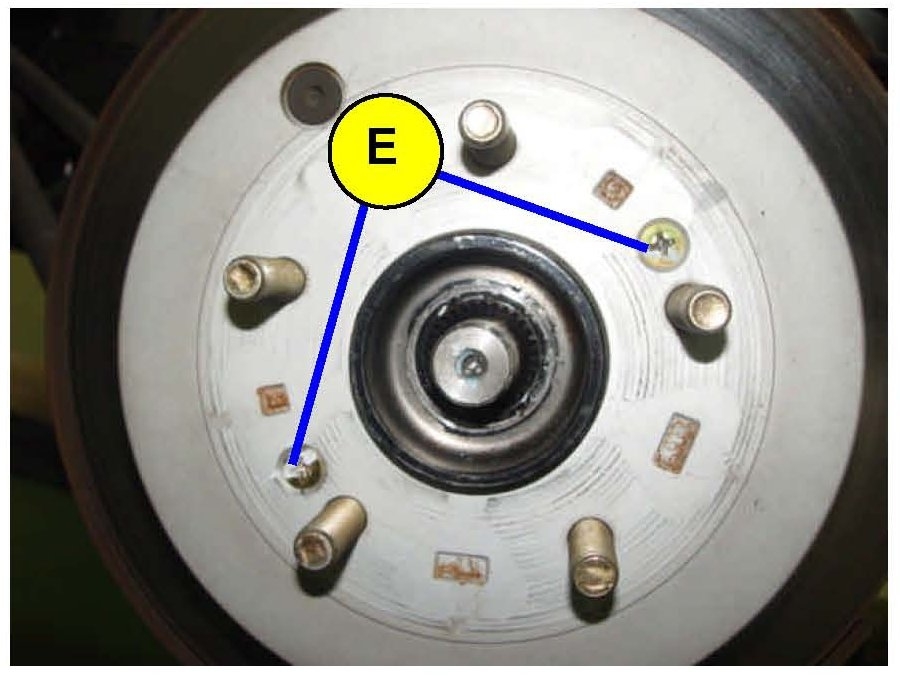
7. Remove the brake rotor by unfastening the two screws (E).
Pic 10
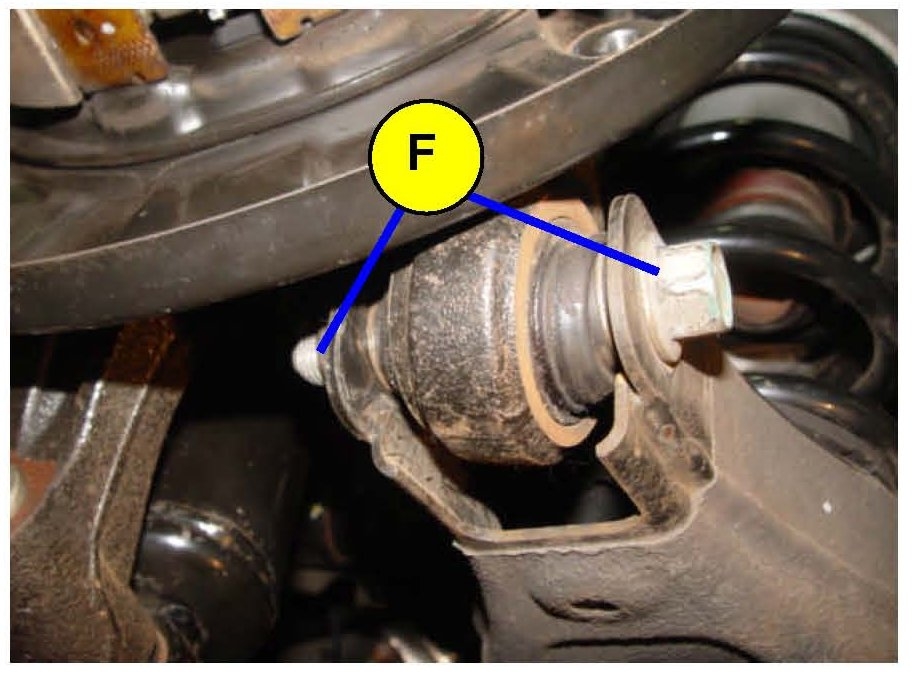
8. Using a jack, support the rear lower arm and remove the mounting bolt (F) facing toward the tire.
Tightening torque: 14 16 kgf.M(137.3 156.9 N.M, 101.3 115.7 lbf-ft)
pic 11
9. Remove the rear strut upper mounting bolt (G).
Tightening torque: 14 16 kgf.M(137.3 156.9 N.M, 101.3 115.7 lbf-ft)
pic 12
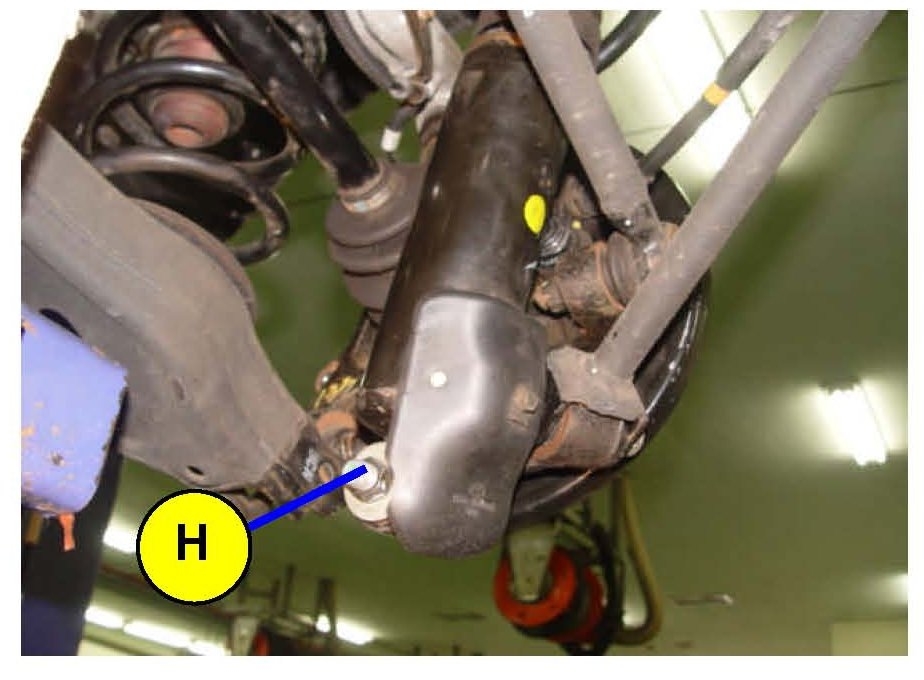
10. Remove the rear strut lower mounting bolt (H) and remove the rear strut assembly.
Tightening torque: 10 12 kgf.M(98.1 117.6 N.M, 72.4 86.7 lbf-ft)
pic 13
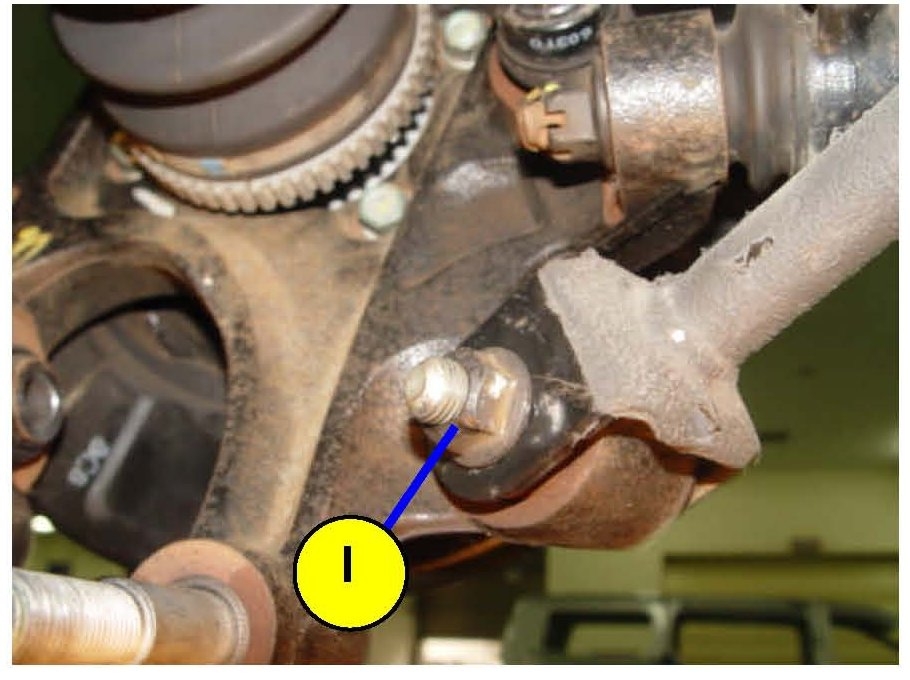
11. Remove the trailing arm mounting bolt (I).
Tightening torque: 14 16 kgf.M(137.3 156.9 N.M, 101.3 115.7 lbf-ft)
pic 14
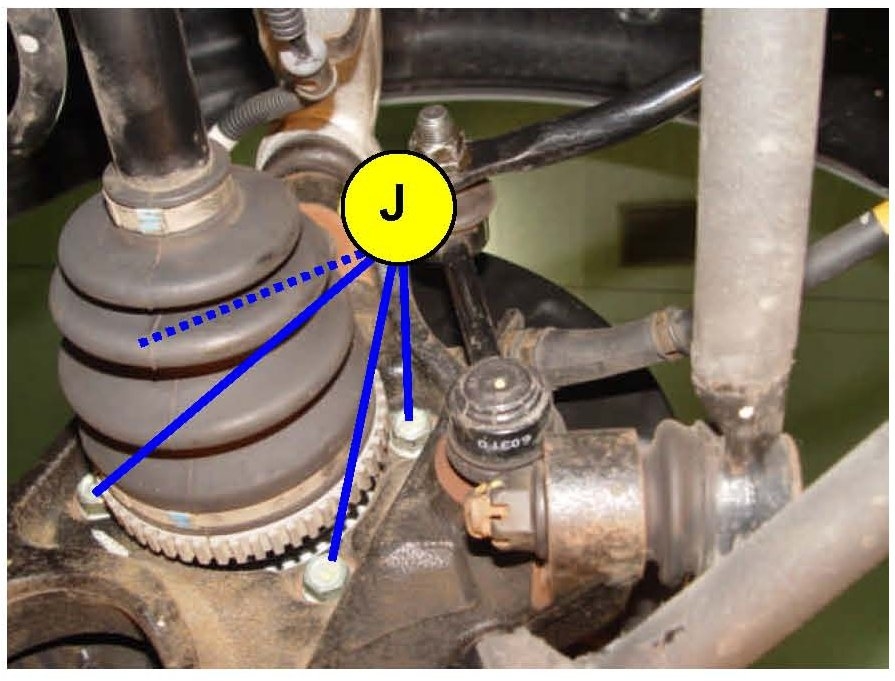
12. Remove the four rear axle carrier hub mounting bolts (J).
Tightening torque: 8 9 kgf.M(78.5 88.2 N.M, 57.9 65.0 lbf-ft)
pic 15
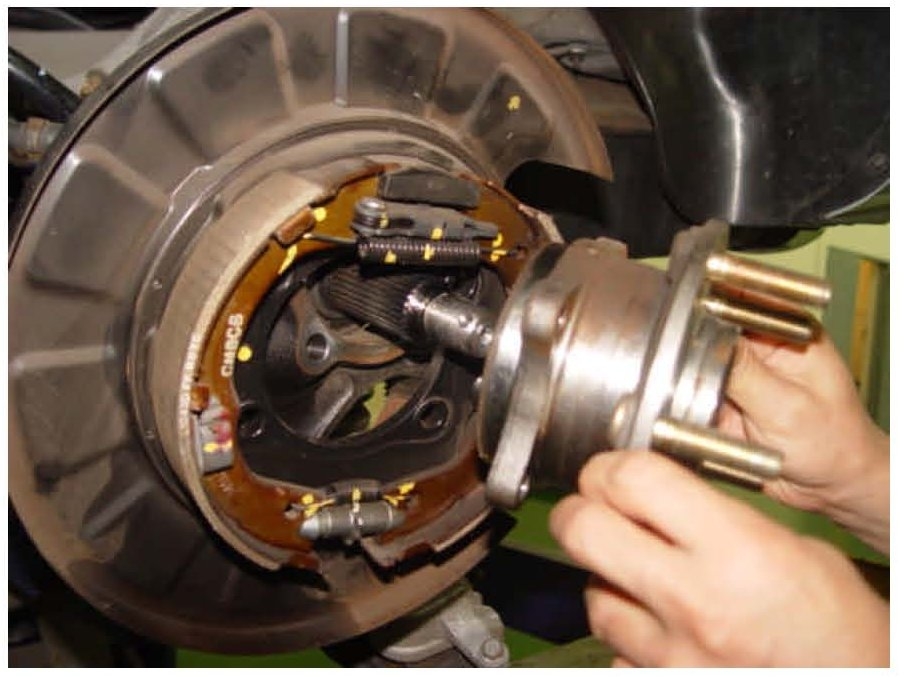
13. Remove the rear hub assembly from the vehicle.
Pic 16
14. Install the new dust cover with the raised edge facing outwards as shown.
Pic 17
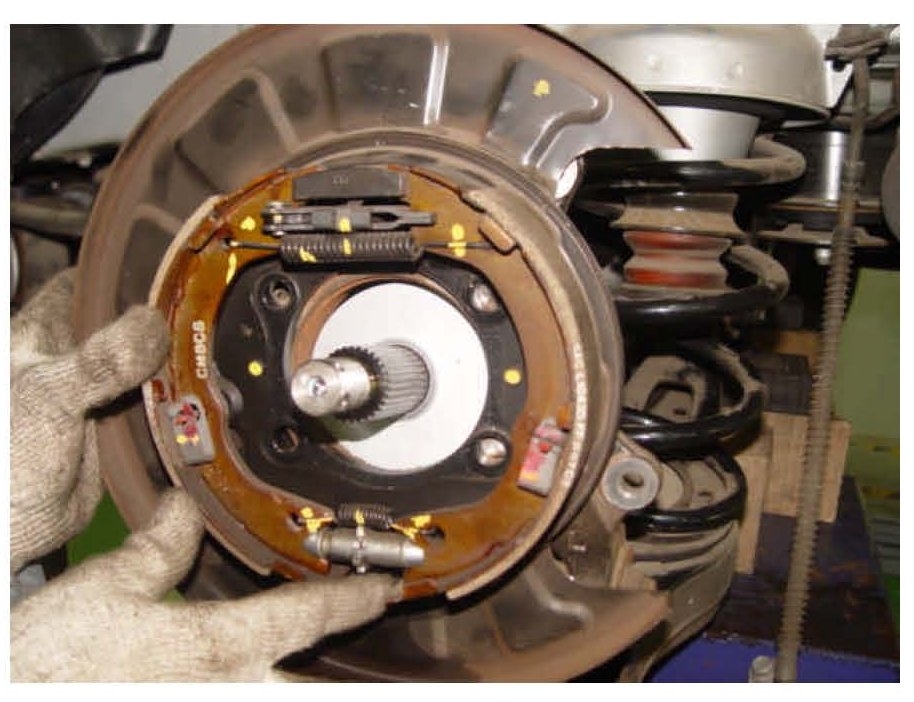
15. Set the dust cover and parking brake into position.
Pic 18
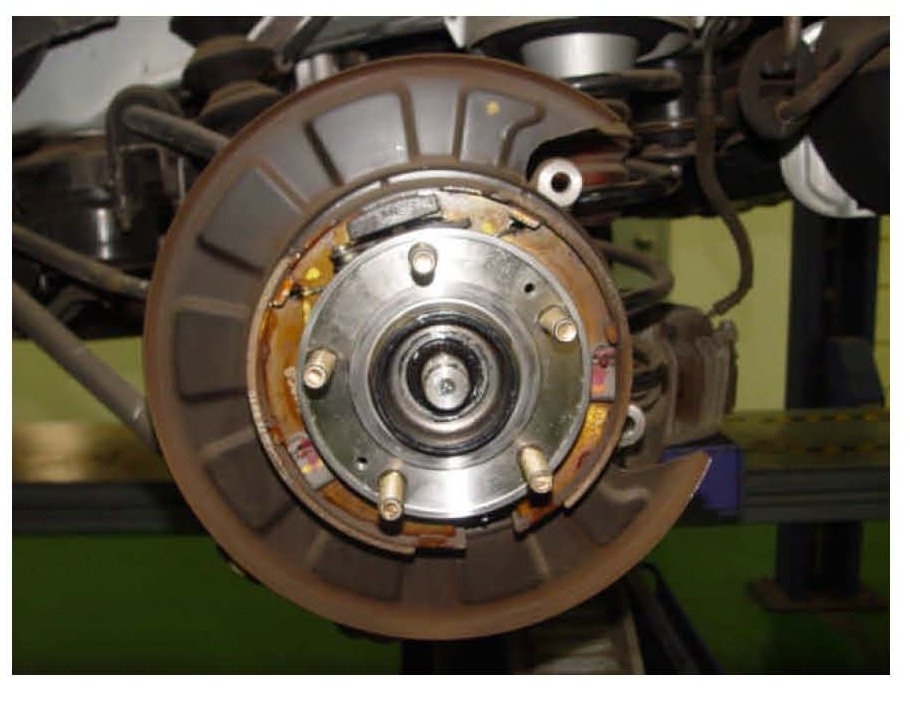
16. Install the new hub bearing.
Pic 19
17. Re-install all removed components in reverse order of removal.
IMPORTANT:
The washer which accompanies the castle nut (D) must be installed with the convex side facing outwards.
Be sure to use new split pins when reassembling components.
18. Repeat procedure on right side of vehicle.
_____________________________
Again, the last picture is the exploded view I mentioned. Let me know if this helps or if you have other questions.
Take care,
Joe
Images (Click to make bigger)
SPONSORED LINKS
Thursday, April 25th, 2019 AT 7:41 PM