Hi,
There is a very good chance it is the pump. On the pump, there is what is called a weep hole. When the bearing starts going bad or the seal in the pump, it will leak through that hole. Confirm that is where it is coming from. That may have been the cause of the belt noise you had at first.
Take a look through this link. You may find it of interest.
https://www.2carpros.com/articles/symptoms-of-a-bad-water-pump
____________________
Replacement of the water pump on this vehicle requires the removal of the timing belt. Since it has 91K on it, this is the time to replace the belt as well since you will already have it off.
I am going to first provide the directions for removal or the belt, then replacement of the pump, and finally replacement of the belt. That is the order that you will do this.
___________________
Timing Belt Removal
1995 Mazda MX-3 L4-1598cc 1.6L DOHC
Timing Belt Removal
Vehicle Engine, Cooling and Exhaust Engine Timing Components Timing Belt Service and Repair Procedures Timing Belt Removal
TIMING BELT REMOVAL
Refer to TSB #B00394 for belt squeal or whine noise
Timing Belt Removal
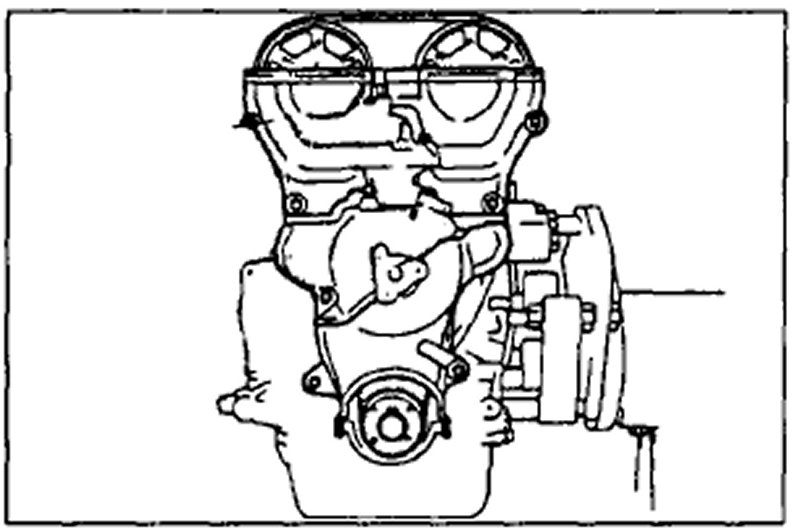
Disassemble in the order shown in the figure, referring to Disassembly Note.
pic 1
1. Cylinder head cover
2. Water pump pulley
3. Timing belt cover, upper
4. Timing belt cover, middle
5. Timing belt cover, lower
6. Pulley lock bolt (disassembly note)
7. Pulley boss
8. Timing belt (disassembly note)
9. Tensioner and tensioner spring
10. Idler
pic 2
Disassembly Note:
Pulley lock bolt
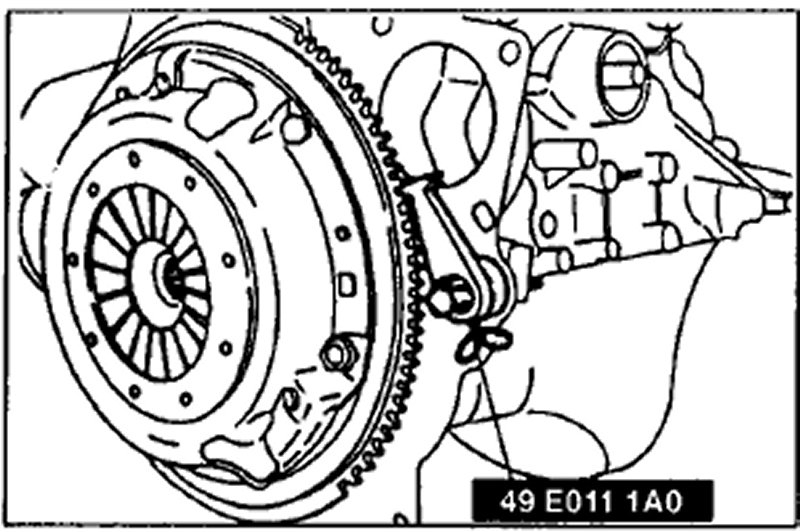
1. Hold the flywheel (MTX) or drive plate (ATX) by using the SST.
2. Loosen the pulley lock bolt.
3. Remove the pulley lock bolt.
pic 3
Timing belt
1. Protect the tensioner with a rag.
2. Loosen the tensioner lock bolt. Pry the tensioner outward with a bar.
3. Tighten the lock bolt with the tensioner spring fully extended.
pic 4
4. Mark the timing belt rotation for proper installation.
pic 5
5. Remove the timing belt.
______________________________________
Water Pump Replacement
1995 Mazda MX-3 L4-1598cc 1.6L DOHC
Procedures
Vehicle Engine, Cooling and Exhaust Engine Water Pump Service and Repair Procedures
PROCEDURES
1. Remove timing belt as outlined under Timing Belt, Replace.
2. Remove water inlet and bypass pipes.
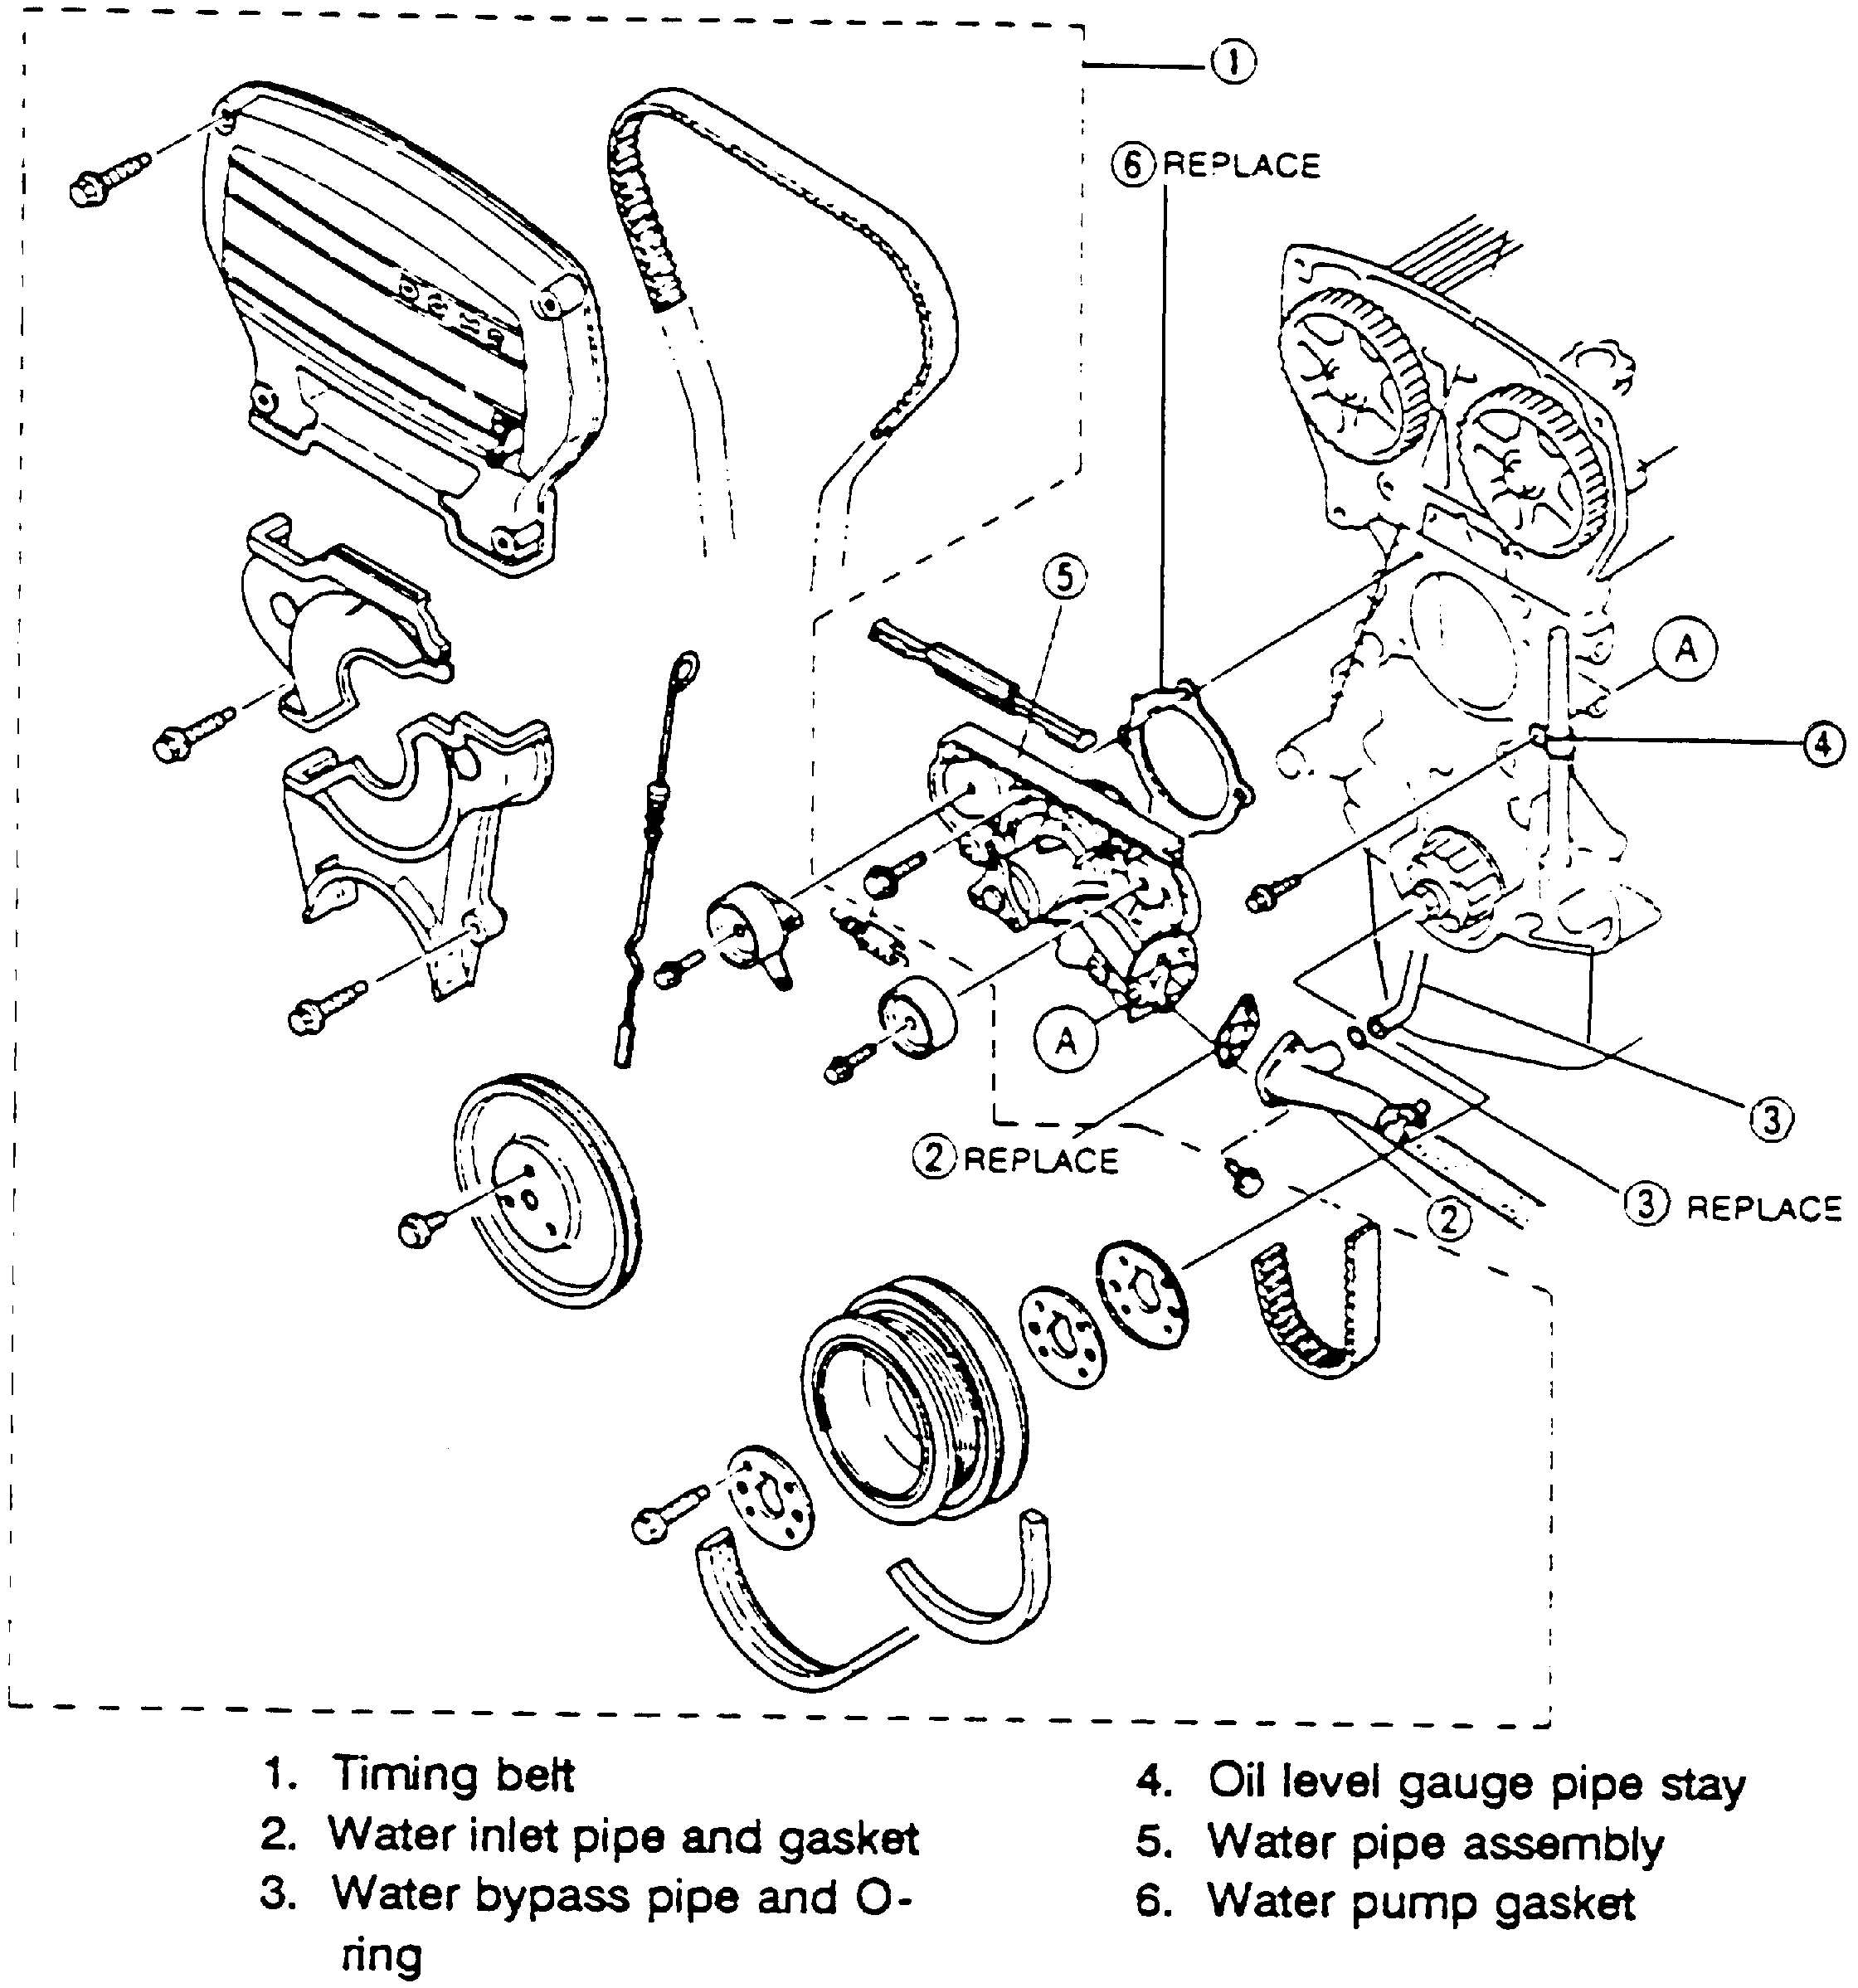
Fig. 84 Water Pump Replacement
pic 6
Fig. 85 Water Pump Replacement
pic 7
3. Remove water pump mounting bolts, then water pump, Figs. 84 and 85.
4. Reverse procedure to install. Tighten mounting bolts to specifications.
_____________________________________
Timing Belt Installation
1995 Mazda MX-3 L4-1598cc 1.6L DOHC
Timing Belt Installation
Vehicle Engine, Cooling and Exhaust Engine Timing Components Timing Belt Service and Repair Procedures Timing Belt Installation
TIMING BELT INSTALLATION
Refer to TSB #B00394 for belt squeal or whine noise
Timing Belt Installation
pic 8
Torque Specifications
pic 9
Idler
Install the idler.
Tightening torque:
38-01 Nm [3.8-O.3 kgf-m, 28-38 ft-lbf]
Tensioner and Tensioner Spring
1. Install the tensioner and the tensioner spring.
2. Temporarily secure the tensioner with the spring fully extended.
pic 10
Timing Belt
1. Verify that the timing belt pulley mark is aligned with the timing mark.
pic 11
2. Verify that the camshaft pulley marks are aligned with the seal plate marks.
pic 12
3. Install the timing belt so that there is no looseness at the idler side or between the camshaft pulleys.
4. Install the pulley boss and pulley lock bolt.
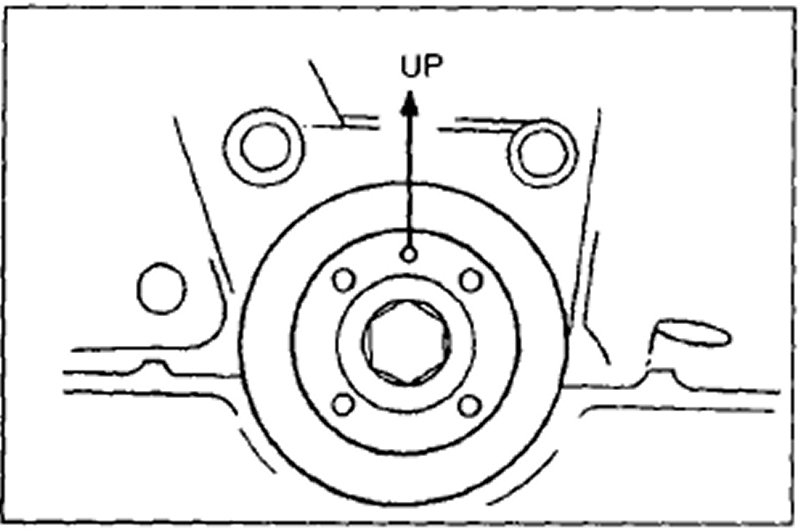
5. Turn the crankshaft two turns clockwise and face the pin on the pulley boss upright. Do not turn the crankshaft counterclockwise.
6. Verify that the camshaft pulley marks are aligned with the seal plate marks. If not, remove the timing belt and repeat from tensioner installation.
pic 13
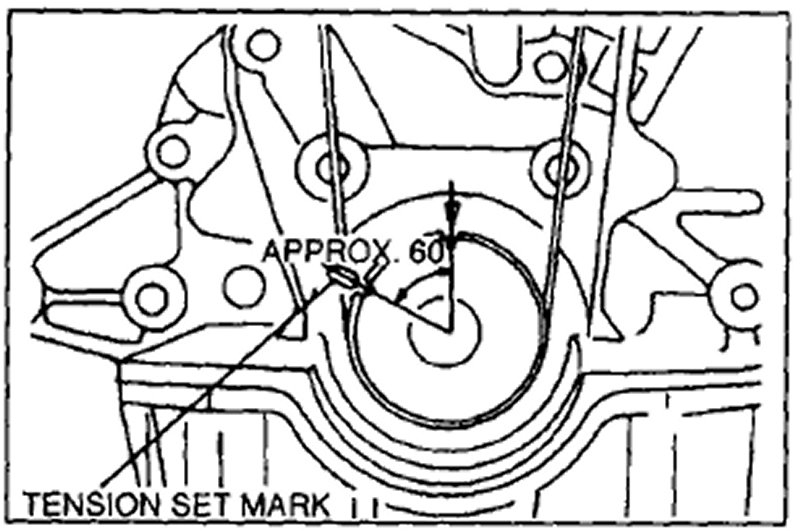
7. Turn the camshaft 1 and 5/6 turns and align the timing belt pulley mark with the tension set mark for proper timing belt tension adjustment.
pic 14
8. Loosen the tensioner lock bolt to apply tensioner to the timing belt.
9. Tighten the tensioner lock bolt.
Tightening torque:
38-61 Nm [3.8-6.3 kgf-m, 28-38 ft-lbf]
10. Turn the crankshaft 2 and 1/6 turns and verify that the timing marks are correctly aligned.
pic 15
11. Measure the timing belt deflection by applying moderate pressure 98 N [1 0 kgf, 22 Ibf] midway between the camshaft pulleys. If the deflection is not correct, repeat from step 8 above.
Deflection: 9.5-11.5mm [0.37-O.45 in]
pic 16
Timing Belt Cover
Install the lower, middle, and upper timing belt covers.
Tightening torque:
7.9-10.7 Nm [80-110 kgf-cm, 70-95.4 in-lbf]
pic 17
Crankshaft Pulley
1. Install the crankshaft pulley.
2. Install the plate and tighten the bolts.
Tightening torque:
12.3-17.1 Nm [1.25-1.75 kgf m, 9.05-12.6 ft-lbf]
pic 18
Water Pump Pulley
Install the water pump pulley and tighten the bolts.
Tightening torque:
7.9-10.7 Nm [80-110 kgf-cm, 70-95.4 in-lbf]
pic 19
Cylinder Head Cover
1. Apply silicone sealant to the shaded areas as shown.
2. Install the cylinder head cover.
Tightening torque:
5.0-8.8 Nm [50-90 kgf-cm, 44-78 in-lbf]
__________________________________
Let me know if this helps or if you have other questions.
Take care,
Joe
Images (Click to make bigger)
SPONSORED LINKS
Sunday, October 25th, 2020 AT 6:45 PM